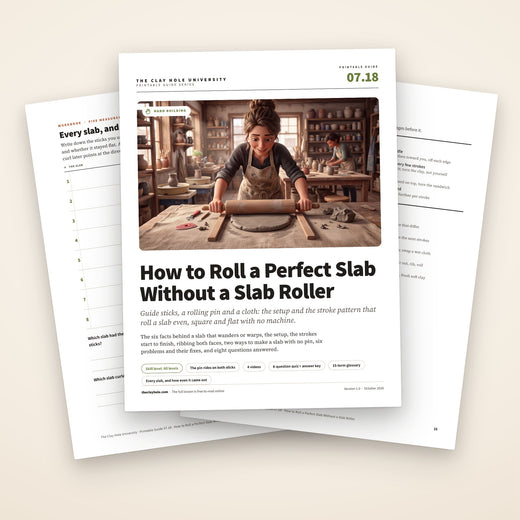
How to Roll a Perfect Slab Without a Slab Roller
A rolling pin, two strips of wood and a piece of cloth roll a slab as even as any machine, and one that can stay flatter. Here is why a slab wanders and warps, the setup that makes evenness automatic, a stroke pattern that keeps it square, and two ways to make a slab with no pin at all.
Two guide sticks set the thickness and the pin rides on them. Short strokes from the middle out, a quarter turn every few strokes and a flip or two keep the slab even, square and free of the stretch that warps it later. Then rib both faces.

Jump to a section
The sticks do the measuring. You do the pushing.
Lay two strips of wood of the same thickness either side of the clay and roll until the pin rides on both of them. Wherever the pin has ridden on both sticks, the slab is exactly as thick as the sticks. That is all evenness is.
A pin moves clay the way you push it. Roll back and forth along one line and the slab grows into a long oval, with its flat particles all lying the same way. Clay lined up one way shrinks unevenly as it dries, and that is a slab that curls a week later.
So push it every way, a little at a time: short strokes from the middle out, a quarter turn every few strokes, a flip or two. Then press both faces with a rib and move it flat. A slab made that way has nothing one-sided to remember.
Six steps to an even slab
- Set up. A cloth stretched flat over a board, two guide sticks either side of where the clay will go, and nothing laid on top of the clay. The sticks are the thickness of the slab: 3/8 inch suits a mug or a small tile, and thin slabs warp, so go thicker when in doubt.
- Beat the block flat first. Slam it on the table or press it with the heel of your hand into a thick pancake, in the shape you want: square for a square slab, round for a round one.
- Roll from the middle out. Short strokes away from you and off the far edge, then from the middle toward you and off the near edge. Never back and forth across the whole slab, and never stop a stroke on the clay.
- Turn it and flip it. Every few strokes, slide your hands under it and give it a quarter turn. Once or twice, lay a second cloth or a board on top and turn the whole sandwich over.
- Finish on the sticks. Lighter strokes as it gets close. The last ones ride on both sticks the whole way across, then again at right angles. Check the thickness with a needle tool in a few places.
- Rib both faces. A hard rib, firm pressure, corner to corner and then across at right angles. Flip it the same way and do the back.
Three things that go wrong
Thick at one end, thin at the other
The pin was not riding on both sticks at the end. Keep rolling, lighter, until it rides on both from edge to edge, then turn the slab a quarter and do it again.
A long oval, stuck to the cloth
Too many strokes in one direction without lifting it. Lift it and turn it every few strokes: that is what keeps it square, and what makes it let go of the cloth.
Flat today, curled next week
Rolled one way, ribbed on one face, or picked up by an edge. Each of those builds in a stretch, and the drying and the firing bring it back out.
Why slabs wander, and why they warp
Six facts about clay under a rolling pin. Every step on this page follows from one of them.
- Clay keeps its volume. Pressing it does not make it smaller, only thinner and bigger. A slab twelve inches square and 3/8 inch thick is 54 cubic inches of clay, the same 54 cubic inches as a block about four and a quarter inches square and three inches tall.
- A pin pushes clay the way the stroke goes. A slab roller squeezes the whole slab in one direction on every pass. A pin squeezes a strip at a time, in whichever direction you roll. That is the whole advantage of rolling by hand, and the whole risk.
- One direction stretches as much as it squeezes. Roll the same line over and over and the clay does not only get thinner. It gets longer, into an oval and then a strip.
- The particles line up the way they are pushed. Clay particles are flat, and pushing them one way lays them down in that direction, like grains of rice. Clay lined up one way shrinks more one way than the other as it dries and fires, and slabs and tiles are where that shows most.
- Strokes from every direction spread it around. Short strokes from the middle out, with the slab turned between them, push the particles a little every way and nowhere much. That is why a slab rolled by hand can come out with less curl built into it than one from a machine.
- The sticks decide where you stop, not your arms. Pressure only decides how fast you get there. Once the pin rides on both sticks, pressing harder does nothing, because the pin has nowhere lower to go.
The sentence worth keeping
A slab remembers every direction it was pushed. Push it every direction, a little at a time, and it has nothing one-sided to remember.
What you need on the table
Six things, and only the sticks are special. Most of a perfect slab is decided here, before the pin touches the clay.
Two guide sticks
Two strips of wood of exactly the same thickness, a little longer than the slab. Their thickness is your slab’s thickness. Wood strips from a hardware store cut to length, strips of balsa, or a wooden yardstick cut in two all work. Measure both: sticks that differ by a hair make a slab that tapers by a hair.
A rolling pin
Heavy, straight and smooth, with a barrel long enough to rest on both sticks with the slab between them. Handles or none: a length of hardwood dowel or pipe does the same job. A dent or a ridge in the pin prints itself into every stroke.
A cloth on a board
Canvas, or another stiff fabric with very little weave, stretched flat over a smooth board. Fabric drinks a little water from the clay, and that is what lets the slab come away. Plastic or polished wood holds on to it.
A second cloth or a board
For flipping. Laid over the slab, it turns the clay, the cloth and the board into one sandwich you can turn over without ever lifting the bare slab.
A hard rib and a soft rib
The hard one, metal or stiff plastic, is the one that compresses. The soft one smooths, and it comes second if it comes at all.
A needle tool and a ruler
For checking thickness away from the edges. Push the needle straight down until it meets the cloth, pinch it at the surface of the clay, pull it out and measure.
Nothing on top of the clay
Put the sticks on the same cloth as the clay and roll the pin straight on the clay, and the slab comes out the thickness of the sticks. Lay a cloth or a sheet of plastic over the clay and it takes its share of the gap, so the slab comes out thinner by that much. It is the same thing the mats do on a slab roller, and the fix is the same: know what the layer takes, or leave it off.
Pick the thickness, cut the clay, start flat
Decisions made before the first stroke save strokes later, and every stroke you skip is stretch you never put in.
The thickness comes from what the slab becomes. These are the numbers our other lessons teach, all measured on the wet slab. Thin slabs warp, so when in doubt, go thicker.
| The piece | Slab thickness | Taught in |
|---|---|---|
| A slab mug | 3/8 inch | Slab mugs and cups |
| A tile up to about 8 inches across | 3/8 inch | Ceramic tiles that stay flat |
| A bigger tile | 1/2 inch | Ceramic tiles that stay flat |
| A slab mold around 13 inches across or smaller | about 1/3 inch | Slab roller tips |
| A bigger slab mold | 1/2 inch | Slab roller tips |
- Wedge it, or not. Clay straight from a fresh bag is already mixed and free of air, so it can go straight to the table. Reclaim and mixed scraps get wedged properly first.
- Cut enough, plus a third. Length times width times thickness in inches, times 0.07, is the weight in pounds. A slab twelve inches square at 3/8 inch is about 3 3/4 pounds. Add a third for the offcuts and cut about five. How Much Clay Do I Need? has the rest of the arithmetic.
- Shape the block like the slab. A square block for a square slab, a round one for a round slab. Fixing the shape later costs strokes, and strokes are stretch.
- Beat it flat first. Slam it on the table at an angle, turn it, slam it again, or press it down with the heel of your hand, until it is a thick, even pancake. Rolling a tall lump is slow, hard work, and it is the part that makes people give up on rolling by hand.
Rolling it, stroke by stroke
Short strokes, lifted often, from every direction. This order keeps a slab even and square without your having to think about it.
- Sticks either side, parallel. Set them a little wider apart than the slab will finish, so the clay never reaches them. Clay that squeezes up over a stick lifts the pin off it.
- Start in the middle. Set the pin across the center and roll away from you, off the far edge. Back to the middle, and roll toward you, off the near edge. Starting in the middle pushes the clay out both ways instead of driving it all to one end, and a stroke that runs off the edge leaves no step where it stopped.
- A few strokes, then a quarter turn. Slide your hands under the slab, flat, and turn it a quarter. Turn the clay, not yourself, so the next strokes cross it a new way. Lifting it is also what stops it gripping the cloth.
- Flip it once or twice. Lay the second cloth or board on top, one hand under and one on top, and turn the sandwich over. Peel back the cloth that is now on top. Both faces get rolled, and the slab lets go of a cloth it was starting to stick to.
- Ease off as it nears the sticks. The thinner the slab, the further each stroke stretches it, so the last strokes should ask the least of it. Lighter pressure, same pattern.
- Finish with the pin on both sticks. Roll edge to edge with the pin riding on both, then turn the slab a quarter and do it again, so the last strokes cross at right angles.
- Check it before you trust it. Needle tool and ruler in four or five places across the slab, not only the middle. A thick spot gets a few more strokes on the sticks.
The sentence worth keeping
Short strokes from the middle out, a quarter turn every few, and stop when the pin rides on both sticks. Everything else on this page is detail.
Rib both faces, in two directions
Rolling leaves the clay loosely packed and lined up the way it last moved. A rib packs it back together and knocks the lining up out of it.
- Hard rib, low angle, real pressure. Corner to corner across the whole top face. You are squashing the surface, not smoothing it.
- Again, at right angles to the first pass. One direction only lines the particles up a different way. Two crossing passes are what mix them up.
- Flip it and do the back the same. The sandwich again, so the bare slab is never lifted. A slab compressed on one face has a reason to curl toward the other.
- Keep it dry. A wet rib or a wet sponge puts water back into the surface you just closed up. Barely damp, or nothing.
- Soft rib last, if at all. For a polished surface, after the hard rib, never before it. The fine weave the cloth leaves is normal, and either rib takes it off. Leave it if you like the look.
About ninety seconds a side
It is the step almost everybody skips, because the slab already looks finished. It is also the difference between a slab that is flat today and one that is still flat after the firing.
Square, round, and cut to size
The pin only ever pushes clay the way it is rolling, so the direction of your strokes decides the shape.
For a square
Start from a square block and turn a quarter every few strokes. If one direction starts to run long, put a ruler across it both ways and give the short direction the next few strokes.
For a round
Start round and turn it often, a little at a time. A round slab saves clay when the piece will be cut round anyway. For draping over one of our slab molds, roll it square, the way the slab mold lesson teaches.
Roll bigger, then cut
The edges take the most stretch, so the pieces that most need to stay flat come from the middle, a couple of inches in from the edge where you can. Cut along a ruler or a template with a needle tool, and put fresh trimmings straight back in your bag.
No rolling pin at all
Throwing a slab and cutting one off the block both work with your hands and a wire, and each gives you something rolling does not.
- Throwing a slab. Flatten the block a little, lift it, and swing it down so it lands on the table at an angle and skids, stretching away from you as it lands. Turn it, pick it up and throw it again, until it is as thin as you want.
- What throwing gives you. Speed, a slab that can go very thin, almost like fabric, and a soft, tapered edge. Paul Linhares, who throws the slabs for his platters, says thrown slabs also come out better compressed.
- What it does not give you. One even thickness. The edges usually end up thinner than the middle. If the slab has to be even, finish it with a few strokes of a pin between guide sticks. It also needs a long, clear stretch of table.
- Cutting from the block. Pull a wire through the block with each end held down at the same height: on two equal stacks of thin slats, or in the matching notches of two notched sticks or a harp. Lift off the slab, drop the wire one slat or one notch, and cut again.
- Cut slabs come out matching. It is the fastest way to several slabs of the same thickness, for a box or a set of tiles. The block has to be solid, because the wire opens every air pocket it passes through.
- Nothing has pressed a cut slab. The wire only slices, so the clay is exactly as loose as it was in the block. Give it a few strokes between guide sticks or rib both faces well before it becomes anything.
Off the cloth without undoing it
A perfect slab can be stretched out of shape in the time it takes to pick it up.
- Peel the cloth off the slab. Lay a board on the slab, turn the sandwich over, and roll the cloth back away from the clay, slowly. Pulling the clay off the cloth stretches the whole slab.
- Move it on something flat. Slide the board, or carry the slab flat on your palms and fingers. Never pick it up by an edge: a soft slab hanging from one side stretches under its own weight.
- Tiles go straight onto the board they dry on. Cut them there and stop touching them. Drying anything flat is its own lesson, Ceramic Tiles That Stay Flat.
- Build soft, or wait for firm. Wrapping a form wants a slab that still bends. A box wants slabs you can lift by a corner without them drooping, which in our dry studio is usually one to three hours under loose plastic. Check the slab, not the clock.
- Clean the cloth damp. Scrape it and wipe it with a damp sponge. Never shake out or brush off a cloth caked with dry clay indoors: dry clay dust carries crystalline silica, and shaking or brushing is exactly how it gets into the air you breathe.
Six things that go wrong, and the fix
Thick at one end, thin at the other
The pin was not riding on both sticks for the last strokes, or the sticks are not the same thickness. Measure the sticks, then roll edge to edge on both of them, in two directions.
A long oval instead of a square
Too many strokes the same way. Give the short direction the next few strokes, and turn the slab more often from here on.
Stuck to the cloth
It was lifted too rarely, the cloth is damp, or the clay is very soft. Lift and turn it every few strokes, and flip it. A cloth that is wet through gets swapped for a dry one.
Stuck to the pin
The clay is wet on the surface. Lay a second piece of canvas over it and roll through that, remembering that it now takes its share of the gap and the slab comes out thinner than the sticks.
A soft bump in the slab
Trapped air. Pierce it once with the tip of a needle tool, press the air out toward the hole with your fingers, close it with a rib and roll over it again.
Cracked or torn edges
The edges were asked to stretch further than they could: heavy strokes at the thin end, or clay that had started to stiffen. Lighter strokes near the end and fresh, soft clay. The edges get trimmed off anyway.
The ones that come up at the tables
Is a slab rolled by hand as good as one from a slab roller?
Yes. The evenness comes from the sticks, and the many directions of a pin can leave less curl built in than the single direction of a machine. What a slab roller wins is speed, once you are making a lot of big slabs.
Do I need to be certified to roll slabs by hand at the studio?
No. Rolling a slab with a rolling pin is open to every Member at every Level. The slab rollers are the ones that need the free slab roller and slab mold certification first.
What can I use for guide sticks?
Any two strips of wood of exactly the same thickness, longer than the slab: strips from a hardware store cut to length, balsa strips, or a wooden yardstick cut in two. Two pairs stacked let you roll thicker first and take the top pair away for the last strokes.
What can I use instead of a rolling pin?
Anything straight and smooth with a barrel long enough to rest on both sticks: a length of hardwood dowel or a length of pipe. A lighter one means more pushing, not a worse slab. Its length also sets the widest slab you can roll, because the slab has to fit between the sticks and the pin has to reach across both. A longer slab only needs longer sticks and a longer cloth.
Why did my slab come out thinner than my sticks?
Something was in the gap with it, usually a cloth or a sheet of plastic laid over the top, or it was stretched afterwards by being picked up by an edge or pulled off the cloth. The sticks only measure what the pin can reach.
How thick should my slab be?
It depends on what it becomes: 3/8 inch for a mug, 3/8 inch for a tile and half an inch once it is over about eight inches across, about a third of an inch for a slab mold around 13 inches across or smaller and half an inch for anything bigger. All wet numbers. Thin slabs warp, so when in doubt, go thicker.
Why roll on canvas and not straight on the table?
Fabric drinks a little water from the clay, so the slab lets go of it. A smooth, shiny surface like plastic or polished wood holds on, and the slab stretches or tears as it comes off.
How long before I can build with it?
It depends on the build. A slab mug wants the slab soft leather hard, firm enough to stand on one edge without folding. A box wants slabs you can lift by a corner without them drooping. The clay, the room and the thickness all change the time, so check the slab, not the clock.
Where to go next
Slab roller tips
When you are certified and a roller is free: thickness, stretch and keeping a slab square on the machine.
Read it →Ceramic tiles that stay flat
Compression and slow, even drying for anything made from a slab that has to stay flat.
Read it →Slab mugs and cups
A 3/8 inch slab turned into a mug, from the template to the handle.
Read it →How much clay do I need?
Starting weights for dozens of forms, and the slab arithmetic in full.
Read it →Leather hard clay
When a slab is ready to wrap, to drape, or to stand up as the wall of a box.
Read it →Clay Hole University
Every lesson and guide in one place, from the first day at the wheel through firing.
Start there →Two sticks and a pin are a slab roller
Strip a slab roller down and it is two things: a gap that sets the thickness, and a way to squeeze clay through it. Two sticks and a pin are the same two things, with one difference that works in your favor. You choose the direction of every squeeze.
Use that. Short strokes from the middle out, turned and flipped, finished on the sticks in two directions and ribbed on both faces, give a slab that is even today and still flat after the firing. It takes a few minutes longer than the machine, and it needs no certification and no waiting for a roller.
Two sticks set the thickness and the pin rides on them. Short strokes from the middle out with a quarter turn every few keep the slab even and square. Flip it, finish on the sticks in two directions, rib both faces, and move it flat.
For the full story, why slabs warp, what to use for sticks and cloth, the thickness for each piece and two ways to make a slab with no pin at all, switch to the Comprehensive Version at the top of the page.
Which version would you like to print?
Videos come out as a labeled box with the title and channel to search for, since paper does not play them.