Drying your pottery

Most pottery doesn’t die in the kiln. It dies on the shelf.

Drying is the part nobody warns you about. You make the thing, you love the thing, you come back a week later and there is a crack running through the bottom of the thing. It happened quietly, on a shelf, in the dark, while you were at work.

The good news is that drying is almost entirely controllable, and the whole skill comes down to one idea that most people get backwards. This page is the long version. The video below is the short version. Both are worth your time.

The good news is that drying is almost entirely controllable, and the whole skill comes down to one idea that most people get backwards. This is the short version of that idea and what to do about it. There is a much longer one behind the toggle below.

An illustration of a worried potter in a beanie holding up an unfired plate with an S-shaped crack across its base, stamped DP, in a sunlit studio full of pots.

Every method, every clay body, the weather, the folklore and the crack diagnosis.

Start here

Cover it for what you want next, then leave it alone

Bags live on the wheel side under the wedging table, in three sizes, with more in the tool room. Take the smallest one your piece will fit inside, because it is the air trapped in the bag, not the bag itself, that dries your pot.

More air in the bag means more drying

That one sentence is the whole system. Pick the setting that matches what you want to find next time you walk in.

Every bit of air squeezed out. Still soft next week, ready to carve, add a handle or keep building.
A little air left in, no gaps. Leather hard by next class. This is your trimming setting.
Bag laid loosely over the top. Air moves in and out around the edges. Mostly dry when you next see it.
No bag at all. Fastest, and correct for a slab mold piece made without extra water, and for the last week of anything.

How long the whole thing takes

Roughly a week under cover, then at least another full week out in the open. When the calendar and your gut disagree, believe your gut.

Three ways to ruin it without trying

A wooden bat. Wood soaks up the water coming out of your clay and warps. Storage bats are plastic for a reason.
The heat lamps. Fine for briefly stiffening something that is collapsing on you. Never for drying a finished piece.
Leaving it right way up. The base is the only part getting no air at all. Flip it the moment it is firm enough to handle.
Start here

Plan the drying for the piece in front of you

Answer five things and we will tell you how to cover it, roughly how long it needs, and what is most likely to go wrong. Numbers are a starting point, not a promise. Your shelf is the real authority.

How did you make it?
How big is it?
How even is the clay?
What time of year is it?
What do you want next time you come in?
Your plan

Lay a bag gently over the top

A little air gets in around the edges, so it stiffens without racing.

Under cover for roughly 2 to 3 days
Then uncovered for at least 7 days
Soonest it can go for bisque 10 days
Store it upside down once it is firm enough to lift, so the base gets air too.

This is a guide, not a rule. Thickness beats every other input, and a genuinely thick piece can stay wet at its core long after the surface has gone pale. When the estimate and your gut disagree, believe your gut and give it another week. Nobody has ever regretted that.

The one idea

Even beats slow

Almost everyone believes the goal is to dry pottery slowly. It isn’t. The goal is to dry it evenly. Slow is just the easiest way most of us get there.

Clay shrinks as it loses water. If the whole piece shrinks together, nothing happens. If the rim shrinks while the base is still soft, the rim is now too small for the base it is attached to, and something has to give. That is a crack. Every drying crack you will ever get is that same story, told in a different place on the pot.

Which means a piece dried fast but evenly beats a piece dried slowly but unevenly, every single time. It also means the bag over your work is not a magic slowness blanket. It is a tool for making the rim, the walls and the base lose water at the same rate as each other.

Three things this changes about how you work

Even walls matter more than careful covering. A pot with a chunky base and thin walls is fighting you before you ever pick up a bag.
Attach things at matching wetness. A soft handle on a leather hard mug will shrink more than the mug and tear itself off at the join.
Sharp inside corners are crack starters. Where a wall meets a base at a hard right angle, round it. A soft curve dries as one piece; a sharp corner dries as two.
The studio rule, and we mean it

A week uncovered before it goes on the bisque table

Once your piece has finished drying slowly under cover, it needs to sit out in the open for at least a week before it goes anywhere near the ready-for-bisque tables. That week is not padding. It is how the water deep in the middle of the clay finds its way out.

Thick pieces need longer, sometimes much longer. A surface can look and feel completely dry while the core is still holding water, and the kiln does not care how dry the outside was.

Putting a piece out is you saying it is dry. We check everything we can, but we cannot see inside your clay any better than you can. Anything with a question mark over it does not go in.

Water turns to steam at 212°F and expands about seventeen hundred times. A wet piece does not crack in the kiln, it detonates, and it takes other people’s work with it. Kiln shelves get wrecked. Members who keep putting wet clay out can lose their membership over it. That sounds heavy written down. It is genuinely easy in practice: when in doubt, leave it another week and ask any instructor.

Thick pieces need longer, sometimes much longer, because a surface can feel completely dry while the core still holds water. That water turns to steam at 212°F and expands about seventeen hundred times, so a wet piece does not crack in the kiln, it detonates, and it takes other people’s work with it. When in doubt, leave it another week and ask any instructor.

Drying in Utah

What this valley does to a drying pot

Every studio has a climate problem. Ours is that we live in a high desert with a valley that traps weather, so drying advice written for potters in Oregon or Georgia does not transfer cleanly, and neither does advice written for last winter.

39% Average outdoor humidity
44°F Average dew point, the honest measure of how much water the air is actually carrying

Salt Lake City thirty-year NOAA averages. Draper sits in the same valley and behaves the same way.

Summer: fast, and fast is fine

Summer is the quickest drying of the year in here, and that is not the problem people assume it is. Fast drying is only dangerous when it is uneven. What summer punishes is sloppiness: a rim left uncovered while the base sits on plastic, a handle exposed while the body is under a bag. Cover properly and summer is the easiest season to work in.

Why winter is slower, and it is mostly not the humidity

Two things work against you from about November, and only one of them is the one people guess at.

The big one is temperature. We heat the studio to around 55°F overnight and on weekends, because nobody is in it. That is the large majority of the hours your piece spends on its shelf. Evaporation is driven hard by temperature, so clay sitting at 55°F gives up water slowly even when the air around it is thirsty. That single fact accounts for most of the gap between a January mug and a July one.

The second is how weather sits here. When snow or rain comes through, the moisture tends to hang around the valley for days, and often it has not really cleared before the next system arrives. So some winter stretches genuinely are damp all the way through, and those are the weeks that catch people out.

The part that surprises people is that winter is not steadily damp in here. On a clear cold run, with the heat on for class, the air in this building gets about as dry as it is all year. Cold air carries almost no water, and as one ceramic engineer writing for Ceramics Monthly points out, room-temperature air holds four to five times what freezing air does, so warming cold outside air collapses its relative humidity. Your piece spends most of the week in a cold still room and then a few hours in genuinely thirsty air while class runs.

And no hard rules. Not all winters here are the same. Some are wet and gray for weeks, some are cold and bone dry, and both of them feel like winter from inside a car. From December through February the honest advice is to stop trusting the calendar and start reading the actual piece. Check the color, give it longer than you think, and add more still if we have just had a wet stretch.

Watch this first

How to properly dry your pottery

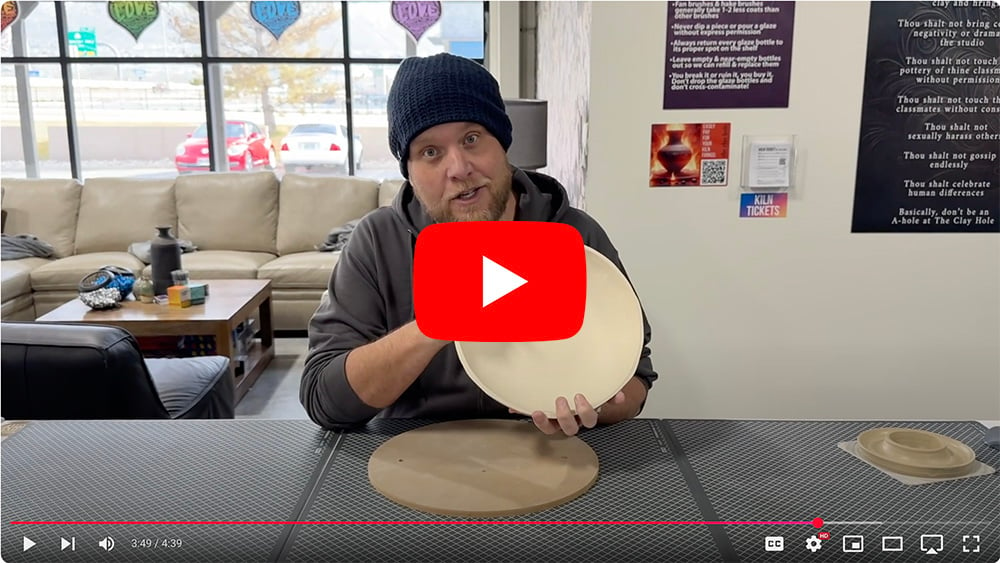
Everything on this page is the written, expanded version of this video. If you only have five minutes, spend them here instead. It covers wiring off at the right moment, choosing a bag, the three bag sizes and where they live, storing upside down, and why wooden bats are off limits.

This is the same teaching in five minutes, watched instead of read. It covers wiring off at the right moment, choosing a bag, the three bag sizes and where they live, storing upside down, and why wooden bats are off limits.

Watch it once before your next class and the rest of this page will make a lot more sense.

Plays right here on the page. Open it on YouTube if you would rather have it full screen.

The first hour matters most

What to do the moment you finish making it

How much water is trapped in your clay right now depends almost entirely on how you made the piece. Pick your method.

Wheel work is the wettest thing you can make. You spend the whole session adding water to the clay, and as a beginner you trap far more of it than you will in a year’s time. Your first pieces want a couple of weeks of slow drying, minimum.

1

Leave it on the wheel bat for 20 to 30 minutes

Most people wire off immediately. Don’t. Let it sit in open air and stiffen while a little surface water evaporates. It comes off the bat cleanly instead of distorting in your hands. Not under the heat lamps.

2

Then wire it off

It should feel noticeably firmer and less floppy than it did when you stopped throwing. If it still feels alarming to touch, give it another ten minutes.

3

Cup it, lift it, move it to a storage bat

Two hands, cupped around it, gently. Still be careful. It goes onto a storage bat that lives on your shelf, never onto the wheel bat, and never onto a wooden bat.

4

Cover it for the outcome you want

Sealed tight to stay soft, a little air in the bag for leather hard, draped loosely over the top to get mostly dry. The planner at the top of this page will pick for you.

5

Flip it over as soon as it can take it

Once it is firm enough to handle without denting, turn it upside down. Your bats are plastic, which means the base is the one part of your pot getting no air at all until you do this. Thick base plus no airflow is the single most reliable way to grow a crack across the bottom.

Wheel work is the wettest thing you can make and needs the most care. Hand-built and slab mold pieces carry far less water, so they need less. The order is the same either way.

1

Let it stiffen on the bat for 20 to 30 minutes

Straight off the wheel, leave it sitting in open air before you wire it off. It comes away cleanly instead of distorting in your hands. Not under the heat lamps. Hand-built and slab mold work can go straight to the next step.

2

Move it to a storage bat, two hands, cupped

It goes onto a plastic storage bat that lives on your shelf. Never back onto a wheel bat, and never onto a wooden one.

3

Cover it for the outcome you want, then flip it over

Pick the setting from the top of this page. Once the piece is firm enough to handle without denting, turn it upside down, because the base is the one part of your pot getting no air at all until you do.

Purple Level and Black Level

The cotton sheets, and why fabric beats plastic

There is a basket of high thread count 100% cotton sheets back by the shelves. Purple Level Members and Black Level Members can take one, drape it over a piece, and get a quality of drying that a plastic bag simply cannot produce.

Plastic bag

A barrier you have to manage

Plastic doesn’t breathe. It blocks evaporation completely wherever it touches, and lets it run free wherever it gapes open. So the moisture map of your pot ends up decided by where the bag happened to fold when you walked away.

That is workable, and most of the studio does it every week. But you are steering the piece by fiddling with a bag, and the bag moves.

Cotton sheet

A brake that works everywhere at once

Fabric is permeable. Air passes through the whole sheet at the same rate, which means every square inch of your pot is slowed by the same amount. Evenness stops being something you arrange and starts being the default.

The high thread count is the point. A tight weave slows the air more, and a smooth one won’t print its texture into your clay the way a coarse cloth will.

Sheets dry faster than bags

This trips people up. A sheet is a brake, not a seal, so a piece under one dries a lot quicker than the same piece under plastic. Do not use a sheet if you need the piece still workable next week. Sheets are for the final stretch, when you want it dry and you want it dry evenly.

Upside down under there, if it will go

A sheet only helps the surfaces it can reach. With the piece the right way up, the base is still pressed against a plastic bat with no air on it, so you have made the rest of the pot dry faster than its own bottom. If the shape will not sit upside down, add another sheet instead and give it longer. Slower everywhere beats faster on five sides out of six.

Whose sheets are whose

We provide the basket for Purple Level and Black Level Members, and those sheets are shared rather than assigned. When your piece is dry, the sheet goes back in the basket for the next person.

Green Level and Yellow Level Members are genuinely welcome to buy their own and bring them in. Two rules and no others: 100% cotton, and the highest thread count you can find. A poly blend will not breathe the same way, and a coarse weave can print its own texture into soft clay.

Stack them. This is the part nobody thinks of.

One sheet slows a piece a little. Six sheets slow it enormously, and here is the part that matters: it is still drying evenly. Every layer you add is another uniform brake across the entire surface, not another place for a covering to gape or fold. Dan has been known to run six at once and had a piece dry excruciatingly slowly and completely evenly at the same time.

Which turns the sheets into a dial, and a plastic bag has never had a dial. For a piece with thin areas and thick areas, that is the whole answer: start with however many sheets you think will slow it to the right pace, then pull one off every week or so. Down to one. Then none. You are easing the piece toward dry instead of dropping it there, and the piece gets to even itself out at every step on the way.

The version potters in dry climates swear by

For something big or awkward, combine the two. Cloth directly over the piece, then a plastic bag loosely over the whole arrangement. The fabric evens the surface out, the plastic stops the studio’s air movement getting at it, and you get slow and even at the same time. Potters working in arid climates use exactly this for pieces that would otherwise be impossible, and change the cloth every couple of days.

Bags and bats

What to cover it with, and what to set it on

Three bag sizes

We stock 10 × 10, 13 × 14 and 16 × 20. They live on the wheel side under the wedging table, and there are more in the tool room. If nothing fits, you can rip a bag open along its seam to double its size.

Choose the smallest bag that will do the job. Not just because we buy them, though we do. A pot swimming in a huge bag has a large volume of air trapped in there with it, and all that air will pull water out of your piece before it gives up. The bag is not the thing slowing your pot down. The air inside the bag is the thing speeding it up.

More air inside the bag means more drying

That one sentence is the whole system. Everything else follows from it.

Push every bit of air out. Piece stays properly wet. Come back next week and carve it, add a handle, keep building.
Leave a little air in, no gaps. Leather hard by next class. This is your trimming setting.
Lay the bag loosely over the top. Air moves in and out around the edges. Mostly dry when you next see it.
No bag at all. Fastest. Correct for slab mold pieces made without extra water, and for the final week of anything.

Never store pottery on a wooden bat

Wood absorbs the water coming out of your clay, then warps as it dries out again. A warped bat is no good to anybody, and there is nothing to be done with it afterward. Wheel bats are for throwing on. Storage bats are for storing on. They are not interchangeable.

Your storage bats are plastic, and that has a consequence

Plastic does not wick. Some studios use plaster or cement board bats precisely because they pull water out of a piece from underneath and keep flat things flat. Ours don’t do that, which is fine, but it means the base of your pot gets no air at all until you turn it over. Turning it over is the easiest fix, and worth doing whenever the piece will take it. Plenty of pieces cannot be turned over, and that is fine too. It just means the base is going to lag behind everything above it, so you slow the whole piece down and let the rest wait for it. That matters most when the piece has thin areas and thick areas, which is exactly when stacking sheets earns its keep.

The heat lamps

Fine for briefly stiffening something wet that is threatening to collapse on you. Never for drying a finished piece. A heat lamp warms one side of one surface, which is a machine for producing exactly the uneven shrinkage this entire page is about avoiding. Stiffen and move on. Do not park anything under there and leave.

Your clay body

Some of our clays are far fussier than others

Shrinkage is the number that matters. The more a clay shrinks, the more movement there is for uneven drying to turn into a crack. Tap any row.

ClayPublished shrinkage
52 Buff 10.0% total fired
B-Mix with Grog 11.0% total fired
B-Mix 12.0% total fired
Half & Half 12.0% total fired
Speckled Buff 12.0% total fired
Berlin Gray 12.0% total fired
B-Mix with Specks 12.47% total fired
#16 Porcelain 13.9% total fired

Manufacturer published figures for total shrinkage, wet clay to fired pot. Shrinkage is not the only thing that matters, but it is the one number that reliably tells you how much room for error you are working with.

A 25 pound bag of 52 Buff stoneware clay as sold at the studio.
Laguna WC851

52 Buff

10.0% total shrinkage

The lowest shrinkage of our Laguna clays and a good general purpose body. Less total movement between wet and fired means less stress built up along the way, which makes this a forgiving choice for a first big piece or anything with awkward joins in it.

Your clay body

Grog forgives you. Porcelain does not.

Everything we sell shrinks somewhere between 10 and 14 percent on its way from wet to fired, and those differences matter far less than the evenness of your own walls. One thing is worth knowing, and it is not the shrinkage number.

Grog. Berlin Gray is forty percent grog and is the most forgiving clay in the building, so reach for it when you are attempting something big, awkward or sculptural. #16 Porcelain shrinks the most, makes the most fragile bone dry greenware, and wants slow, even, covered drying and careful hands. Everything in between is standard care.

Is it actually dry

Three checks, in order of how much you should trust them

Two checks, and one warning

Check one

Look at the color

This is the most useful check and the one nobody teaches. Clay lightens as it dries, so a piece with pale shoulders and a darker base is drawing you a map of where the water still is. Take it into good light and look for one uniform tone across the whole thing, inside and out, including the foot. Any darker patch is a wet patch.

Check two

Hold it to your cheek

Evaporating water cools the surface, so damp clay feels cold. Room temperature means dry. But be careful with this one in winter. In a cool building a bone dry pot feels cool too, and plenty of members have talked themselves out of a perfectly dry piece in January. Cold against your cheek is a definite no. Cool is ambiguous.

Check three

Weigh it twice

The only one that is actually objective. Weigh the piece, wait two days, weigh it again. If the number stopped moving, the water stopped leaving. Fussy, and worth it exactly once: on the first genuinely big piece you make, so you learn what a week of drying really looks like on your own work.

Handle bone dry work like it is made of crackers

There is a persistent idea that pottery gets stronger as it dries. It does not. Bone dry greenware is the most fragile your piece will ever be, in its entire life. Handles snap off, rims chip, and thin work breaks if you grab it wrong. Two hands, from underneath, and never by the handle. You did not spend three weeks drying it carefully to lose it on the walk to the bisque table.

Studio folklore

Ten things people say about drying

Pottery runs on handed-down wisdom, and a fair amount of it is wrong. Some of these are half right, which is worse than being wrong, because half right is what survives.

“S-cracks in the bottom mean you didn’t compress the base enough”
Half true, and the half people repeat is the wrong half

Compression helps. It genuinely does. But it is not the cause, and treating it as the cause sends people off compressing harder while the actual problem goes untouched.

An S-crack is unequal shrinkage between the base and the walls, full stop. Ceramic Arts Network has been about as blunt about this as a ceramics publication gets: lack of compression does not cause an S crack, stress from shrinkage does.

What is far more likely to be doing it to you: the puddle of water that sat in the bottom of your pot the whole time you were throwing. That base is now wetter than the walls, so it dries later, shrinks later, and tears while the rest of the pot holds still. Sponge the water out as you go, keep the base close to the same thickness as the walls, and flip the piece over early.

“The slower you dry it, the better”
Half true

Slow is not the goal. Even is the goal. Slow is popular because it is the easiest way for a person with a bag and no equipment to get even, and it buys you time for water to migrate from the thick parts to the thin ones.

But a piece dried fast and evenly will beat a piece dried slowly and unevenly every time. Industrial potteries dry work in hours by heating it right through first so the whole thing releases moisture at once. You are not going to do that on your shelf. It does mean that if you have a small even-walled slab mold piece made without water, drying it uncovered in two days is not you cutting corners. It is just correct.

“Put a fan on it, just not too close”
False as usually meant

A fan pointed at a pot dries the side facing the fan. That is the definition of uneven, and distance only changes how fast it goes wrong.

Gently circulating the air in a whole room is a different thing and is fine. Aiming moving air at a specific piece is not. This is also why a spot near a door, a walkway or a vent is a bad shelf position for anything you care about.

“If it feels cold on your cheek it’s still wet”
True in summer, unreliable in winter

The physics is sound. Evaporation cools a surface, so a damp pot reads colder than the room. The trouble is that the test compares your piece to your face, and it assumes the room is warm.

In a cool studio in January a completely dry pot will still feel cool, and people regularly leave good work sitting for weeks because of it. Use the color check as your primary read and treat the cheek test as a second opinion.

“Once it’s bone dry it’s pretty tough”
False, and backwards

Bone dry greenware is the weakest and most brittle state your piece will ever be in. It feels solid because it is rigid, and rigid is not the same as strong. Leather hard clay is far more forgiving to handle. More finished work is lost carrying bone dry pieces across a room than is lost to any drying crack.

“Grogged clay won’t crack”
Half true

Grog genuinely helps. It lowers shrinkage and gives water easier routes out through the clay. Laguna say so themselves about B-Mix with Grog: a more forgiving body, pieces stay attached better, less cracking and warping. Berlin Gray is 40% grog and its maker advertises exactly this.

What grog buys you is margin, not immunity. Dry a grogged piece unevenly and it will still crack, it will just take slightly more carelessness to get there. And a smooth clay dried properly will outlast a grogged clay dried badly.

“Wrap it in newspaper to slow it down”
False, and it does the opposite of what you want

Dry paper in contact with damp clay wicks water out of it. So the parts the paper touches dry faster and the parts it bridges over dry normally, and you have engineered a moisture gradient by hand. Damp cloth works because it is damp. Dry newspaper is a sponge you have wrapped around your pot.

“Thick pieces just take longer”
True, and dangerously incomplete

Thickness does not only add time, it changes the failure mode. In a thin even wall the whole cross section dries at about the same rate. In a thick one the surface goes rigid while the middle is still soft, so the outside is trying to shrink around a core that isn’t ready. That is why a thick piece can look bone dry, pass the cheek test, and still be carrying water in its middle two weeks later. Thick work needs longer and more even conditions, not just patience.

“Just smear some slip in the crack”
False, and it wastes a firing

Plain slip is clay and water, so it shrinks as it dries and shrinks again in the kiln, more than the piece around it. It pulls away from the sides of the crack and the crack comes back, usually widened, usually after the bisque, occasionally after the glaze firing when you have already paid for it.

A proper mender is a different formula built to hold across a join. We sell Mayco Clay Mender in the studio for this. And the honest part: some cracks are not worth saving. A hairline in a decorative sculpture, sure, have a go. A crack through the base of a mug you intend to drink from is telling you to make another mug.

“You can bring a bone dry piece back with a spray bottle”
Almost always false

Bone dry clay does not rewet gracefully. Water hits the surface, that surface swells while the clay a millimeter underneath stays rigid, and you get the same unequal movement that cracks pots in the first place. Spraying a dry pot is a fast way to turn one problem into several.

Slow, sealed rehydration in a damp box can work, but we don’t have damp boxes for members, and doing it properly takes days of attention. If a piece has gone dry before you finished it, the realistic options are to finish it as it is, or start again and get further next time.

Diagnosis

What your crack is telling you

Cracks are not random. Where it appeared tells you what happened. Tap whichever one you are staring at.

A curve or S in the base

What happened: the base shrank at a different rate from the walls.

Next time: sponge the puddle out of the bottom as you throw, keep the base close to the wall thickness, compress the base while it is on the wheel, and turn the pot over early so the foot gets air.

Worth stealing

Six tricks that mostly cost nothing

Mugs in a ring, handles inward

Arrange mugs in a circle on the bat with every handle pointing toward the middle. The handles shelter each other from moving air and dry closer to the rate of the mug walls. Free, takes four seconds, and it is one of the better handle-crack fixes going.

Plastic on the fast bits only

Instead of bagging the whole piece, wrap a narrow strip of plastic around just the rim, or just the handle. You are braking the parts that run ahead and leaving the rest alone, which is a far more precise instrument than a bag over everything.

Weigh down flat work

Platters and plates lift in the middle as they dry. A cloth bag of rice or dry beans set on top, over a layer of plastic so nothing marks the clay, holds it honest. Kiln posts work too. Keep it gentle.

Attach handles early, not late

The instinct is to wait until the mug is stiff and safe to handle. The problem is that the later you attach, the bigger the moisture gap between the two pieces of clay. Get the handle on as soon as the rim will hold its shape.

Cut slabs from the middle

The edges of a rolled slab have been stretched harder than the center, so they carry more built-in stress and warp more. Cut your shape out of the middle. Rib both faces in the same direction while you are at it.

Make a sacrificial twin

Building something big you actually care about? Make a small lump of the same clay at the same thickness and dry it alongside. When you want to know what is going on inside your sculpture, snap the twin in half and look. Dark in the middle means wait.

One last thing

You will still crack things. So do we.

Nobody gets a perfect record at this, and anyone who says otherwise is not making anything interesting. What changes is that the cracks stop being mysterious. You look at where it split, you know what you did, and you do it differently on the next one.

If you are not sure about a piece, ask. Grab anyone in a pink shirt or a purple shirt and hold the thing up. Between them our instructors have been drying pottery for a very long time, and an honest look at your actual pot beats any web page ever written, including this one.

The long version, behind the toggle at the top, adds a drying planner, what each kind of crack is telling you, all eight clay bodies, the cotton sheets, and ten things people say about drying that are not quite true.