Pottery Date Night
 Bring All Your Friends Free Week
 Give a Month of Pottery
 Private Pottery Parties

 The Welcome Booklet
 Your First Ten Sessions
 The Pottery Process
 Finding the Studio
 Your Classes Never Expire
 The Four Tables
 Who’s Who
 The Rewards Program
 Flux Glazes
 The Calculators
 Kiln Tracker
 Holiday Kiln Deadlines

 Beginner’s Tool Set
 Fingernail Clippers
 Mayco Clay Mender
 Epoxy for Kintsugi
 Applicator Bottles
 Large Bead Rack
 Raku Workshop
 Nighttime Raku
 Horsehair and Feather Raku
 The Clay Hole T-Shirt
 Embroidered Crewneck
 Zip-Up Hoodie
 Pre-Made Bisqueware
 Glaze Catchers
 Kiln Cookies
 Clay Cubby Rental
 The Glaze Bible, Printed
 The Book of Molds, Printed
 Printable Pottery Guides
 Free Printable Trackers
 Gifts for Potters
 Christmas Pottery Ideas
 Mother’s Day Gift Ideas
 Pottery Date Night
 Studio Calendar
 2027 Studio Events
 What Should I Do Today?
 How to Throw on the Pottery Wheel
 How to Make a Pinch Pot
 How to Tap Center a Pot
 The Five Stages of Clay
 Is Pottery Hard to Learn?
 Pottery Wheel Practice Drills
 20 Easy Hand-Building Projects
 Everything That Sounds Wrong

 A Beautiful Piece, Every Time
 Slab Roller Tips
 Any Dish as a Slump Mold
 Slab Roller & Slab Mold Certification
 The Pottery Skill Tree
 Clay & Pottery Calculators
 Logging Your Pottery and Glazes
 The Pottery Dictionary
 Why Did My Pottery Do That?
 The Pottery Cone Chart
 Pottery Myths, Fact-Checked
 Is Handmade Pottery Food Safe?
 Incredible Ceramic Artist Videos
 How Dan Throws Giant Pots
 How to Dry Your Pottery
 The Pottery Wheel Introduction
 Pottery by Zodiac Sign
 Personality and the Pottery Wheel
 Pottery for Engineers
 ADHD, Hyperfocus, and Never Running Out
 Hobbies for Burnout
 Screen-Free Hobbies for Adults
 Every Addiction I Ever Had Lost to Art
 Functional Pottery Is Engineering
 How Do We Compare?
 Pottery Classes by City
 Every Pottery Studio in Utah
 Pottery in Draper
 Featured Members
 The Signature Wall
 Making Friends as an Adult Is Brutal
 The Clay Hole Commandments
 2027 Pottery Contests
 2027 Studio Parties
 Gallery Night

 Scream It Into the Void
 Destroy the Glaze Wall
 Daily Affirmation Cards
 Everything That Can Go Wrong
 Subscribe to Our Newsletters
 Contact The Clay Hole
 Corporate Team Building

 Glaze Combinations
 Glazes We Do Not Carry
 Making Glaze Test Tiles
 The Mega Glaze Tool
 How to Use the Mega Glaze Tool

 Glaze Brushing Techniques
 How to Use Underglaze
 How to Use Dipping Glazes
 Glaze Problems, Causes and Fixes
 The Dipping Glaze Guide

 Making a Glaze Catcher
 Fused or Sharp After Firing
 The Signature Wall
 His Viral Videos
 His Own Ceramics
 Meet Mud
Big pots are not thrown. They are assembled.
Nobody throws a thirty inch vase out of one lump. Not your favorite potter on the internet, not the person whose pot you saw at a gallery, and not us. They throw it in pieces and weld the pieces together while the clay is still soft enough to forget it was ever two things. Here is how that actually works, in words you can hold in one hand and videos you can watch with clean ones.
Nobody throws a thirty inch vase out of one lump. Not your favorite potter on the internet, not us. They throw it in pieces and weld those pieces together while the clay is still soft enough to forget it was ever two things.
Jump to a part of this page

Which version would you like to print?
Videos come out as a labeled box with the title and channel to search for, since paper does not play them.
Reading it and watching it are two different skills, and you need both
Watch a potter join two sections and it looks like nothing. Hands move, a seam disappears, the pot is taller. It takes eleven seconds and you come away certain you could do that.
Then you try it and the top half slumps sideways into the bottom half and you have no idea which of the eleven seconds you got wrong.
That gap is the whole problem. Video is unbeatable at showing you how fast something happens, how wet the clay looks, how much pressure a hand is putting on a rim. It is terrible at telling you why any of it is happening, because the reasons are invisible and the person doing it stopped noticing them years ago.
Words are the opposite. A sentence like "the lower section has to be stiff enough to carry the weight, and the upper section has to be soft enough to move when you weld it" is not satisfying to read and it is not fun to watch. It is also the entire technique. Once you are carrying that sentence, the video stops being magic and starts being evidence.
There is a practical reason too. You cannot pause a video with clay on your hands. You can glance at a list.
So this page does both on purpose. Read the steps first. Watch the hands second. Then put the list on your phone, prop it against the splash pan, and go be wrong a few times, which is the only part of this nobody can do for you.
The order we would actually use
Read the checklist once, all the way through, before you watch anything. Then pick one video from the method you chose and watch it end to end without skipping. Then read the checklist again. The second read is where it lands, because now you have pictures to hang the sentences on.
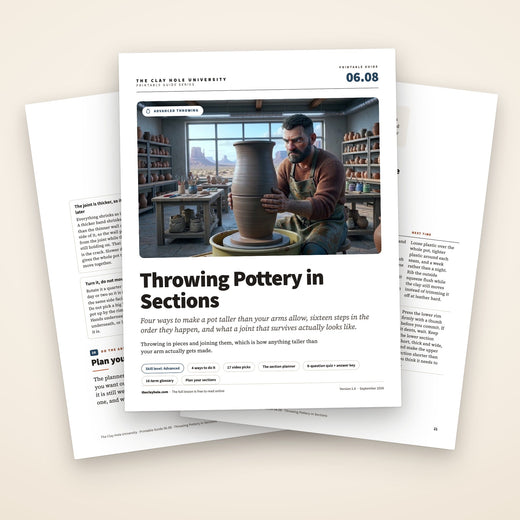
There are four ways to make a pot taller than your arms allow
One pot, thrown in pieces, welded while the clay still moves
They are not ranked. They solve different problems, they fail in different ways, and most potters end up using two of them depending on the form. Read all four, then use the picker underneath to narrow it down.
Every way of making a pot taller than your arms allow is a different answer to the same problem. Here is the problem, and the two things that decide whether a seam holds.
Stiffen, then join
Throw the bottom section. Let it firm up until it can carry weight. Throw the next section as a bottomless cylinder on its own bat, flip it over, and set it rim to rim on the first one. Weld the seam, re-true the whole thing as one pot, repeat.
This is the standard, the one most demonstrations show, and the one that gives you the most control over the finished shape. It is also the slowest, because you spend real time waiting for clay to stop being wet.
Wet to wet
Same idea, no waiting. You throw the bottom section thick and low and stubby, throw the top section immediately, and join them while both are still soft. Nothing gets stiffened, nothing gets torched, the whole pot happens in one sitting.
It works because a short, thick, wide section can carry a surprising amount before it buckles. Push the bottom section taller or thinner than it wants to be and the whole pot sits down on itself in front of you.
Cylinder stacking
Throw plain, boring, straight cylinders. No shape, no belly, no rim treatment, nothing to admire. Stack two or three of them into one tall tube, weld the joints, and only then shape the whole column as a single pot.
The advantage is enormous for anyone learning: a plain cylinder is a skill you already have, and shaping happens once, at the end, on a form that is already the height you wanted. The cost is that you commit to the silhouette late.
Coil and throw
The oldest one, and the one that is not really sectional at all. You throw as tall as the clay will go, then lay a fat coil around the rim, weld it down, and throw that up as if it were part of the pot. Repeat until you run out of ambition or arm.
There is never a joint between two finished forms, so there is never a joint to crack. Instead the pot grows a ring at a time. It is the method behind most genuinely enormous pots, and the one that feels least like the throwing you already know.
The problem is weight, not skill
A wall that holds up eight inches of wet clay will not hold up twenty four. Push past that and the pot sits down on itself while you watch. So you build it in pieces, and each piece only ever carries what goes directly on top of it.
Soft on stiff, every time
The lower section has to be stiff enough to carry the load. The upper section has to be soft enough to move when you weld it. Two stiff sections will not join. Two soft ones will not stand. That one sentence is most of the technique.
The method this page teaches
Throw the bottom section. Stiffen it. Throw the next one as an open tube with no floor. Weld them, re-true as one pot, repeat. If this is your first, throw plain cylinders and shape the column at the end. The other three methods are in the comprehensive version.
Tell us what you are up against
Coil and throw
Nothing else scales the same way.
Six decisions that are much cheaper to make now
Four decisions to make at the wedging table
Every one of these is a decision people make halfway through instead, usually with wet hands and a section already drying. Make them at the wedging table.
Every one of these is a decision people make halfway through instead, usually with wet hands and a section already drying.
Draw it full size and mark the joints
Actual size, on paper or cardboard, with a line across it where each joint goes. Tape it to the wall behind your wheel. Put the joints where the form changes angle, because a seam hides in a shoulder or a waist and shows on a long straight wall.
Two sections, not four
Two is a vase. Three is a project. Four is a commitment. Every extra section is another wait, another session to book, another chance to knock the pot off center and another thick band to dry evenly. Most people who fail at four would have finished at two.
One clay body, and give it grog
Grog is structure. B-Mix with Grog is our usual answer for big sectional work, and Speckled Buff and 52 Buff both hold up well. Never join two different clay bodies. They shrink by different amounts and pull the seam apart for the rest of its life.
Wedge it all now, and throw it thick
Weigh, wedge and bag every ball for every section before anything touches the wheel. Walls around three eighths of an inch, floors around three quarters. A big pot carries load a mug never does. You can trim weight off later. You cannot add it back.
Draw it full size
On paper, on cardboard, on the back of a bag. Actual size, with a line across it where each joint goes. Tape it to the wall behind your wheel. You will look at it forty times, and it is the only thing that keeps section three the width section three needs to be.
Put the joints where the form bends
A seam hides in a shoulder, a waist, or a change of angle. It shows on a long straight wall, because that is where the eye follows a line. If your drawing has a natural crease in it, that is your joint.
Pick a clay with tooth
Grog is structure. B-Mix with Grog is our usual answer for big sectional work, and Speckled Buff and 52 Buff both hold up well. Our #16 Porcelain will do it in experienced hands and will punish everyone else, because a smooth body slumps sooner and moves more in the joint.
Wedge everything before you start
Weigh and wedge every ball for every section now, and wrap them. Wedging a fresh lump while section one is quietly stiffening past the point of usefulness is how a two hour job becomes a two week job.
Throw thicker than feels right
Walls around three eighths of an inch, floors around three quarters. A big pot carries load a mug never does, and a wall that would be elegant at eight inches is a liability at twenty four. You can always trim weight off later. You cannot add it back.
Decide how many sections
Two is a vase. Three is a project. Four is a commitment. Every extra section adds a joint, a wait, a chance to go off center and another thing to dry evenly. Most people who fail at four sections would have finished at two.
One more, and it is the one people skip
Book the time. A three section pot is not a thing you squeeze into the last forty minutes of a class. Decide which session is the throwing session and which is the joining session before you open the bag, because the clay is going to keep to its own schedule whatever yours says.
Sixteen steps, in the order they happen
Nine steps, in the order they happen
This is the stiffen-then-join method, because it is the one the other three are variations on. Tap a step to cross it off. Nothing is saved when you leave the page, so it resets clean for the next pot.
Tap a step to cross it off. Nothing is saved when you leave the page, so it resets clean for the next pot.
The week after is where most of these are lost
The joint is thicker than the wall beside it, so it dries later while the thinner wall shrinks away from it. That tug is the crack. Loose plastic over the whole pot, a snugger strip around each seam, a quarter turn every day or two, and never lift a big leather hard pot by the rim. Bone dry means bone dry: a thick seam holds water long after the surface feels dry, and a piece that goes into a bisque wet does not crack, it bursts.
What a joint that survives actually looks like
Cut a finished sectional pot in half and the joint should be invisible in the cross section too. Not a line with clay on either side of it. One continuous wall that happens to be slightly thicker where the two used to be.

- A thicker band, not a thinner oneThe wall through the joint should be a little heavier than the wall above and below it. If the joint is the thinnest point of the pot, it is a hinge, and it will find a way to behave like one.
- A reinforcing coil on the insideA thin coil pressed into the inside corner and blended away in both directions. It costs thirty seconds, it doubles the effective thickness where the stress is worst, and nobody ever sees it.
- Scored and slipped, generouslyTwo flat clay faces pushed together do not bond, they touch. Deep scoring on both faces and real slip is what turns contact into a weld.
- An outside seam ribbed flatSqueeze always shows up outside as a small ridge. Rib it back flush with the wall while the clay still moves. Trimming it off when leather hard removes wall thickness at exactly the wrong place.
- Same wetness on both sidesSofter above, stiffer below, but not by much. A big difference in moisture is a big difference in shrinkage, and shrinkage differences are what open a joint in the kiln days later.
Torches at The Clay Hole
Stiffening a section with a propane torch is the fastest way to turn a two day pot into a two hour pot. It is also an open flame in a room full of people, so it is the one part of this technique with rules attached.
A propane torch turns a two day pot into a two hour pot. It is also an open flame in a room full of people, so it has rules.
- 1Get trained by Dan first, in person. Ask him at the studio. There is no online version of this and no signing up for it. It takes a few minutes and it happens once.
- 2Purple Level and Black Level Members only. Training and Level are two separate gates and you need both.
- 3Never on a plastic bat. Ever. A masonite bat or straight onto the wheel head, and nothing else.
- 4Keep it moving. A torch parked in one spot does not stiffen clay, it dries a patch of it much faster than everything around it, which is a crack you have chosen to build in.
- Green Level
- Yellow Level
- Purple Level
- Black Level
Not torch trained? You have not lost anything
A torch buys you time, not quality. Everything on this page works with a fan, an open shelf and patience, and the wet to wet method does not need stiffening at all. Plenty of very large pots get made here by people who have simply learned to plan across two sessions instead of one.
Not torch trained? You have not lost anything
A torch buys time, not quality. A fan, an open shelf and patience get you to the same place. Throw the bottom section at the end of one session and come back to it at the start of the next.
Seventeen videos, fifteen potters, none of them us
Two videos. The whole arc, then the joint.
Grouped by method so you can watch the one you chose rather than all of them. Every title and channel here was checked against YouTube itself rather than copied off a search page. Nothing loads until you press play, so no video player and no YouTube cookies arrive on this page unless you ask for them.
Three minutes on the whole idea with no talking, then half an hour on nothing but the seam. Nothing loads until you press play.
Throwing A Large Vase In Two Pieces
Three minutes, no narration, the entire arc. Both sections, the flip, the join and the re-truing. Watch this one first.
Joining Demonstration, Two Piece Vase · Matt Horne Crystalline Workshop
Half an hour on the seam alone, slow enough to see every decision. The joint is the only part that really matters.
Start here if you have three minutes
The whole idea, start to finish, with no talking. Watch this before you commit to reading anything.
Throwing A Large Vase In Two Pieces
Three minutes, no narration, the entire arc. Both sections, the flip, the join and the re-truing. If you only ever watch one thing on this page, this is the one that makes the rest of it make sense.
Method 1 · Stiffen, then join
Five takes on the standard method, from five very different studios. They disagree about torches, about how stiff is stiff enough, and about whether to add a coil at the seam. That disagreement is worth seeing.
Joining Demonstration, Two Piece Vase · Matt Horne Crystalline Workshop
The most watched joining demonstration on the internet, and deservedly. Half an hour on the seam alone, at a pace that lets you see every decision. Start with this one.
SIMON LEACH POTTERY - How to join a two piece pot ! - Cómo unirse a un bote de dos piezas!
Third generation of one of the most famous pottery families in the world, talking the entire way through. He explains why he is doing things while he does them, which is exactly the gap video usually leaves.
Wheel Throwing Tutorial | Large Sectional Pot With Derek
Filmed in a community studio much like ours, on equipment much like ours, teaching a class rather than performing. If you want the version that assumes you are a member and not a production potter, this is it.
pottery technique two piece pot joining and finishing
Thirteen minutes almost entirely about what happens after the two halves meet. The finishing is the half of the job most videos cut away from, and it is the half that decides whether the seam shows.
Throwing a 10lb POT in TWO parts
Ten pounds is a realistic first big pot, which makes this the most transferable video in the group. Real time, real hesitation, and clay weights you can actually buy on a Tuesday.
Method 2 · Wet to wet
No waiting, no torch, one sitting. Watch how low and how thick they leave the bottom section, because that is the entire trick.
Two Pieces, One Form: How to throw a wet to wet two piece vase
The clearest explanation anywhere of why wet to wet works at all, and where the ceiling on it is. If you are impatient by nature, start here rather than fighting the stiffen and join method.
16. Wheel Throw in Sections - Wet in Wet
Half an hour of patient, teacherly detail from a channel that films everything at full length and never edits out the awkward bits. Slow, thorough, and very hard to misunderstand.
Method 3 · Cylinder stacking
Throw boring tubes, stack them, shape the result. The friendliest route in if you can already pull a decent cylinder and have never joined anything.
Struggling With Tall Pots? How to Throw Tall Forms With Cylinder Stacking Part 1
Built as a lesson rather than a demonstration, which is rarer than it should be. Part one sets up the whole approach and explains why stacking is easier than pulling taller.
Stop Struggling with Tall Pots! Stack Your Clay Instead (Pottery Wheel Tutorial)
The newest video on this page by some distance, and the most complete. Same channel, later thinking, and worth watching after part one rather than instead of it.
How To Throw and Stack Forms On The Wheel
A university ceramics take, which means less production polish and more explaining. Fourteen minutes, no wasted ones, and a useful counterweight to the professional studio videos above.
Stacking Clay: An Exercise in Sectionals
Framed as an exercise rather than a project, which is the right way to think about your first three attempts. Nobody expects the practice pot to survive, and that takes the pressure off entirely.
Method 4 · Coil and throw
Add a coil to the rim, weld it, throw it up, repeat. This is how the genuinely enormous pots get made, and it looks nothing like the throwing you already do.
Coil Throwing
The reference video for this method, and the one everyone else links to. Forty minutes, uncut, showing exactly how big a coil should be and how it gets welded before it gets pulled.
Alex Matisse showing how to add a coil when throwing BIG pots.
Ten minutes on one narrow question: how do you attach the coil so the join does not become the weak point. Short, specific, and answers the thing everybody gets wrong on their first try.
Coil Building and Throwing a Tall Vase on the Pottery Wheel
Nine minutes at a comfortable scale. Most coil throwing videos are of pots you will not attempt this year, and this one is of a vase you could reasonably start on Thursday.
And two about how this usually goes
Every other video on this page shows the version that worked. These two show the rest of it, which is most of it.
How to Create A Two Part Pottery Vase, A Journey of Learning
Fifty one minutes from one of the most technically precise potters working, and he still calls it a journey of learning. Watch it for the attitude as much as the technique.
How to throw a tall pot in sections (ends in disaster) - Ridge Pottery
Filmed on a big pots course, and the title is not a joke. Somebody experienced does everything reasonably and it still comes down. The most useful half hour on this page, and the least watched.
None of these videos are ours and none of these potters are affiliated with The Clay Hole. Every channel is credited above and every card links straight to the original. If you find one of these useful, go and say so on their video rather than here. We have a page of twenty four more videos from potters we admire if you want to keep going.
More sectional pots die drying than die on the wheel
This is the part nobody films, because it takes a week and nothing happens. It is also the part where a pot you were proud of quietly develops a hairline through the seam and you never find out why.
The joint is thicker, so it dries later
Everything shrinks as it dries. A thicker band shrinks later than the thinner wall on either side of it, so the wall pulls away from the joint while the joint is still holding on. That tug is the crack. Slower drying gives the whole pot time to move together.
Cover the joints tighter than the pot
Loose plastic over the whole thing, and a strip of plastic taped or wrapped a little snugger around each seam. You are not trying to stop the pot drying, you are trying to stop it drying unevenly.
The rim and the foot are the enemy
Air moves fastest past the top edge and around the base, so those dry first and pull hardest on everything else. A tall pot rewards a plastic collar around the rim more than almost anything else you can do.
Turn it, do not move it
Rotate it a quarter turn every day or two so it is not always the same side facing the room. Do not pick a big leather hard pot up by the rim, ever. Hands underneath, or a board underneath, or leave it where it is.
Give it a week, not a night
A mug is dry in two days. A three section pot on a shelf under plastic is a week or more, and there is no way to hurry it that does not cost you the pot. Plan the shelf space before you plan the pot.
Bone dry means bone dry
Thick joints hold water long after the surface looks and feels dry. A big piece that goes into a bisque with moisture still in the seam does not crack, it bursts, and it takes its neighbors with it. When in doubt, give it another few days.
Plan your sections
Tell it the pot you want out of the kiln and it works backwards: how tall to throw each section while it is still wet, roughly how much clay to weigh out for each one, and what the whole thing is going to cost you here. Change anything and everything updates, including the numbers further down the page.
Tell it the pot you want out of the kiln and it works backwards: how tall to throw each section, how much clay to weigh out, and what it costs to fire here.
| Section | Throw it this tall | Weigh out | What it is |
|---|
How it gets there, so you can argue with it: finished dimensions are scaled up by about twelve percent for shrinkage, half an inch of height is added back per joint for what the welding eats, and clay is estimated from a three eighths inch wall, a three quarter inch floor on the bottom section only, and fifteen percent on top for slip, squeeze and the bit you never use. Real clay bodies and real hands vary. Treat it as a starting weight, not a rule.
Shrinkage, the height each joint eats and fifteen percent for slip and squeeze are all in there. Real clay bodies and real hands vary, so treat it as a starting weight, not a rule.
What this costs, before you buy the clay
Bisque firings are free at any size. Glaze firings are five cents per cubic inch with a $4.80 minimum, measured as the box your piece fits inside, and they cap at $600. On a pot this size that is the most expensive part of the project, which is why the number is up there. Clay starts at $28 for a 25 lb bag before your Level discount.
Big pots cost real money to fire
Bisque firings are free, every time, however big the piece. Glaze firings are charged at five cents per cubic inch with a $4.80 minimum, measured as the box your piece fits inside. That is fine for a mug. On a pot this size it is the most expensive thing about the whole project, and it surprises people at the counter. It does stop climbing, though. Firing charges cap at $600, so past about 12,000 cubic inches the price simply stays there no matter how much further you go.
Clay is priced from $28 for a 25 lb bag of our all purpose clay. Yellow Level takes $2 off a bag, Purple Level $4 and Black Level $6. Premium and specialty bodies cost more. Bisque is free at any size.
What you get for it
Four kilns, and the reason a piece this size is possible here at all is the L&L bell lift at 41½ cubic feet. Inside it is 43½″ wide by 30½″ deep by 54″ tall. That is a genuinely unusual thing for a community studio to own, and it is the difference between reading this page and doing it.
Alongside it sit a Skutt 1027 at 7 cubic feet, a Skutt 1227 at around 10, and a tester. Bisque runs to cone 05, glaze to cone 5½.
Two things to plan for
Kilns fire when there is enough work to fill one, so a big piece waits like everything else, and a piece this size takes up a lot of a kiln. And it has to live somewhere in the meantime. Check your shelf honestly before you make something that will own it for a month.
Something went wrong. Tell us which thing
Nine failures we see most often, what actually caused each one, and what to do differently. Nothing here is a sign you should not be attempting this.
The three that get first attempts, what actually caused each one, and what to do differently. Nothing here is a sign you should not be attempting this.
The joint dried faster than the wall.
Nothing to do.
Dry it slower.
Nine answers
The question everybody asks first
How many sections is too many?
There is no ceiling in principle. In practice, every joint is another wait, another chance to knock the pot off center, and another band of thicker clay to dry evenly. Two sections is a very achievable first attempt. Three is where most members settle. If your first thought is four, do a two section version of the same pot first, because everything you learn on the first joint applies to all of them.
Do all the sections have to be the same clay?
Yes, and not for a fussy reason. Different clay bodies shrink by different amounts. Join two of them and the joint is being pulled apart from both sides for the entire time it dries and again in every firing. Even the same body from two different bags is fine, but two different bodies is asking a seam to do something it cannot.
Can I join a section I threw last week to one I threw today?
Only if last week’s section is still genuinely leather hard, which means it was bagged properly. A bone dry section will not join to anything. If a section has gone past leather hard and you have not started the next one, wrap it tightly and check it daily rather than hoping. Soft on stiff works. Wet on bone dry does not, no matter how much slip you use.
Will the joint show on the finished pot?
Not if it was welded properly and ribbed flush while the clay still moved. A seam that is invisible when leather hard stays invisible. A seam you can feel with a fingernail will be more obvious after glazing, not less, because glaze pools in a groove and thins over a ridge. Put your joints where the form changes direction and even a slightly imperfect one disappears.
Do I actually need a torch?
No. A torch saves time and nothing else. Stiffening happens on its own with a fan, an open shelf and a few hours, or overnight if you are working across two sessions. The wet to wet method skips stiffening entirely. Torches are available here to Purple Level and Black Level Members who have been trained in person by Dan, never on a plastic bat, and that is the whole policy.
How much clay am I going to go through?
More than you expect, and the planner above will give you a number for your specific pot. As a rough shape of it: a two foot pot a foot across is somewhere near two bags of clay. Clay starts at $28 for a 25 lb bag before your Level discount. It is worth practicing the joint on two small cylinders first rather than learning it on the expensive one.
What does a big pot cost to fire here?
Bisque is free at any size. Glaze firings are five cents per cubic inch with a $4.80 minimum, measured on the box your piece fits inside, so cost climbs with the cube of the pot rather than with its height. A 12 inch wide, 24 inch tall pot is 3,456 cubic inches, which is $172.80. That is not a penalty for making something big, it is what a piece that size takes up in a kiln. It also stops: firing charges cap at $600, which works out to around 12,000 cubic inches, so that is the most you will ever pay for one piece however enormous it gets. The calculator on this page will price yours before you buy the clay.
How big can you actually fire?
Our L&L bell lift is 41½ cubic feet, 43½″ wide by 30½″ deep by 54″ tall inside. That is far larger than almost anything anyone attempts, and if you are willing to pay the firing, we can probably handle it. Talk to us before you start something at the top of that range so we can plan the kiln around it.
Is this an advanced technique? Should I wait?
If you can throw a clean cylinder, you can stack two of them. The skills are not exotic, they are just unfamiliar, and the cylinder stacking method exists precisely to let people attempt this earlier than they think they should. The only part of it gated by Level is the torch. Everything else is open to every member from day one, and the worst realistic outcome is that you learn a lot and reclaim the clay.
Is this an advanced technique? Should I wait?
If you can throw a clean cylinder, you can stack two of them. The skills are not exotic, only unfamiliar. The only part gated by Level is the torch. Everything else is open to every member from day one, and the worst realistic outcome is that you learn a lot and reclaim the clay.
Your first one will not work. Make it anyway.
Nobody joins a good seam the first time. The clay teaches you what stiff enough feels like, and there is no way to be told it. What we can give you is 29 wheels, a kiln that fires four feet tall, instructors in every single class, and somewhere to leave a very large pot alone for a week while it does what it needs to do.
There is a much longer version of this page. The switch is at the top.
12896 S Pony Express Rd, Suite 100, Draper, Utah 84020. Questions about a piece you are planning? Text the studio on 385-241-5528 before you buy the clay, not after.