Pottery Date Night
 Bring All Your Friends Free Week
 Give a Month of Pottery
 Private Pottery Parties

 The Welcome Booklet
 Your First Ten Sessions
 The Pottery Process
 Finding the Studio
 Your Classes Never Expire
 The Four Tables
 Who’s Who
 The Rewards Program
 Flux Glazes
 The Calculators
 Kiln Tracker
 Holiday Kiln Deadlines

 Beginner’s Tool Set
 Fingernail Clippers
 Mayco Clay Mender
 Epoxy for Kintsugi
 Applicator Bottles
 Large Bead Rack
 Raku Workshop
 Nighttime Raku
 Horsehair and Feather Raku
 The Clay Hole T-Shirt
 Embroidered Crewneck
 Zip-Up Hoodie
 Pre-Made Bisqueware
 Glaze Catchers
 Kiln Cookies
 Clay Cubby Rental
 The Glaze Bible, Printed
 The Book of Molds, Printed
 Printable Pottery Guides
 Free Printable Trackers
 Gifts for Potters
 Christmas Pottery Ideas
 Mother’s Day Gift Ideas
 Pottery Date Night
 Studio Calendar
 2027 Studio Events
 What Should I Do Today?
 How to Throw on the Pottery Wheel
 How to Make a Pinch Pot
 How to Tap Center a Pot
 The Five Stages of Clay
 Is Pottery Hard to Learn?
 Pottery Wheel Practice Drills
 20 Easy Hand-Building Projects
 Everything That Sounds Wrong

 A Beautiful Piece, Every Time
 Slab Roller Tips
 Any Dish as a Slump Mold
 Slab Roller & Slab Mold Certification
 The Pottery Skill Tree
 Clay & Pottery Calculators
 Logging Your Pottery and Glazes
 The Pottery Dictionary
 Why Did My Pottery Do That?
 The Pottery Cone Chart
 Pottery Myths, Fact-Checked
 Is Handmade Pottery Food Safe?
 Incredible Ceramic Artist Videos
 How Dan Throws Giant Pots
 How to Dry Your Pottery
 The Pottery Wheel Introduction
 Pottery by Zodiac Sign
 Personality and the Pottery Wheel
 Pottery for Engineers
 ADHD, Hyperfocus, and Never Running Out
 Hobbies for Burnout
 Screen-Free Hobbies for Adults
 Every Addiction I Ever Had Lost to Art
 Functional Pottery Is Engineering
 How Do We Compare?
 Pottery Classes by City
 Every Pottery Studio in Utah
 Pottery in Draper
 Featured Members
 The Signature Wall
 Making Friends as an Adult Is Brutal
 The Clay Hole Commandments
 2027 Pottery Contests
 2027 Studio Parties
 Gallery Night

 Scream It Into the Void
 Destroy the Glaze Wall
 Daily Affirmation Cards
 Everything That Can Go Wrong
 Subscribe to Our Newsletters
 Contact The Clay Hole
 Corporate Team Building

 Glaze Combinations
 Glazes We Do Not Carry
 Making Glaze Test Tiles
 The Mega Glaze Tool
 How to Use the Mega Glaze Tool

 Glaze Brushing Techniques
 How to Use Underglaze
 How to Use Dipping Glazes
 Glaze Problems, Causes and Fixes
 The Dipping Glaze Guide

 Making a Glaze Catcher
 Fused or Sharp After Firing
 The Signature Wall
 His Viral Videos
 His Own Ceramics
 Meet Mud
Hand-building and wheel technique
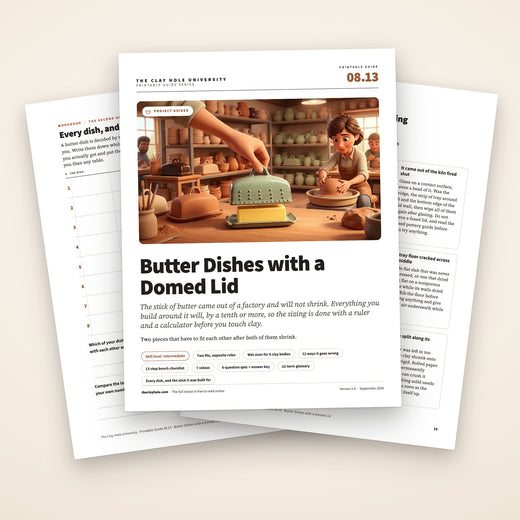
Butter Dishes With a Domed Lid
Every other lidded pot only has to agree with itself. This one has to agree with a stick of butter, and the butter does not shrink in the kiln. That single difference is what makes a butter dish harder than it looks and easier than it feels.
Jump to a section
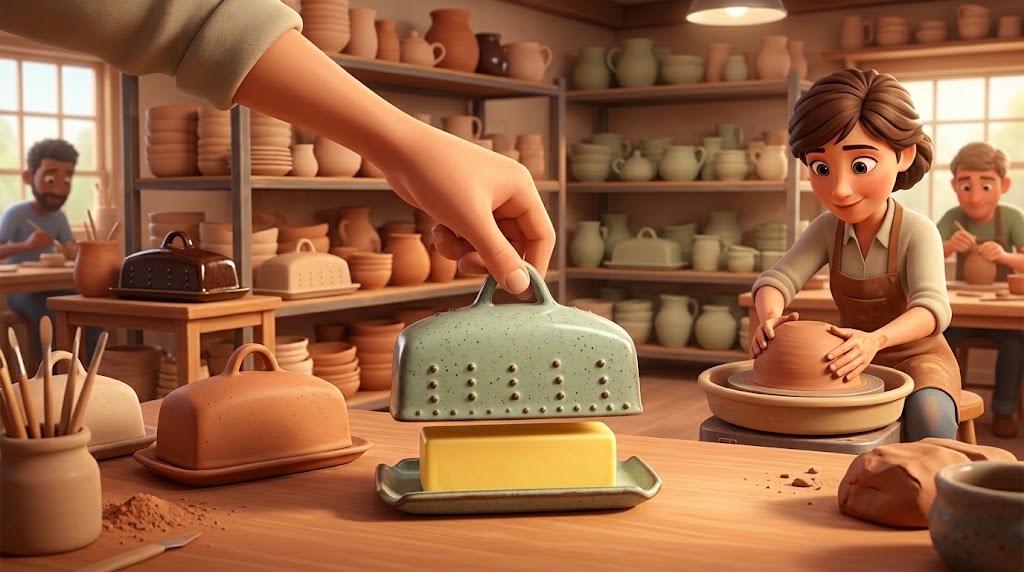
The lid is the easy half. The arithmetic is the half that decides it.
The short version
Measure the butter, multiply by 1.17, build it from slabs
The one number people get wrong
A dome is shortest at its edges, and butter is a box with square corners. Check the height of your lid above the corner of the butter, not above the middle of it. That one measurement is the difference between a butter dish and a very nice paperweight.
Go to your fridge and measure the stick of butter you actually buy. Not the one on the internet. Yours.
A butter dish has two fits. The butter into the tray is pure arithmetic, done before you touch clay, and it only fails one way: too big is still a butter dish, too small is a soap dish. The lid onto the tray is the ordinary lid problem, and it is solved by keeping the pair together on one shelf from the day you build them.
So: pick the finished inside you want, multiply every measurement by 1.17 to cover the shrinkage, and build it that big in wet clay. Then follow the steps below.
01 · The one idea
A butter dish has two fits, and they obey opposite rules
Say it once and the rest of the page follows
The lid and the tray shrink together. The butter does not shrink at all. Every rule below is one of those two sentences wearing a different hat.
Almost everybody builds a butter dish thinking about one fit. There are two, they fail in different ways, and mixing up which rule applies to which is the single most common reason a finished dish is useless.
Fit one: the butter into the tray
This one is against an object that came out of a factory and will be exactly the same size on the day you open the kiln as it is right now. Your clay is going to lose ten to fourteen percent on the way there. So this fit is entirely arithmetic, done before you touch clay, and it is one-directional: a tray that ends up a little roomier than planned is still a perfectly good butter dish. A tray that ends up a little tight is firewood.
Fit two: the lid onto the tray
This one is two pieces of the same clay, so they shrink by the same percentage and a lid that sits right on the wet tray sits right on the fired one. That fit is not about arithmetic at all. It is about keeping the pair together, at the same wetness, on the same shelf, from the moment you build them until they come out of the glaze fire. It is exactly the same problem as any other lid, and we have a whole page on it: throwing lids that fit covers galleries, calipers and trimming a lid against its own pot in detail.
Get those two straight and a butter dish stops being intimidating. Fit one is a spreadsheet. Fit two is housekeeping. Neither one is a skill you have to develop at the wheel, which is why a butter dish is a genuinely good early project even though it has a reputation for being a hard one.
02 · Why this page reads like this
A video plays forward. A spec sheet waits.
There are hundreds of butter dish videos and we have linked seven good ones further down. So it is fair to ask why we bothered writing the thing out as well.
What the video does better
Hands. How soft the slab is when it goes over the former, how hard somebody presses to seat a join, what leather hard actually looks like when an arch is firm enough to lift off its former. Nobody has ever written a sentence that teaches those, and watching is the fastest way to learn them.
What the page does better
The numbers, and the order. This project is mostly measuring, and measuring is the part that gets edited out of videos because it is not interesting to film. You will be standing at a bench with a ruler in one hand. A page holds still while you check something twice.
The gap nobody plans for
This build has about two weeks in the middle of it. You make it, it dries, it bisques, you glaze, it fires. Nobody rewatches a thirty-minute video to remember what they were supposed to do at the glazing stage. They come back to a list.
What we actually see happen in the studio
Members who only watch tend to arrive at the bench with a feeling for the shape and no plan for the size. Members who only read tend to have the size exactly right and no idea how firm the clay is supposed to be. The ones who do both, in either order, mostly get a working butter dish on the first go. So this page is built to sit next to the videos rather than replace them: read it once, watch one or two, then keep the checklist open on your phone while your hands are covered in slip.
03 · The object you did not make
Measure the butter first
Butter is not one size. There are two shapes on American shelves, they are noticeably different, and Utah is one of the places that gets both of them. Guessing which one your household buys is the fastest way to make a dish that fits nothing.
| Shape | Length | Cross-section | Where it turns up |
|---|---|---|---|
| Elgin, the long one | About 4¾ to 4.8″ | About 1¼ to 1.3″ square | The default east of the Rockies, and what almost every store-bought butter dish is designed around |
| Western stubby, the fat one | About 3.1″ | About 1.5″ square | Standard west of the Rockies. A quarter of an inch taller and wider than an Elgin, which is exactly enough to foul a lid |
Both are four ounces and eight tablespoons. Only the packaging differs, and it differs because of which decade a dairy bought its machines in.
Long Elgin sticks run about 4.8 inches by 1¼ square. Fat Western stubbies run about 3.1 inches by 1.5 square. Utah gets both, so take the length from one and the girth from the other and a single dish holds either.
Build for the long one and the fat one at once
You do not have to choose. Take the length from the Elgin and the height and width from the stubby, and one dish holds either. That means an interior floor long enough for a 4.8 inch stick and headroom generous enough for a 1.5 inch one. It costs you nothing except a slightly roomier dish.
Two minutes that save two weeks
Open the fridge. Put a ruler on the stick. Write down three numbers: length, width, height. Do it before you cut a single slab, and do it again if somebody else does the grocery shopping, because a dish sized to the butter you assumed is a dish sized to nothing.
Half a stick, and the other thing people forget
Most butter dishes spend most of their lives holding a stick that has been cut into. A half stick laid on its side is wider and lower than a whole one, and a stick with a knife-scoop taken out of the middle of it is neither. None of that changes the maximum you have to clear, which is a full unopened stick, so size for that and everything else fits underneath.
04 · The arithmetic
Three numbers, and where each one comes from
Two numbers and one multiplication
Clay shrinks on the way to a finished pot, so the dish you build has to be bigger than the dish you want. This is the only part of a butter dish that is genuinely unforgiving, and it is entirely solved before you touch clay.
The target, finished
Inside the fired dish we aim for 5½″ long, 2½″ wide and 1.9″ of headroom. The length holds an Elgin with room to get a finger in at each end. The width and the height clear a Western stubby. Nothing about those three is sacred, but they are a good place to start and they fit every stick sold in Utah.
The shrinkage
Our clay bodies give up between ten percent and about fourteen on the way from wet to fired, depending on which one you throw. Shrinkage plays no favorites: length, width and height all lose the same percentage.
The multiplier
Divide the finished size by what is left after shrinking, and you get the wet size. For a twelve percent clay that is dividing by 0.88, which is the same as multiplying by 1.136.
Clay shrinks on the way to a finished pot, so the dish you build has to be bigger than the dish you want.
If you remember one thing from this page, make it this
Multiply every finished measurement by 1.17. That covers every clay body we stock, including Number 16 Porcelain, which shrinks the most at 13.9 percent. On our highest-shrinkage clay it lands you almost exactly on target; on our lowest it leaves the dish about five percent roomier than planned, and a roomier butter dish is still a butter dish. This shortcut is safe here precisely because fit one only fails in one direction. Do not carry it over to a jar lid, where loose is just as broken as tight.
Or use your clay's real number
Wet sizes for a finished interior of 5½ by 2½ by 1.9 inches, worked out for each body we stock. Shrinkage figures are the manufacturers' own.
| Clay body | Shrinks | Cut it this long | Cut it this wide | Build it this tall |
|---|---|---|---|---|
| 52 Buff | 10% | 6.11″ | 2.78″ | 2.11″ |
| B-Mix with Grog | 11% | 6.18″ | 2.81″ | 2.13″ |
| B-Mix | 12% | 6.25″ | 2.84″ | 2.16″ |
| B-Mix with Specks | 12.47% | 6.28″ | 2.86″ | 2.17″ |
| Speckled Buff | 12% | 6.25″ | 2.84″ | 2.16″ |
| Half and Half | 12% | 6.25″ | 2.84″ | 2.16″ |
| Number 16 Porcelain | 13.9% | 6.39″ | 2.90″ | 2.21″ |
| Berlin Gray | 12% | 6.25″ | 2.84″ | 2.16″ |
The clay and pottery calculators will run these for any measurement you like, and carry the same figures.
Both halves from the same bag, and one reason it matters more here
Mixing clay bodies across a lid and a tray breaks fit two, because two bodies shrinking at different rates cannot stay a pair. On a butter dish there is a second reason: the tray is a wide flat slab and the lid is an arch, so they already dry at different speeds even when everything else is identical. Do not hand them a difference in shrinkage on top of that.
05 · The part that catches everybody
A dome is shortest where the butter is tallest
Butter is a box with square corners. A dome is a curve. They meet at the worst possible place, and the measurement almost everybody takes is the one that does not matter.
Butter is a box with square corners. A dome is a curve. Check your headroom above the corner of the butter, never above the middle.

- The measurement people take. Height at the middle: 0.40″ of clear air above the butter. Looks generous. Tells you almost nothing.
- The measurement that decides it. Height above the butter's own corner on the same lid: 0.02″. That is not clearance, that is contact.
- A Western stubby in cross-section, 1.5 inches square. Swap in an Elgin and the same lid clears its corner by 0.32″, which is why a dish can work perfectly all year and then fail the week somebody buys different butter.
- The fix, and it is free. Give the lid a straight wall for the first 1.55″ and start the arch above that. Same footprint, same overall height, no extra clay.
- What that buys. Corner clearance goes from 0.02″ to 0.33″. To get the same room out of an arch that springs off the floor you would have to make the lid 2.29″ tall, which starts to look like a hat.
- Where the two pieces touch. The bottom edge of the lid wall, resting on the tray outside the ridge. Keep this bare of glaze, along with the strip of tray it lands on.
The one question to ask before you shape a lid
Does the arch start above the butter, or below it? If it starts below, the curve is stealing headroom exactly where the butter needs it and you will need a much taller dome than you expect. If it starts above, the corners sit under a vertical wall and the shape of the arch stops mattering at all. Every domed butter dish that works has answered this, whether or not the potter knew they were answering it.
06 · The method we would pick
Building one from slabs, in ten steps
Building one from slabs, in seven steps
Slabs win here because a butter dish is a rectangular object and a slab is a rectangular thing. You can cut to a measured number instead of judging it by eye, and you can put a ruler on every piece before it becomes a pot. Plan on about two and a half to three pounds of clay.
A butter dish is rectangular and a slab is rectangular, so you can cut to a measured number instead of judging by eye. Plan on about two and a half to three pounds of clay.
-
Roll a quarter-inch slab and let it firm up
Quarter of an inch is the sweet spot: thinner and the arch sags, thicker and the lid is a brick. Roll more than you think you need, in one go, so every piece comes from clay of the same wetness. Our slab rollers, once you have the free slab roller and slab mold certification, will get you there in a few passes. Until then, roll it by hand between two quarter inch guide sticks. Then leave it under plastic until it is firm enough to pick up without stretching, but still soft enough to bend.
-
Cut the tray floor to your wet number
Roll a quarter-inch slab and cut the tray floor
Not your finished number. The one you got after multiplying. Cut it as a rectangle, then take the corners off at a shallow angle if you want an oval-ish tray, because square corners are the first thing to crack.
Cut the wet number, not the finished one. Take the sharp corners off at a shallow angle; square corners crack first.
-
Add the tray walls
A strip about three quarters of an inch tall around the edge of the floor, or press the whole floor into a shallow slab mold and skip the strips. Either way, score and slip every join properly. A butter dish gets picked up by its tray for years.
-
Press the locating ridge into the floor
A low ridge, about a quarter of an inch tall, running around the floor set in from the tray edge. The lid drops over the outside of it and that is the only thing stopping the lid sliding off when somebody carries it to the table. Leave a comfortable gap between the ridge and where the lid wall will land.
-
Make a former for the arch
A magazine or a few sheets of newspaper rolled into a log and taped, wrapped in a plastic bag. A pool noodle. A length of pipe cut lengthwise. It needs to be the right width, roughly the right curve, and it needs to come out afterward, which is what the plastic is for. Paper has one real advantage: it can be crushed and pulled out even when the clay has tightened around it.
-
Drape the lid slab, and give it a straight wall first
Lay the slab over the former and ease it down. Do not stretch it, let gravity do it. The part that matters is the bottom: the last inch and a half of each side wants to come down vertically, not curve all the way to the bench. That straight wall is the whole trick from the section above.
-
Cut and fit the two end walls
Stand the lid up, trace the actual profile onto a fresh piece of slab, and cut two ends to that line rather than to a shape you drew earlier. Bevel the edges so they meet cleanly, score and slip, and reinforce the inside of each seam with a thin coil pressed in and smoothed. Those two seams are where a dome cracks.
-
Leave the former in until the arch holds itself up
Too early and the roof sags. Too late and the clay shrinks onto a rigid object and splits. Firm enough to keep its shape when you press it gently is the moment. If you used rolled paper, crush it inward rather than pulling it out sideways.
-
Add the knob, then check the fit
Put the lid on the tray and look at it from the side before anything dries further. Any rocking, any gap at one end, any place the lid does not sit down on the tray: fix it now, while everything still moves.
-
Put the butter in it
Put the actual butter in it
Take a real stick out of the fridge, sit it on the tray, and put the lid on. You are checking one thing: does the lid clear the corners of the butter with room to spare? Do this while the clay is still wet enough to change. It is the only test that counts, and it takes ten seconds.
Wrap the butter, or wrap the clay
Wet clay against a stick of butter is bad for both. Leave the butter in its wrapper for the fit test, and remember the wrapper is adding a hair to every dimension, which is a hair in your favor.
Why the tray floor cracks, and the thirty seconds that stop it
A wide flat slab with walls around it is the classic shape for a crack straight across the middle. Compress the floor with a rib before you attach anything to it, and dry the finished tray on something that lets air underneath rather than flat on a nonporous bench, so the floor and the walls stiffen at something like the same rate.
If you would rather not fight an arch at all
Make a round one. A shallow crock with a domed lid is the same object with the corners taken out of the problem, the butter goes in as a whole stick or cut in half, and the fit becomes an ordinary lid fit. Nobody will think less of you, and it is a genuinely faster route to something you will use.
07 · The other route
Throwing it instead
A domed lid is a bowl you have not turned over yet. Once that lands, the wheel route stops being mysterious, and it gives you a smoothness that slabs have to work for.
- Throw the tray as a wide shallow dish with a low wall, from about a pound and a quarter. Compress the floor properly. It is the widest flattest thing you will make this week and it is the one most likely to crack.
- Put the locating ridge in while it spins. A shallow groove or a raised ring in the floor, set in from the wall, is far easier to make true on a wheel than by hand.
- Set your calipers on the outside of the tray wall before it comes off the wheel, because the lid is going to sit over it.
- Throw the lid upside down as a shallow bowl, from a similar weight of clay. Flipped over, the inside of the bowl becomes the inside of the dome.
- Raise a real wall on that bowl rather than letting it curve all the way to the wheel head. That wall becomes the straight section above the butter, and skipping it is how a thrown butter dish ends up clearing at the middle and touching at the edges.
- Trim the lid on the tray, using the tray as the chuck once both are leather hard, and test the fit between passes.
Round, or altered into an oval
Thrown parts come off the wheel round. You can keep them round, which is easy and looks deliberate, or gently squeeze both halves into an oval while they are still soft. Squeeze them the same amount in the same direction and mark which way round they go, because an oval lid fits an oval tray exactly one way.
Two pages that carry the rest of this
The measuring, the calipers and the trimming-against-the-pot technique are all covered properly in throwing lids that fit, and the tool work in trimming and turning. There is no reason to repeat them here, because a thrown butter dish lid is an ordinary lid that happens to be sitting on a tray.
08 · Staying put
The lip is what makes it a dish instead of two objects
The test
Set the lid on the tray at leather hard and nudge it with one finger. If it slides, the ridge is too low. Then lift the lid straight up. It should come away on its own and the tray should stay where it is. If the tray lifts with it, the fit is too tight, so open it up before it dries.
A domed lid sitting flat on a flat tray will slide off the first time somebody passes it across a table. Something has to locate it, and there are three ways to do that.
A ridge on the tray. A low wall standing up out of the tray floor, with the lid dropping over the outside of it. This is the easiest to build on a slab dish, the easiest to get right, and the one we would suggest first. Make the ridge tall enough that the lid has to be lifted rather than pushed, which in practice means around a quarter of an inch.
A flange on the lid. A ring on the underside of the lid that drops down inside the ridge or inside the tray walls. It hides the joint neatly and it is more work, because the flange has to be built at exactly the right offset and it is the first thing to warp.
A recessed well. The tray floor is sunk below the rim, and the lid simply sits in the resulting dip. Cleanest to look at, hardest to build from slabs, and it eats headroom, so if you go this way remember to add the depth of the well back onto the height of your dome.
Whichever you pick, keep the contact surfaces flat and keep them narrow. A wide contact area gives glaze more chances to weld the two halves together, and a rounded one lets the lid rock.
09 · The handle
Knobs get grabbed with buttery fingers
This is the one part of a butter dish where the usual lid advice is not quite enough, because of what is going to be on the hand that reaches for it.
Give it something to hook
A smooth sphere is a lovely object and a poor handle for greasy fingers. A bar across the top, a loop, a ridge, or anything with an undercut gives a fingertip somewhere to catch. Test it with actual buttery hands before you decide you like it.
Keep it hollow or keep it small
A solid lump of clay on a thin arched slab dries at a completely different rate from the thing it is stuck to, and that argument ends in a crack across the lid. This is the same rule as any lid knob, and a domed lid is thinner than most. A hollow knob is a closed form, so put a small hole through it with a needle tool where it meets the lid, so any water left inside can leave as steam in the kiln.
Attach at soft leather hard
Both pieces at the same firmness, both faces scored and slipped properly, and the join kept thick where it meets the lid rather than tapered to a neat point. If you would rather pull a handle than build a knob, pulling handles covers the technique.
Or skip the knob entirely
A lid long enough to overhang the tray at both ends gives you two places to grip and needs no knob at all. It is the least fussy solution on this page, it dries more evenly than a lid with a lump on top, and it is very hard to get wrong.
10 · The two weeks after
Where a good butter dish still dies
You can measure everything correctly and still open the kiln to a lid that will not move. Both of the remaining failures happen after the building is finished, and both are completely preventable.
Drying and the bisque
- Dry the lid sitting on its tray. Both pieces go slightly out of true as they dry, and a pair drying together goes out of true in the same direction.
- Same shelf, same plastic, the whole time. The arch is thinner than the tray and will try to race ahead. Wrap the lid more heavily rather than uncovering the tray.
- Lift the lid every day or so and set it back down, so the contact surfaces do not bond while the clay is still soft.
- Bisque it in place too. We bisque to cone 05, and a lid that rode through the bisque on its own tray comes out matched.
The glaze firing
- Glaze the inside. It is a food surface, so use a glaze rated for food and check it in the Food Safe Lookup first. Butter comes off a glazed floor far more easily than off bare stoneware.
- Keep glaze off every surface where the two halves touch, or wax resist both, then wipe both again after glazing even if you waxed them.
- Fire the lid on the tray so the pair moves together, with the whole pair on a kiln cookie. At The Clay Hole staff load every kiln, so tell the studio team the two go as one pair. Our glaze firings go to cone 5½, and pots genuinely do move at that temperature.
- Watch a runny glaze on the inside of the lid wall. It does not have to start on a contact surface to end up on one.
Do not chase an airtight seal
A butter dish is not a sealed container and does not need to be. The fit only has to keep the lid on and the dust off. Chasing a tight seal on two ceramic surfaces gets you a lid that binds after glaze, and a box that traps moisture around butter is not doing the butter any favors either. Loose enough to lift with one finger is the target. If yours does come out of the kiln fused, fixing fused and sharp pottery walks through what is worth trying, and come and find a member of staff before you start levering.
11 · Watch somebody do it
Seven potters, two routes, none of them us
Two videos, then go and make one
Grouped by what they teach rather than by who made them. Watch the one covering the part you are least sure about. They only load when you tap them.
Watch the first one, and the second if you want to follow along at the bench. They only load when you tap them.
Handbuilding a Butter Dish
Indigo Fire
Five minutes, start to finish, and the fastest way to get the shape into your head before you commit any clay. Watch this one first even if you are going to throw yours.
Make a butter dish with a slab of clay! (Hand building tutorial)
Perrin Pottery
Half an hour, real time, and the maker says up front that it needs nothing but a rolling pin and a couple of cutters. If you want to follow along at the bench with one video open, this is the one we would pick.
How To Make a Slab Pottery Butter Dish
The Pottery Wheel
Built around a printable template, with two different knob designs and a lot of attention to beveling the joins. It also talks about deliberately leaving the lid room so the two parts do not end up too tight, which is the same argument we make about not chasing a seal.
Creating a Lidded Butter Dish with a Textured Slab and a Focal Accent Ceramics II
KaransPotsAndGlass
Made for a college ceramics class, so it moves at a teaching pace. Good on rolling and texturing the slab before anything gets assembled.
Watch Me Make a Butter Dish - Part 2 - Throwing the Dome on the Potters Wheel
jstarceramics
The single clearest demonstration we found of the idea that a domed lid is a bowl thrown upside down. Part one on the same channel throws the base and part three trims both halves, so the series covers the whole wheel route in under half an hour.
making a butter dish, The Blackheath Pottery, making a porcelain butter dish on the wheel
The Blackheath Pottery
Throws a base and a lid, turns both sections and adds a handle, in real time and in porcelain, which is the least forgiving body you could pick for it. Worth watching for the turning alone.
How I make a ceramic butter dish | The entire pottery process | Hand-carved pottery
Hana Ceramics
Narrated over the top rather than filmed as a lesson, and it follows one dish from wet clay all the way through carving, glazing and firing. This is the one to watch for the two weeks that happen after the building stops.
Every one of these is somebody else’s work, linked because it is good. None of them are ours and none of them are sponsored.
12 · Troubleshooting
Twelve ways a butter dish stops working
The three that get you the first time
Find the symptom, read the cause. Almost all of these were decided long before the moment you noticed them, which is the annoying part and also the useful part.
The rest are on the comprehensive version. These are the ones that happen on a first attempt.
The butter does not fit and there is nothing to be done
Correct, there is nothing to be done, and that is the entire reason for the multiplier. Either the shrinkage was never added or the finished target was measured against the wrong stick. Clay does not stretch back. Keep it as a soap dish and build the next one at the wet number.
The lid touches the butter near the edges
The arch started too low, so the dome is at its shortest exactly where the butter is at its tallest. Nothing is wrong with your measuring; you measured the middle. Next time give the lid a straight wall past the height of the butter before the curve starts.
It came out of the kiln fired shut
Glaze on a contact surface, even a bead of it. Wax the ridge, the strip of tray around it and the bottom edge of the lid wall, then wipe all of them again after glazing. Do not force a fused lid, and read the fused pottery guide before you try anything.
The butter fits but you cannot get it out
The floor is long enough for the stick and nothing else. You need room at the ends for a fingertip or a knife tip to get underneath. A third of an inch spare at each end is the difference between a dish people use and one that lives in a cupboard.
The lid slides off when it is carried
No locating ridge, or a ridge too shallow to do anything. It needs to be deep enough that the lid has to be lifted rather than pushed. This is not a comfort question; a lid that slides is a lid that ends up on the floor.
The tray floor cracked across the middle
A wide flat slab that was never compressed, or one that dried sitting flat on a nonporous surface while its walls dried faster. Rib the floor before attaching anything and give the tray air underneath while it dries.
The dome sagged before it firmed up
The slab was too soft or too thin when it went over the former, or the former came out too early. A quarter inch is the working thickness; let the slab firm up under plastic before draping, and leave the former in until the arch holds its own shape.
The dome cracked at one of the end seams
The two end walls are where a domed lid fails, because the arch shrinks against them. Score and slip properly, reinforce the inside of each seam with a thin coil, and make sure the ends and the arch are at the same firmness when you join them.
The dome split along its length
The former was left in too long, so the clay shrank onto something rigid. Rolled paper solves this permanently because you can crush it inward. Anything solid needs to come out as soon as the arch will hold itself up.
The lid rocks, or only fits one way round
Normal, and mostly not a fault. Almost nothing comes out of a kiln perfectly true, so most lids have a best orientation. Mark it with a dot on the lid and a matching dot on the tray at leather hard, while you can still tell which way is which.
The knob snapped off
Solid clay on a thin arch, attached to clay that was too dry, or scored and slipped too lightly. Keep knobs hollow or small, attach at soft leather hard, and keep the join thick where it meets the lid instead of tapering it to a point.
It worked for a year and then stopped
Somebody bought different butter. A dish built around an Elgin has about a third of an inch of corner clearance, and a Western stubby is a quarter inch taller and wider, which uses all of it. This is the one failure on the list that is not your fault, and it is why we suggest building for both shapes from the start.
Three of these are one problem wearing different hats
A split dome, a cracked tray floor and a rocking lid are all the same thing: two parts of one object drying at different speeds, or one part shrinking against something that would not move with it. A sagged dome is a different failure: a slab that was too soft or too thin, or a former taken out too early. Storage and drying are not an afterthought to this craft. On a butter dish they are most of it.
13 · At the bench
The list to keep open on your phone
In order, from a fridge door to a fired pair. Tap an item to tick it off. It remembers where you got to, so you can put the phone down, wash your hands, and come back.
14 · Questions
Things members ask us about butter dishes
If yours is not here, ask at the front desk. Somebody will have made the same mistake and will be pleased to say so.
Do I glaze the inside?
Yes, with a glaze rated for food, so check it in the Food Safe Lookup first. It is a food surface, and butter comes off a glazed floor far more easily than off bare stoneware. Glaze the inside of the tray and the inside of the lid, and keep it off only the narrow surfaces where the two halves actually touch. Dipping glazes are one way to cover the inside of a tray evenly, once you have the free dipping glaze certification.
Does it need to be airtight?
No, and chasing one will cost you the dish. Two glazed ceramic surfaces will never seal properly anyway, and a fit tight enough to try will be a lid that binds once glaze adds its own thickness. The lid has one job: stay on and keep the dust off. Loose enough to lift with one finger is right.
How much clay should I bring?
Plan on about two and a half to three pounds for a slab-built dish, which gives you a quarter-inch slab with enough spare to recut a piece you are not happy with. For a thrown one, about a pound and a quarter for each half. Take more than you need and reclaim what is left.
Can I make one dish that fits both stick shapes?
Yes, and we would. Take the length from the long Elgin stick and the width and height from the fat Western stubby. The result is slightly roomier than a dish built for either one alone, and it holds whatever comes home from the store. The only cost is that a stubby has a bit of space around it.
What about a French butter keeper, the one with water in it?
Different object, and a genuinely good one, but not this page. A butter keeper is a bell that holds packed butter upside down in a water-filled crock, so the geometry, the fit and the wall thickness are all a different problem. It is much closer to an ordinary lidded pot, so throwing lids that fit is the better starting point for one.
Dishwasher and microwave?
Dishwasher and microwave are two separate questions, and each one is decided glaze by glaze, so look up the glaze you used in the Food Safe Lookup. Microwaving a butter dish is mostly a question of what happens to the butter, but avoid it with any glaze carrying a metallic or luster finish. If you are unsure about a particular glaze, the glaze finder lists what each one is suitable for.
My first one came out too small. Is that normal?
Extremely. It is the most common outcome of a first butter dish, and it is almost always shrinkage that got left out rather than anything to do with skill. Build the second one at the wet number, take fifteen minutes to make both at once while you are set up, and the second will fit.
Where to go next
The first pot you make that has to obey the grocery store
Go and measure your butter
Which is why a butter dish feels so much harder than the making in it warrants. There is nothing difficult about a slab with a curve in it. There is something genuinely new about building to a number you took off an object somebody else manufactured, and getting that right is a bigger moment than it looks. Measure first, multiply, and start the arch above the butter.
Then multiply by 1.17 and start the arch above the butter. That is the whole thing. If you want the reasoning, the wheel-thrown route and the full troubleshooting list, the comprehensive version is at the top of this page.
Throwing lids that fit
Galleries, calipers and trimming a lid against its own pot. Everything about fit two, in detail.
Slab rollers and slab molds
Getting an even quarter-inch slab off the roller, and what the slab molds will and will not do.
Scoring and slipping joins
The end seams of a domed lid are the joins most likely to open. This is how to make them hold.
The calculators
Shrinkage for any measurement and any body we stock, plus firing costs and clay math.
When it comes out fused
What is worth trying on a lid that welded itself shut, and what will break the tray.
The slab mug
The other slab project worth making once you have this one down.
Which version would you like to print?
Videos come out as a labeled box with the title and channel to search for, since paper does not play them.