Pottery Date Night
 Bring All Your Friends Free Week
 Give a Month of Pottery
 Private Pottery Parties

 The Welcome Booklet
 Your First Ten Sessions
 The Pottery Process
 Finding the Studio
 Your Classes Never Expire
 The Four Tables
 Who’s Who
 The Rewards Program
 Flux Glazes
 The Calculators
 Kiln Tracker
 Holiday Kiln Deadlines

 Beginner’s Tool Set
 Fingernail Clippers
 Mayco Clay Mender
 Epoxy for Kintsugi
 Applicator Bottles
 Large Bead Rack
 Raku Workshop
 Nighttime Raku
 Horsehair and Feather Raku
 The Clay Hole T-Shirt
 Embroidered Crewneck
 Zip-Up Hoodie
 Pre-Made Bisqueware
 Glaze Catchers
 Kiln Cookies
 Clay Cubby Rental
 The Glaze Bible, Printed
 The Book of Molds, Printed
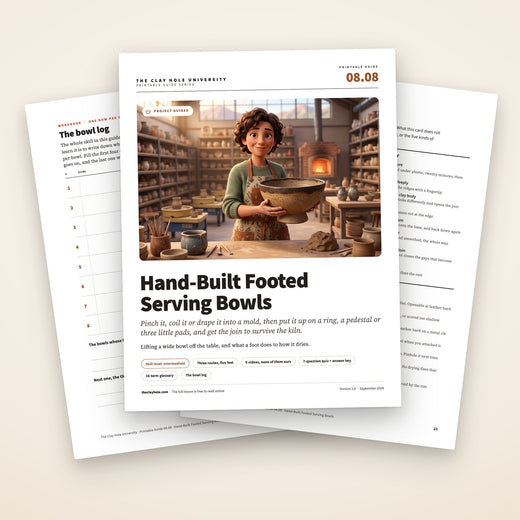
 Printable Pottery Guides
 Free Printable Trackers
 Gifts for Potters
 Christmas Pottery Ideas
 Mother’s Day Gift Ideas
 Pottery Date Night
 Studio Calendar
 2027 Studio Events
 What Should I Do Today?
 How to Throw on the Pottery Wheel
 How to Make a Pinch Pot
 How to Tap Center a Pot
 The Five Stages of Clay
 Is Pottery Hard to Learn?
 Pottery Wheel Practice Drills
 20 Easy Hand-Building Projects
 Everything That Sounds Wrong

 A Beautiful Piece, Every Time
 Slab Roller Tips
 Any Dish as a Slump Mold
 Slab Roller & Slab Mold Certification
 The Pottery Skill Tree
 Clay & Pottery Calculators
 Logging Your Pottery and Glazes
 The Pottery Dictionary
 Why Did My Pottery Do That?
 The Pottery Cone Chart
 Pottery Myths, Fact-Checked
 Is Handmade Pottery Food Safe?
 Incredible Ceramic Artist Videos
 How Dan Throws Giant Pots
 How to Dry Your Pottery
 The Pottery Wheel Introduction
 Pottery by Zodiac Sign
 Personality and the Pottery Wheel
 Pottery for Engineers
 ADHD, Hyperfocus, and Never Running Out
 Hobbies for Burnout
 Screen-Free Hobbies for Adults
 Every Addiction I Ever Had Lost to Art
 Functional Pottery Is Engineering
 How Do We Compare?
 Pottery Classes by City
 Every Pottery Studio in Utah
 Pottery in Draper
 Featured Members
 The Signature Wall
 Making Friends as an Adult Is Brutal
 The Clay Hole Commandments
 2027 Pottery Contests
 2027 Studio Parties
 Gallery Night

 Scream It Into the Void
 Destroy the Glaze Wall
 Daily Affirmation Cards
 Everything That Can Go Wrong
 Subscribe to Our Newsletters
 Contact The Clay Hole
 Corporate Team Building

 Glaze Combinations
 Glazes We Do Not Carry
 Making Glaze Test Tiles
 The Mega Glaze Tool
 How to Use the Mega Glaze Tool

 Glaze Brushing Techniques
 How to Use Underglaze
 How to Use Dipping Glazes
 Glaze Problems, Causes and Fixes
 The Dipping Glaze Guide

 Making a Glaze Catcher
 Fused or Sharp After Firing
 The Signature Wall
 His Viral Videos
 His Own Ceramics
 Meet Mud
How to Hand-Build a Footed Serving Bowl
A foot is the difference between a bowl that sits on your table and a bowl that presents on your table. You do not need the wheel to make one. You need a base thick enough to score into, a coil, and the patience to let two pieces of clay reach the same leather hard before you introduce them.
A foot turns a bowl into a serving piece, and you do not need the wheel to make one. Here is the shortest route that works on your first try: press a slab into a slab mold, then add a coil foot ring the next class.

Jump to a section
Watching teaches your hands. Reading teaches the order.
The short version
Read the list. Watch the hands. Read the list again with the video in your head.
A video is the fastest way to see what a move looks like. It is a poor way to remember what order the moves go in, because it runs at the maker’s pace instead of yours, and the ninety seconds you actually need are buried in the middle of a fourteen-minute clip. When your hands are wet, scrubbing a timeline is not a real option.
Reading works the other way around. Your eyes set the speed, a numbered list holds still while you look away and do the thing, and going back one step costs nothing. What reading cannot do is show you how much pressure a bonding pinch takes, or what a properly scored surface looks like before the slip goes on.
We watch this play out at the tables every week. The members who get a clean foot on the first try are almost always the ones who watched somebody do it and then worked off a written sequence, rather than trying to hold a whole video in their head.
So this page does both, deliberately. Every technique is written as a numbered list you can prop on a phone and read with a clay-covered thumb, and every list has a video under it from somebody who does this for a living. None of the videos are ours. We picked them because they are the clearest demonstrations we could find, and we credit every channel.
What a foot actually is
A foot is any piece of clay that lifts the bowl off the table. That is the whole definition. Everything else is a decision about how tall, how wide, and whether it is one ring or three lumps.

- The rim. The last thing anyone touches and the first thing they judge. Keep it slightly thicker than the wall until the very end.
- The wall. Roughly a quarter inch on a hand-built serving bowl. Thinner looks elegant and slumps in the glaze firing.
- The floor. Leave this thicker than the wall, three eighths to half an inch, so there is meat to score into when the foot goes on.
- The join. A ring of contact maybe a quarter inch wide, holding up the entire piece. Almost every failure on this page happens here.
- The foot ring, with its reinforcing coil. One continuous ring of clay. Its outside diameter wants to land between a third and a half of the rim diameter.
- The contact edge. The only part that touches your table and the kiln shelf. Level it, round it slightly, and never glaze it.
- The hollow. The air under the bowl. This is what makes a foot ring lighter and dry faster than a solid slab of clay would.
The drawing is to scale
The foot in that cross-section is about 45 percent of the rim, which sits inside the range that works. Under a third and the bowl tips when somebody serves from the edge. Over a half and it stops reading as a foot and starts reading as a pedestal that lost its nerve.
Three ways to build the bowl, one way to attach the foot
The foot is the same job no matter how the bowl got made, so the only real choice is how you form the vessel. Here is how they compare, including the part each method is bad at.
Pinch
Best for a bowl that looks made by a person. Every finger mark stays in the wall, and the form comes out soft and slightly asymmetric in a way that nothing else reproduces.
Hardest part is even wall thickness. Most first pinch bowls are thick at the floor, thin at the rim, and heavy.
Realistic size is eight to ten inches across. Bigger than that and the walls slump before you get there.
Coil
Best for size and for texture. Coiling is the only hand-building method with no real ceiling, and you can leave the coils visible or scrape them into a surface nobody would guess was built by hand.
Hardest part is patience. Height comes in shifts, not in one sitting, and rushing it is how the walls fold.
Realistic size is anything, across two or three classes.
Slab into a slab mold
Best for getting a genuinely good bowl on your first night. The slab mold does the shaping, so all of your attention goes to thickness, texture and the rim.
Hardest part is knowing when to take it out. Too early and it slumps, too late and it cracks on the form.
Realistic size is whatever slab mold you can reach. We keep 248 of them.
If you cannot decide, answer this instead
How much do you want to see your own hands in the finished bowl? All of them, pinch it. Some of them, coil it. None of them, and you would rather spend the evening on surface and glaze, use a slab mold. There is no wrong answer and no order you have to learn them in.
A footed bowl is two pieces of clay, joined once
- Build the bowl first, then let it reach leather hard, which is firm enough to sit upside down without deforming.
- The foot is a coil laid in a ring under the base, scored and slipped on like anything else.
- Make that ring a third to a half as wide as the rim. Narrower tips, wider stops looking like a foot.
- Both pieces must be at the same leather hard when they meet. A dry foot on a wetter bowl is the reason feet come off in the kiln.
- Level the bottom while it is still soft enough to fix, and round that edge.
- Dry it slowly under loose plastic, and never glaze the part that touches the kiln shelf.
Build the bowl in a slab mold
You can pinch or coil a bowl instead. A slab mold is the route with the highest chance of a good result on your first attempt, so it is the one we are giving you here.
One thing first
Slab rollers and slab molds need the studio training video before you can use them. It is on the new member checklist.
- Roll the slab to three eighths of an inch. Thinner warps once it is curved.
- Let it stiffen on the table for ten to twenty minutes, then add any texture you want while it is still flat.
- Press it into a slump mold from the center outward, or drape it over a hump mold and smooth downward. No folds either way.
- Cut the excess with the knife angled, so the rim is chamfered rather than knife-thin, then soften that edge with a damp finger.
- Compress the whole surface with a rubber rib while it is still on the form. This is what prevents warping.
- Leave it in a slump mold until it holds its own shape. Take it off a hump mold sooner, because clay shrinks onto a dome and cracks.
- Flip it out, level the rim, and cover it loosely.
- Build it about 14 percent bigger than the size you want. Most of our clay bodies shrink about 12 percent by the time they reach cone 5½, and allowing for that means dividing by 0.88 rather than adding 12.
Add a coil foot ring
Three things that go wrong
The foot falls off in the kiln. It was drier than the bowl when you attached it.
The bowl rocks. The contact edge was never leveled while it was soft.
A crack opens across the floor. The floor was never compressed with a rib.
- Wait for firm leather hard, then turn the bowl over onto foam so the rim carries no weight.
- Check that both pieces feel equally damp. If one is drier, wrap it in a damp paper towel under plastic for twenty minutes first. Nothing else on this list matters as much.
- Mark a circle a third to a half as wide as the rim. A jar lid works.
- Roll a coil that length plus an inch, at the same thickness as the bowl wall.
- Score both surfaces deeply enough to feel the ridges, then slip both.
- Lay the coil on the mark, cut the ends on matching diagonals, butt them and blend the seam closed.
- Press down evenly all the way around until a little slip squeezes out, then blend the outside of the join into the base.
- Run a small soft coil into the inside corner and smooth it. That fillet is what stops the crack.
- Level the contact edge by dragging the foot across a metal rib laid flat on the table, then round it with a damp finger.
- Cover it loosely for a day or two so the foot and the bowl dry at the same rate.
Pinch the bowl
Start with two and a half to three pounds of clay for a serving bowl. A pound and a half makes something cereal-sized.
- Wedge properly and roll the clay into a ball. Any air you leave in here comes back as a blister in the bisque.
- Flatten the ball slightly and seat it on a banding wheel or a bat so you can turn it without picking it up.
- Push one thumb into the center and stop three eighths of an inch from the bottom. Check the depth with a needle tool rather than guessing.
- Pinch between thumb and fingers starting at the floor, and rotate the pot a quarter turn after every single pinch. Same pressure every time is what makes the wall even.
- Work in rings. Finish a complete circle at one height before you move up. Skipping around is how you get thin patches.
- Keep the rim thicker than the wall the whole way through. It is the structure holding everything open. Thin it last, if at all.
- When the walls start to soften and flare on their own, stop. Set it down for twenty minutes, let it firm, then keep going.
- Once the shape is right, compress the inside floor with a rounded rib, working from the center outward. This is your insurance against a crack in the base.
- Refine the outside with a metal rib, then a rubber rib, then a barely damp sponge. In that order.
- Set it upside down on a piece of foam to firm up to leather hard. The foot goes on next class.
Coil the bowl
Roll more coils than you think you need before you start, and keep them under plastic. Stopping mid-wall to roll another one is how the piece dries unevenly.
- Roll coils on a dry surface, not on canvas. Canvas dries the outside of the coil and leaves it cracking as you bend it.
- Aim for even, not round. A coil that is the same thickness end to end matters far more than a coil with a perfect circular section.
- Cut or pinch a floor disc three eighths of an inch thick, and compress it hard with a rib before anything goes on top of it.
- Score and slip, then set the first coil on top of the floor, not out on its edge. The wall should rise from inside the perimeter.
- Blend the inside seam on every single coil, with a finger or a wooden tool, before you add the next one. The outside can stay textured if you like the look.
- Add two or three coils, then stop. Let them firm for fifteen or twenty minutes while you work on something else. Height comes in shifts.
- To flare outward, set each coil slightly outside the one below and blend downward on a diagonal. To pull inward, set it slightly inside and squeeze the wall gently as you blend.
- At leather hard, scrape the inside with a metal rib, then smooth with a rubber rib. Do the outside only if you want the coils to disappear.
- Level the rim by holding a needle tool at a fixed height and turning the bowl into it, then compress the cut edge with a scrap of chamois or thin leather.
- Let it come to firm leather hard before you turn it over for the foot.
The one coil skill worth watching twice
The bonding pinch is what actually holds a coil pot together. Scoring and slipping without it just glues two surfaces that will still separate.
Drape a slab into a slab mold
This is how most bowls in this building get made, and it is the only route that reliably produces something you are proud of on night one.
Before you touch a slab roller here
Slab rollers and slab molds both require the studio training video first. It takes a few minutes and it is on the new member checklist. Which slab molds you can reach depends on your level, so check membership levels if you are not sure.
- Roll the slab to three eighths of an inch. That is the slab as it comes off the roller, not the finished wall: pressing it into the form and compressing it with a rib thins it toward the quarter inch you are aiming for. A slab rolled at a quarter inch looks fine flat and warps once it is curved and drying.
- Let the slab stiffen on the table for ten to twenty minutes. A floppy slab records every finger and will not hold the slab mold’s shape.
- Add texture now if you want it, while the slab is flat and supported. Stamps, lace, rollers, a leaf. It is much harder later.
- Into a slump mold, which is a hollow: lay the slab in and press from the center outward toward the rim, easing the clay down so it never folds over on itself.
- Over a hump mold, which is a dome: drape it on and smooth downward and outward with a flat palm.
- Cut the excess with the knife held at an angle so the rim comes out chamfered rather than knife-thin, then soften that edge with a damp finger.
- Compress the whole surface with a rubber rib while it is still in or on the form. This is where warping is prevented, not later.
- Timing: leave it in a slump mold until it holds its own shape, usually an hour to overnight. Take it off a hump mold sooner, because the clay shrinks onto a dome and will crack if you forget it.
- Flip it out, level the rim, and cover it loosely so it reaches leather hard slowly and evenly.
- Foot next class, on a bowl that is firm enough to sit upside down without deforming.
Building and attaching the foot
One rule outranks everything else here: both pieces have to be at the same leather hard. If the bowl is drier than the foot, the foot shrinks against a piece that has already stopped moving, and the join opens. Usually in the kiln, where you cannot fix it.
Numbers that work
- Foot diameter: one third to one half of the rim diameter.
- Foot ring height: three eighths to three quarters of an inch.
- Pedestal height: one and a half to four inches for a serving bowl.
- Foot wall thickness: the same as the bowl wall, or slightly thicker. Never thinner.
- Floor thickness before you attach: three eighths to half an inch. Three quarters if you plan to carve the foot instead.
- Where it sits: under the line where the wall meets the floor, not out at the edge and not in the middle.
The tip test
Set the finished bowl on the table and push gently on the rim with one finger. If it tips before it slides, the foot is too small for the bowl. That is a two-second check and it is more reliable than any measurement, because it accounts for how deep the bowl is and where the weight actually sits.
Do this at leather hard, while the foot can still come off and go back on somewhere better.
A. The coil foot ring
- Wait for firm leather hard, then turn the bowl over onto foam so the rim carries no weight.
- Mark the circle. A jar lid, a compass, or a paper circle you cut and traced all work.
- Roll a coil as long as that circle plus an inch, at the same thickness as the bowl wall.
- Score both surfaces deeply enough to feel with a fingertip, then slip both.
- Lay the coil on the mark, cut the two ends on matching diagonals, butt them and blend the seam closed.
- Press down with even pressure the whole way around, then blend the outside of the join up into the base with a wooden tool.
- Run a small soft coil into the inside corner and smooth it. That fillet is what stops the crack.
- Level the contact edge: lay a metal rib flat on the table and drag the foot across it, or hold a needle tool at a fixed height and turn the bowl.
- Round the contact edge with a damp finger so it will not scratch a table or chip on a kiln shelf.
B. The slab foot ring
Same job, cut instead of rolled. Cut a strip of slab as tall as you want the foot and as long as the circle, bend it into a ring, and join the ends. You get a straight-sided, architectural foot with a crisper edge than a coil gives you.
Everything about scoring, slipping, the fillet and leveling is identical to the coil version. Cut the strip a little long and trim the overlap on a diagonal.
Two things to watch. A slab strip dries faster than a rolled coil, so cut it right before you attach it. And a perfectly straight wall shows a wobble that a rounded coil hides, so take your time leveling.
C. The pedestal
- Build it as a short cylinder or a truncated cone, coiled or from a wrapped slab.
- Flare the bottom outward. A straight column of the same diameter as the join looks unstable and is unstable.
- Build it a day ahead if you can, so it is firm enough to take the weight of a wet bowl.
- Pierce a pinhole somewhere it will not be seen. It is not the air that does the damage. A sealed cavity cannot dry out on the inside, so it goes into the kiln still holding water, and water flashing to steam is what takes a piece apart. The hole lets the inside dry and gives the steam a way out.
- Score, slip, press, fillet inside and out, then level as normal.
- Check the height against your studio shelf before you commit. A tall bowl on a tall pedestal does not always fit.
D. Three or four feet
Small pinched pads or short coil lumps, placed under the wall line rather than out at the edge. Casual, fast, and it drains and dries beautifully because air gets everywhere.
Use three, not four. Three feet cannot rock. Four will, the moment one of them ends up a hair short, and leveling four feet on a curved base is genuinely annoying.
E. The carved foot
Build the base three quarters of an inch thick, let it reach leather hard, flip it, and carve the ring out with a loop tool. There is no attachment, so there is no join, so there is no join to crack.
The cost is clay and weight, and you have to commit to the extra thickness at the very start, before you know what the bowl wants to be.
Joins that survive the kiln
Press, do not smear
Smearing moves clay across a surface. Pressing pushes two surfaces into each other. Only one of them survives a firing.
- Match the moisture first. If one piece is noticeably drier, wrap it with a damp paper towel under plastic for twenty minutes and go do something else. Nothing else on this list can rescue a moisture mismatch.
- Score both sides, deeply. Crosshatch until you can feel the ridges with a fingertip. Faint scratches are decoration, not scoring.
- Use slip made from the same clay body. Different clay shrinks at a different rate and pulls the join apart on its own.
- Press the pieces together and hold. You want to see a little slip squeeze out at the edge. That squeeze is the proof the two surfaces met.
- Blend the outside seam closed with a wooden tool, working clay from the foot up onto the base and from the base down onto the foot.
- Add a fillet. A thin soft coil pressed into the inside corner and smoothed, all the way around. A right-angled join concentrates stress. A curved one spreads it.
- Compress the finished join with the back of a wooden tool. Compression closes the microscopic gaps that become cracks.
- Cover the join area loosely for a day so it dries no faster than the rest of the piece.
When a join goes wrong anyway
A hairline crack found at leather hard can be fixed. Open it slightly, wet it, work soft clay of the same body in, compress, and dry slowly. A crack found after the bisque is a different problem, and Clay Mender is available in the studio for that. A foot that fell off entirely is not worth rescuing. Grind the base flat, glaze it, and call it a bowl.
Drying a piece with a foot on it
Utah air is dry enough that a bowl left uncovered on a shelf can be too far gone by the next class. A footed bowl has a thick ring on a thin base, which is exactly the shape that punishes fast drying.
- Tent it, do not wrap it. Dry cleaner plastic draped over the piece with the ends open slows the air without sealing moisture against the clay.
- Keep it covered for the first day or two after the foot goes on. This is the window where a moisture difference between foot and bowl turns into a crack.
- Turn it upside down for part of the drying. A rim on a shelf dries slower than a rim in open air, and evening that out is what keeps the rim round.
- Nothing near a vent, a door, or a heater. Moving air on one side and still air on the other is how a bowl comes out oval.
- Expect three to seven days for a hand-built serving bowl here, longer if it is thick or if you keep it covered.
- Test it against your cheek. If it feels cool, there is still water in it evaporating. Bone dry is room temperature.
- Do not put a piece on the bisque shelf that you are not certain about. A wet piece in a bisque kiln can take neighboring work with it.
We have a whole guide on drying your pottery, plus the studio’s own drying video. Both are worth twenty minutes before you lose a piece you liked.
What a foot costs you in shrinkage, shelf space and firing
A foot is not free. It adds height, and in this building height is measured twice: once by the shelf your piece dries on, and once by the kiln invoice. Here is all of it.
Figured at a serving-bowl depth of about 40 percent of the rim. Shrinkage percentages come from our own clay collection. Firing figures are estimates, not a quote.
The foot goes into the height
Glaze firing is priced on the box your piece occupies, so a foot is not just clay, it is billable volume. A ten inch bowl four inches deep is about 400 cubic inches, which is twenty dollars. Put that same bowl on a three inch pedestal and it becomes 700 cubic inches, which is thirty five. Worth knowing before you commit to the drama.
Which clay to reach for
Grog and sand give clay tooth, which means it holds a shape while you build instead of relaxing out of it. B-Mix w/Grog is the friendliest of ours for hand-building a big bowl. Porcelain is the least forgiving: beautiful, and it will find every join you were lazy about.
Do not glaze the contact edge
Whatever touches the kiln shelf has to be bare. Wipe the contact edge clean with a damp sponge before it goes on the glaze cart, and use a kiln cookie under anything with a runny glaze near the bottom. We bisque at cone 05 and glaze fire to cone 5½, which is cone 5 with a twelve minute hold.
Nine ways this goes badly, and what caused each one
Every one of these has happened at our tables. Most of them trace back to two things: moisture that did not match, or a surface that was never compressed.
The join cracked while it dried
The foot and the bowl were at different moisture levels when they met, or there was no fillet in the inside corner. Fix the next one by matching moisture first and running a soft coil into that corner. This one can sometimes be repaired at leather hard: open the crack slightly, wet it, work in soft clay of the same body, compress, and dry it slowly under plastic.
The join cracked in the bisque
Same cause, found later. Either the surfaces were smeared rather than pressed, or the scoring was too shallow to give the slip anything to grab. A bisque crack in a foot join is not repairable in any way that survives a glaze firing.
The bowl rocks on the table
The contact edge is not level. Fix this at leather hard by dragging the foot across a metal rib laid flat on the table. After the bisque you can grind it, which works but eats time and leaves a rough edge. Four feet rock far more often than three do.
The rim went wavy
Either the slab was too soft when it went into the slab mold, or the rim dried faster than the wall below it. Stiffen slabs before draping, and keep the rim covered for the first day. A wavy rim at leather hard can often be eased back by supporting it and letting it dry flat under light plastic.
The foot came off in the kiln
The foot was drier than the bowl when it was attached, so it had already done some of its shrinking. As the bowl caught up in the kiln it pulled away. This is the single most common footed bowl failure, and the only real prevention is matching moisture before you score anything.
The pedestal blew apart
Trapped water, not trapped air. A hollow form closed on both ends cannot dry out on the inside, so it goes into the kiln still carrying water, and water flashing to steam is what takes a piece apart. Always pierce a pinhole in any hollow foot, somewhere it will not be seen, and do it before the piece dries, so the inside can dry and the steam has a way out.
The bowl slumped in the glaze firing
The walls were too thin near the floor to hold a wide form at temperature, or a very fluid glaze pooled low and softened the wall. Wide bowls want thicker walls than tall pots. Keep glazes that run away from the bottom third of a wide piece.
A crack opened across the floor
The floor was never compressed. Clay particles at the base need to be pushed together with a rib before anything else happens, and no amount of careful drying afterwards makes up for skipping it. Compress the floor on every route, every time.
The whole bowl warped oval
One side dried faster than the other, usually because it was near moving air, or the piece was lifted and carried while it was still soft. Move work with two hands under the base, never by the rim, and rotate anything drying near a doorway.
The whole build as one checklist
The short checklist
Route-independent. Works whether you pinched it, coiled it or draped it. Screenshot it if that is easier than keeping a tab open with wet hands.
Everything above, in the order you will actually need it. Screenshot it if that is easier than keeping a tab open with wet hands.
Night one: the bowl
- Wedge properly. Air in the clay becomes a blister in the bisque.
- Build about 14 percent bigger than the finished size you want. Shrinking 12 percent and building 12 percent bigger are not the same number.
- Floor three eighths to half an inch thick. Thicker than the walls.
- Walls about a quarter inch, even from floor to rim.
- Compress the inside floor with a rib. Every route, every time.
- Keep the rim thicker than the wall until the very end.
- Level the rim, then compress the cut edge.
- Cover loosely. It needs to be leather hard next class, not bone dry.
Night two: the foot
- Check that the bowl and the coil feel equally damp. Fix this before anything else.
- Turn the bowl onto foam so the rim carries no weight.
- Mark a circle a third to a half as wide as the rim.
- Score both surfaces deeply enough to feel. Slip both.
- Press and hold until slip squeezes out at the edge.
- Blend the outside seam. Add a fillet coil to the inside corner.
- Pinhole any hollow pedestal, somewhere it will not be seen.
- Level the contact edge, then round it with a damp finger.
- Push the rim with one finger. If it tips before it slides, the foot is too small.
- Tent it in plastic for a day or two, then dry slowly and out of any draft.
- Bone dry and room temperature before it goes on the bisque shelf.
- Wipe the contact edge bare before glazing. Nothing glazed touches the shelf.
Night one: the bowl
- Slab at three eighths of an inch. Let it stiffen before it goes on the form.
- Build about 14 percent bigger than the size you want.
- Compress the whole surface with a rubber rib while it is on the form.
- Cut the rim at an angle, then soften the edge.
- Cover loosely. Leather hard next class, not bone dry.
Night two: the foot
- Both pieces equally damp before you score anything.
- Ring a third to a half as wide as the rim.
- Score deeply, slip both, press until slip squeezes out.
- Fillet coil into the inside corner.
- Level the contact edge, round it, then do the tip test.
- Tent it for a day or two, dry slowly, glaze nothing that touches the shelf.
Questions we get every week
Do I need the pottery wheel to put a foot on a bowl?
No. A trimmed foot ring is a wheel technique, but an attached foot ring is not, and an attached one is arguably stronger because you are adding clay rather than removing it. Every method on this page is done standing at a table.
Foot ring or pedestal for my first one?
Foot ring. It is shorter, it needs less clay, it has no sealed air to worry about, and if it is a little uneven you can still level it. Build two or three of those before you attempt a pedestal.
Can I attach the foot the same day I make the bowl?
Only if the bowl is firm enough to sit upside down without deforming and the coil is at the same moisture. In practice that usually means waiting until the next class, which is also the safer answer. A soft bowl flattens under its own weight the moment you turn it over.
How thick should the base be before I attach a foot?
Three eighths to half an inch. You need enough material to score into without cutting through, and enough mass that the base does not flex when you press the ring on. If you plan to carve the foot out of the base instead of attaching one, go to three quarters of an inch.
Does the foot have to be hollow?
A ring is hollow by definition, which is part of why it works. A solid disc foot is fine if it stays under about half an inch thick, but it is heavier, it dries slower than everything around it, and that difference is what cracks joins. If you want a solid look, make a ring and hide it.
Can I make the bowl in a slab mold and hand-build the foot?
Yes, and it is the most common combination in this building. The slab mold gives you an even, well-shaped bowl, and the coil foot gives it the character a slab mold cannot. Nothing about mixing the two causes any problem.
How long until it can go on the bisque shelf?
Three to seven days for most hand-built serving bowls here, and longer if it is thick or you keep it covered. The test is not the calendar, it is temperature: hold it against your cheek, and if it feels cool it is still evaporating water. Bone dry is room temperature.
Will the foot survive the glaze firing without stilts?
Yes, as long as the contact edge is level and completely free of glaze. Wipe it bare with a damp sponge before the piece goes on the cart. If you are using a glaze that runs, put a kiln cookie underneath as insurance.
Next things worth reading
How to dry your pottery
The single biggest cause of lost work, covered properly. Read it before your first footed piece, not after.
Read the guideOur clay bodies
Eight of them, with shrinkage rates and prices. Grog is your friend for a big hand-built bowl.
See the claysHow to wedge clay properly
Where every pinch and coil bowl actually begins. Air left in the clay comes back as a blister.
Learn to wedgeThe five stages of clay
Leather hard gets said constantly around here. This is what it means and what you can do at each stage.
Read the stagesMembership levels explained
Which slab molds and which shelf you get, at each of the four levels.
Compare levelsStudio FAQs
Everything else, answered. Firing, classes, glazes, and what is included.
Read the FAQsThe bowl is the easy half
Almost nobody gets a foot perfectly level on the first try, and almost everybody gets it right on the third. The part that takes real discipline is not the shaping, it is the waiting: letting the bowl come to leather hard, letting the coil match it, and letting the whole thing dry slower than you want it to.
Bring the questions to class. There is an instructor on the hand-building side every session, and a footed bowl is one of the few projects where two minutes of somebody looking at your join saves you two weeks.
Almost nobody gets a foot perfectly level on the first try, and almost everybody gets it right on the third. Bring the questions to class. There is an instructor on the hand-building side every session.
There is a much longer version of this page if you want the pinch and coil routes, five kinds of foot, the troubleshooting list and the firing math. Switch it at the top.
Every video on this page belongs to the channel credited beside it. None of them are ours, none of the makers are affiliated with us, and we recommend them because they are good. Nothing loads from YouTube until you press play.
Which version would you like to print?
Videos come out as a labeled box with the title and channel to search for, since paper does not play them.