Pottery Date Night
 Bring All Your Friends Free Week
 Give a Month of Pottery
 Private Pottery Parties

 The Welcome Booklet
 Your First Ten Sessions
 The Pottery Process
 Finding the Studio
 Your Classes Never Expire
 The Four Tables
 Who’s Who
 The Rewards Program
 Flux Glazes
 The Calculators
 Kiln Tracker
 Holiday Kiln Deadlines

 Beginner’s Tool Set
 Fingernail Clippers
 Mayco Clay Mender
 Epoxy for Kintsugi
 Applicator Bottles
 Large Bead Rack
 Raku Workshop
 Nighttime Raku
 Horsehair and Feather Raku
 The Clay Hole T-Shirt
 Embroidered Crewneck
 Zip-Up Hoodie
 Pre-Made Bisqueware
 Glaze Catchers
 Kiln Cookies
 Clay Cubby Rental
 The Glaze Bible, Printed
 The Book of Molds, Printed
 Printable Pottery Guides
 Free Printable Trackers
 Gifts for Potters
 Christmas Pottery Ideas
 Mother’s Day Gift Ideas
 Pottery Date Night
 Studio Calendar
 2027 Studio Events
 What Should I Do Today?
 How to Throw on the Pottery Wheel
 How to Make a Pinch Pot
 How to Tap Center a Pot
 The Five Stages of Clay
 Is Pottery Hard to Learn?
 Pottery Wheel Practice Drills
 20 Easy Hand-Building Projects
 Everything That Sounds Wrong

 A Beautiful Piece, Every Time
 Slab Roller Tips
 Any Dish as a Slump Mold
 Slab Roller & Slab Mold Certification
 The Pottery Skill Tree
 Clay & Pottery Calculators
 Logging Your Pottery and Glazes
 The Pottery Dictionary
 Why Did My Pottery Do That?
 The Pottery Cone Chart
 Pottery Myths, Fact-Checked
 Is Handmade Pottery Food Safe?
 Incredible Ceramic Artist Videos
 How Dan Throws Giant Pots
 How to Dry Your Pottery
 The Pottery Wheel Introduction
 Pottery by Zodiac Sign
 Personality and the Pottery Wheel
 Pottery for Engineers
 ADHD, Hyperfocus, and Never Running Out
 Hobbies for Burnout
 Screen-Free Hobbies for Adults
 Every Addiction I Ever Had Lost to Art
 Functional Pottery Is Engineering
 How Do We Compare?
 Pottery Classes by City
 Every Pottery Studio in Utah
 Pottery in Draper
 Featured Members
 The Signature Wall
 Making Friends as an Adult Is Brutal
 The Clay Hole Commandments
 2027 Pottery Contests
 2027 Studio Parties
 Gallery Night

 Scream It Into the Void
 Destroy the Glaze Wall
 Daily Affirmation Cards
 Everything That Can Go Wrong
 Subscribe to Our Newsletters
 Contact The Clay Hole
 Corporate Team Building

 Glaze Combinations
 Glazes We Do Not Carry
 Making Glaze Test Tiles
 The Mega Glaze Tool
 How to Use the Mega Glaze Tool

 Glaze Brushing Techniques
 How to Use Underglaze
 How to Use Dipping Glazes
 Glaze Problems, Causes and Fixes
 The Dipping Glaze Guide

 Making a Glaze Catcher
 Fused or Sharp After Firing
 The Signature Wall
 His Viral Videos
 His Own Ceramics
 Meet Mud
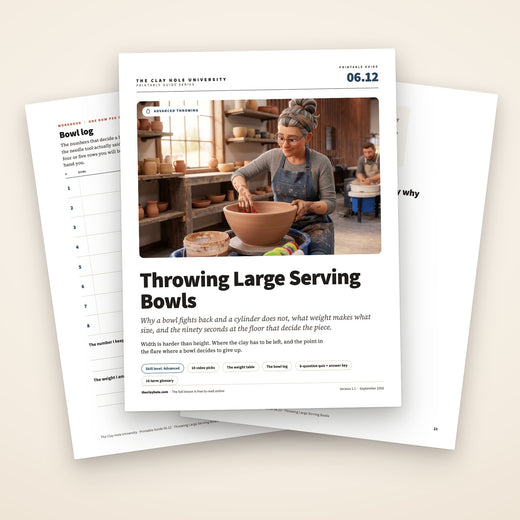
Throwing Large Serving Bowls
A big bowl is not a big mug, and it is not a wide plate either. It is the one form where the clay is genuinely trying to fall down while you work, and almost everything that goes wrong goes wrong at the bottom. Here is the whole job: how much clay, how to center it, how to open a floor that will hold, how to get the wall up before you take it out, and how to dry the thing without watching it crack.
A big bowl is not a big mug. The clay is genuinely trying to fall down while you work, and almost everything that goes wrong goes wrong at the bottom. Here is the short version: what to bring, what to do at the wheel, and the six things that decide a big bowl after you leave.

Which version would you like to print?
Videos come out as a labeled box with the title and channel to search for, since paper does not play them.
A bowl's wall leans out over nothing
A cylinder stands on itself. Every pound of clay in a mug is sitting on the clay underneath it. A bowl is different: the further you open it, the more of the wall hangs out in the air, and all of that load lands on the turn between the floor and the wall. So big bowls do not fail at the rim. They fail at the bottom, and they fail because the bottom was too thin or never properly compressed.
Leave more clay in the floor than feels right. Go up before you go out. Slow the wheel down as it gets wider.
That is the entire page in three lines. Everything below is how to actually do it.
How much clay
4 pounds for your first serving bowl. That gets you roughly 9 to 11 inches
wide on the wheel and around 9 inches once it has been fired.
5 pounds once 4 has worked five times in a row, then 6 pounds on the same terms. Family salad bowl size.
8 pounds and up once 6 has worked five times in a row. Measure your shelf first.
Clay shrinks somewhere around 10 to 14 percent between wet and fired, so a bowl that measures 11 inches on the wheel comes out closer to 9 and a half.
Before you sit down
- Wedge it properly. Spiral, or in two halves joined. A bad wedge at 6 pounds is a wobble you cannot fix later.
- Use slightly softer clay than you would for a mug. Not sloppy. Soft enough that leverage beats strength.
- Beat it into a low, wide dome on the table before it goes near the wheel. A bowl starts broad, not tall.
- Bat on, and check it does not rock. You cannot lift a wet 12 inch bowl off a wheelhead with your hands. Nobody can.
- Tools within reach first: needle tool, wooden rib, flexible rib, sponge, chamois, wire.
- Throw the big piece first, while your arms are fresh. Centering is the part that runs out of you.
Nine steps, in order
Do them in this order. The order is most of the technique.
- 1
Center low and wide
Wheel fast, elbows locked into your hips, lean from the hips rather than pushing with your arms. Cone up and down three times, then finish it as a broad low dome, not a tall cone. Release your hands over two full rotations.
- 2
Open down, then out, on a curve
No flat pad with a corner in it. The inside of a bowl is one continuous arc that starts at the dead center. A corner is where the crack goes.
- 3
Measure the floor with a needle tool
Push through to the bat, pinch the needle where it meets the clay, pull it out and look. Three eighths to half an inch on a 5 pound bowl. Under a quarter inch and the floor is too thin to trust. Do not guess this.
- 4
Compress the floor, then compress it again
Rib or fingertips, center outward, several firm passes. Big floors crack far more than small ones, and this is the step that prevents it.
- 5
Pull the wall up before you take it out
Three to five pulls, thick and nearly vertical, like a short fat cylinder. Every pull starts at the bat. This is the step people skip, and skipping it is why bowls collapse.
- 6
Leave the wall thicker at the bottom
Opposite of a mug. On a bowl the bottom of the wall is a structural member holding the rest out in the air. Taper it thinner as you go up.
- 7
Compress the rim after every single pull
Every one. The rim is a hoop, and a hoop under tension is what keeps a circle round. A soft rim is why bowls dry oval.
- 8
Shape it out with a rib, slowly, then stop
Slow the wheel right down as the diameter grows. Push from the inside, support from the outside, two or three passes with the rib and no more. Each extra pass adds water and takes strength out.
- 9
Wire twice, then carry the bat
Wheel stopped, wire pulled tight and flat, twice. Then lift the bat and never the pot. A wet bowl picked up by its rim is a warped bowl every time.
Two videos, and that is enough
One bowl from throwing to trimmed foot, and one aimed at people newer to larger forms. Read the nine steps, watch these, put the phone face down.
Neither of these is ours and neither is the only right way. If a method feels wrong after a fair try, switch to the other one.
Why a bowl fights back and a cylinder does not
People who can throw a tall vase sit down with 6 pounds, open it wide, and watch the whole thing fold in about eleven seconds. It is not a strength problem and it is usually not a skill problem either. A bowl is a genuinely different structure.
The wall hangs over nothing
In a cylinder every pound of clay sits on the clay directly beneath it. In a bowl the wall leans outward, so more and more of it is cantilevered into the air as you open. All that load arrives at one place: the turn where the floor becomes the wall. Big bowls do not fail at the rim. They fail at the bottom.
The rim is traveling much faster
On a mug the rim sits about 3 inches from center. On a 13 inch bowl it is six and a half inches out, so at the same wheel speed it covers twice the distance every rotation and wants twice as badly to keep going outward. Wheel speed that felt fine on a mug will throw the rim clean off a bowl.
Water has somewhere to sit
A cylinder sheds water down its wall. A bowl is a puddle with ambitions. Slip pools in the bottom, softens the exact spot that is carrying the most load, and does it quietly while you are looking at the rim. Sponge the inside out properly and often.
Three rules fall straight out of that
Leave more clay in the floor than feels right. Get the wall up before you take it out. Slow the wheel as the diameter grows. Almost every technique below is one of those three wearing a different hat.
Watch the videos. Read the lists. Both.
There are ten videos further down, from potters who are better at this than most of us will ever be. They are here because there are things film does that writing cannot. You cannot describe the speed of a good pull, or what a wall looks like half a second before it goes. You have to see it.
But you cannot pause a video with wet hands. You cannot skim one for the one number you forgot. And when the bowl is on the wheel and something is going wrong, you do not have four minutes to scrub back to the moment where the potter said the thing about the floor.
Words hold still. That is the whole advantage. A short list can be glanced at in a second and a half, and a glance is all you get with a wheel running.
There is a reasonable pile of research behind pairing the two, and it lands roughly where you would expect: people hold onto a demonstration better when it comes with words attached, because the picture and the labels go into memory by different routes and each one gives the other something to hang on to. The video gives you the picture. The list gives you the names for what you just watched. At the wheel, it is the names that come back.
So read the list, watch the person, then put the phone face down and go and do it badly four or five times.
If you would rather not scroll through all of it, the Nutshell toggle at the top of the page cuts this down to the parts you need in your hand tonight, and remembers your choice on every other page on the site.
What weight makes what size
This is a map, not a law. Everything here assumes a wall you would be happy to eat out of rather than a wall thrown as thin as it will physically go. Skilled potters get considerably more diameter out of the same weight, and one of the videos below takes a 4 pound lump to a 10 inch bowl.
| Clay | Wet across | Fired across | What that is |
|---|---|---|---|
| 3 lb | Wet across8 to 9 in | Fired acrossabout 7½ to 8 in | What that isCereal bowl, side bowl. Where to learn the shape. |
| 4 lb | Wet across9 to 11 in | Fired acrossabout 8 to 9½ in | What that isYour first real serving bowl. Pasta bowl. Start here. |
| 5 lb | Wet across10 to 12 in | Fired acrossabout 9 to 10½ in | What that isSalad bowl for two or three people. |
| 6 lb | Wet across11 to 13 in | Fired acrossabout 10 to 11½ in | What that isThe family salad bowl. The one people ask you to make. |
| 8 lb | Wet across12 to 15 in | Fired acrossabout 11 to 13 in | What that isCenterpiece. Check your shelf before you wedge it. |
| 10 lb | Wet across14 to 16 in | Fired acrossabout 12½ to 14 in | What that isSerious. Spiral wedging is no longer optional. |
| 12 to 15 lb | Wet across16 to 19 in | Fired acrossabout 14 to 17 in | What that isPunch bowl. Past here, consider throwing in sections instead. |
Two numbers to keep in your head
Clay shrinks roughly 10 to 14 percent from wet to fired, so measure it on the wheel and expect to lose about an inch off every eight. And go up one row at a time. Somebody who can throw a clean 4 pound bowl can usually throw a 6. Almost nobody goes from 4 to 10 and gets a bowl out of it. There is a whole page on how to climb the weight ladder without wasting a month.
Most big bowls are lost before the wheel turns
None of this is glamorous and all of it is load bearing. A poorly wedged lump or a bat that rocks will beat you no matter how good your hands are.
The clay
- Wedge it like you mean it. Spiral wedging. Ram’s head is the hardest of the methods on your wrists and it tops out for most people around five or six pounds, so past that go spiral, or wedge the lump in two halves and then wedge those two halves together. Our throwing fundamentals page covers the technique.
- Softer than mug clay, firmer than mud. A big lump takes longer to center and you want leverage doing the work rather than grip strength. Clay straight out of a fresh bag is usually about right. A bag that has been open three weeks is not.
- A stoneware with some grit in it holds a wide wall up better than a smooth porcelain. Porcelain will absolutely do this, it is just less forgiving about every other thing on this page. Ask an instructor which of our clay bodies suits the size you have in mind.
- Beat it into a low, wide dome on the wedging table. Not a tall cone. You are starting a shape that is broad and short, so start the lump broad and short and save yourself two minutes of coning.
The setup
- Use a bat. Above about 4 pounds this stops being a preference. A wet 12 inch bowl cannot be lifted off a wheelhead by hand without distorting it, and no amount of care changes that. Here is the longer argument.
- Seat the bat and push on all four edges. If it rocks, fix it now. A bat that moves half a millimeter puts a wobble into every pull you make on top of it.
- Throw the lump down hard and seal the bottom edge the whole way round. A heavy lump that is not properly stuck will walk sideways under pressure, and you will blame your centering.
- Tools laid out before you start: needle tool, wooden or metal rib for the inside curve, flexible rib, sponge on a stick, chamois, wire, and a ruler if you care about the finished size.
- Sit so your shoulders are above the clay. If you are looking up at the lump you cannot get your weight over it, and centering becomes an arm exercise you will lose.
- Big piece first. Centering is the part of the session that runs out of you. Do not spend your arms on three mugs and then try to center 8 pounds.
Centering a heavy lump is leverage, not strength
Everybody's first instinct with a big lump is to push harder. It does not work, it hurts, and it is the reason people decide they are not strong enough for big pots. The trick is to stop using your arms as the engine.
- Wheel fast. Faster than feels comfortable. Speed is what makes the clay want to be round.
- Lock your elbows into your hips or your thighs and lean from the hips. Your arms become struts. Your body weight is the force.
- Stack your hands. One hand on top of the other, or braced against it. Two hands doing one job beats two hands doing two jobs.
- Cone up and down three or four times. This is not decorative. It lines the clay particles up and drags any lumps or air through the middle where you can feel them.
- Finish low and wide, not tall. Cone down into a broad dome a bit wider than the floor you want. For a 5 pound bowl that is a mound roughly two inches high with a soft top.
- Check with your knuckle, eyes shut, ten rotations. Your eyes will lie to you about a big lump. Your hands will not.
- Release over two full rotations. Lifting your hands off quickly puts a divot in centered clay, and on a big lump the divot is proportionally bigger.
- If it will not center, stop and re-wedge it. Ten more minutes of fighting a badly wedged lump costs more than starting again, and the pot was never going to be good anyway.
The floor is the whole ballgame
If there is one section on this page worth reading twice, it is this one. More large bowls are lost to a bad floor than to everything else combined, and the damage is done in the first ninety seconds, long before anything looks wrong.
- 1
Open down first, then out, and keep it slow
Thumbs or fingers straight down through the middle, gently, with the wheel at a moderate speed. Big lumps do not like being rushed at this stage. Then widen.
- 2
Open on a curve, not into a flat pad
This is the bit that separates a bowl from a bucket. The inside of a bowl is one continuous arc that starts at the dead center and never straightens out. If you press a flat pad and then turn a corner to go up the wall, you have built a shelf. That shelf is a stress line, it will show through the glaze forever, and it is where an S-crack starts.
- 3
Leave the floor thicker than you would for a mug
Three eighths to half an inch on a 5 pound bowl, and more as the weight goes up. Two things are about to happen to that floor: it has to carry a wall that leans out over open air, and you are going to carve a foot ring out of it in a few days. A mug floor on a bowl gives you neither.
- 4
Measure it with a needle tool. Do not guess
Push the needle straight down until it touches the bat, pinch it with your thumbnail at the clay surface, pull it out and look at the gap. Everybody thinks they can eyeball this and nobody can. If it comes out under a quarter inch, stop and feed clay back into the floor from the inside corner, then compress it and measure again. If you cannot get it back, wire it off and start again rather than spending forty minutes on a bowl that will crack.
- 5
Compress the floor. Then compress it again
A rib or the pads of your fingers, working from the dead center outward, firm pressure, several passes with the wheel slowed to about the speed you would pull at. Then do the whole thing a second time. Compressing pushes the clay particles into alignment so the floor dries as one piece instead of pulling itself apart from the middle. A 12 inch floor has far more room to crack than a 3 inch one, so it needs far more of this. There is a whole page on compression if you want the detail.
- 6
Set the width of the floor now, deliberately
The flat part you have just opened decides where the foot ring can live, and you cannot change it later. Aim for roughly a third of the finished diameter. On a bowl that will end up 12 inches across, that is about a 4 inch floor. Much narrower and the finished bowl rocks on a table. Much wider and it reads as a bucket rather than a bowl.
Where S-cracks come from
Nearly every S-crack we see in a big bowl traces back to the floor: one left too thin, or one never really compressed, and then dried unevenly against a faster rim. The first two take about ninety extra seconds to get right, and all of it is invisible until the piece comes out of the bisque firing with a crack across the bottom. There is also a page on rescuing a bottom thrown too thin, though it is a rescue rather than a fix.
Up first. Then out. In that order, every time
Here is the single most common way a big bowl dies. Somebody opens it wide because bowls are wide, and then tries to pull a wall that is already leaning out at forty five degrees. You cannot lift clay that is lying down. Gravity is pulling in one direction and you are pulling in another, and gravity has more experience.
- 1
Pull it up nearly vertical, like a short fat cylinder
Three to five pulls before you shape anything. It will look wrong. It will look like a thick, squat, ugly pot with no bowl in it at all. That is exactly correct. All the clay you need is now standing up where you can reach it.
- 2
Start every pull at the bat
Not halfway up because that is where the clay is. Anchor low, squeeze, and travel the whole wall in one continuous move. Starting a pull midway leaves a thick ring at the bottom that you will never get out, and that ring is dead weight sitting exactly where you least want it.
- 3
Knuckle outside, fingertips inside, outside hand steering
The outside hand does the shaping and the inside hand mostly follows and supports. On a wide form it is tempting to let the inside hand take over, and that is how walls get thin in one spot and thick in another.
- 4
Leave the wall thicker at the bottom than at the top
This is the opposite of what you want in a mug, where even walls are the goal. On a bowl, the bottom third of the wall is a structural member: it is holding everything above it out over thin air. Taper it, thick at the turn and thinning as it rises. A bowl with a bottom wall as thin as its rim will sag before you finish shaping it.
- 5
Compress the rim after every pull
Every single one. Two fingers and a thumb, or a chamois, wheel slowed right down. A rim that has been compressed after each pull is a tensioned hoop holding a circle. A rim that has not is a floppy edge that will go oval on the shelf whatever else you do right.
- 6
Slow the wheel as the diameter grows
The rim is traveling further per rotation with every inch you gain. What felt like a sensible speed at 5 inches across is a hazard at 13. Bowls are thrown slower than cylinders and much slower at the end than at the start.
- 7
Sponge the puddle out of the bottom
Between every pull. A sponge on a stick, or press a sponge into the floor, lift it clear and squeeze it out into the bucket. Standing water sits on the one part of the pot carrying the most load and quietly softens it while you concentrate on the rim.
Neither of these is ours. Pick whichever method looks more like your body and give it a fair run of four or five bowls before you decide it does not suit you.
One curve, or it looks like two pots glued together
Once the clay is standing up, shaping is the fun part and the short part. This is where the ribs earn their place, and where most people either stop too late or stop far too late.

- 1The rim keeps a little extra thickness. It is the hoop that holds the circle round. A knife edge on a 12 inch bowl goes oval on the shelf.
- 2The wall is thickest low down and thins as it rises. The bottom of the wall is carrying everything above it out over open air.
- 3Floor meets wall as a curve, never a corner. A corner is a stress line, and a stress line is where the crack goes.
- 4The floor stays thick. Three eighths to half an inch wet on a 5 pound bowl, because a foot ring gets carved out of it later.
- 5The flat footprint is about a third of the finished width. Narrower and it rocks. Wider and it reads as a bucket.
Shape from the inside
The inside hand or a wooden rib pushes outward and the outside hand supports and follows. A bowl is shaped by what is pressing out, not by what is pressing in. Trying to shape a bowl from the outside squashes it.
Use a real rib
A large bowl rib does something fingers cannot: it makes an identical curve on every single rotation. Fingers make a curve that varies with pressure, and on a 13 inch span that variation is visible from across the room. One continuous pass from the center outward, not in sections. More on what each rib is for.
Two or three passes, then stop
Every extra pass with a rib adds water to the wall and takes strength out of it. Get the curve, clean the surface, leave. Bowls are not improved by a fourth look, and this is the exact point at which most of them collapse.
The eye level test
Crouch until your eye is level with the rim and look at the outline against the far wall. You are looking for one arc from the foot to the lip. If you can see a bend, a shoulder, or a place where the line changes its mind, that is two shapes glued together and no glaze will hide it. Fix it now while there is still water in the clay, or accept it and move on. Both are legitimate. What does not work is finding it at the trimming stage.
Two whole bowls, without the edits
Everything above is in pieces because that is how it is learned. These two put it back together. One is a genuinely large stoneware bowl taken all the way through to a trimmed foot, the other is the same shape at a size you could try this week.
Know what a bowl looks like just before it goes
A collapsing bowl gives you about four seconds of warning and it gives the same warning every time. Learn these and you will save more pots than any technique on this page.
- The wall feels warm and slippery rather than firm. That is clay that has taken on more water than it can carry. Stop, sponge the inside out, and give it ten minutes.
- The rim is visibly wobbling as it turns. You have lost round, and every pull from here makes it worse rather than better. Level it with a needle tool or stop.
- A spiral is winding up the outside of the wall. Your hands are traveling faster than the wheel is turning. Slow your hands, not the wheel, and read the page on twisting afterwards.
- You have been on the same piece for more than about fifteen minutes. Time is a material here. The clay has been absorbing water the entire time and there is a point past which no technique saves it.
Stop one pull early.
A bowl that came out slightly thicker than you wanted is a bowl. A perfect bowl lying in a heap on the wheel head is clay. At this size the entire skill is knowing which of those two you are about to make, and choosing the first one on purpose.
This is where big bowls actually die
You survived the throwing. Statistically, the piece is still in more danger on the shelf than it ever was on the wheel, because a bowl has a thin exposed rim and a thick floor sitting flat on a bat, and those two dry at completely different speeds.
- Lay plastic over the rim only for the first day or two and leave the floor open. You are not trying to keep it wet. You are trying to make the rim and the floor dry at the same rate.
- Get it off the bat once it holds its shape, so air can reach the floor. A thick floor sealed against a bat is the most common cracked bottom there is.
- Never stand a soft bowl on its rim. Once it is leather hard and trimmed, upside down is fine and helps. Before that it is just a warped rim waiting to happen.
- Trim on the dry side of leather hard, upside down, anchored with at least four lugs of clay. Cut the outside of the foot first, then the inside, then the recess in the middle.
- Foot ring about a third of the bowl's diameter. Much narrower on a piece this wide and it rocks on the table.
- Give it two to four weeks to dry. Small pieces can be bone dry in 48 hours. A 13 inch bowl is not a small piece, and slow drying is free while a crack is not.
Two numbers to check before you wedge
Will it fit on your shelf
Shelves are 24 × 12 × 8″ at Green Level, 24 × 12 × 12″ at Yellow Level, 36 × 16 × 14″ at Purple Level and 48 × 16 × 16″ at Black Level Member. A 13 inch bowl does not go on a shelf that is 12 inches deep. Measure first, because a bowl living on the floor gets knocked.
What it costs to fire
Glaze firing is 5 cents per cubic inch, with a flat $4.80 for anything 125 cubic inches or under, measured as the box the piece fits inside. A 12 inch bowl standing 5 inches tall is 12 × 12 × 5, so 720 cubic inches, so $36. Bisque firing is free. A big bowl is a real cost and it is better to know that going in.
The FAQs page has a calculator that will do the arithmetic for your actual measurements.
Wide and shallow is a different problem, solved with time
A deep bowl mostly stands up. A wide, shallow bowl or a platter is almost entirely unsupported, and there is a point past which no technique will hold wet clay out that far in one sitting. The answer is not better hands. The answer is to stop and come back.
Throwing it in two sittings
- Throw it most of the way, then stop deliberately. Get the floor set, the wall up and the curve roughly there, but leave it steeper than the shape you want.
- Let it stiffen for twenty to sixty minutes. A fan helps, and so does simply going and doing something else. You want it firm enough to hold weight and still soft enough to move.
- Come back and take it out the rest of the way with a rib, slowly, on a slow wheel. Clay that has lost a little water will hold a shape that soft clay physically cannot.
- Keep the rim damp while it waits. A strip of plastic over just the rim stops it drying ahead of the rest and cracking when you move it.
What changes as it flattens
- The floor has to get thicker, not thinner. A wide flat floor is a span, and spans sag. This is the opposite of the instinct to lighten a big piece.
- Compression matters more with every inch. A 15 inch floor has five times the area of a 7 inch one and five times the opportunity to crack.
- The wheel goes slower still. At platter diameters the rim is moving quickly enough that a moment of uneven pressure throws it out of round permanently.
- It will need support in the kiln. Very wide flat pieces can slump at temperature. Talk to an instructor before you commit a week to something 16 inches across and nearly flat.
Getting it to the shelf without ruining it
Thirty seconds of carelessness here undoes forty minutes of good work, and it happens to experienced potters constantly because the throwing is the part that feels like the hard bit.
- Wire underneath with the wheel stopped. Pull the wire taut, keep it flat against the bat, and go all the way through in one pass. A big floor grips hard, so do it twice.
- Then leave it on the bat. That is the entire reason you used one. Wire it again in a couple of hours, before it starts to shrink, or the drying floor will crack itself trying to pull away.
- Lift the bat, never the pot. Two hands, flat, underneath. A wet bowl picked up by the rim comes out oval and there is no recovering it.
- Walk it there in one go. Do not set it down halfway and pick it up again. Every handling is a chance to distort it while it is at its softest.
- Know where it is going before you carry it. Clear the space first. A wide bowl held in two hands cannot also move a box of tools out of the way. Full detail on getting a pot off the wheel.
More big bowls die on the shelf than on the wheel
This is not a dramatic claim. A bowl has a thin exposed rim standing in open air and a thick floor lying flat against a bat, and those two parts want to dry at wildly different speeds. The difference between them is the crack.
The first two days
- Lay a ring of plastic over the rim only and leave the floor open. Not sealed, not tight. You are slowing the rim down so the floor can catch up, not keeping the piece wet.
- Keep it out of a draft. A breeze across one side of a 13 inch rim dries that side first, and a rim that shrinks unevenly goes oval on its way to leather hard.
- Get it off the bat as soon as it will hold its own shape. Air needs to reach the underside of that thick floor. This one change prevents more cracked bottoms than anything else here.
After that
- Do not stand a soft bowl on its rim. It feels like a clever way to get air underneath and it is a reliable way to flatten one side of your rim.
- Once trimmed and leather hard, upside down is genuinely useful. Sitting on its own foot ring, the rim and base even out and the shape settles.
- Give it two to four weeks. Some pieces are bone dry on a studio shelf in 48 hours. A large bowl with a half inch floor is never one of them, and a piece that goes into a bisque firing with water still in the floor does not come out in one piece.
- Slow drying is free. That is the whole argument. There is no cost to being patient and a total cost to being impatient.
Why bowls specifically go oval
Three causes, and they stack. A rim that was never properly compressed has no tension holding the circle. A bowl lifted by the rim while wet is pulled out of round in one movement. And a bowl that dries faster on one side than the other shrinks unevenly and takes the shape with it. Get all three right and warping mostly stops being something that happens to you.
The foot ring is half the bowl
A large bowl with a badly judged foot looks heavy no matter how well it was thrown, and a large bowl with a good one looks like it is barely touching the table. This is also the stage where you find out whether you left enough clay in the floor.
- 1
Wait for the dry side of leather hard
Too soft and it distorts under the tool and under the lugs holding it down. Too dry and it chips rather than cutting. You want a fingernail to leave a mark without picking up clay.
- 2
Center it upside down, and take your time
On a big bowl this is genuinely fiddly. Use the concentric rings on the wheel head, spin it slowly, and watch the gap between the rim and a fixed point rather than watching the bowl. Adjust until the gap stops changing.
- 3
Anchor it with at least four lugs of clay, or use a chuck
Three lugs will let a heavy bowl walk. Press them against the wall, not over the rim, so you are not putting a flat spot into the edge you spent all that time compressing.
- 4
Cut the outside of the foot first
Establish the outer diameter and commit to it. Roughly a third of the bowl's width. Then cut the inside line of the ring, then clear the recess between them. Working in that order means the trimmings fall away from the detail you have already cut.
- 5
Check the thickness constantly
Press a finger into the recess as you go. The moment you feel any flex, you are done in that area. On a bowl this size leave more than you would on a mug, because there is a great deal more weight sitting over that floor.
- 6
Trim the outside curve to match the inside curve
Run a finger down the inside and then the outside. They should feel like the same arc with a consistent thickness between them. This is the step that makes a heavy bowl feel light, and it is the one people skip.
If you want the foot ring itself in more depth, we have pages on trimming and turning and on feet and foot rings for bowls and platters.
Shelf space, kiln space, and what a big bowl costs
Worth reading before you wedge 8 pounds rather than afterwards. Large pieces run into two practical walls here, and both of them are easier to plan around than to solve later.
Will it fit on your shelf
| Level | Your shelf | Biggest bowl that comfortably lives there |
|---|---|---|
| Green Level Member | Your shelf24 × 12 × 8″ | Biggest bowlAround 10 to 11 inches across. The 8 inch height is the real limit if you also want other work up there. |
| Yellow Level Member | Your shelf24 × 12 × 12″ | Biggest bowlAround 11 inches. Same 12 inch depth as Green Level, with more headroom above it. |
| Purple Level Member | Your shelf36 × 16 × 14″ | Biggest bowlAround 15 inches, and room for a second piece beside it. |
| Black Level Member | Your shelf48 × 16 × 16″ | Biggest bowlAround 15 inches as well, since depth rather than width is the constraint, but far more of them. |
Those are the shelf dimensions by Level, and depth is what catches people out. A 13 inch bowl does not sit on a 12 inch deep shelf, whatever else is going on. Measure before you throw, because a large piece with nowhere to live ends up somewhere it can be knocked.
What it costs to fire
Glaze firings are 5 cents per cubic inch, with a flat $4.80 for anything 125 cubic inches or under, measured as the box the piece fits inside at its widest points. A 10 inch bowl standing 4½ inches tall comes to about $22.50. A 12 inch bowl 5 inches tall is $36. A 14 inch bowl 6 inches tall is around $58.80. Bisque firings are free, every time.
Dipping glaze on a big bowl
The dipping glaze upcharge has two tiers, and the line sits at 525 cubic inches measured height by width by depth. A 10 inch bowl squeaks under it. A 12 inch bowl is comfortably over. The exact figure depends on your Level and is on the FAQs page. Use a glaze catcher underneath either way, because a wide bowl sheds a lot of glaze.
Kiln space is rarely the problem
We fire glaze to cone 5½, which is cone 5 with a twelve minute hold at peak, and our largest kiln is a 41½ cubic foot L&L bell lift. Size on its own is almost never the issue. Very wide and very flat is a different question, so ask an instructor before committing to anything past about 16 inches. More on what a firing actually does.
One more practical thing
There are 29 wheels here, and they are not identical in how they feel under load. If you are about to center 8 pounds, it is worth using the same wheel you used last time rather than whichever one is free. Consistency in the equipment removes one variable from a job that already has plenty. Glazing a piece this size is also its own skill, and there is a page on glazing big pottery when you get there.
Something went wrong. Here is probably why
Pick whatever happened to yours. Every one of these has a cause that sits earlier in the process than the moment you noticed it, which is the frustrating and useful thing about pottery.
It went oval
Three causes and they stack up. The rim was not compressed after every pull, so there was no tension holding the circle. Or it was lifted by the rim while still wet, which pulls a bowl out of round in one movement and cannot be undone. Or it dried faster on one side than the other, usually because of a draft or because it sat against a wall.
Next time: compress the rim after every single pull, carry it on the bat with two flat hands underneath, and lay plastic over just the rim for the first two days, away from any moving air.
Cracked across the bottom
Almost always the floor, and almost always decided in the first two minutes of throwing. Either it was left too thin to survive the shrinkage, or it was never really compressed, or it dried sealed against a bat while the rim dried in open air. A crack that runs roughly in an S shape is the classic signature of a floor that dried and shrank unevenly against its wall. Compressing the floor helps, but how evenly it dries matters as much.
Next time: needle tool the floor and actually look at the mark, leave three eighths to half an inch on a 5 pound bowl, compress it twice, and get it off the bat as soon as it holds shape so the underside can breathe.
The wall collapsed outward
You went out before you went up. Once the wall is leaning past about forty five degrees there is no pulling it, because you are trying to lift clay that is already lying down. The other contributor is water: a wall that has been worked for fifteen minutes has absorbed enough to have lost most of its strength, and no technique gets that back.
Next time: three to five vertical pulls before any shaping at all, sponge the puddle out of the floor between pulls, and set yourself a hard limit of about fifteen minutes on the piece.
Heavy and clunky
Usually too few pulls rather than too much clay. People throw a big bowl with the same three pulls they use on a mug, and three pulls simply cannot move that much clay up a wall. The rest of it is left sitting in a thick ring at the bottom where you cannot reach it, and then the trimming stage has to remove half the pot.
Next time: four or five pulls, every one starting at the bat, and cut one bowl in half with a wire afterwards to see where your clay actually ended up. It is a genuinely useful thing to do once and almost nobody does it.
There is a twist in it
A spiral winding up the outside means your hands traveled faster than the wheel turned, so each rotation got a slightly different amount of pressure and the wall wound up like a barber pole. On big pieces it usually appears in the last two pulls, when arms are tired and patience is short.
Next time: slow your hands and keep the wheel brisk for the pulls, taking at least three full seconds from base to rim. The twisting page goes into it properly.
It stuck to the bat, or cracked when it came off
A large floor has a lot of surface area gripping that bat, and clay shrinks as it dries. If the piece is still stuck when the shrinking starts, the floor tears itself apart trying to pull inward against something that will not let go.
Next time: wire underneath twice at the end of the session, then wire it again an hour or two later before any real drying has happened. Two passes with a taut wire held flat, not one hopeful pass with a slack one.
The bit to keep on your phone
Copy this, paste it wherever you keep things, and glance at it between pulls. It is the whole page with the explanations taken out.
- Go up one weight, not three.
- Wedge it properly. Spiral, or two halves joined.
- Slightly softer than mug clay.
- Beat it into a low wide dome, not a cone.
- Bat on. Check it does not rock.
- Slam it down. Seal the bottom edge.
- Tools out. Shoulders above the clay.
- Big piece first, while you are fresh.
- Check your shelf will take it.
- Wheel fast. Elbows in hips. Lean.
- Cone up and down three times. Finish low and wide.
- Open down, then out, on a curve.
- Needle tool the floor. Do not guess.
- Compress the floor twice.
- Floor about a third of the finished width.
- Up nearly vertical first. Three to five pulls.
- Every pull starts at the bat.
- Thicker at the bottom, thinner at the rim.
- Compress the rim every pull.
- Slow the wheel as it widens.
- Sponge the puddle out.
- Shape from inside with a rib. Two or three passes.
- Stop one pull early.
- Wire twice, wheel stopped, wire taut.
- Carry the bat, never the pot.
- Wire again an hour or two later.
- Loose plastic for the first two days.
- No drafts.
- Off the bat once it holds shape.
- Never stand a soft bowl on its rim.
- Trim on the dry side of leather hard.
- Four lugs minimum. Foot about a third of the width.
- Outside curve should match inside curve.
- Two to four weeks to bone dry.
The ones we actually get asked
How much clay do I need for a 12 inch salad bowl?
Around 8 pounds, allowing for shrinkage. You would throw it to roughly 13 or 14 inches wet and it would come out near 12. If you want to be certain, throw it slightly wider than your target, because nobody has ever been annoyed that a serving bowl came out a bit generous.
Can I try this in my third class?
You can try anything you like here and nobody will stop you, but probably not yet. Centering 6 pounds is a different physical skill from centering 2, and the failure modes on this page all arrive faster than a new potter can react to them. The usual route is to get comfortable at 2 to 3 pounds, throw a few small bowls so the curve is in your hands, then go up half a pound to a pound at a time. Most people are throwing decent 4 pound bowls a few months in.
Do I really have to use a bat?
Above about 4 pounds, yes. Not because of a rule, but because a wet bowl over about 10 inches across cannot be lifted off a wheel head by hand without pulling it out of round. The bat is not making it easier, it is making it possible. Below that weight it is a preference and we have a whole page arguing both sides.
Why did mine come out oval when it was round on the wheel?
Almost certainly one of three things. The rim was not compressed after each pull, so nothing was holding the circle in tension. Or it was picked up by the rim while wet. Or it dried unevenly, which usually means a draft or a wall on one side. Bowls are the form most punished by all three, because a wide thin rim has the least structural help.
What will a big bowl cost me to fire?
Glaze firings are 5 cents per cubic inch, with a flat $4.80 for anything 125 cubic inches or under, measured as the box the piece fits inside. A 12 inch bowl standing 5 inches tall works out at $36. A 14 inch bowl 6 inches tall is closer to $59. Bisque firings are free. The FAQs page has a calculator if you want to put your own measurements in.
Will it fit on my shelf?
Depth is the constraint, not width. Green Level Member and Yellow Level Member shelves are 12 inches deep, so anything past about 11 inches across becomes a problem. Purple Level Member and Black Level Member shelves are 16 inches deep and will take a 15 inch bowl. Measure before you wedge, because a large piece with nowhere to live ends up somewhere it can get knocked.
Can I throw a really big bowl in two pieces?
Yes, and past about 15 pounds it becomes the sensible answer rather than a compromise. You throw the lower section, let it stiffen, throw a second section and join them. It is a different set of skills with its own rules, and we have a page on throwing pottery in sections.
Which clay should I use?
A stoneware with some grit in it holds a wide wall up better than a very smooth body, because the grog gives it something to stand on while it is wet. Porcelain absolutely will do this, it is just less forgiving about every other thing on this page, so it is not where we would start. Ask an instructor which of our clay bodies suits the size you have in mind, and buy the fresh bag rather than the one that has been open a month.
How long before I can trim it?
Usually two to four days for a large bowl, but go by the clay rather than the calendar. You want the dry side of leather hard: a fingernail leaves a mark without picking clay up, and the piece feels cool rather than damp. Too soft and the lugs distort it. Too dry and it chips instead of cutting.
The pages that pair with this one
Your first big bowl is going to be bad
It will be heavy, the curve will have a bend in it somewhere, and the foot ring will be a little too small. That is not a sign you did it wrong. That is the piece doing its job, which is teaching your hands what six pounds of clay feels like when it is trying to leave.
The thing worth knowing is that the gap between a bad big bowl and a good one is much smaller than the gap between never trying and trying. Almost everything on this page is a correction of about ten percent: a slightly thicker floor, two more pulls, a slower wheel, a week longer on the shelf. None of it is a secret and none of it is talent. It is a list, and you now have the list.
So wedge six pounds, put a bat on, and go and make a heavy one. Then make another. The fourth one is usually the first one somebody asks you to make again.
Everything here is a correction of about ten percent: a thicker floor, two more pulls, a slower wheel, a week longer on the shelf. Wedge four pounds and go and make a heavy one. Then make another.
There is a considerably longer version of this page with ten videos, a cross-section diagram and a full troubleshooting section. The toggle at the top switches to it.