Pottery Date Night
 Bring All Your Friends Free Week
 Give a Month of Pottery
 Private Pottery Parties

 The Welcome Booklet
 Your First Ten Sessions
 The Pottery Process
 Finding the Studio
 Your Classes Never Expire
 The Four Tables
 Who’s Who
 The Rewards Program
 Flux Glazes
 The Calculators
 Kiln Tracker
 Holiday Kiln Deadlines

 Beginner’s Tool Set
 Fingernail Clippers
 Mayco Clay Mender
 Epoxy for Kintsugi
 Applicator Bottles
 Large Bead Rack
 Raku Workshop
 Nighttime Raku
 Horsehair and Feather Raku
 The Clay Hole T-Shirt
 Embroidered Crewneck
 Zip-Up Hoodie
 Pre-Made Bisqueware
 Glaze Catchers
 Kiln Cookies
 Clay Cubby Rental
 The Glaze Bible, Printed
 The Book of Molds, Printed
 Printable Pottery Guides
 Free Printable Trackers
 Gifts for Potters
 Christmas Pottery Ideas
 Mother’s Day Gift Ideas
 Pottery Date Night
 Studio Calendar
 2027 Studio Events
 What Should I Do Today?
 How to Throw on the Pottery Wheel
 How to Make a Pinch Pot
 How to Tap Center a Pot
 The Five Stages of Clay
 Is Pottery Hard to Learn?
 Pottery Wheel Practice Drills
 20 Easy Hand-Building Projects
 Everything That Sounds Wrong

 A Beautiful Piece, Every Time
 Slab Roller Tips
 Any Dish as a Slump Mold
 Slab Roller & Slab Mold Certification
 The Pottery Skill Tree
 Clay & Pottery Calculators
 Logging Your Pottery and Glazes
 The Pottery Dictionary
 Why Did My Pottery Do That?
 The Pottery Cone Chart
 Pottery Myths, Fact-Checked
 Is Handmade Pottery Food Safe?
 Incredible Ceramic Artist Videos
 How Dan Throws Giant Pots
 How to Dry Your Pottery
 The Pottery Wheel Introduction
 Pottery by Zodiac Sign
 Personality and the Pottery Wheel
 Pottery for Engineers
 ADHD, Hyperfocus, and Never Running Out
 Hobbies for Burnout
 Screen-Free Hobbies for Adults
 Every Addiction I Ever Had Lost to Art
 Functional Pottery Is Engineering
 How Do We Compare?
 Pottery Classes by City
 Every Pottery Studio in Utah
 Pottery in Draper
 Featured Members
 The Signature Wall
 Making Friends as an Adult Is Brutal
 The Clay Hole Commandments
 2027 Pottery Contests
 2027 Studio Parties
 Gallery Night

 Scream It Into the Void
 Destroy the Glaze Wall
 Daily Affirmation Cards
 Everything That Can Go Wrong
 Subscribe to Our Newsletters
 Contact The Clay Hole
 Corporate Team Building

 Glaze Combinations
 Glazes We Do Not Carry
 Making Glaze Test Tiles
 The Mega Glaze Tool
 How to Use the Mega Glaze Tool

 Glaze Brushing Techniques
 How to Use Underglaze
 How to Use Dipping Glazes
 Glaze Problems, Causes and Fixes
 The Dipping Glaze Guide

 Making a Glaze Catcher
 Fused or Sharp After Firing
 The Signature Wall
 His Viral Videos
 His Own Ceramics
 Meet Mud
Nobody gets bigger by grabbing more clay.
They get bigger by adding half a pound at a time and then refusing to move on until it feels boring. That is the whole trick. I am going to spend an entire page saying it in slightly different ways, because nobody believes it the first time.
They get bigger by adding half a pound at a time and then refusing to move on until it feels boring. That is the whole trick, and everything below is what it takes to survive the extra half pound.
I did not believe it either. I skipped from two pounds to six because I had watched a man on the internet do it in four minutes, and I spent that whole night making expensive gray pancakes.

Twice the clay is not twice the work. It is a different job.
Here is the part that nobody says out loud, so I will. When you double the clay, almost nothing about the process doubles. Some of it goes up a little. Some of it goes up a lot. And two or three things stop working entirely and have to be replaced with something else.
That is why a person who throws a beautiful mug can sit down with five pounds and produce something that looks like it lost a fight. It is not a talent problem. They are doing the two-pound version of a five-pound job.
Force goes up faster than weight
A bigger lump has more mass fighting you and a wider base gripping the wheel head. Going from two pounds to five does not feel like two and a half times harder. It feels like a wall. That is normal and it is not about your hands.
Arms stop being enough
Small work can be centered with hands and forearms. Big work cannot. At some point you have to stop pushing and start leaning, with locked elbows and your body weight doing the pushing. Almost everyone hits that wall between three and five pounds.
The clock becomes an ingredient
A mug takes six minutes. A ten-pound planter takes forty. Clay does not care how long you have been at it, but it does keep absorbing water the whole time. Time is now something you have to budget.
Three pulls stops being the answer
Every beginner learns to pull three times. With more clay, each pull moves a smaller percentage of the wall, so three pulls leaves you with a short, thick, heavy pot and no clay left in the base to fix it with. You need more pulls, not stronger ones.
Gravity finally shows up
A three-inch wall does not care about its own weight. A twelve-inch wall absolutely does. Everything you get away with at small sizes, uneven thickness, a soft spot, a wet band, turns into a hinge that the whole pot folds on.
The failure moves later
Small pots fail while you are centering. Big pots fail on the last pull, after twenty-five minutes of good work, which hurts more and teaches you less, because by then it is hard to tell which decision actually killed it.
The one that catches everybody
Strength is not the gate. I have watched teenagers half my size center ten pounds while a guy who deadlifts more than I weigh could not get through five. Leverage, posture and patience are the gate. If you are muscling it, you have already lost, and you will lose harder the more clay you add.
Watching somebody do it and reading how it works are two different skills.
You need both, and most people only ever get one.
A video shows you the thing. That is enormous. You get the speed, the angle of the wrist, the sound the clay makes when it is finally sitting still. None of that survives being written down. I could type for a week and never hand you the picture of what a properly braced forearm looks like.
But here is the problem with video, and I say this as somebody who has made hundreds of them. It goes by. You watch a great potter center eight pounds, you feel like you understand it, and then you sit down at the wheel and your hands have absolutely no idea what to do. The understanding was real. It just was not yours yet.
Words are slower and worse and much stickier. When you read anchor your elbows into your hip bones, you have to build the picture yourself. Your brain does the work instead of watching somebody else's brain do it. That effort is annoying, and it is exactly why it stays.
So the video shows you the shape of it. The words make it yours.
That is the whole reason this page is laid out the way it is. Every section gives you the written version first, in short lists you can hold in your head or hold in your hand, and then hands you somebody far better than me actually doing it. Read the list. Watch the hands. Then go do it badly eleven times, which is the part neither of us can skip.
How I would actually use this page
- Read the section once, sitting down, away from clay. It takes four minutes.
- Watch one video. Just one. Three videos in a row is entertainment, not learning.
- Copy the phone list at the bottom and keep it open on the splash pan side of your wheel.
- Throw. Come back to the page only when something specific goes wrong.
Two things change when you add clay. Everything else follows from those two.
Your arms stop being the engine and your body has to take over. And the clock starts running, because a big piece sits in water for half an hour instead of six minutes. Strength is not the gate. Leverage, posture and patience are, which is why teenagers regularly center more clay than people who lift.
What follows is four things, in order: prep it properly, center with your body, open wide and measure the floor, then take more pulls than you think.
The one rule, and it is the whole assignment
Go up one rung at a time. Half a pound at a time under three pounds, a pound at a time up to eight, two pounds at a time above that. Throw at least five in a row at the new weight before you move again, and cut one of them in half to see where your clay actually ended up.
Jump two rungs instead and eleven things change at once, the pot dies, and the only lesson available is that six pounds is hard. Which you already knew.
One rung at a time, and the rung is smaller than you want it to be.
Every weight below is approximate, because clay bodies shrink differently and because a wide bowl and a tall vase made from the same lump are not the same problem. Use it as a direction, not as a law.
The important column is the last one. It tells you what is going to break first when you step up, so that when it breaks you can say ah, right, that instead of concluding that you are bad at pottery.
Throw at least five in a row at the new weight before you move again, and cut one of them in half to see what your walls are actually doing.
Why the jumps are so annoyingly small
Because a small jump keeps almost everything the same and changes one thing. When that one thing goes wrong, you know exactly what it was. Jump from two pounds to six and eleven things change at once, the pot dies, and the only lesson available is that six pounds is hard. Which you already knew.
Under three pounds, go up half a pound. From three to eight, go up a pound. Above eight, go up two. And stay at each one until it stops being interesting.
Most big pots are lost before the wheel is switched on.
This is the least glamorous section on the page and it is the one that changes the most when you scale up. At two pounds you can get away with sloppy prep. At eight pounds sloppy prep is simply a slower way of finding out you wasted your evening.
At two pounds you can get away with sloppy prep. At eight pounds sloppy prep is simply a slower way of finding out you wasted your evening.
-
1
Wedge it properly, and know that it now takes real time
Ram's head wedging tops out for most people somewhere around five or six pounds. Past that you want spiral wedging, or you wedge it in two halves and then wedge those two halves together. Ten pounds is a couple of minutes of actual work, not a token twenty seconds. Budget for it.
-
2
Go slightly softer than you would for a mug
Stiff clay is easier to keep upright and much harder to center. At bigger weights the centering fight is the one that will beat you, so trade a little wall strength for clay that will actually move. If a bag has been open a while, wedge some fresh in with it.
-
3
Shape it into a cone before it goes anywhere near the wheel
People pat big lumps into cubes and blobs and then wonder why centering takes ten minutes. Beat it into a rough cone or a smooth ball with a flat bottom, on the table, with your hands. Every uneven bit you fix down here is a bit you do not have to fix while it is spinning.
-
4
Use a bat, and mean it
Above about three pounds you are not wiring a pot off the wheel head and lifting it with your fingers without wrecking it. Bat, every time. Check it is seated flat and not rocking before you put clay on it, because a bat with a wobble hands you a pot with a wobble and you will blame your hands for an hour.
-
5
Slam it down hard and seal the edge
Throw it onto the center of the bat with genuine force, then press the bottom edge down and outward all the way around so there is no gap underneath. A big lump that is only resting on the bat will creep sideways under pressure. This is the single most skipped step at bigger weights.
-
6
Set your seat higher, or the clay lower
You want your shoulders above the clay so you can press down into it rather than across at it. If your wheel is fixed, sit up on something. Leaning down over a big lump with your elbows in the air is how people hurt their backs and fail to center at the same time.
-
7
Put everything you need within reach first
Water, sponge, rib, needle tool, wire. Once a big piece is going you cannot leave it to go get something, and you cannot dry your hands and come back. Fifteen minutes in, standing up to find a rib will cost you the pot.
-
1
Wedge it properly, and go a little softer
Ram's head tops out around five or six pounds. Past that, spiral wedge it, or wedge it in two halves and then wedge those together. Ten pounds is a couple of minutes of real work. Go slightly softer than mug clay, and pick a body with grog or sand in it.
-
2
Cone it on the table before it touches the wheel
A rough cone, or a smooth ball with a flat bottom, beaten out by hand. Every uneven bit you fix down here is one you do not have to fix while it is spinning.
-
3
Bat on, slammed down, bottom edge sealed
Above about three pounds it is a bat every time. Check it is seated flat and not rocking, throw the clay down with real force, then press the bottom edge down and outward all the way around. A lump only resting on the bat will creep sideways under pressure, and this is the most skipped step at bigger weights.
-
4
Set your body and your bench before you start
Shoulders above the clay so you press down into it rather than across at it. Water, sponge, rib, needle tool and wire within reach. Biggest piece first, while you are fresh.
Pick a clay with some backbone
Not every bag wants to go big. Grog and sand give a wall something to stand on, which is exactly what you need when the wall gets tall. Smooth, fine bodies feel beautiful and then fold over. If a clay is described as silky and rewarding, read that as this will punish you at twelve inches.
Which of our bags does what is further down, in the studio section.
Centering is where the size jump actually happens.
If you only read one section, read this one. Nearly everybody who says they cannot throw big is actually saying they cannot center big, and those are very different problems with very different fixes.
Nearly everybody who says they cannot throw big is actually saying they cannot center big, and those are very different problems.
The good news is that the technique does not really change. What changes is where the force comes from, and how long you are willing to stay in the position.
What actually changes
- Faster wheel, not slower. Instinct says slow it down because it feels out of control. Instinct is wrong. A faster wheel does more of the centering for you. Slow it down later, for the delicate parts.
- Faster wheel, not slower. Instinct says slow it down. Instinct is wrong: a faster wheel does more of the centering for you.
- Lock your elbows into your body. Elbows into hip bones, or braced on your thighs, or one arm pinned across your ribs. Anywhere they cannot travel. Then you are not pushing with your arms, you are holding a shape and leaning.
- Lock your elbows into your body. Into your hip bones, braced on your thighs, or one arm pinned across your ribs. Anywhere they cannot travel.
- Lean, do not push. Move your whole upper body forward from the hips. Your arms should feel like braces on a bridge, not like pistons.
- Stack your hands. Left hand pushing in, right hand on top of the left, or one palm reinforcing the other. Two hands doing one job beats two hands doing two jobs.
- Cone up and down more times than feels necessary. Coning is what actually homogenizes a big lump and lines the particles up. At two pounds you can skip it. At eight pounds it is the job. Three or four full cycles is normal.
- Cone up and down more times than feels necessary. Coning is what homogenizes a big lump. At two pounds you can skip it. At eight pounds it is the job, three or four full cycles.
- Work the base, not just the top. The commonest big-lump failure is a centered top sitting on an off-center base. Get low, put pressure at the bottom third, and finish there.
- Leave slowly. Slower than that. A big lump stores real energy. Snatching your hands away pulls it straight back off center and undoes everything. Ease off over a couple of full rotations.
What people do instead
- Squeeze harder. The lump is bigger, so surely more grip. This exhausts you in ninety seconds and moves almost nothing.
- Add more water, because it feels grabby. Now it is slippery and getting softer by the second, and you are on a clock you just started.
- Slow the wheel right down. Feels calmer. Removes the only free help you had.
- Chase the high spot around with a fingertip. You cannot out-run a spinning wheel. Hold still and let it come to you.
- Give up at four minutes and decide it is centered enough. It is not, and every step after this one will be harder because of it.
- Lean over the top to look at it. Now your elbows are in the air, your back hurts, and you have lost all your leverage at the exact moment you needed it.
The test that settles it
Rest a knuckle lightly against the clay, close your eyes, and let the wheel turn ten times. If you feel a bump, it is not centered. Your eyes will lie to you about this constantly. Your hands will not.
Three potters, three ways of doing the same thing
None of these are ours and none of them are wrong. Pick the one whose body looks most like yours and start there. If a method feels bad after a fair try, switch. There is no correct one.
One video, and it is the one to watch
Nothing loads from YouTube until you press play. Until then these are just images. All three creators are unaffiliated with us and we get nothing if you watch them, which is exactly why we are comfortable recommending them.
Nothing loads from YouTube until you press play. He is unaffiliated with us and we get nothing if you watch him.
The other kind of centering, the one that happens after the pot is made
Tap centering gets a leather hard pot running true on the wheel head again, with small taps timed to the turn rather than force. It will not center a fresh ten pound lump, but a big piece has to be centered a second time before it is trimmed, so it is a very useful thing to have in your pocket, and we built a practice tool for it.
A wide floor is a different move, not a bigger one.
Opening is the step people scale up worst, because it looks like the easy bit. It is not. A floor you got wrong at two pounds gives you a slightly heavy mug. A floor you got wrong at eight pounds gives you a cracked base three weeks later, after you have already glazed it.
A floor you got wrong at two pounds gives you a slightly heavy mug. A floor you got wrong at eight pounds gives you a cracked base three weeks later, after you have already glazed it.
- Down first, then out, and wider than feels right. Almost every failed big pot was opened too narrow, and a small hole means you cannot get your hand and forearm in there later to pull.
- Measure the floor. Do not guess it. Needle tool through to the bat, pinch at the surface, pull it out and look. Three eighths to half an inch after compression is sane on a large form.
- Compress the floor, then compress it again. Rib from the center outward, several passes, and once more after your first pull. A wide floor cracks far more easily than a narrow one.
- Get the corner clean. Leave a soft mushy curve where floor meets wall and your first pull starts halfway up, which means half your clay never leaves the bottom.
- Go down before you go out. Find your depth first with both thumbs or a braced finger, then widen. Widening first and then trying to go deeper drags the floor off center.
- Open wider than feels right. Almost every failed big pot was opened too narrow. If the hole is small, the clay has nowhere to go and you cannot get your hand and forearm in there later to pull.
- Measure the floor. Do not guess it. Push a needle tool through until it touches the bat, pinch it at the surface, pull it out, look. Everybody thinks they can feel it. Almost nobody can, and at this size a quarter inch of error matters.
- Leave more floor than you would on a mug. A big pot needs a base it can stand on, and you will want something to trim into later. Somewhere around three eighths to half an inch after compression is a sane place to start.
- Compress the floor properly, then compress it again. Rib or fingertips, from the center outward, several passes. A wide floor has far more room to crack than a narrow one, and compression is half of what prevents it. The other half is drying: keep the floor close to the thickness of the wall above it and dry the piece evenly. You cannot fix either of them later.
- Get the corner clean. The join between floor and wall is where you set up your first pull. Leave a soft mushy curve there and your first pull will start halfway up, which means half your clay never leaves the bottom.
The habit that turns this from guesswork into knowledge
Cut one open. Wire a finished piece straight down the middle and look at the cross section. Where is the clay? Almost always the answer is still in the bottom, and seeing it once teaches you more than reading this paragraph forty times.
Do it every fifth pot at a new weight. Not the good one. Cut open the one you were going to recycle anyway.
More clay needs more pulls, not stronger ones.
This is where the three-pull habit you learned on mugs quietly betrays you. Each pull can only move so much wall before it thins it dangerously, and that limit does not grow just because the lump did. So you take more passes, each one gentler than you think, and you accept that a big pot takes eight minutes of pulling rather than ninety seconds.
Each pull can only move so much wall before it thins it dangerously, and that limit does not grow just because the lump did. More passes, each one gentler than you think, and a big pot takes eight minutes of pulling rather than ninety seconds.
Doing it
- Start every pull at the very bottom. Below where you think the clay is. If you start an inch up, everything below that inch stays there forever and you have just built a heavy pot with thin sides.
- Use a knuckle or the heel of your hand outside, fingertips inside. Fingertips alone are fine for a mug. On a big wall they dig in and tear rather than lift. A broader contact patch moves more clay with less damage.
- Slow the wheel as the pot gets taller. Fast for centering, slower for pulling, slower again near the top. A tall thin wall on a fast wheel wants to fly apart.
- Keep the base thicker than the top. The bottom is carrying everything above it. A wall of even thickness top to bottom is a wall that folds at the base.
- Slow the wheel as it gets taller, and keep the base thicker than the top. The bottom carries everything above it, and a tall thin wall on a fast wheel wants to fly apart.
- Collar in every couple of pulls. Clay flares outward as you lift it. Two hands around the pot, gentle squeeze, wheel slow, brings the diameter back in and thickens the wall so you can pull again. Skip this and your cylinder becomes a bowl.
- Compress the rim after every single pull. Not at the end. Every time. Two fingers and a thumb, light, one full rotation. The rim is the first thing to go soft and it takes the wall with it.
- Stop one pull before you want to. The last pull is the one that kills big pots. A slightly thicker pot that exists beats a perfect one in a bucket.
Two things worth knowing about your body
Your arms will be tired by pull four. That is not a fitness problem, it is a leverage problem, and the answer is the same as centering. Brace your outside forearm against your thigh or the wheel edge. Keep your inside arm as straight as the pot allows. Move your body, not your hands.
And throw the big thing first. If you have three pieces to make tonight, the ten pound one gets made while you are fresh and your hands are steady, not at nine o'clock when you are tired and hungry and have already decided you deserve a result.
Twist is a bigger deal at this size
More clay and more pulls means more chances for the wall to wind up on itself. If your pots are coming out with a spiral in them, that has its own page.
Watch somebody take it up
One tutorial aimed exactly at the person stepping up a weight class, and one short set of tips from a professional on what changes when the form gets large.
The thing that actually kills most big pots is not a technique. It is minutes.
Clay does not fail because you touched it wrong. It fails because it got soft, and it got soft because it was wet and it was wet for a long time. At mug size you finish before that matters. At planter size you are in a race, and nobody tells you the race has started.
Clay fails because it got wet and stayed wet. At planter size you are in a race. And you are allowed to throw the lower half, stop, let it firm up for twenty minutes and come back to it. That is standard practice for large work, not cheating.
Water is a lubricant, not an ingredient
Enough to stop your hands dragging. That is the whole job. Every extra splash is being absorbed into a wall that has to hold itself up for another twenty minutes. Many potters who throw large use slip off the wheel instead of clean water, because slip lubricates without adding as much water.
Sponge the inside out as you go
Water pools in the bottom of a deep pot and sits there softening the exact spot carrying the most weight. Get it out with a sponge on a stick every few pulls. This one habit saves more big pots than any hand position.
Have a plan before you start
Know the shape you are making. Big pieces punish improvisation, because deciding what to do next while the wheel spins costs you the one thing you do not have. Draw it on a scrap of paper if you need to. I do, and I own the place.
Let the bottom firm up
For the really big stuff, throw the lower section, then stop. Let it stiffen for twenty minutes or speed it along, then come back and take it higher. You are allowed to do this. It is not cheating and every production potter alive does it.
Know what you are willing to lose
Decide before you sit down how many attempts this weight gets tonight. Three is a good number. Big pots take real time and a fourth attempt at the end of a tired evening is almost always worse than the third, which means you finish the night on your worst work and take that feeling home with you. Stop while it is still fun. The clay will be there Thursday.
Somebody else's version of this entire page, in one video
If you would rather have all of it at once from two people who are good company, start here.
Why only one here
Because you do not need six videos telling you the same five things. The three centering videos above are three genuinely different methods, which is worth your time. This is the overview, and one overview is plenty.
If you do want to fall down a hole, we keep a page of the best pottery videos we have found, none of them ours.
At some point you stop adding clay and start adding sections.
There is a limit, and it is not really about strength. It is about reach. You cannot pull a wall taller than your forearm can get inside, and you cannot center a lump wider than your hands can brace against. For most people that lands somewhere around fifteen to twenty five pounds, and it is a genuine physical ceiling rather than a failure of nerve.
The limit is reach, not strength. You cannot pull a wall taller than your forearm gets inside, which for most people lands somewhere around fifteen to twenty five pounds.
Past it, big pots are not thrown taller. They are thrown in pieces and joined, which is a completely different skill with its own rules about joints, stiffness and drying. It deserved its own page rather than three paragraphs at the bottom of this one.
Past it, pots are thrown in pieces and joined. Different skill, different rules, its own page.
Do not skip ahead to it. Sectional work assumes you can already throw a clean cylinder at seven or eight pounds.
Something went wrong. Tell us which thing.
The three ways a heavier pot usually dies.
Every one of these is a failure that only shows up once you add clay. Pick the one that matches what actually happened, not the one that matches what you would prefer to have happened.
Almost every first attempt at a new weight fails in one of these three ways. Find yours, and pick the one that matches what actually happened rather than what you would prefer to have happened.
Five pounds beats you when three did not
There is a weight, usually between three and five pounds, where arm strength stops being enough. It is a wall rather than a fade, and pushing harder is the thing that already stopped working.
- Lock your elbows into your hip bones or thighs, lean from the hips, and stack one hand on the other.
- Speed the wheel up rather than down, and finish at the base rather than the top.
- Ease off over two full rotations. Snatching your hands away pulls it straight back off center.
It came out short, thick and heavy
Almost all the clay is still sitting in the bottom inch. Three pulls moves a good proportion of a small wall and a poor proportion of a big one.
- Take five to eight pulls, not three, each one gentler than you think.
- Start every pull right at the bat, below where you believe the clay is.
- Knuckle outside rather than a fingertip, and collar in every couple of pulls.
It went soft, or it folded on the last pull
Two failures with one cause, and the cause is minutes. A big piece sits in water for half an hour, and one greedy pass at the end of that is the most common way a big pot dies.
- Enough water to stop the drag and nothing more. Sponge the inside out every few pulls.
- Compress the rim after every pull. A soft rim takes the wall down with it.
- Decide the height before you start and stop there. Firm the base up and come back instead.
You are still centering with your arms
There is a weight, usually between three and five pounds, where arm strength simply stops being enough. It is not a gradual fade. It is a wall, and the answer is not to push harder, because pushing harder is the thing that stopped working.
- Lock your elbows into your hip bones or brace them on your thighs so they physically cannot move.
- Lean forward from the hips. Your body provides the force, your arms just hold the shape.
- Stack one hand on top of the other so both are doing the same job.
- Speed the wheel up rather than down.
You are only working the top of the lump
The classic big-lump failure. The top comes true quickly because it is easy to reach, so it looks centered, and the bottom third never gets touched. Then you open it and everything wobbles and you cannot work out why.
- Get your shoulders lower so you are pressing down and in at the base, not across at the top.
- Finish at the bottom. Whatever you touch last is what ends up true.
- Cone up and back down again. Coning is what fixes a bad base, and one cycle is rarely enough at this size.
- Check with a knuckle and your eyes closed rather than by looking.
You let go too fast
A big lump is holding real energy. Releasing pressure suddenly lets it spring back, and it takes your last two minutes of work with it. This is one of the most common and most invisible mistakes at bigger weights.
- Ease off over at least two full rotations of the wheel. Count them.
- Reduce pressure first, then move your hands away, never both at once.
- Keep your hands wet enough that they do not grab on the way out.
Too much water, too much time, or both
Big pieces spend far longer on the wheel, so the same watering habit that was fine on a mug delivers several times as much water into the wall. It is not one bad decision, it is twenty small ones adding up over half an hour.
- Use enough water to stop the drag, and nothing beyond that.
- Sponge the standing water out of the inside every few pulls.
- Use the slip already on the wheel as lubricant instead of fresh water.
- Throw the lower half, stop, let it firm up, then finish it. This is normal practice, not a workaround.
The lump was never properly sealed to the bat
At small weights friction alone holds a pot down. At bigger weights the sideways force during centering easily exceeds it, and the whole thing creeps a millimeter at a time until it is visibly off. You almost never catch it happening.
- Slam the clay down with real force onto a bat that is wiped dry to the touch.
- Press the bottom edge down and outward the whole way around before you switch the wheel on.
- Check the bat is properly seated on the pins and not rocking.
- Keep standing water off the bat surface around the base.
You ran out of pulls, not out of clay
Almost all the clay is still sitting in the bottom inch. Three pulls moves a good proportion of a small wall and a poor proportion of a big one, so the pot is short and the base is enormous. Cut one open and you will see it immediately.
- Take five to eight pulls, not three. Each one gentler than you think.
- Start every single pull right at the bat, below where you believe the clay is.
- Clean the outside corner first so your fingers can actually get under the clay.
- Use a knuckle outside rather than a fingertip to move more clay per pass.
You are not collaring
Clay flares outward every time you lift it. This is physics, not a mistake, and on a mug there are not enough pulls for it to matter. Over six or seven pulls it compounds until your cylinder is a wide shallow bowl you did not order.
- Every two pulls, slow the wheel and squeeze the diameter back in with both hands.
- Collaring also thickens the wall again, which buys you another pull.
- Keep the inside hand out of the way while you do it.
The rim is not being compressed often enough
The rim is the thinnest, wettest, most worked part of the pot and it is holding the top of the wall together. Once it goes soft it wobbles, and a wobbling rim drags the wall underneath it out of true within a rotation or two.
- Compress after every pull, not once at the end.
- Two fingers and a thumb, light pressure, one full slow rotation.
- If it is already uneven, trim it level with a needle tool rather than trying to push it true.
- Keep the rim slightly thicker than the wall below it on large forms.
That pull was one too many
There is a last pull that works and a next one that does not, and the gap between them is very small. Twenty five minutes of good work plus one greedy pass is the most common way a big pot dies, and it is the most avoidable.
- Decide the height before you start and stop when you reach it.
- If a pull feels like it is going badly, stop mid-pull rather than finishing it out of hope.
- A slightly thick pot that survives is worth more than a perfect one in the recycling bucket.
- Firm the lower section up and come back to it rather than pushing on while it is soft.
Sequencing and leverage, not fitness
If your arms are shaking early, you are holding your own arm weight up as well as pushing. Bracing removes most of the load, and throwing the big piece when you are fresh removes the rest.
- Brace your outside forearm against your thigh or the wheel edge for every pull.
- Throw the largest piece first in a session, always.
- Sit so your shoulders are above the clay rather than level with it.
- Step back a half pound. You may have jumped two rungs at once.
You guessed instead of measuring
Everyone believes they can feel the floor through their fingers. Almost nobody can, and the error scales with the pot. On a big piece a thick floor is also several pounds of clay that never made it into the walls.
- Push a needle tool through to the bat, pinch at the surface, pull out and look.
- Do it before your first pull, while you can still fix it.
- Aim for roughly three eighths to half an inch on a large form, after compression.
- Cut a finished one in half to calibrate what your hands are actually telling you.
The floor was not compressed enough
A wide floor has far more room for the clay particles to pull apart as it dries, and the crack usually shows up days later or in the kiln, long after you could do anything about it. Width makes it more likely, and so does a floor left much thicker than the wall above it.
- Compress from the center outward with a rib, several passes, immediately after opening.
- Do it again after your first pull, because pulling stretches the floor too.
- Do not leave standing water sitting in the bottom while you work.
- Dry big pieces slowly and evenly, and cover the rim before the base.
The short version, for propping against the splash pan.
Know when the pot is already gone.
Everything above, boiled down to the things you can actually think about with wet hands. Copy it, paste it into your notes app, keep it open. Nobody is going to read seven thousand words while a wheel is spinning.
The button below copies a full checklist into your notes app, which is where it belongs once your hands are wet. Before that, four signs that mean stop rather than push on.
- Go up one rung only. Half a pound under 3, a pound to 8, two above that.
- Wedge it properly. Spiral, or in two halves joined.
- Slightly softer than mug clay.
- Beat it into a cone on the table first.
- Bat on, seated flat, no rocking.
- Slam it down. Seal the bottom edge all the way round.
- Tools within reach. Shoulders above the clay.
- Biggest piece first, while you are fresh.
- Wheel fast. Faster than feels comfortable.
- Elbows locked into hips or thighs.
- Lean from the hips. Do not push with arms.
- Stack your hands. One job, two hands.
- Cone up and down three or four times.
- Finish at the base, not the top.
- Knuckle test, eyes shut, ten rotations.
- Release over two full rotations. Slowly.
- Down first, then out. Open wider than feels right.
- Needle tool the floor. Do not guess it.
- Compress the floor. Then compress it again.
- Five to eight pulls, not three.
- Start every pull at the bat.
- Knuckle outside, fingertips inside.
- Collar in every two pulls. Compress the rim every pull.
- Slow the wheel as it gets taller. Stop one pull early.
Four stop signs
If any of these happen, stop and reset rather than pushing on. Every one of them is a pot that is already lost and just has not told you yet.
- The wall feels slippery and warm rather than firm. It is saturated.
- The rim is visibly wobbling as it turns.
- You can see a spiral twist winding up the outside.
- Your hands are shaking. Shaking hands do not make round pots.
Plain text, no formatting, pastes cleanly into any notes app.
Going big in our building.
What our building gives you for big work, and where the limits are.
Three things to know before you throw something large. And a fourth: ask an instructor to watch you center for ninety seconds. It is the best use of them there is.
The kiln is not your limit
Our largest kiln is a 41½ cubic foot L&L bell lift, with an interior 43½ inches wide, 30½ deep and 54 tall. Whatever you can throw, we can almost certainly fire. The ceiling on this page is your forearms, not our equipment.
Bigger costs more to fire
Bisque firing is free and always will be. Glaze firing is charged by volume, so a large piece costs more than a mug. You pay for the kiln space it takes, and you can work out the number before you glaze it.
Height runs out before width does
A Purple Level shelf is 36 inches wide by 16 deep by 14 tall. Width and depth are generous. Height is the one that catches people. Measure your shelf before you decide on a twenty inch vase, and ask us where oversized work goes.
Some of our bags want this and some do not
B-Mix w/Grog is the one to reach for first. Half & Half has the backbone for tall work and Speckled Buff is excellent for planters. Berlin Gray specifically wants to sink back down on you at size, and plain B-Mix and porcelain are hard mode. Clay starts at $28 for a 25 pound bag.
Wedging fifteen pounds takes a table and a minute
Not a corner of a table and twenty seconds. If you are heading upward, get comfortable with spiral wedging first. It is the single prerequisite most people skip, and it is the one that makes ten pounds behave.
Ask an instructor to watch you center
Four instructors work every instructed session and this is genuinely the best use of them. Ninety seconds of somebody watching your elbows will save you three weeks. Friday evenings and weekend mornings are open studio with no instructors, so pick your night accordingly.
Our eight clay bodies
What each bag actually does on the wheel, and which ones have the backbone for large work.
See the claysHow to spiral wedge
The prerequisite for anything above about six pounds, done properly and slowly.
Learn itClay and firing calculators
Work out clay weights and what a firing will cost before you throw it, not after.
Run the numbersThe complete throwing guide
The whole process from wedging to wiring off, if you want the foundations rather than the step up.
Read the guidePulling walls, in detail
The hand offset, the squeeze point, and the six ways a cylinder folds over on you.
Go deeperTrimming a big pot
Getting a big pot back on the wheel upside down and centered, and why a heavy base under thin walls lets go.
TrimmingNine questions we get at the wheels.
How long should I stay at one weight before going up?
Until it is boring. In practice that usually means five or more in a row that come out the way you intended, not five attempts of which two worked. If you are still surprised by the outcome, you are not done with that weight.
Do I need to be strong to throw big?
No, and this is the myth that keeps people small. You need leverage, position and patience. Strength lets you get away with bad position for a while, which is arguably a disadvantage, because it delays the moment you learn to brace properly. Plenty of our members who throw the biggest work are not the strongest people in the room.
Should I use softer or firmer clay for larger pieces?
Slightly softer than you would use for a mug. Firm clay holds a tall wall up beautifully and is brutal to center, and centering is the fight you are more likely to lose. A body with grog or sand in it gets you the wall strength back without making the centering harder.
Why does my pot come out short and thick every time?
Because the clay is still in the bottom. You are almost certainly taking three pulls out of habit and starting each one slightly too high. Take more passes, start every one right at the bat, and cut a finished piece in half to see where the clay actually ended up. It is a genuinely startling thing to look at.
How much clay do I need for a specific pot?
The ladder above is a reasonable starting point, but shape changes it a lot. A wide shallow bowl and a tall narrow vase from the same weight look nothing alike. The practical answer is to weigh what you use for a piece you liked and write it down. After a month you will have your own chart, which beats anybody else's.
Is it cheating to let the bottom firm up and come back to it?
No. It is standard practice for large work and professional potters do it constantly. A pot thrown in one continuous go is not worth more than one thrown in two stages. Only the finished piece exists.
What is the biggest thing I can throw as one piece?
It depends on your arms more than your skill. You cannot pull a wall taller than your forearm reaches inside, and for most people the practical ceiling is somewhere between fifteen and twenty five pounds. Past that, work gets thrown in sections and joined, which is a separate skill with its own page.
Does a bigger piece cost more to fire here?
Yes. Bisque firing is free. Glaze firing is charged by volume, so a large piece costs more than a small one. Our calculators page will give you the number ahead of time.
I have been stuck at the same weight for months. What now?
Two things, in order. First, halve the jump you have been attempting; most stuck people are trying to go up a pound when half a pound would have gone through. Second, ask an instructor to watch you center for ninety seconds. Almost every long plateau turns out to be one fixable body position thing that is invisible from the inside.
Add half a pound. That is the whole assignment.
Not five pounds. Not the thing you saw somebody do on your phone last night. Half a pound more than the weight you are already good at, made five times, until the interesting part goes out of it.
It is the least exciting advice on this entire page and it is the only one that reliably works. I wish somebody had made me do it two years earlier. I would have a lot fewer stories about gray pancakes.
It is the least exciting advice here and the only one that reliably works.
Twenty nine wheels, four instructors in every instructed session, and a kiln big enough that it will not be the thing standing in your way.
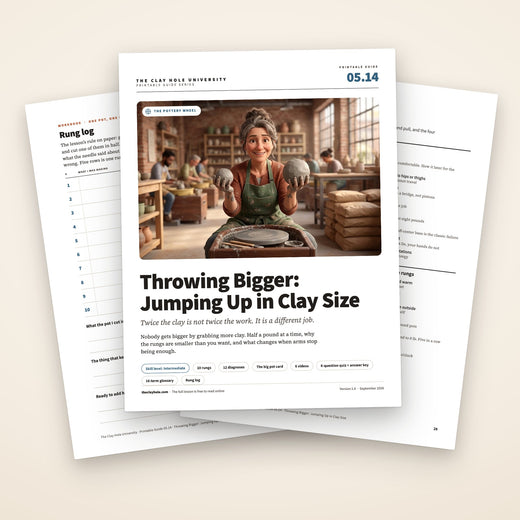
There is a much longer version of this page behind the toggle at the top: the full weight ladder, twelve diagnoses, six videos and nine common questions.
Which version would you like to print?
Videos come out as a labeled box with the title and channel to search for, since paper does not play them. Every accordion is opened first, so nothing prints blank.