Pottery Date Night
 Bring All Your Friends Free Week
 Give a Month of Pottery
 Private Pottery Parties

 The Welcome Booklet
 Your First Ten Sessions
 The Pottery Process
 Finding the Studio
 Your Classes Never Expire
 The Four Tables
 Who’s Who
 The Rewards Program
 Flux Glazes
 The Calculators
 Kiln Tracker
 Holiday Kiln Deadlines

 Beginner’s Tool Set
 Fingernail Clippers
 Mayco Clay Mender
 Epoxy for Kintsugi
 Applicator Bottles
 Large Bead Rack
 Raku Workshop
 Nighttime Raku
 Horsehair and Feather Raku
 The Clay Hole T-Shirt
 Embroidered Crewneck
 Zip-Up Hoodie
 Pre-Made Bisqueware
 Glaze Catchers
 Kiln Cookies
 Clay Cubby Rental
 The Glaze Bible, Printed
 The Book of Molds, Printed
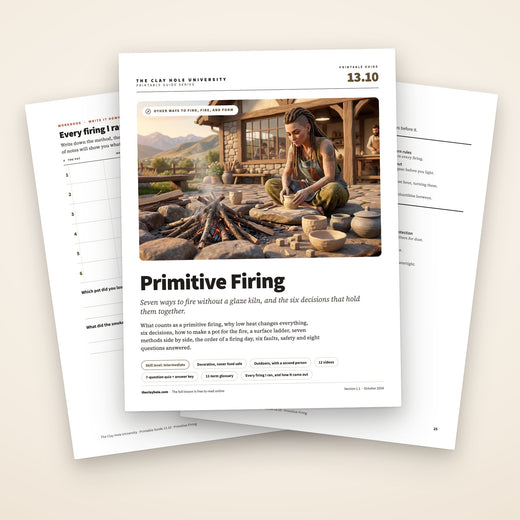
 Printable Pottery Guides
 Free Printable Trackers
 Gifts for Potters
 Christmas Pottery Ideas
 Mother’s Day Gift Ideas
 Pottery Date Night
 Studio Calendar
 2027 Studio Events
 What Should I Do Today?
 How to Throw on the Pottery Wheel
 How to Make a Pinch Pot
 How to Tap Center a Pot
 The Five Stages of Clay
 Is Pottery Hard to Learn?
 Pottery Wheel Practice Drills
 20 Easy Hand-Building Projects
 Everything That Sounds Wrong

 A Beautiful Piece, Every Time
 Slab Roller Tips
 Any Dish as a Slump Mold
 Slab Roller & Slab Mold Certification
 The Pottery Skill Tree
 Clay & Pottery Calculators
 Logging Your Pottery and Glazes
 The Pottery Dictionary
 Why Did My Pottery Do That?
 The Pottery Cone Chart
 Pottery Myths, Fact-Checked
 Is Handmade Pottery Food Safe?
 Incredible Ceramic Artist Videos
 How Dan Throws Giant Pots
 How to Dry Your Pottery
 The Pottery Wheel Introduction
 Pottery by Zodiac Sign
 Personality and the Pottery Wheel
 Pottery for Engineers
 ADHD, Hyperfocus, and Never Running Out
 Hobbies for Burnout
 Screen-Free Hobbies for Adults
 Every Addiction I Ever Had Lost to Art
 Functional Pottery Is Engineering
 How Do We Compare?
 Pottery Classes by City
 Every Pottery Studio in Utah
 Pottery in Draper
 Featured Members
 The Signature Wall
 Making Friends as an Adult Is Brutal
 The Clay Hole Commandments
 2027 Pottery Contests
 2027 Studio Parties
 Gallery Night

 Scream It Into the Void
 Destroy the Glaze Wall
 Daily Affirmation Cards
 Everything That Can Go Wrong
 Subscribe to Our Newsletters
 Contact The Clay Hole
 Corporate Team Building

 Glaze Combinations
 Glazes We Do Not Carry
 Making Glaze Test Tiles
 The Mega Glaze Tool
 How to Use the Mega Glaze Tool

 Glaze Brushing Techniques
 How to Use Underglaze
 How to Use Dipping Glazes
 Glaze Problems, Causes and Fixes
 The Dipping Glaze Guide

 Making a Glaze Catcher
 Fused or Sharp After Firing
 The Signature Wall
 His Viral Videos
 His Own Ceramics
 Meet Mud
Primitive firing, and how to stop losing pots to it
Pit fires, barrels, raku, naked raku, horsehair, saggars and obvara. Seven ways of putting a pot into the fire instead of into a kiln, all held together by the same physics and the same six decisions. Here is the whole family, what each one gives you, and twelve videos from people who actually do this.
Seven ways of putting a pot into the fire instead of into a kiln, boiled down to the six decisions that are the same in every one of them. Read this before your first firing.
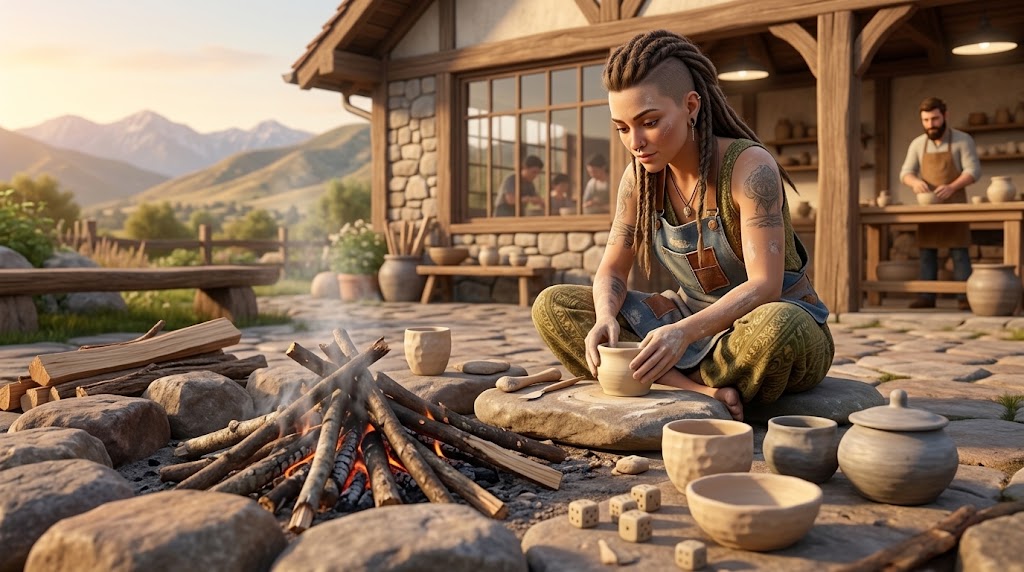
Primitive firing, on one screen
Every method on this page is the same trick. Get a porous pot hot enough to harden but not hot enough to turn to glass, then let smoke, ash and metal vapor land directly on the bare surface. There is no glaze doing the decorating. The fire is the decorating.
The six decisions, one line each
- Clay. Something open, with grog or sand in it. A smooth porcelain will crack. Here that means B-Mix with Grog or Berlin Gray, the two we recommend.
- Form. Round, even walls around a quarter inch, no handles, no thin rims, no sharp corners. Fire finds every join you rushed.
- Dryness. Bone dry is not a feeling. Plan on one to two weeks for ordinary work, and longer for thick pieces. Trapped water turns to steam and blows a hole out through the nearest wall.
- Surface. Burnish it, or coat it in terra sigillata, or both. A rough pot takes smoke as a gray smudge. A polished pot takes it as a black mirror.
- Ramp. Warm slowly, always. Preheat beside the fire for an hour before anything touches flame.
- Cool. Slowly for pit and barrel, which means overnight. Raku is the one exception, and that speed is exactly why raku loses pots.
Pick one
- You have a backyard and a day. Pit or barrel firing. Cheapest to start, slowest to finish, softest results.
- You want drama and metallic color today. Raku. Needs a fuel kiln, tongs, a can of sawdust and somebody who has done it before.
- You want lines and marks you drew yourself. Horsehair, feather, or a saggar packed with salts and copper.
Safety floor, and none of it is optional. Everything here happens outdoors, upwind, with a fire extinguisher and a hose within reach. Fumes from copper, salt and ferric chloride are genuinely toxic, so you wear a fitted half face respirator with organic vapor and acid gas cartridges and P100 filters, with eye protection under any face shield, or you skip that material. Never burn treated or painted wood, plywood, plastic, foam, rubber, glossy paper or anything that once held a solvent or pesticide. Ferric chloride is corrosive: leave it out until you have several ordinary firings behind you. Nobody fires alone, and in Utah you check the county burn window and the air quality before you light anything.
What you end up with. A porous, decorative pot. Not watertight, not food safe, not dishwasher safe, not ever. Seal it with wax or an acrylic if you want the color to stay put, and put a glass liner in it if you want to keep flowers in it.
Fire day, in order
- Check the county burn window and the air quality. Utah opens and closes these seasonally and shuts them hard during an inversion. If either says no, that is the answer.
- Lay everything out before you strike a match. Fuel, colorants, tongs, gloves, respirator, extinguisher, hose, and a safe flat place to set a hot pot down. Once a fire is going you should not be walking away to look for a tool.
- Warm the pots beside the fire for an hour, turning them. They should be too hot to hold comfortably before anything touches flame. This one step prevents more losses than everything else on this list combined.
- Load with air gaps. Pots not touching each other and not touching metal. A pot jammed against a barrel wall heats on one side only and cracks down the middle.
- Light small and feed it gradually. You are trying to get the whole mass warm before any part of it gets hot.
- Burn to full heat, then let it fall to coals. That is the point where carbon gets driven into the clay rather than sitting on it.
- Cover it, with a small gap for a pit or barrel and the lid shut for raku, and stay with it until the fire is out. Then overnight to cool for a pit or a barrel. Twenty to thirty minutes in a can for raku. Opening early lets oxygen in and burns your blacks straight off.
- Unload a pit or barrel cold, not warm. A pot that survived the entire firing will still crack if you pull it into cool air too soon.
The three that will get you
- A loud crack and a hole blown out of a wall. Trapped moisture flashing to steam. The pot was not bone dry, or it was not preheated long enough, and usually both.
- A pot in two clean halves. Thermal shock from heating or cooling too fast, or a clay body with nothing open in it. Slow down, or change clay.
- Everything came out uniform gray. Either oxygen got back in before the pot cooled, or the surface was too rough to hold carbon. Seal the container better and burnish harder. Both fixes are free.
Pack this
Bone dry pots, sawdust and small dry wood, newspaper and straw, copper carbonate and salt, heavy gloves and long tongs, a fitted half face respirator with organic vapor, acid gas and P100 filters, eye protection under a face shield if anything glowing is being moved, an extinguisher and a hose, a plain uncoated steel lid (never galvanized) or an old kiln shelf to smother with, and food and something to sit on. It is a long day.
Two videos, in this order
Eighteen minutes from digging and drying wild clay to firing in an open pit. The video says it is for beginners.
Watch on YouTubeThe five things that break pots outdoors: over firing, under firing, under oxidizing, thermal shock and poor preheating.
Watch on YouTubeThere is a much longer version of this page, with all seven methods, the temperature science, the surface ladder, a full troubleshooting section and twelve videos. Switch to Comprehensive at the top.
Why this page makes you read it and watch it
Firing without a kiln runs on judgment, not settings. The words carry the judgment, the videos show what right and wrong look like. Read first, then burn.
What counts as a primitive firing
A primitive firing is any firing where the fire, the smoke or the vapor touches the pot directly, and the temperature stays low enough that the clay never turns to glass. That is the whole definition, and it is worth holding onto, because it explains everything else on this page.
Nine minutes on firing without a kiln. The chapters cover the primary fire, the secondary fire, temperature, and what went wrong.
Watch on YouTubeWhat it includes
Open fires and pits. Sawdust and barrel firings. Raku and every variant of it, including naked raku, horsehair, feather, copper matte and obvara. Saggar firings, whether the saggar is a thrown clay box, a metal tin or a wrap of heavy aluminum foil.
What it does not include
Anything where a glaze does the work. An electric kiln firing to cone 5½ is a sealed, clean, oxygen-rich box, and the pot comes out with a layer of glass over it. Nothing in that firing touches the clay except heat.
The one that sits on the fence. Salt and soda firing is atmospheric, which means vapor lands on the bare pot exactly like it does here, but it happens at cone 9 to 10 in a purpose-built kiln. It shares the philosophy and none of the temperature. If that is what you are after, read our salt and soda page instead.
What nobody puts in the reel
Primitive firing photographs beautifully and that is exactly the problem. Here is what the photographs leave out.
- You will break pots. Not one, and not only at the start. Even a careful pit firing loses pieces, and every experienced person you will watch on this page has a bucket of sherds they did not film.
- Nothing you make is functional. Porous clay holds water for a while and then weeps it out through the wall. It is not food safe, it will not survive a dishwasher, and no amount of sealer changes what the clay is.
- You cannot repeat a result. Two identical pots, side by side in the same pit, come out different. That is the appeal, and it is also why you should never promise somebody a specific piece.
- It takes a whole day, and most of it is waiting. Loading is slow, the burn is hours, and a proper cool down runs overnight.
- We do not do this at the studio. There is no pit at The Clay Hole and there is not going to be one. What we do run is raku, outdoors, at workshops announced one at a time on the calendar. Everything else on this page is written for a firing you go and do somewhere else.
Everything follows from staying below the glass
A stoneware glaze firing melts silica into a continuous layer of glass and seals the clay underneath it. Primitive firings never get near that. They stop hundreds of degrees short, the clay stays open and thirsty, and that porosity is what lets carbon and metal vapor soak into the surface instead of sitting on top of it. Read this drawing once and the rest of the page explains itself.
- Sawdust and barrel smolder around 1,100 to 1,400 F. The coolest of the family, and the gentlest on a pot.
- Open fires and pits run roughly 1,200 to 1,800 F, and it is uneven across the pit. Two pots a foot apart do not see the same firing.
- Raku is pulled at roughly 1,650 to 1,850 F, hot enough to melt a low fire glaze and no hotter.
- A bisque firing here goes to cone 05, about 1,888 F. Every primitive firing on this page stays well below the cone 5½ glaze firing that seals clay into glass.
- A glaze firing here goes to cone 5½, just over 2,180 F. That is where glass forms and where a pot becomes watertight. Nothing on this page reaches it.
This is why a pit fired pot is porous, why the black rubs off if you handle it hard, and why sealing it afterwards is a finish rather than a fix. It is also why these firings are so forgiving of wild and dug clay that would slump into a puddle at cone 5½. If you want the longer version of what heat is doing to clay, read what a kiln firing actually does .
Six decisions that are the same in every one of these firings
The methods look wildly different from the outside. A pit in the dirt and a propane kiln on a driveway have nothing visually in common. But they ask you the same six questions, in the same order, and almost every lost pot is one of these answered wrong.
Which clay
Open, grogged and forgiving. Grog and sand give the body somewhere to put the stress when it heats unevenly. Smooth, tight, plastic bodies have nowhere to put it and crack instead.
Which form
Round, even, thick enough to be tough and thin enough to heat through. Every attachment, undercut and sharp corner is a place where two thicknesses meet and pull against each other.
How dry
Bone dry, measured in weeks rather than in how it feels. Any water still hiding in a wall becomes steam at temperature and leaves through the nearest surface, taking clay with it.
What surface
The fire can only decorate what you give it. A rough wall scatters smoke into a gray blur. A burnished or terra sigillata wall holds it as a hard black line.
How fast up
Slowly in every method but raku, which starts gently and then climbs fast on purpose. The heat has to reach the middle of a wall before the outside gets far ahead of it. Preheating is not a nicety, it is the single highest return on your time all day.
How fast down
Slowly for everything except raku, where the whole point is speed. That is precisely why raku has the highest loss rate of the family and why raku clay bodies are chosen so carefully.
Most losses happen weeks before the fire
By the time you are standing over a burning pit, the outcome is mostly decided. A pot that was going to survive was built to survive, and the building rules are the same whichever method you end up choosing.
Build it like this
- Pick a clay with grog or sand. Of the eight clay bodies we carry, the two we recommend for anything involving direct fire are B-Mix with Grog and Berlin Gray. That is not us being precious. Those two survive thermal shock and the others accept a loss rate we would not want a room full of people to accept at once.
- Keep the walls even, around a quarter inch. Even matters more than thin. A wall that is a quarter inch in one place and half an inch an inch away will crack at the join between the two.
- Round beats angular. A curve spreads stress around itself. A corner concentrates it in one line and then splits along that line.
- Compress the floor and the rim properly. Every bit of throwing discipline pays back double here, because the fire will find whatever you skipped. If you are unsure what that means, read compressing the floor and the rim .
- Start small and make more than you need. Six small pots teach you six times as much as one large one, and you will not mind losing two of them.
- Hand building is a genuinely good fit. Pinch pots and coil pots suit these firings, and they suit the aesthetic. See pinch pots and coil building .
Leave these off
- Handles, spouts and knobs. An attachment is a different thickness stuck to a wall, heating at a different rate. They pop off, and often take a patch of wall with them.
- Fine detail and thin rims. A knife edge rim is the first thing to chip when a pot gets moved with tongs or buried in coals.
- Glaze, of any kind. Outside of raku, glaze has no business here. It will not melt properly at these temperatures, and where it does soften it will glue your pot to whatever it is resting on.
- Anything you would be upset to lose. Everybody ignores this one once and only once.
The shine is decided long before the fire
This is the part beginners skip and then wonder why their pots came out looking like gray smudged flowerpots. Smoke lands on whatever texture you hand it. If the wall is rough, the carbon scatters and reads as dirt. If the wall is polished, the same carbon reads as a hard black mirror, and the difference between the two is entirely your labor, not the firing.
The ladder, cheapest effort first
- Bare clay, smoothed with a rib. Free, takes about a minute, and gives you soft grays and browns. Perfectly respectable, and the right starting point for a first firing.
- Burnishing. Rubbing a wall at hard leather hard with a smooth stone or the back of a spoon until the fine particles lie flat and it shines. This is the single biggest upgrade available to you and it costs nothing but time.
- Terra sigillata. A very fine clay slip, brushed thin and polished with a soft cloth. It gives a burnished look with less rubbing, and it takes colorants beautifully.
- Both. Burnish the clay, then a coat or two of terra sigillata, then polish again. This is what the best pit fired and horsehair work you have seen is doing.
- Resists and wraps. Slip resist for naked raku, foil and combustibles for saggar, masking for hard edges. These are surface decisions too, and they are covered on the method pages.
We have a whole page on this one subject, with the recipes and the timing: burnishing and terra sigillata . If you do nothing else on this page, do that page.
Two people doing it properly
Fourteen minutes on burnishing, with a little history and some troubleshooting. The chapters cover tools, the final shine and burnishing with oil.
Watch on YouTubeEight minutes on what terra sigillata is, how modern and Roman versions differ, and how levigation refines the slip.
Watch on YouTubeBone dry greenware, or bisque it first
This is the one real decision that splits the family, and both answers are defensible. The traditional methods fire raw greenware straight into the fire. Most modern studio versions bisque first. Here is what each one actually costs you.
| Raw greenware | Bisqued first | |
|---|---|---|
| Risk of loss | Highest. One firing has to drive off chemical water and harden the pot at once. | Much lower. The scary part already happened in a controlled kiln. |
| Surface | Carbon soaks deepest, and the blacks go darker and richer. | Slightly less absorbent, so colors read a touch lighter. |
| Preheat | Non negotiable, and long. An hour or more warming beside the fire. | Still do it, but you have more margin if you get it slightly wrong. |
| Cost | Nothing extra. | Nothing extra here either. Bisque comes with the pieces you glaze here, so ask us before bringing work you plan to fire only elsewhere. |
| Best for | Wild clay, ancient replication, and anyone chasing the deepest blacks. | Your first several firings. A cone 05 bisque softens a plain burnish, so for a polished pot use terra sigillata, or ask us first. |
Our recommendation. Bisque first until you have run four or five firings and know your own fire. Bisque comes with the pieces you glaze here, so ask us before bringing work you plan to fire only elsewhere. Wild or outside clay never comes into our kilns. Once you want the deepest carbon you can get, try a raw firing with pots you are prepared to lose. If you are working with clay you dug yourself, read prepping and testing wild clay first, because an untested body raw fires very differently.
The seven, side by side
If you strip out the romance, choosing between these comes down to two questions. What do you want the surface to do, and what equipment can you actually get your hands on?
| Method | What it gives you | What it needs | Effort | Our page |
|---|---|---|---|---|
| Open fire and pit | Soft flashing, blushes of pink and orange, deep blacks | A legal outdoor fire, a day, fuel, colorants | A full day plus overnight cooling | Pit firing |
| Sawdust and barrel | Soft grays to velvet black, gentle gradients | A steel drum, sawdust, a lid | Light the top, stay with it until the fire is out, then leave it to cool overnight | Covered on this page and in the pit firing guide |
| Raku | Metallic luster, copper flash, crackle, hard blacks | A fuel kiln, tongs, gloves, a reduction can, a second person | A couple of hours per load | Raku firing |
| Naked raku | Crisp black crackle lines on a bare white surface | Everything raku needs, plus a resist slip and a glaze over it | Raku, plus real patience at the flaking stage | Naked raku |
| Horsehair and feather | Drawn black lines and smoke trails you place yourself | A kiln you can open hot, tongs, horsehair or feathers | Minutes per pot, once it is hot | Horsehair and feather |
| Saggar | Concentrated color from salts, copper and organics | A container, foil or a clay box, plus combustibles and salts | Slow to pack, low and slow to fire | Saggar firing |
| Obvara | Warm tan and brown marbling, like scorched bread | A raku setup and a fermented flour and yeast batter made days ahead | Days of fermenting, seconds of dunking | Covered on this page |
If you are choosing for the first time and want one answer. Barrel firing. It is the cheapest to set up, the gentlest on your pots, the easiest to keep under control, and it teaches you what smoke does to a surface without asking you to handle anything glowing.
Seven ways in, each with somebody good doing it
Read the description, watch the clip, then follow the link if that is the one you want. None of these people work for us and none of them know we exist. They are here because they teach the thing properly and they show the parts that go wrong.
1. Open fire and pit firing
Eighteen minutes from digging and drying wild clay, through tempering, forming and drying, to firing in an open pit. The video says it is for beginners.
Watch on YouTubeThe oldest firing there is, and still the most direct. Pots are nested in a pit or on the ground, packed around with sawdust, wood, dung, seaweed, copper carbonate and salt, then buried in fuel and burned down over hours. Never burn treated or painted wood, plywood, plastic, foam, rubber, glossy paper or anything that once held a solvent or pesticide.
What you get is flashing: pinks, oranges, soft grays and black, placed by where the fire happened to run rather than by you. Nothing about it is repeatable, which is the point.
Start here if you have a legal place to burn and a whole day. Full walkthrough on our pit firing page .
2. Sawdust and barrel firing
Eleven minutes on pit and barrel firing, with pots packed in sawdust. The description calls it the channel’s first barrel firing video.
Watch on YouTubeA clean, uncoated steel drum (never galvanized, painted or plastic lined, because zinc fumes make people sick), layers of sawdust, pots nested in with combustibles between them, lit at the top and left to smolder downward under a loose lid, with a person beside it and water and a shovel within reach until the fire is out. It can run for twelve hours or more, so plan for that. Once the drum is cold to the touch on the outside, the pots come out, often the next morning.
The results are the softest in the family: grays shading into velvet black, with edges that look drawn rather than burned. It is also the cheapest way in and the easiest to keep under control, because it smolders slowly downward from the top.
Start here if you want to learn what smoke does to a burnished surface without handling anything glowing.
3. Raku
Twenty one minutes on firing raku in a homemade kiln. The chapters follow the first, third and fourth firings and the changes made after each.
Watch on YouTubeBisqued pots go into a small fuel kiln, get taken to roughly 1,650 to 1,850 F in under an hour, and are pulled out glowing with tongs and dropped straight into a can of sawdust or newspaper. The lid goes on, everything catches, and the starved atmosphere pulls oxygen out of the glaze.
That is where the metallics come from. Copper glazes flash green, red and oil slick. Bare clay goes deep black. Crackle lines fill with carbon and read as ink.
Start here if you have access to a raku setup and somebody experienced. This is the one we run: our raku guide and raku certification .
4. Naked raku
Seven minutes on the naked raku process from MCC Ceramics.
Watch on YouTubeA layer of resist slip goes on, then a raku glaze over the top of it. In the reduction can the glaze crazes, carbon drives down through every crack in it, and afterwards the whole glaze and slip shell flakes away in sheets. What is left is bare white clay with hard black lines exactly where the cracks were.
It is called naked because there is no glaze on the finished piece at all. The glaze was a stencil and it is now in the bin.
Start here if you already raku and want graphic, drawn looking results. Details on our naked raku page .
5. Horsehair and feather
A two minute clip from Marcia Selsor’s raku video on terra sigillata plus feather and horsehair.
Watch on YouTubeA pot comes out of the kiln at around 1,100 to 1,300 F and you lay horsehair, feathers or sugar onto it by hand. Each one carbonizes on contact and leaves a line exactly where it touched. Ferric chloride sprayed on afterwards fumes the surface into oranges and rusts. It is corrosive, so leave it for later.
This is the most hands on method, where you are drawing rather than arranging. It is also the one that rewards a burnished terra sigillata surface most obviously, because a rough wall turns every line into a smudge.
Start here if you want deliberate marks. See horsehair and feather .
6. Saggar firing
Under five minutes on a foil saggar, from preparing the pot to unwrapping the finished piece.
Watch on YouTubeThe pot goes inside a container before it goes in the fire. That container might be a thrown clay box, an old metal tin, or most often a wrap of heavy duty aluminum foil. Inside it with the pot go salts, copper carbonate, steel wool, banana skins, seaweed and coffee grounds. Never put in treated or painted wood, plywood, plastic, foam, rubber, glossy paper or anything that once held a solvent or pesticide.
Sealing that atmosphere in a small space concentrates it. Where an open pit gives you soft gradients across a whole pot, a saggar gives you saturated color packed tight against the wall.
Start here if you want control over which color lands where. Read our saggar page .
7. Obvara
A five minute clip from Marcia Selsor’s raku video, titled as an obvara firing.
Watch on YouTubeThe odd one, and the one most people have never heard of. A batter of flour, yeast, sugar and water ferments for several days. A pot is taken to around 1,650 F, pulled out, and plunged straight into the batter. The mixture scorches onto the hot surface instantly, then the pot is quenched in water to stop it.
The result looks like scorched bread: warm tans, browns and near blacks in a marbled pattern that nothing else produces. Baltic in origin, and it is having a deserved revival.
Start here if you already have a raku setup and want a surface nobody else at the studio has. Plan several days ahead for the batter.
The order of operations, whichever method you picked
The materials change. The sequence does not. Every one of these firings runs through the same eight stages, and the two that people rush are the two that cost them pots.
-
Check the weather and the rules
Wind is the enemy of a controlled burn and the friend of an uncontrolled one. Check the county burn window, check the air quality, and do not fire on a red air day. Utah takes both seriously and so should you.
-
Lay out everything before you light anything
Pots, fuel, colorants, tongs, gloves, respirator, extinguisher, hose, a bucket of water and a flat safe place to set hot things down. Once a fire is going you should not be walking away to look for a tool.
-
Warm the pots
Beside the fire, not in it, for a minimum of an hour. Turn them. They should be too hot to hold comfortably before they go anywhere near flame. This single step prevents more losses than everything else combined.
-
Load
Pots not touching each other, not touching metal, and nested in whatever combustible you chose. Leave space for air to move. A pot jammed tight against a barrel wall heats on one side only.
-
Bring the heat up slowly
A small fire first, fed gradually. You are trying to get the whole mass warm before any part of it gets hot. Rushing here produces the loud crack you will hear and immediately regret.
-
Reach temperature, then reduce
For a pit or barrel, let it burn to full heat and fall to coals. For raku, pull and drop into the can and lid it. Either way, this is the moment the carbon gets driven into the clay.
-
Smother and wait
Cover it. A pit or a barrel gets a lid or a sheet of metal with a small gap left, and a raku can gets its lid shut. Keep a person with it, with water and a shovel within reach, until the fire is out. Then leave it to cool, overnight for pit and barrel. Twenty to thirty minutes in a can for raku. Opening early lets oxygen back in and burns your blacks straight back off.
-
Unload cold, and be patient
For a pit or a barrel, cold means genuinely cold, not warm. A pot that survived the whole firing will still crack if you pull it into cool air too soon. Raku is the exception: it comes out of its can after twenty or thirty minutes, still hot, so heavy gloves, every time.
When it goes wrong, and it will
Almost every failure in this family has a short list of causes, and the cause is usually earlier in the process than the moment it went visibly wrong.
Seven minutes on five outdoor firing problems: over firing, under firing, under oxidizing, thermal shock and poor preheating.
Watch on YouTubeThe six you will meet
- A loud crack and a hole blown out of a wall. Trapped moisture flashing to steam. The pot was not bone dry, or it was not preheated long enough. Both, usually.
- A pot in two clean halves. Thermal shock from heating or cooling too fast, or a clay body with nothing open in it. Slow down, or change clay.
- Flakes lifting off the surface. Spalling. Usually lime or another impurity in a wild clay body, drawing moisture and popping the surface off above it.
- Everything came out uniform gray. Oxygen got back in before the pot cooled, not enough contrast in what you packed, or a surface too rough to hold anything. Burnish more, vary the combustibles more.
- The black rubbed off on your hands. That is loose carbon sitting on the surface rather than in it. Buff it back with a soft cloth and then seal it.
- Colors looked incredible, then faded within a week. They were never fixed. Some fuming effects are genuinely fugitive. Seal promptly and keep the piece out of direct sun.
Cleaning, sealing, and what the pot is actually for
Fifteen minutes comparing a cutting board sealant, lard, starch and milk on earthenware bowls, ending in a water retention test. The maker seals bowls for food and drink. We treat primitive fired pots as decorative only.
Watch on YouTubeWash the ash off with water and a soft brush, and let it dry completely. Resist the urge to scrub. A lot of the softest color sits loose on the surface and a stiff brush takes it straight off along with the ash.
Then buff. A soft cloth, a little pressure, and most pieces come up considerably richer than they looked wet. Some people finish with a thin coat of paste wax, some with an acrylic sealer, and some with nothing at all.
What it is for. Looking at. A primitive fired pot is porous all the way through, so it is never food safe, never dishwasher safe and never genuinely watertight. Put a glass or plastic liner inside it if you want it to hold flowers. Anything you drink out of needs a glaze picked through our Food Safe Lookup, and that is a different page.
Sealing does not make it functional. A wax or acrylic finish deepens the color and stops carbon coming off on your hands. It does not close the pores, it does not make the piece safe to eat from, and it will not survive hot water. Say that out loud to anybody you give one to.
This is the part that hurts people
Everything on this page involves open flame, glowing objects and materials that are genuinely toxic when they burn. None of it is dangerous if you respect it. All of it is dangerous if you improvise.
- Outdoors, always, with no exceptions. Not a garage, not a carport, not a shed with the door open. These firings produce carbon monoxide and dense smoke by design.
- Stand upwind, and move if the wind turns. Copper, salt, chrome and ferric chloride fumes are toxic to breathe. Wear a fitted half face respirator with organic vapor and acid gas cartridges and P100 particulate filters whenever you handle colorant powders or work near fumes, with eye protection under any face shield. If you do not have one, do not use those materials. Ferric chloride is corrosive: leave it out until you have several ordinary firings behind you, and never put it in a wrap with metal.
- Never fire alone. Two people, minimum, for anything involving tongs and a glowing pot. One person handles the pot, the other handles the lid.
- Dress for it. Natural fibers, closed shoes, no synthetics anywhere near heat, long sleeves, proper heat gloves, eye protection, and a face shield for raku. Synthetic fabric melts onto skin.
- Extinguisher and hose within reach, every time. Plus a clear zone around the fire and something safe to set a hot pot down on.
- Never put a narrow necked or closed form into water or batter while it is hot. Water pours in through the neck, flashes to steam, and the piece bursts, and a hole does not change that. Anything enclosed also needs a hole in it before it sees fire.
- Check the burn rules before every firing. Utah counties open and close burn windows through the year and inversion season closes them hard. Check the county, check the air quality index, and if either says no, that is the answer.
Our raku workshops exist partly because of all of the above. They run outdoors, a few times a year, with the kit, the supervision and the second pair of hands already in place. Take the certification if you like, and watch the studio calendar for the next date.
What we do, and what you do somewhere else
What The Clay Hole does
- Raku, outdoors, at our workshops. With the kilns, the tongs, the cans and the team that runs it. There is a certification you can take ahead of time, though it is not required. Everyone signs the waiver and sits through the safety meeting in person, and dates land on the calendar .
- Bisque, with your glazing. Bisque comes with the pieces you glaze here, so ask us before bringing work you plan to fire only elsewhere, such as in a pit. Wild or outside clay never comes into our kilns.
- The clay. Eight clay bodies, of which B-Mix with Grog and Berlin Gray are the two we recommend for anything involving direct fire.
- The making side of it. Wheels, hand building tables, slab molds and nearly 10,000 square feet to spread out in while you build the pots you are going to burn.
What we do not do
- Pit firing. There is no pit here and there will not be one. It needs open ground, a burn permit and a day, and none of those live in a commercial suite in Draper.
- Barrel firings on site. Same reason. Saggar and obvara need the same outdoor kit as raku, so ask us first. Everything you learn here about any of them is for a firing you run yourself.
- Fire glazed work in a pit, a barrel or a saggar. Outside of raku, glaze softens, sticks, and ruins whatever it is resting on.
- Promise you a result. Nobody can, in this family of firings, and anybody who does is selling something.
Every glaze firing here goes to cone 5½, and is priced by the size of the box the piece fits in. That is the opposite end of the temperature scale from everything on this page, and it is where a pot meant for food belongs, with a glaze from our Food Safe Lookup.
What people ask us about primitive firing
Can I do any of this with clay I bought here?
Yes, and B-Mix with Grog or Berlin Gray are the two to reach for. Both are open enough to survive being heated unevenly. The smoother, tighter bodies we carry will crack at a rate you will not enjoy. If you are firing wild clay you dug yourself, test it small first and read prepping and testing wild clay .
Do I have to bisque first?
No, but for your first several firings you should. A bisqued pot has already survived the most dangerous part of its life in a controlled kiln. Raw greenware takes carbon deeper and gives richer blacks, which is why traditional firings do it, but it loses more pots.
Is a pit fired mug safe to drink from?
No. The clay never reaches the temperature at which it stops being porous, so it holds water in its walls, weeps slowly, and cannot be reliably cleaned. Sealing it changes the look, not the physics. Anything you eat or drink from needs a glaze picked through our Food Safe Lookup.
Why did my pot come out gray instead of black?
Two usual reasons. Either oxygen got back in before the pot cooled, which burns carbon straight back off, or the surface was too rough to hold it. Seal the container better and burnish harder. Both fixes are free.
Can I fire in a fire pit in my backyard?
Often yes, but check first. Utah counties run seasonal burn windows and close them during inversions, and the rules differ between a recreational fire and an open burn. Check your county and the air quality index on the day, and never fire on a red air day.
How long does a firing actually take?
A raku load runs a couple of hours. A pit firing is a full day of tending plus overnight cooling. A barrel firing is an hour of packing and then twelve hours or more of keeping watch while it burns down. None of them are afternoon projects you squeeze in after work.
What is the cheapest way to try this?
A steel drum, a bag of sawdust and six small burnished pots. Cheap to set up, the easiest to keep under control, and it teaches you more about smoke on a surface than any amount of reading.
Is salt and soda firing the same family?
Philosophically yes, practically no. Vapor lands on bare clay in exactly the same way, but it happens at cone 9 to 10 in a purpose built kiln, and the pots come out vitrified and often functional, though an unglazed inside needs a liner glaze. See salt and soda firing .
Two lists to keep open while you work
Pack this
- Pots, bone dry, preferably bisqued
- Fuel: sawdust, shavings, small dry wood
- Combustibles: newspaper, straw, dried leaves, seaweed, banana skins
- Colorants: copper carbonate, salt, steel wool, copper wire
- Heavy leather or welding gloves, and long tongs
- Fitted half face respirator with organic vapor, acid gas and P100 filters, plus eye protection
- Face shield if anything glowing is being moved
- Fire extinguisher, a hose or full buckets, and a shovel
- Plain uncoated steel (never galvanized) or an old kiln shelf to smother with
- A safe flat place to set hot things down
- Water, food and something to sit on. It is a long day
Fire day, in order
- Check the county burn window and the air quality
- Lay everything out before striking a match
- Warm the pots beside the fire for an hour or more, turning them
- Load with air gaps, nothing touching metal or each other
- Light small, feed gradually, no rush
- Burn to full heat, then let it fall to coals
- Cover and smother: a small gap for a pit or barrel, the lid shut for raku
- Stay with it until it is out. Overnight to cool for pit and barrel
- Unload cold, wash gently, dry completely
- Buff with a soft cloth, then seal if you want to
Where to go from here
Go in expecting to be surprised
That is the short version
Every other firing you will ever do is an attempt to control an outcome. This family is the opposite. You do the controllable parts properly, which is the clay, the form, the drying, the surface and the ramp, and then you hand the pot to the fire and find out. Do the first five well enough and the sixth is reliably worth watching.
There is a much longer version of this page with all seven methods, the temperature science, the full troubleshooting list and twelve videos. Switch to Comprehensive at the top whenever you want it.
Nothing fired this way is food safe or watertight. Everything here happens outdoors, with a second person, upwind, and inside your county burn rules.
Which version would you like to print?
Videos come out as a labeled box with the title and channel to search for, since paper does not play them.