Pottery Date Night
 Bring All Your Friends Free Week
 Give a Month of Pottery
 Private Pottery Parties

 The Welcome Booklet
 Your First Ten Sessions
 The Pottery Process
 Finding the Studio
 Your Classes Never Expire
 The Four Tables
 Who’s Who
 The Rewards Program
 Flux Glazes
 The Calculators
 Kiln Tracker
 Holiday Kiln Deadlines

 Beginner’s Tool Set
 Fingernail Clippers
 Mayco Clay Mender
 Epoxy for Kintsugi
 Applicator Bottles
 Large Bead Rack
 Raku Workshop
 Nighttime Raku
 Horsehair and Feather Raku
 The Clay Hole T-Shirt
 Embroidered Crewneck
 Zip-Up Hoodie
 Pre-Made Bisqueware
 Glaze Catchers
 Kiln Cookies
 Clay Cubby Rental
 The Glaze Bible, Printed
 The Book of Molds, Printed
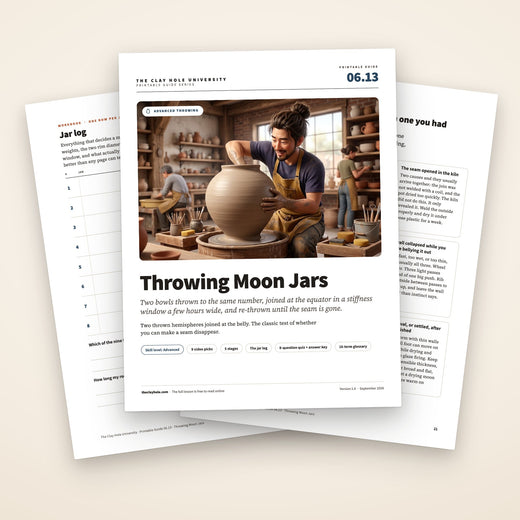
 Printable Pottery Guides
 Free Printable Trackers
 Gifts for Potters
 Christmas Pottery Ideas
 Mother’s Day Gift Ideas
 Pottery Date Night
 Studio Calendar
 2027 Studio Events
 What Should I Do Today?
 How to Throw on the Pottery Wheel
 How to Make a Pinch Pot
 How to Tap Center a Pot
 The Five Stages of Clay
 Is Pottery Hard to Learn?
 Pottery Wheel Practice Drills
 20 Easy Hand-Building Projects
 Everything That Sounds Wrong

 A Beautiful Piece, Every Time
 Slab Roller Tips
 Any Dish as a Slump Mold
 Slab Roller & Slab Mold Certification
 The Pottery Skill Tree
 Clay & Pottery Calculators
 Logging Your Pottery and Glazes
 The Pottery Dictionary
 Why Did My Pottery Do That?
 The Pottery Cone Chart
 Pottery Myths, Fact-Checked
 Is Handmade Pottery Food Safe?
 Incredible Ceramic Artist Videos
 How Dan Throws Giant Pots
 How to Dry Your Pottery
 The Pottery Wheel Introduction
 Pottery by Zodiac Sign
 Personality and the Pottery Wheel
 Pottery for Engineers
 ADHD, Hyperfocus, and Never Running Out
 Hobbies for Burnout
 Screen-Free Hobbies for Adults
 Every Addiction I Ever Had Lost to Art
 Functional Pottery Is Engineering
 How Do We Compare?
 Pottery Classes by City
 Every Pottery Studio in Utah
 Pottery in Draper
 Featured Members
 The Signature Wall
 Making Friends as an Adult Is Brutal
 The Clay Hole Commandments
 2027 Pottery Contests
 2027 Studio Parties
 Gallery Night

 Scream It Into the Void
 Destroy the Glaze Wall
 Daily Affirmation Cards
 Everything That Can Go Wrong
 Subscribe to Our Newsletters
 Contact The Clay Hole
 Corporate Team Building

 Glaze Combinations
 Glazes We Do Not Carry
 Making Glaze Test Tiles
 The Mega Glaze Tool
 How to Use the Mega Glaze Tool

 Glaze Brushing Techniques
 How to Use Underglaze
 How to Use Dipping Glazes
 Glaze Problems, Causes and Fixes
 The Dipping Glaze Guide

 Making a Glaze Catcher
 Fused or Sharp After Firing
 The Signature Wall
 His Viral Videos
 His Own Ceramics
 Meet Mud
The Clay Hole University
How to throw a moon jar
A moon jar is two bowls. You throw them separately, let them stiffen, and join them rim to rim into one round pot. The throwing is the part most people worry about, and it is almost never the part that ruins it.
Written for anyone who can already throw a decent bowl. If you can center two pounds and pull an even wall, you have enough to start. You will not get a good one tonight, and that is not a reason to wait.
Jump to a section
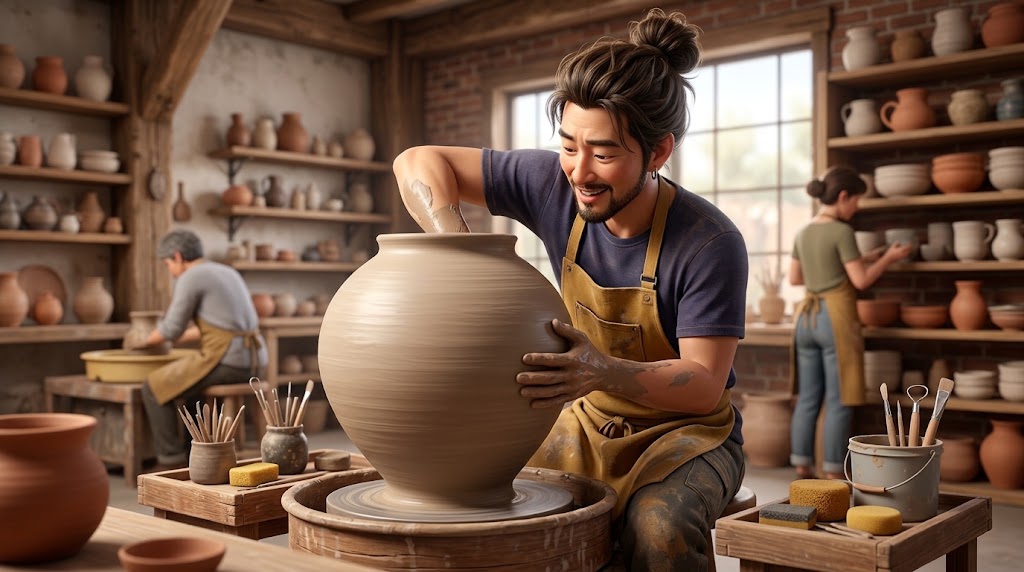
The belly is thrown as a bowl lying on its back. Everything you do to it is a slow push from the inside, with the outside hand there to stop it running away.
Start here
Two bowls, one seam, and a lot of waiting
A moon jar is round because it was made in two halves, not in spite of it. Throw a deep bowl. Throw a second deep bowl the same width. Let both go firm. Turn one upside down onto the other, join them at the rims, and you are holding a sphere with a seam around its equator.
The one thing that decides whether it works
The two rims have to be the same diameter and the same thickness, and both halves have to be the same stiffness when they meet. Everything on this page is downstream of those two sentences. Measure the rims with calipers while they are still on the wheel, because you cannot fix a mismatch later.
-
Throw two matching bowls
Same weight of clay, same rim diameter, walls a touch thicker than you would leave a normal bowl. Cut a wide flat rim on each, about a quarter inch across, and check both with calipers before you stop the wheel.
-
Let them stiffen together
Soft leather hard is the target. Firm enough that a bowl can carry its own weight upside down, soft enough that a fingernail still marks it easily. Both halves under the same plastic, in the same place, for the same length of time.
-
Score, slip, and press them together
Score both rims properly, wet them with thick slip, then lower one onto the other and press straight down. No twisting. Any slip that squeezes out is a good sign.
-
Weld the seam with a coil
Press a thin coil into the joint all the way around and blend it flat with a rib and a wet finger. This is a weld, not a decoration. A seam that is only glued opens in the kiln.
-
Re-throw the joint on the wheel
Center the joined form, wet the seam, and use a rib and light pressure to true the equator back into one continuous curve. The wheel is slow. Your hands are barely doing anything.
-
Cut the mouth and add the neck
Cut a hole in the top half before the clay gets any drier. That hole lets the inside dry and gives any steam a way out, so it has to exist before the pot goes in a kiln. Throw a short collar, score, slip and attach it.
-
Trim a foot, then dry it slowly
Invert on a soft chuck or a towel ring, trim a small flat foot, and then dry it under loose plastic for a week or more. Fast drying is what cracks the seam, not the joining.
Reading the steps first and then watching somebody do it beats watching alone. Video shows you the speed and the pressure. Words tell you what the person is solving, and words are the thing you can glance at with clay on your hands. There are two videos below and a much longer version of this page behind the Comprehensive toggle.
Watch for the rims
Two four pound balls, thrown to match. Notice how thick the walls are left, how flat the rims are cut, and how neither half looks like half a sphere until they are together.
Watch for the squeeze out
Slip coming out of the joint all the way around is the confirmation you want. Then watch how much of the finished roundness arrives after the join, on the wheel, rather than before it.
Why this is written down
Read it, watch it, then read it again with muddy hands
We could have posted nine videos and called it a page. We did not, because video and writing are good at completely different jobs, and a moon jar happens to need both.
Video runs at the speed of the clay
Nobody can write down how slowly a wall swells. You have to watch a hand push from the inside for eleven seconds and see how little happens. Pressure, angle, pace and the moment somebody stops and lets the wheel run are all motion, and motion belongs on video.
Writing is the thing you can glance at
A video is a line. You watch it end to end and you cannot scan it. Finding the third thing somebody said at 6:12 means dragging a scrubber with a wet thumb. Seven numbered steps can be read in two seconds, in any order, off a phone leaning against a water bucket.
And the part nobody enjoys hearing
Watching somebody who is good at something feels like learning, and it is mostly a lie. Recognizing a move is not owning it. Writing forces the reason into words: the wheel is slow because centrifugal force is trying to open the belly while you close it. Once that is said out loud you stop copying a hand position and start solving a problem.
So this is the order we would use
Read the steps first, before you watch anything, so the words already mean something. Then watch one video all the way through without trying to learn from it, just to see the shape of the whole job. Then throw, with the step list open on your phone and the video closed. Come back to the video afterward, once you know what went wrong, because that is the pass where you will actually see the answer.
The form
What a moon jar actually is
The moon jar is a Korean form, made in white porcelain during the Joseon dynasty, mostly across the 1600s and 1700s. The Korean name is dalhangari. The English name is modern, coined in the twentieth century by people who thought the pots looked like a full moon, and it stuck because it is a good description.
The thing worth knowing before you throw one is why it was made in two pieces. A sphere that size cannot be thrown in one go. The clay at the widest point has nothing under it, the wall is being asked to hold a shape that leans out over open air, and it goes down. So potters threw two deep bowls and joined them, and the slight lopsidedness that results from two halves never being identical is the reason these pots look alive instead of manufactured.

-
The mouth is about a third of the belly
Roughly 36 percent of the widest diameter in the drawing. Wide enough that the pot reads as open, narrow enough that it still reads as round. Go much wider and you have a bowl. Go much narrower and you have a bottle.
-
The widest point sits at the middle, and that is the seam
Because the pot is two equal halves, the equator is both the widest point and the joint. That is convenient: when you re-throw the joined pot you are working the widest, softest part of the curve, which is exactly where you want to be pushing anyway.
-
The foot is a little smaller than the mouth
About 30 percent of the belly. A foot the same size as the mouth makes the pot look like a barrel. A slightly smaller foot is what makes it look like it is floating, which is the whole trick.
-
Height and width are close to equal
The drawing is about six percent taller than it is wide. That is the range to aim at. Two bowls that are too shallow give you a squashed pumpkin, and two that are too deep give you an egg. Neither is a disaster, and both are common on a first attempt.
Watch this one first, and not for technique
You are about to spend two evenings and eight pounds of clay chasing a shape. It helps enormously to have looked hard at the real thing first, because the target is not "a sphere." It is a specific balance of mouth, belly and foot that your eye can learn faster than your hands can.
Pay attention to how little decoration there is and how much the surface still does. That is what you are aiming the glaze at later.
What to watch for
- How much of the work is done with the hand inside, pushing, rather than with both hands squeezing.
- The wheel speed. It is slower than you expect and it stays slow.
- How thick the rim is left. Nobody making one of these throws a thin, tidy rim, because that rim becomes a structural joint.
- How long the pot sits doing nothing between stages. Most of making a moon jar is waiting.
The first decision
Two halves, or one piece
Small round pots can be thrown in one go, closed at the top like any enclosed form. Big ones cannot. There is one question that tells you which you are dealing with, and it is not about your skill level.
Ask this before you weigh out clay
Can you get a hand inside the pot and still reach the widest point, with room to push? If yes, throw it in one piece. If no, throw it in two halves. That is the whole rule. For most people and most wheels the crossover lands somewhere around seven or eight inches across, which is roughly three pounds of clay.
Nothing about this is a judgment on your throwing. Potters who have made hundreds of these still make everything above a certain size in two halves, because the alternative is a puddle.
| Finished size | How to make it | What usually goes wrong |
|---|---|---|
| Under about 5 inches | One piece. Throw a fat cylinder, belly it out, and collar the top closed like any enclosed form. | Almost nothing. This is the version to make three of before you attempt anything bigger. |
| 5 to 8 inches | Either. One piece is faster. Two halves gives you a rounder belly, because you are not fighting to collar a wide opening closed. | Collaring a one-piece pot this size thickens and softens the shoulder, and it folds. Slow down and take more passes than feel necessary. |
| 8 to 14 inches | Two halves. Two equal bowls, joined at the equator, then re-thrown on the wheel. | The rims do not match, or one half is stiffer than the other. Both are decided before you join, not during. |
| Over 14 inches | Two halves, and consider throwing each half itself in two sections. See our page on throwing pottery in sections. | Weight. A large half is heavy, awkward and soft, and most losses at this size happen while carrying it, not while throwing it. |
The one-piece route, done well
This is the route for anything you can reach inside. Watch the moment the wall stops going up and starts going out, and watch how the hand outside does almost nothing except be present.
If you have already read our page on throwing enclosed forms , everything here will look familiar. A one-piece moon jar is an enclosed form that got opened again at the top.
What to do first
Make a small one-piece round pot before you make a big two-piece one. It teaches you what a belly feels like when it is about to give up, and it costs you an hour instead of an evening. Then go to two halves for anything you actually want to keep.
Setup
Before you sit down
Four decisions, all of them cheap to get right and expensive to get wrong once there is clay on the wheel.
Clay: smooth, plastic, and plenty of it
Porcelain is what the originals were made from and it is the hardest thing you could pick for a first attempt. It moves less, it slumps sooner, and it punishes uneven walls. A smooth, plastic stoneware will hold a wide belly with far less argument and will still look like a moon jar under a white glaze.
Whatever you pick, throw both halves from the same bag on the same day. Two halves from two clay bodies shrink at different rates and split at the seam.
Weight: two identical balls
Weigh them. Do not eyeball them. Two and a half to three pounds each is a sensible first jar and gives you something around eight or nine inches finished. Wedge both, then set the second one aside under plastic so it does not stiffen while you throw the first.
If you are used to jumping up in size , resist it here. Six pounds total is already a large pot once it is round.
Calipers are not optional
This is the one tool people skip and then wish they had not. You need to measure the outside diameter of the first rim and set the second bowl to match it. By eye, a quarter inch of difference is invisible on the wheel and impossible to hide at the seam.
We keep calipers in the studio. Ask if you cannot find a pair.
Bats, and where the halves will live
Throw both halves on bats. You are going to move them, stiffen them and flip one of them upside down, and none of that is pleasant off a bare wheel head. Decide where they will sit while they firm up before you start, and make sure it is somewhere they can be covered together.
Our page on bat or no bat covers the trade-offs if you normally throw without one.
The tool list, so you can gather it in one trip
- Calipers
- A flexible metal or rubber rib, and a wooden rib with a curved edge
- Needle tool
- Cutting wire
- Sponge, and a second sponge on a stick for reaching inside
- A scoring tool, a fork, or a serrated rib
- A tub of thick slip made from the same clay body
- Two bats and enough plastic to cover both halves together
Stage one
Throwing the two bowls
You are not throwing a bowl you would eat from. You are throwing half a sphere lying on its back, with a rim that has one job: to meet another rim exactly. Ten steps, and steps eight and nine are the ones people skip.
-
Center, and take your time about it
Three pounds is enough clay that a wobble you could ignore on a mug becomes a wall that is thick on one side and thin on the other. A half with an uneven wall will not hold a belly. Our page on throwing on the wheel covers centering if you want the refresher.
-
Open wide and set a flat floor
Open to about half the width of your clay and keep the floor flat and compressed. This floor becomes the top of the pot in one half and the bottom in the other, so it needs to be even either way. Compress it properly with a rib before you go up.
-
Pull the wall straight up first
Do not start curving yet. Pull a short, thick, straight-sided wall, two or three passes, and leave it noticeably thicker than a normal bowl. About a quarter inch at the top and closer to three eighths near the base. All of that extra clay gets used later.
-
Now belly it out from the inside
Slow the wheel down. Put your inside hand against the wall low, and push out, gently, while the outside hand rides along just above the swell to stop it running. The wall goes out because you pushed it, not because the wheel threw it.
-
Take three passes, not one
Each pass moves the wall a small amount and each pass thins it. Trying to get the whole curve in one push is the single most common way a half collapses. If the wall starts to feel floppy, stop, rib the outside to firm it up, and come back.
-
Stop the curve short of vertical
You want the wall arriving at the rim still leaning outward slightly, not turning back in. Half a sphere ends at its equator, and the equator is the widest point, so the last thing before the rim should be the widest thing on the pot.
-
Rib the outside into one clean curve
A curved wooden rib, held against the outside while the inside hand supports, will take the small dents and steps out and leave you a real arc. This is worth two full minutes. A seam blends beautifully into a good curve and looks like a scar on a lumpy one. See using ribs while you throw .
-
Cut a flat rim, about a quarter inch wide
Hold a flat rib or a metal scraper level against the spinning rim and cut it into a flat, horizontal band. Not a rounded rim, not a tapered one. A flat shelf. Two flat shelves meet each other. Two rounded rims meet at a line and trap air.
-
Measure the outside diameter and write it down
Calipers, across the outside of the rim, while it is still turning slowly. Note the number. The second bowl gets thrown to that number, checked while there is still clay to move.
-
Wire it off, and throw the second one
Leave it on its bat. Wire underneath now so it does not stick as it dries. Then throw the second half from the same weight of clay to the same diameter, and cut the same flat rim. Getting a pot off the wheel has its own page if that part is where you lose things.
Match the rims
Your two halves will not be identical. Nobody’s are. What matters is that the rims match, because that is the only place they physically have to agree. A belly that is slightly fuller on one side is a moon jar. Two rims that are a quarter inch apart is a repair job.
What to watch for
- Two four pound balls, thrown to match each other. That is the whole plan and it is worth seeing it stated in clay.
- How thick the walls are left compared to a normal bowl.
- The rim getting cut flat rather than rounded off.
- How wide and low each half stays. Neither one looks like half a sphere until they are together, which is disconcerting the first time.
Part two, where they get joined, is further down this page.
Stage two
The stiffness window, which is the whole ball game
More moon jars are lost here than at the wheel. Both halves have to arrive at the same firmness at the same time, and that firmness is narrower than people expect.
Too soft
The upper half sags under its own weight the moment you invert it. The belly flattens, the rim spreads, and you get an oval. If a half will not hold its shape upside down in your two hands for ten seconds, it is not ready.
Too firm
The rims will not weld. They will stick, which feels like success, and then the seam opens in the bisque firing or the glaze firing and you find out weeks later. Leather hard is already too late for a good join.
The test we actually use
Press a thumbnail into the outside wall. It should mark easily and leave a clean edge, without the clay feeling wet or greasy under your thumb. That is soft leather hard, and that is the window. Both halves get tested, not one.
Getting there usually takes somewhere between two and six hours under loose plastic, and it depends far more on how dry the room is than on the clock. In Utah, assume things are drying faster than you think.
Cover them together
One sheet of plastic over both bats, loosely, not sealed. Sealed plastic keeps them soft forever. Naked halves stiffen in an hour and go past the window.
Watch the rims, not the bellies
The rim is thin and exposed and it stiffens first. If the rims have gone hard while the walls are still soft, wrap a damp paper towel around each rim for twenty minutes to bring them back.
If one gets ahead of the other
Slow the fast one down rather than rushing the slow one. Bag the firmer half in plastic and leave the softer one open, and check every twenty minutes. Our page on softening hard clay covers the rescue if it has gone properly stiff.
Stage three
Joining the halves
The join takes about four minutes and it decides whether this pot survives two firings. Score properly, slip generously, press straight down, and then weld the outside with a coil. A seam that is only glued will open, and it will open long after you stopped worrying about it.
-
Score both rims, hard
Deep, crossed scratches all the way around both flat rims, right to both edges. Not a polite scuff. You are giving the two clay bodies something to grip. Our page on score and slip goes into why this works.
-
Slip both, thickly
Thick slip made from the same clay body, the consistency of yogurt, painted onto both rims. Both, not one. Slip on one rim only gets absorbed by the dry side and leaves you a dry contact.
-
Invert the top half and line it up
Lift the second half with a hand under the bat, turn it over, and bring it down onto the first with your eyes at rim level. Take a second to get it concentric before anything touches. This is easier with a second person, and it is not cheating to ask.
-
Press straight down, and do not twist
Even pressure with both hands, straight down, until slip squeezes out of the joint all the way around. Squeezed-out slip is the confirmation you wanted. A twist at this point smears the two rims past each other and thins the joint.
-
Weld the outside with a coil
Roll a thin coil of the same clay, press it into the outside of the seam all the way around, and blend it upward and downward into both halves with a rib and a wet finger. Now the join is a continuous thickness of clay rather than two edges holding hands.
-
Leave the inside alone
You cannot reach it and you do not need to. The outside weld plus properly slipped rims is enough, and it is exactly what the traditional pots have. Trying to reach in through a hole you have not cut yet is how people put a thumb through a wall.
You have just made a sealed balloon
There is now a closed pocket of air inside your pot, and that is useful for the next twenty minutes: it stiffens the whole form and lets you push the belly around from outside without it caving. That trapped air is not the reason you must cut a hole before this thing ever sees a kiln. The reason is water, and it is further down this page.
What to watch for
- How firm both halves are before they meet, and how confidently the top one gets picked up and turned over.
- The slip squeezing out of the joint, which is the visual you are trying to reproduce.
- The seam being worked back into the curve rather than left as a ridge.
- How much of the finished roundness arrives after the join, not before it.
[Tutor’s artwork] [Full version] Half-and-half Moon Jar: Merging the Two Halves
NOOB ceramic
Worth it for the merge alone
The value of this one is the length. It does not cut away from the boring part, and the boring part is the part you need. You get to see how long somebody spends blending a seam, which is much longer than anybody expects and is the reason their seams disappear.
Stage four
Re-throwing the joined form
This is the stage that turns two bowls into a moon jar, and it is the one missing from most people’s first attempt. The joined pot goes back on the wheel and gets thrown again, from the outside only, until the seam stops being a seam and becomes the widest part of a single curve.
-
Stick it down and center it
Set the joined pot back on its bat, or on a fresh one over three coils of soft clay pressed down to hold it. Turn the wheel slowly and tap it true. If you have read our page on tap centering , this is the same move on a much bigger object.
-
Wet the seam and the area around it
A sponge of water over the equator, a band about three inches wide. You are softening the surface you are about to move, not soaking the pot.
-
Rib the equator, gently, with the wheel slow
A flexible metal rib held against the seam, angled slightly, with your other hand steadying the pot above or below. Light pressure. You are shaving the ridge down into the curve, and the trapped air inside is what stops the wall from folding away from you.
-
Push the belly out if you want more roundness
Two hands cupped around the widest point, pressing gently inward and upward while the wheel turns, will actually swell a sealed form outward as the air inside resists. Small amounts. This is the move that rescues an egg-shaped jar into a round one.
-
Run a finger over the seam and feel for it
Your eyes will forgive a ridge that your fingertips find instantly, and glaze will find it too. Keep going until you cannot feel where the join is.
Do not chase perfect
A moon jar that is very slightly off round is the correct outcome. The historic pots are visibly lopsided and that is a large part of why people love them. Stop when the seam is invisible to your fingers, not when the profile is a mathematical circle.
Why we included a big one
This one is a moon jar in two halves, thrown big, so the join is easy to see. Everything here transfers directly. If you are heading toward something big, our page on throwing pottery in sections is the next thing to read.
Stage five
The hole, the neck and the foot
You are holding a sealed clay balloon with an invisible seam. Three things left, and the order matters: cut the mouth while the clay is still workable, add the neck, then flip it and trim a foot once the top can take the weight.
-
Find the center of the top and mark it
Turn the wheel slowly and hold a pencil or a needle tool steady against the top. It will scribe a circle, and the middle of that circle is your center. Mark the mouth diameter the same way, at about a third of the widest part of the pot.
-
Cut the hole with a needle tool, wheel stopped
Go slowly, keep the tool vertical, and support the wall from outside with your other hand. Lift the disc out cleanly and keep it, because it is a useful test tile for the glaze you are considering.
-
Clean and compress the new rim
A freshly cut edge is rough and full of stress. Wet a finger and run it around the inside and outside of the cut, then compress the rim with a sponge or a rib on a slow wheel. An uncompressed cut edge is a crack waiting for the bisque firing.
-
Throw a short collar and attach it
Throw a small ring or short cylinder from a fistful of clay, the same diameter as your hole, and let it stiffen slightly. Score and slip both, press it on, and blend the outside with a coil the same way you did the seam. A moon jar mouth is short and slightly flared, not a tall neck.
-
Wait, then flip it for the foot
The top has to be firm enough to carry the whole pot upside down. That is usually the next day, not the same evening. Nest the pot mouth down in a soft chuck, a bowl lined with foam, or a ring of towel.
-
Trim a small, flat, generous foot
Trim a flat foot around thirty percent of the widest diameter. Resist the urge to cut a deep, delicate foot ring. This pot is heavy and round and it needs to sit down solidly, and a broad flat foot is also what stops it slumping in the glaze firing. Our page on feet and foot rings covers the options, and trimming and turning covers the technique.
What to watch for
- The order of operations at the top. Hole, then rim, then neck.
- How small the added neck is relative to how big it feels while you are throwing it.
- The pot going upside down and what it is resting on while the foot gets trimmed.
Physics, briefly
Steam, slow drying, and where moon jars crack
Two of the three ways a finished moon jar dies are decided after the making is over. Both of them are about water getting in and out of a shape whose inside you cannot reach.
The water has to have a way out
Water is what bursts pots, not air. A moon jar is the hardest thing in the studio to dry, because the inside cannot breathe and the seam is the thickest part of it, so it is the likeliest piece you own to still be holding water on firing day. That water flashes to steam at 212°F, takes up roughly 1,600 times the room it did as a liquid, and has to force its way out. If the only exit is a microscopic flaw in your seam, it will use that, and it will widen it on the way. Heated air is the small half of the story: from room temperature to boiling it grows about 27 percent, which a porous greenware wall lets out without complaint. The mouth is what lets the inside dry and gives any steam a way out, which is why cutting it is not optional and not a decoration.
If you ever make a fully closed round form on purpose, it still needs a pinhole somewhere, usually under the foot.
The seam dries last and shrinks most
The weld is thicker than the walls on either side of it, so it holds water longer, and it is the last place to shrink. Everywhere else has already finished moving and is holding the seam still while the seam tries to contract. That is what tears a join open, and it happens on the shelf, not in the kiln.
Slow drying is the entire answer, and there is no substitute for it.
Round things dry unevenly
The belly is exposed on all sides and the inside is a sealed cave with one small hole. The outside dries fast and the inside does not, and the wall ends up trying to be two different sizes at once. Loose plastic slows the outside down until the inside can catch up.
How we would dry one
- Days one to three: loose plastic tent over the whole pot, not touching it, not sealed. A dry cleaning bag is ideal.
- Days four to seven: plastic pulled back a little further each day, so the pot is spending more time uncovered.
- Week two: uncovered, but not in a draft and not near a heat vent.
- Before it goes in a bisque: it should feel room temperature, not cool. Cool means water, and water in a thick seam is a crack.
About two weeks is normal for a jar this size, and there is no reward for rushing it. Everything else on this page can be redone. A cracked seam cannot.
Glaze and kiln
Glazing and firing something this round
A moon jar is a large, heavy, curved, mostly featureless surface, which makes it both the easiest and the hardest thing to glaze. Easy because there is nowhere for a glaze to hide. Hard for exactly the same reason.
The surface shows everything
Every brush lap, every drip and every thin patch is visible on a big plain curve, because there is no pattern to break it up. If you are brushing, plan on three even coats and change direction with each one. If you want a single flawless field of color, ask an instructor how they would glaze a piece this size.
Our guides to dipping glazes and to glazing big and intricate pottery faster are both worth reading before you start on a piece this size.
Holding it while you glaze it
There is no comfortable grip on a sphere. Two hands under the belly means fingerprints in the glaze on the widest, most visible part of the pot. Glaze the inside first through the mouth, let it dry, then hold the pot by the foot and the mouth for the outside and touch up the two contact points last.
Our glaze finder is a fast way to see what a glaze actually does before you commit a firing to it.
Slumping is a real risk at this size
A wide round form with thin walls and a small foot can settle outward in the glaze firing. We fire glaze to cone 5½, which is cone 5 with a twelve minute hold, and at that temperature a clay body is soft for a while. Keep the belly walls a sensible thickness and keep the foot broad, and this stops being a worry.
Bisque, and the cost of the glaze firing
Bisque goes to cone 05 and it is free. Glaze firing is charged by volume at five cents per cubic inch with a four dollar eighty minimum, and a moon jar is one of the very few things anybody makes here where that number is worth working out in advance. A nine inch jar is not a mug. Our calculators will do the arithmetic for you.
Space is not the problem. Our largest kiln is a forty two cubic foot L&L bell lift, and it will swallow a moon jar without an argument. Every piece we fire sits on a kiln cookie, and our staff load every kiln, so a jar this heavy and round goes in on one.
Troubleshooting
Nine ways this goes wrong, and which one you had
Three ways this goes wrong on the first night
Almost every failed moon jar is one of these, and almost none of them are a throwing problem. Find yours, fix that one thing, and try again with the same clay.
These are the three that get people on a first attempt. All three are decided before the halves ever touch each other.
The two rims did not match
You joined them anyway and one edge overhangs the other all the way around. Nothing later fixes this. Measure both rims with calipers on the wheel, while there is still clay to move, and throw the second half to the first half’s number.
The top half sagged when you turned it over
It was too soft. A half that cannot hold its own shape upside down in your hands for ten seconds is not ready to be inverted. Give both halves another hour under loose plastic and test again with a thumbnail.
The seam opened in the kiln
Two causes and they usually arrive together: the join was not welded with a coil, and the pot dried too quickly. The kiln did not do this. It only revealed it. Weld the outside properly and dry it under loose plastic for a week.
It came out egg shaped
Your two bowls were deeper than they were wide, so the sphere came out tall. Throw the next pair shallower, and stop the curve while the wall is still leaning outward at the rim. You can also rescue an egg on the wheel by pushing the belly out during the re-throw.
It came out like a squashed pumpkin
The opposite problem. The halves were too shallow and too wide. Pull the wall higher before you start bellying it, and let the curve travel further before you cut the rim.
A wall collapsed while you were bellying it out
Too fast, too wet, or too thin, and usually all three. Wheel slower. Three light passes instead of one big push. Rib the outside between passes to firm it up, and leave the wall thicker than instinct says.
A crack ran down from the mouth
The cut edge was never compressed. A needle tool leaves a torn, stressed edge, and that edge shrinks against the rest of the pot. Wet finger inside and out, then compress the new rim on a slow wheel before you attach the collar.
There is a visible ridge under the glaze
The seam was blended by eye rather than by touch. Glaze pools on one side of a ridge and thins on the other, and a line you could barely see on raw clay becomes a stripe. Run a fingertip around the equator and keep working until you cannot feel it.
It went oval, or settled, after it was finished
A round form with thin walls and a small foot can move on the shelf while drying and again in the glaze firing. Keep the belly a sensible thickness, keep the foot broad and flat, and do not set a drying moon jar somewhere warm on one side.
The one that is not on this list
"I am not good enough at throwing yet." That is almost never the real answer. Everything above is a measurement, a timing or a drying problem, and all three are fixable on a Tuesday by somebody who has only been throwing a few months.
Expectations
What attempt one actually looks like
Because the internet is full of finished moon jars and almost empty of first ones, and that gap does real damage to people who are perfectly capable of making these.
It will not be round
It will be a bit egg shaped or a bit squat, and one side will be fuller than the other. So are the ones in museums. What you are checking on attempt one is whether the seam held, not whether the profile is a circle.
It takes two sessions, minimum
Throw both halves and join them in one sitting, which takes an afternoon or an evening, most of it waiting. The mouth, the neck and the foot happen the next day. Anybody promising you a moon jar in forty minutes is showing you the tenth one they made that week.
Roughly half of first attempts do not survive
Usually a sagged half or a seam that opened. That is a normal rate and it is not a verdict on you. The clay is not wasted either, because a failed moon jar reclaims like anything else. See reclaiming clay .
Attempt two is dramatically better
This is the genuinely encouraging part. The gap between the first and second moon jar is bigger than the gap between the first and tenth mug, because almost everything you got wrong the first time was a decision rather than a skill, and decisions transfer immediately.
The version we would start you on
A small moon jar is a real moon jar. It teaches the same curve, costs an hour instead of an evening, and it will survive the kiln because there is far less mass to argue with. Make three small ones and the big one stops being frightening.
Vocabulary
Every word we just used
If a term above went past you, it is here. None of it is complicated and all of it gets used at wheel side.
| Word | What it means |
|---|---|
| Dalhangari | The Korean name for a moon jar. The English name is a twentieth century nickname that stuck. |
| Soft leather hard | Firm enough to hold its own shape and be handled, soft enough that a fingernail still marks it easily. The window in which two halves can be welded together. |
| Welding a join | Blending extra clay across a seam so the two pieces become one continuous thickness, rather than two edges stuck together with slip. |
| Collar | Both a noun and a verb. The short ring of clay that becomes the mouth, and the act of squeezing a spinning wall inward to narrow it. |
| The equator | The widest point of the pot, which on a two part moon jar is also the seam. Handy coincidence, because it is where you want to be working anyway. |
| Bellying out | Pushing a wall outward from the inside to create a curve. Done slowly, with the wheel slow, in several passes. |
| Chuck | Anything that cradles an awkward pot on the wheel so you can trim it. A ring of towel, a bowl lined with foam, or a thrown clay cup. |
| Compressing | Pressing clay particles together with a rib, a sponge or a finger, so a surface or an edge is less likely to crack later. Freshly cut edges always need it. |
| Calipers | The measuring tool with two curved arms. The one tool on this page that people skip and regret. |
| Cone 5½ | How we fire glaze here: cone 5 with a twelve minute hold. Bisque goes to cone 05. |
Questions
Questions we get at wheel side
How much clay do I need for a moon jar?
For a first two part jar, two and a half to three pounds per half, so five to six pounds total. That lands you somewhere around eight or nine inches finished. Weigh both balls rather than eyeballing them, because two halves from different weights of clay end up different depths and you get an egg.
Do I have to use porcelain?
No, and we would gently steer you away from it for a first attempt. Porcelain is what the historic jars were made from and it is the least forgiving thing you could pick: it moves less, it slumps sooner, and it is harsher about uneven walls. A smooth plastic stoneware will hold a wide belly with much less argument and looks the part under a white glaze.
Can I throw a moon jar in one piece?
If you can get a hand inside and still reach the widest point with room to push, yes. That usually caps out somewhere around seven or eight inches across. Above that the wall at the belly has nothing supporting it and the pot goes down, which is exactly why the two part method exists. It is not a shortcut and it is not cheating.
Should the seam be visible on a finished moon jar?
On the historic pots it usually is, faintly, and people consider it part of the character rather than a flaw. What you do not want is a seam you can feel, because glaze pools on one side of a ridge and thins on the other and turns a subtle line into a stripe. Blend by touch, not by eye, and let whatever remains be visible.
Why did my seam crack open in the bisque firing?
Almost always drying, not firing. The welded seam is thicker than the walls beside it, so it holds water longer and shrinks last, while everything around it has already finished moving and is holding it still. That tension tears the join. The fix is slower drying under loose plastic for a week or more, plus a proper coil weld rather than a slipped butt joint.
Does a moon jar need an air hole?
Yes, and on a normal moon jar the mouth is it. A sealed pot cannot dry from the inside, so it is the likeliest piece you own to still be holding water on firing day, and in the kiln that water flashes to steam and has to leave through something. If the only route out is a small flaw in your seam it will use that and enlarge it. Heated air is the small half of the story, and a porous greenware wall lets that out without complaint. Any fully closed round form you make on purpose still needs a pinhole somewhere, usually under the foot.
How long does making a moon jar actually take?
Two sessions across two days, plus a week or more of drying. Session one is throwing both halves, waiting for them to firm up, joining them and re-throwing the seam, which takes most of an afternoon or an evening, with a lot of that spent waiting. Session two is the mouth, the neck and the foot. Then it dries slowly, and there is no way to compress that part.
Is a moon jar too advanced for a beginner?
If you can center two or three pounds and pull an even wall, you can attempt one, and we would rather you tried and lost the first one than waited a year. The skills that decide the outcome are measuring, timing and patience, not virtuoso throwing. Start with a small one piece version and move up.
What does it cost to fire a piece this big?
Bisque is free. Glaze firing is charged by volume at five cents per cubic inch with a four dollar eighty minimum, so a large round pot costs meaningfully more than a mug and it is worth working the number out before you commit. Our calculators page will do it for you. Kiln space is not the constraint here: our largest kiln is a forty two cubic foot L&L bell lift.
Keep going
Pages that pick up where this one stops
Three pages to read next
Throwing pottery in sections
The general skill this page is one example of. Read it before you attempt anything above fourteen inches.
Throwing enclosed forms
The one piece route, in full. A small moon jar is an enclosed form that got opened again at the top.
Score and slip
Why a properly scored join holds and a lazy one opens weeks later in a kiln.
Open and closed spheres
Round forms generally, including collaring a wide opening closed without folding the wall.
How to collar in
Making a circle smaller without wrecking it, which is the move behind every neck and every closed top.
Feet and foot rings
What a foot is doing structurally, and why a broad flat one is right for a heavy round pot.
Glazing big and intricate pottery
How to get an even coat onto a large curved surface without printing your fingers into the belly.
The Clay Hole University
Every lesson we have written, in one place, from centering through kiln firing.
One last thing
Go and lose the first one
There is a version of this where you read the whole page twice, decide you are not ready, and make mugs for another year. We would rather you weighed out six pounds this week and found out which of the nine failures is yours. Every one of them is a decision you can change next time, and the second jar really is a different pot.
Weigh out six pounds this week and find out which of the three failures is yours. Every one of them is a decision you can change next time, and the second jar really is a different pot.
There is a much longer version of this page with nine failure modes, a proportion diagram, drying schedules and seven more videos. The toggle at the top switches to it.
Which version would you like to print?
Videos come out as a labeled box with the title and channel to search for, since paper does not play them.