Pottery Date Night
 Bring All Your Friends Free Week
 Give a Month of Pottery
 Private Pottery Parties

 The Welcome Booklet
 Your First Ten Sessions
 The Pottery Process
 Finding the Studio
 Your Classes Never Expire
 The Four Tables
 Who’s Who
 The Rewards Program
 Flux Glazes
 The Calculators
 Kiln Tracker
 Holiday Kiln Deadlines

 Beginner’s Tool Set
 Fingernail Clippers
 Mayco Clay Mender
 Epoxy for Kintsugi
 Applicator Bottles
 Large Bead Rack
 Raku Workshop
 Nighttime Raku
 Horsehair and Feather Raku
 The Clay Hole T-Shirt
 Embroidered Crewneck
 Zip-Up Hoodie
 Pre-Made Bisqueware
 Glaze Catchers
 Kiln Cookies
 Clay Cubby Rental
 The Glaze Bible, Printed
 The Book of Molds, Printed
 Printable Pottery Guides
 Free Printable Trackers
 Gifts for Potters
 Christmas Pottery Ideas
 Mother’s Day Gift Ideas
 Pottery Date Night
 Studio Calendar
 2027 Studio Events
 What Should I Do Today?
 How to Throw on the Pottery Wheel
 How to Make a Pinch Pot
 How to Tap Center a Pot
 The Five Stages of Clay
 Is Pottery Hard to Learn?
 Pottery Wheel Practice Drills
 20 Easy Hand-Building Projects
 Everything That Sounds Wrong

 A Beautiful Piece, Every Time
 Slab Roller Tips
 Any Dish as a Slump Mold
 Slab Roller & Slab Mold Certification
 The Pottery Skill Tree
 Clay & Pottery Calculators
 Logging Your Pottery and Glazes
 The Pottery Dictionary
 Why Did My Pottery Do That?
 The Pottery Cone Chart
 Pottery Myths, Fact-Checked
 Is Handmade Pottery Food Safe?
 Incredible Ceramic Artist Videos
 How Dan Throws Giant Pots
 How to Dry Your Pottery
 The Pottery Wheel Introduction
 Pottery by Zodiac Sign
 Personality and the Pottery Wheel
 Pottery for Engineers
 ADHD, Hyperfocus, and Never Running Out
 Hobbies for Burnout
 Screen-Free Hobbies for Adults
 Every Addiction I Ever Had Lost to Art
 Functional Pottery Is Engineering
 How Do We Compare?
 Pottery Classes by City
 Every Pottery Studio in Utah
 Pottery in Draper
 Featured Members
 The Signature Wall
 Making Friends as an Adult Is Brutal
 The Clay Hole Commandments
 2027 Pottery Contests
 2027 Studio Parties
 Gallery Night

 Scream It Into the Void
 Destroy the Glaze Wall
 Daily Affirmation Cards
 Everything That Can Go Wrong
 Subscribe to Our Newsletters
 Contact The Clay Hole
 Corporate Team Building

 Glaze Combinations
 Glazes We Do Not Carry
 Making Glaze Test Tiles
 The Mega Glaze Tool
 How to Use the Mega Glaze Tool

 Glaze Brushing Techniques
 How to Use Underglaze
 How to Use Dipping Glazes
 Glaze Problems, Causes and Fixes
 The Dipping Glaze Guide

 Making a Glaze Catcher
 Fused or Sharp After Firing
 The Signature Wall
 His Viral Videos
 His Own Ceramics
 Meet Mud
Project Guides
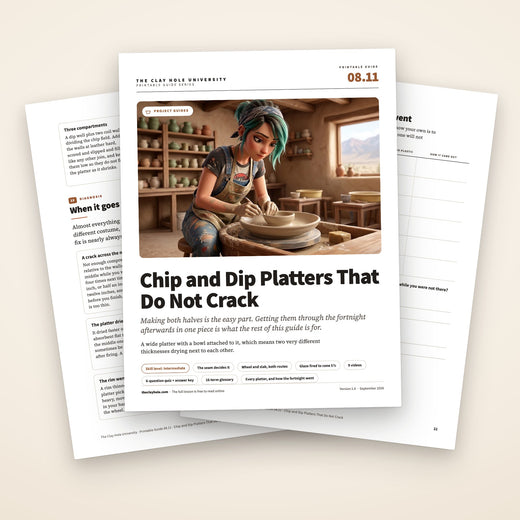
Chip and dip platters.
A wide platter with a bowl attached to it is two pieces of pottery drying next to each other at completely different thicknesses, and almost every one that fails, fails for that reason and not because of anything that happened on the wheel. Here is how to throw one, how to build one, how to join the bowl so the seam holds, and how to get the whole thing dry and flat and out of a kiln in one piece.
Skill level: IntermediateWritten for members of The Clay Hole, and useful to anybody with a wheel or a slab roller. All nine videos on this page belong to the potters who made them, every one is free to watch, and nothing loads from YouTube until you press play.
Written for members of The Clay Hole, and useful to anybody with a wheel or a slab roller. Both videos belong to the potters who made them, and nothing loads from YouTube until you press play.
Jump to a section

Which version would you like to print?
Videos come out as a labeled box carrying the title and the channel to search for, since paper does not play them.
Before you scroll
Why this page has words as well as videos.
Two pieces drying at different speeds is the whole problem, and a video cannot wait out the days with you. The words carry the schedule, the videos show the joins. Use both and the platter survives the week.
The whole thing, in one band
It is a plate with a drying problem.
Neither half is hard. A wide shallow platter and a small bowl are both forms you already know. The difficulty arrives the moment you stick them together, because now a thin rim and a thick join are drying in the same room and they will not shrink on the same schedule. Everything below exists to keep that seam closed.
One question picks your route
Do you want to be able to wash the dip bowl on its own?
If yes, leave the bowl loose and throw a shallow ring on the platter for it to sit in. You have just skipped every difficult thing on this page, and you have made the version that actually gets used, because a bowl you can lift out is a bowl that is easy to wash and comes back.
If no, join it. That is the one people want to make, it looks better on a table, and the rest of this page is about surviving the decision.
Two people building one
The two piece route, sped up, with the platter and bowl thrown separately. Its own description says the drying was rushed and the base cracked in the firings, which is why this guide spends so long on drying.
The hand built route, no wheel involved. An hour long session on texturing with rollers and release agents, then hand building the platter using a chip and dip platter you already own or can buy.
Make it
Seven things, in order.
-
Get everything to three eighths of an inch
Bowl walls, rolled slab, and a platter floor up to about twelve inches. Wider than that, the floor goes to half an inch. Thinner than that and a wide floor cracks. Thicker and you are adding weight nobody can see, and the thick parts dry so much slower than the thin parts that the piece pulls itself apart.
-
Compress the floor, then compress it again
Rib it from the center outward three or four times before you shape anything, and once more at the end. On a wide flat form this is the single instruction that decides whether you get a crack down the middle in six weeks.
-
Leave the rim thicker than the floor
The rim is the hoop holding the platter round while it shrinks. A thin rim goes oval, and once a rim goes oval nothing later in the process puts it back.
-
Trim the foot before the bowl goes on
Once the bowl is attached you can never turn the platter upside down again. Trim it, cut the foot ring, sign it, and only then think about the join.
-
Join at matching leather hardness
Both parts should take a thumbnail mark and neither should dent under a fingertip. Score a wide hatched field across the whole contact area rather than a ring of scratches, slip both faces, press and twist a few degrees to seat it, then blend a soft coil into the inside corner and compress that corner properly. The corner is where the crack starts.
-
Bag it loosely and dry it slowly
Loose plastic over the whole piece for two or three days, then a sheet with the edges open, then bare. Dry it on drywall or a plaster bat, never on plastic and never on a bare wood board that will cup. Plan on a week to two weeks, not two days.
-
Wax the whole foot and set it on a glaze catcher
A wide flat foot is the classic piece that welds itself to a kiln shelf, and a dip well is a bowl, so any glaze that moves will pool in the bottom of it. Keep the runny ones on the outside.
What you are actually making
A big flat thing and a small deep thing.
Strip the name off it and a chip and dip platter is a wide shallow serving plate with a second, much deeper container somewhere on it. Every version of it is a variation on where that second container comes from and whether it is stuck down.

- 1 The rim. Thicker than the chip field, on purpose. It is the hoop that holds the platter round while the clay shrinks, and it is the first thing to dry.
- 2 The foot ring. Set at roughly two thirds of the diameter, never out at the edge. A wide floor with no foot will rock on a table forever.
- 3 The chip field. The flat part, and the largest uninterrupted surface you are ever likely to decorate. Three eighths of an inch after compression is the number up to about twelve inches, and half an inch once you go wider than that.
- 4 The join. The thickest point on the whole piece, and therefore the last part to dry. Everything that goes wrong later starts in this corner.
- 5 The dip well. Deep enough for a spoon to stand in, narrow enough that it does not swallow half the platter. Around four to five inches across and two inches deep works.
Pick a route
Three shapes, and what each one costs you.
These are not three difficulty levels of the same object. They are three different objects that get used differently, and the one that photographs best is not the one that ends up on the counter every weekend.
| The shape | How hard | Drying risk | Living with it |
|---|---|---|---|
| One piece, with a well thrown into it | Hardest to throw. One lump, one form, and the divider ring has to come up out of clay you deliberately left in the middle. | Low. There is no join, and the whole thing is one thickness drying together. | The well ends up shallow, so it holds salsa and not much else. You wash the whole platter every time. |
| A platter with the bowl joined on | Two easy forms, one difficult join. Neither half will trouble you. The seam will. | High, and all of it at the seam. This is the version this page is mostly about. | Looks the best, carries in one hand, and is genuinely annoying to wash because you cannot get at the inside corner. |
| A platter with a loose bowl that sits in a ring | Easiest by a distance. A shallow platter and a small bowl, made and dried and fired as two separate pots. | Low. Nothing is stuck to anything, so nothing can tear. | The bowl slides if you tilt it. It is also easy to wash on its own, which is why this is the one that keeps getting used. |
The question that actually decides it
Do you want to be able to wash the dip bowl on its own? If yes, make it loose and throw a shallow ring on the platter for it to sit in. If no, join it, and give the drying section below more attention than you were planning to.
Route one, on the wheel
Throwing the platter.
A platter is not a wide bowl. A bowl gets its strength from the curve of its wall, and a platter has almost no wall to get strength from, so all of its structure has to come from a compressed floor and a rim left deliberately heavy. Get those two right and the rest is ordinary throwing.
How much clay
Six to eight pounds gets most people a twelve to fourteen inch platter in stoneware. Add a pound if you are new to wide forms, because the first thing that happens is you run out of clay at the rim and end up with a plate. Weigh the bowl separately at one to one and a half pounds and throw it from the same bag on the same day, so both halves shrink at the same rate.
-
Wedge it properly, then throw it on a bat
Uneven moisture through the lump is warp you have already built into the piece before the wheel turns. And a wide flat form is not coming off a bare wheel head in one piece, so put a bat on and expect the platter to live on that bat for a day or two. Which bat, and when .
-
Center low and wide, not tall
Cone it up once to line the clay particles up, then push it back down and keep pushing until you have a thick, even disc most of the way out to your finished width. Widening a platter after it is already open is how floors tear. Do the spreading while the clay is still solid.
-
Open outward, and stop early
Open flat and keep going out, but stop about an inch and a half short of the edge. That untouched ring is the clay that becomes your wall and your rim, and if you spend it on the floor you have nothing left to build with. Opening and setting the floor .
-
Compress the floor before you do anything else
Rib from the center outward, three or four full passes, with real downward pressure and the wheel turning slowly. Then check thickness with a needle tool. Three eighths of an inch after compression is the target on a twelve inch platter, and half an inch on anything wider than twelve inches. This step is boring, it is invisible in the finished pot, and it is the single biggest predictor of whether the floor splits later. Compressing the floor and the rim .
-
Pull the ring up as a short straight wall
One or two pulls, vertical, no flare. A straight wall is easy to push outward afterward. A wall that went out too early is floppy, and there is no recovering it.
-
Push the wall down and out to the angle you want
Support the underside with a rib or your fingers while your other hand presses the wall outward and down. This is the moment the form stops being a bowl. Go slowly, in small increments, and let the wheel do several revolutions at each position rather than forcing it in one pass. Ribs, and which one for what .
-
Leave the rim heavy, then compress it
Do not thin the rim to match the floor. Squeeze it between finger and thumb to consolidate it and run a rib around the edge. A heavy rim is what keeps a fourteen inch circle circular through drying and firing.
-
Rib the whole inside in one pass
Low speed, center to rim, one continuous movement, no lifting off. It knits the surface, pulls water out, and leaves a face that takes underglaze cleanly.
-
Sponge, undercut, wire twice, and leave it alone
Get the standing water out of the middle before it softens the floor. Undercut the foot at an angle with a needle tool, wire underneath twice, and then walk away and let it stiffen on the bat. Do not pick a soft platter up by the rim. Nothing good has ever come of it. Getting the pot off the wheel .
Two potters throwing one in a single piece
The one piece version, thrown thin to avoid trimming at leather hard. The maker’s description says compressing the bottom and the join where bowl meets platter is what keeps it crack free, so watch for that.
A one piece version in earthenware, with a small bowl in the middle of a large plate, all thrown from a single piece of clay.
The part that fails
Throwing the bowl, and joining it on.
A join between two thrown pieces is not glue. It is one continuous body of clay that you are persuading to knit back together, and clay only knits when both sides are at the same stiffness, both sides are genuinely roughened, and there is enough of the same clay in between to fill the gap. Miss any one of the three and it will hold through drying, hold through the bisque, and open up in the glaze firing where you cannot fix it.
Throwing the bowl
- One to one and a half pounds, from the same bag as the platter, on the same day. Different bags shrink differently, and a two percent difference across a four inch join is a crack.
- Throw the walls a touch thicker than you would for a small bowl. It has to survive being pressed down onto something.
- Give it a wide, dead flat foot. Wider than looks right. The contact area is the entire strength of the join, so a bowl that tapers to a narrow base is starting the fight from behind.
- No foot ring on the bowl. You want a full flat disc of clay meeting the platter, not a ring with a void behind it.
- Compress the inside floor of the bowl as hard as you compressed the platter.
Getting the platter ready first
Trim the foot before the bowl goes on
This is the order of operations people get wrong once and never again. The moment a bowl is attached you can no longer turn the platter upside down, which means you can no longer trim it, cut a foot ring into it, or sign it. Do all of that first, let the platter come back to an even leather hard under plastic, and only then start thinking about the join.
The join itself
- Match the hardness. Press a thumbnail into each piece. Both should take a clear mark. Neither should dent under the soft pad of a finger. If one is stiffer, bag it with the other for a day and let them equalize.
- Mark the position. Set the bowl down where you want it and score a light outline around it, so you are not hunting for the spot with slip on your hands.
- Score a field, not a ring. Hatch the whole contact area on both surfaces, crosswise, deep enough to feel. Scratches around the outside edge only are why bowls pop off in the bisque.
- Slip both faces. Slip made from the same clay body, about the consistency of yogurt. Not water, and not a thin wash. Score and slip, properly .
- Press and twist. Push straight down with even pressure, then rotate the bowl a few degrees and back. You want slip to squeeze out all the way around, which is how you know the whole face made contact.
- Blend a coil into the inside corner. Roll a soft coil of the same clay, press it into the angle where the bowl meets the platter, and smear it in both directions with a wooden tool until there is no line left.
- Compress that corner. Run a small rounded rib or the back of a spoon around the fillet with real pressure. A blended corner that has not been compressed is still two surfaces touching.
- Bag the whole piece for two days. The join is now the wettest, thickest part of the platter. Wrapping it loosely lets the moisture even out across the piece instead of leaving a wet seam in a dry plate.
Watch it done both ways
A time lapse of the two piece route, with the platter and bowl thrown separately. Its own description says the drying was rushed and the base of the platter cracked in the firings, which is the lesson in miniature.
Part 1, throwing the platter step by step from centering to shaping, with the ambient sounds of the studio.
Route two, off the wheel
Building one from slabs.
Hand building is the easier route to a big chip and dip platter, and it is the only route to a square, oval or free form one. It also removes the hardest part of the wheel version, because you are no longer trying to hold a fourteen inch circle true while it spins. What it gives you instead is a slab with a memory, and slabs remember every direction you stretched them in.
-
Roll thicker than you think, then compress both sides
Three eighths of an inch through the slab roller, or half an inch for a platter wider than twelve inches. Then take a rib to both faces and compress them, working outward from the middle. The roller stretches clay, and stretched clay that has not been compressed back down is a warp waiting for a kiln. Using the slab rollers .
-
Let it stiffen before you shape it
Twenty to forty minutes flat on drywall or a plaster bat. A slab shaped straight off the roller stretches under its own weight while you handle it, and it will remember. Do not twist it, do not drag it, and pick it up with a board or a cloth rather than by one corner.
-
Drape or press it into a slab mold
The studio carries 248 slab molds, and there are large shallow ones that are exactly the right shape for a chip and dip platter. Drape over a hump mold or press into a dish mold, ease the clay in rather than stretching it, and compress the inside face again once it is seated. Getting the best out of slab molds .
-
Texture and decorate now, not later
Rollers, stamps, lace, leaves, the tread of a shoe. Flat clay takes texture beautifully and this is the one moment it is soft enough and supported enough to take real pressure without distorting. Carving and sgraffito can wait for leather hard.
-
Add a foot, or two
A slab platter has no thrown foot ring, so build one from a coil, or add three feet, or press a shallow ring into the base. On anything longer than it is wide, two parallel foot rings stop the middle sagging. Feet and foot rings .
-
Make the bowl the same way, and join it the same way
Press a second small slab into a bowl shaped slab mold, or pinch one. Then everything in the join section above applies without a single change: matching hardness, a hatched field, thick slip, press and twist, a blended and compressed coil in the corner.
-
Leave it in the mold longer than feels necessary
The slab mold is holding the shape while the clay is at its most willing to move. Let it come to a firm leather hard in there. If it releases on its own, it was ready.
Two hand built ones, start to finish
An hour long hand built version, using textured rollers, release agents and a chip and dip platter you already own or can buy.
A 28 minute step by step tutorial for a handmade platter, starting from preparing the clay slab.
The heart of it
Two thicknesses, one drying schedule.
A thin rim with air on both sides and a thick seam buried under a bowl are never going to dry at the same speed, and they are attached to each other. Whichever one finishes first starts pulling on the one that has not.
Clay shrinks mostly while water is leaving it, and a little more in the kiln. A rim reaches the end of that process days before a join does. For those days you are holding a rigid, finished, fully shrunk plate with a soft wet seam sitting in the middle of it that still has all of its shrinking left to do. When the seam finally gets around to it, the only thing it can pull on is the plate, and the plate is done moving.
That one mechanism explains almost every failure on this form. The hairline that opens around the base of the bowl. The bowl that survives the bisque and quietly lets go in the glaze firing. The platter that looked perfect and came out of the kiln rocking. Poor scoring makes any of them worse, but the cause underneath is timing, and it was decided on a shelf, not at the wheel.
So the whole job is to slow the fast parts down until the slow parts catch up.
The schedule that works
- The first two or three days, loose plastic over everything. Not tight, not sealed. A bag draped over it so the air around the piece stays humid.
- Then a sheet laid on top with the edges left open. The middle stays slowed down, the outside starts to catch up.
- Then bare, on a rack with air underneath. By this point the seam should feel the same temperature against your wrist as the rim does.
- Dry it on something absorbent and flat. Drywall, a plaster bat or cement board pulls moisture out of the underside at roughly the same rate the air pulls it off the top. Plastic traps water under the piece, and a bare wood board cups and takes the platter with it.
- Cover the rim more than the middle. Tear strips of plastic and lay them over the rim only. The edge that wants to race is the edge that gets covered.
- Do not stand it on its rim. That is a genuinely good trick for a plain plate and a bad one here, because the rim is now carrying the weight of a bowl on edge and it was not built for that.
- Weight the middle if it starts to lift. Once it is firm, a kiln post or a bag of rice resting on a sheet of plastic will hold a floor flat without marking it.
- Give it a week to two weeks. Not two days. In Utah air, assume you are drying everything too fast until something proves otherwise.
An hour long session on stopping handbuilt trays, platters and dishes from warping, starting with how clay remembers its shape. Worth watching before your first wide piece rather than after it.
What we see on the shelves
Three failures turn up over and over in the drying room, and all three are the same story.
- A ring crack around the outside of the bowl, opened up during the bisque.
- A platter that dried cupped, so it rocks on a table and no amount of trimming saves it.
- A rim gone slightly oval, always on the piece that got carried across the room by one edge on day two.
If a piece of yours is drying and you are not sure it is going slowly enough, put another bag over it. Nobody has ever ruined a platter by being too patient with it.
Underneath
Feet, foot rings and the wobble.
A wide flat floor almost never comes out of a kiln dead flat. It does not need to, as long as it is standing on three points or on a ring, because a ring only has to be flat where it touches. This is the whole reason wide work gets a foot.
Where the ring goes
Roughly two thirds of the way out from the center, never at the edge. A ring set near the rim leaves a big unsupported disc in the middle that will sag in the glaze firing, and a ring set too tight in the middle makes the platter tippy when somebody puts weight on one side of it.
On anything longer than it is wide, cut two parallel rings rather than one. A single central ring lets the ends drop.
Trimming a wide platter
It goes back on the wheel upside down, which means the rim is carrying the whole piece. Support it. A foam bat, or three coils of soft clay stuck to the wheel head as a chuck, spreads the load and stops you pressing a flat spot into the rim.
Trim it a little stiffer than you would trim a mug. Soft leather hard plus a wide unsupported floor is how you end up pushing your trimming tool straight through the middle. Trimming and turning .
Say it again, because it is the one that costs a whole piece
Trim the platter, cut the foot ring and sign the bottom before the bowl is attached. Afterward the platter can never be turned over again, and a chip and dip platter with no foot and no signature is a chip and dip platter that rocks and that nobody can prove is yours. Feet and foot rings, in full .
Glaze and fire
The expensive end.
A chip and dip platter is one of the largest things most members ever make, and size shows up twice: once on the firing invoice, and once in the way glaze behaves on a big sloped surface with a bowl sitting in the middle of it.
What it costs to fire
Bisque firings are free, every time, and they run to cone 05. Glaze firings run to cone 5½, and they are charged at five cents per cubic inch with a $4.80 minimum, which covers anything 125 cubic inches or under. Measure the widest points, length by width by height.
A fourteen inch platter three and a half inches tall works out at 686 cubic inches, which is $34.30 . That is not a mistake and it is not a penalty. It is simply what it costs to put something that big through a kiln, and it is worth knowing before you weigh out eight pounds of clay rather than after. Pay for a firing .
The two glaze rules for this shape
Wax the entire foot, and set it on a glaze catcher. A wide flat foot has more contact with a kiln shelf than anything else you own, so it has more opportunity to weld itself to one. Glaze catchers and kiln cookies both live at the front desk.
The dip well is a bowl, so treat it like one. Anything that moves in the firing will run down the well wall and pool in the bottom. Keep the flux glazes and the deliberately running ones on the outside of the platter where the movement is the point.
A few more things worth knowing
- The chip field is the best canvas in the building. It is the largest flat area you will ever decorate, and underglaze does not run, so a pattern painted there comes out of the kiln where you put it. Underglaze techniques and rules .
- Three even coats on anything food touches. Thin patchy coverage on a serving surface is the one place where a glaze fault is also a hygiene problem, because food sits in it.
- Dipping a piece this big is a different job. The buckets carry their own training and their own agreement, and a fourteen inch platter is not the piece to learn on. How dipping glazes work .
- Glazing the inside corner takes planning. Where the bowl meets the platter you cannot get a brush in cleanly at any angle. Glaze that corner first, while there is nothing else wet to lean against. Glazing big and intricate pieces faster .
- It goes in the big kiln. Four kilns run here, and the widest is a 41½ cubic foot L&L bell lift, which is where wide work lands. Wide flat pieces also dislike a fast cool, so a platter waiting a few extra days for a full kiln is a platter getting a better firing.
- Pick the glaze before you make the pot, not after. Some of the 650 or so brush-on glazes behave completely differently on a horizontal surface than on a vertical one. The glaze finder will show you what a glaze actually does.
Before you weigh the clay
Will it fit, and what will it cost.
Two numbers decide how big this piece is allowed to be, and both of them are knowable before you touch any clay. One is your firing bill. The other is the depth of your shelf, which is twelve inches on a Green Level Member and Yellow Level Member shelf, and that is less than the width of a lot of the platters people picture when they start.
Measure the widest points, in inches
Glaze firing
$34.30
686 cubic inches at five cents each. Bisque firings are free, every time.
Shelf sizes are 24 by 12 by 8 inches for a Green Level Member, 24 by 12 by 12 for a Yellow Level Member, 36 by 16 by 14 for a Purple Level Member and 48 by 16 by 16 for a Black Level Member. Fit here assumes the platter lying flat on its own, with nothing else on that part of the shelf, which is optimistic. The Levels compared .
Wider than twelve inches
If you are on a Green Level or Yellow Level shelf and you want a platter wider than twelve inches, you have three options and they are all fine: make it about eleven inches and accept that it is a generous snack plate rather than a party centerpiece, plan to move it out of the studio quickly after it is fired, or move up a Level for the month you are making it. What does not work is making a sixteen inch platter and hoping the shelf will stretch.
Other ways in
Once you have made one.
The second one is where the form gets interesting, because by then you know how it dries and you can start spending that knowledge on shape instead of on survival.
A tall walled version, which holds far more and is considerably harder to keep even. The maker’s description says consistent thickness is what avoids the cracks, and that is right.
A quick look, about a minute and a half, from a working pottery in the Yorkshire Dales in England.
Variations that work
Three compartments
A dip well plus two coil walls dividing the chip field. Add the walls at leather hard, scored and slipped and filleted like any other join, and keep them low so they do not fight the platter as it shrinks.
The nesting ring
Throw a shallow ring into the platter, a quarter inch proud and a hair wider than the bowl foot, and let a separate bowl sit down inside it. All the look, none of the join, and the bowl still comes out for washing.
Oval and rectangular
Only really available to hand builders. Long shapes sag in the middle, so two foot rings rather than one, and set the bowl at one end rather than the center so the long span is not carrying it.
Diagnosis
When it goes wrong.
Almost everything on this list is a drying fault wearing a different costume, which is good news, because it means the fix is nearly always the same fix applied earlier.
A crack across the middle of the floor
Not enough compression, a floor left too thick relative to the walls, or water that sat in the middle while you worked. Rib the floor three or four times next time, set it at three eighths of an inch, or half an inch if the platter is wider than twelve inches, and sponge the standing water out before you finish. If you went the other way and it is too thin .
A ring crack around the base of the bowl
The two halves were at different stiffness when they were joined, or the inside corner never got a blended and compressed fillet. This is the single most common failure on the form and it is always found in the bisque, never before.
The platter dried cupped and now it rocks
It dried faster on top than underneath. Use an absorbent flat surface, cover the rim, and weight the middle once it is firm. A shallow cup can sometimes be rescued by sanding the foot flat after firing, wet, over a bucket, with safety glasses and an N95 or better. A deep one cannot.
The bowl came off in the kiln
Scoring around the edge instead of across the whole contact face, or slip too thin to fill the gap. A join that only holds at its perimeter survives handling and drying quite happily and then lets go the moment the clay starts to shrink again in the firing.
The rim went oval
A rim thinned down to match the floor, or a soft platter picked up by one edge. Leave the rim heavy, move it on its bat or board rather than in your hands, and stop touching it once it is off the wheel.
It welded itself to the kiln shelf
Glaze on the foot, or glaze that ran further than expected down a sloped wall. Wax the whole foot, use a glaze catcher under wide work, and keep the movers off the lower half of the outside. Fixing fused and sharp pottery .
Glaze pooled in the dip well and crazed
Too many coats in a place where gravity was always going to collect them, or a glaze that moves being used somewhere flat. Thin coats in the well, and save the dramatic ones for the outside where running is the effect you wanted.
It survived everything and then cracked cooling
Wide flat pieces are the most thermal shock sensitive things in any kiln, and the bottom of a kiln cools fastest. Nothing here is under your control except patience, so tell the staff it is a wide flat piece and leave the loading to them.
Questions we actually get
The ones that come up at the front desk.
How much clay do I need for a chip and dip platter?
Six to eight pounds for the platter and one to one and a half for the bowl, which gives you something around twelve to fourteen inches across. Add a pound to the platter if this is your first wide form, because running out of clay at the rim is the standard first attempt and it turns a platter into a plate. Take both from the same bag on the same day so the two halves shrink together.
Should the dip bowl be attached or loose?
Attached looks better and is much harder. Loose is easier at every single stage and is the one that keeps getting used, because it is easy to wash on its own and because you can put the dip in the fridge without the platter. If you want the attached look without the join, throw a shallow ring into the platter for a separate bowl to nest into.
Can I make one in a single session?
You can throw or build both halves in one session comfortably. You cannot join them in the same session, because the join needs both parts at leather hard and they will not be there for a day or two. Plan on three visits: one to make the parts, one to trim the platter and attach the bowl, one to glaze.
How long does one take to dry?
A week to two weeks under plastic that comes off in stages, and longer is better. That is much slower than a mug and it is not optional here, because the thick seam under the bowl and the thin rim at the edge have to arrive at bone dry together. Plan on about two months for a first finished piece once you add both firings, and a platter sits at the slow end of that.
What does it cost to fire one?
Bisque is free. Glaze firing is five cents per cubic inch measured at the widest points, with a $4.80 minimum that covers anything 125 cubic inches or under, so a fourteen inch platter three and a half inches tall is 686 cubic inches and comes to $34.30. Big pieces cost real money to fire, which is worth knowing at the clay weighing stage rather than at the pickup stage.
How big can I actually make one?
The kilns are not the limit. Four run here, including a 41½ cubic foot L&L bell lift, and wide work goes in that one. Your shelf is the limit. Green Level Member and Yellow Level Member shelves are twelve inches deep, so a platter wider than twelve inches has nowhere to live while it dries and waits. Purple Level Member and Black Level Member shelves are sixteen inches deep.
Is it food safe and dishwasher safe?
Stoneware glazed to full coverage and fired to cone 5½ is most of the way there, and the last part is the glaze. The clay is settled: every body we sell vitrifies at that temperature, so it is dense and watertight. The glaze varies jar by jar, and makers rate each one separately for food, for the dishwasher and for the microwave, so look yours up rather than assuming. Crazing, underfiring and a thin or crawled coat void a good rating whatever the jar says, and so does the rough unglazed inside corner where the bowl meets the platter that never quite comes clean. Three even coats everywhere food touches, and pay attention to that corner.
Do I need a certification to make one?
Not for the making, unless you are using the slab rollers and slab molds, which have their own short training. Brush-on glazes and underglazes need the glazing certification before you glaze anything, and the dipping buckets are separate again. All of them are a video and a quick quiz. Glazing certification .
Where to go next
Slow is the only technique on this page.
That is the short version.
Everything difficult about a chip and dip platter comes down to two parts of the same object finishing at different times, and every fix in every section above is some version of making the fast part wait. Compress more than feels necessary, join at matching hardness, bag it longer than you want to, and accept that the piece is going to occupy a shelf for two weeks. Do those four things and the wheel work is the easy part.
Everything difficult about this form is two parts of one object drying at different speeds, and every fix above is some version of making the fast part wait. If you want the reasoning behind any of it, the videos of other people building one, the troubleshooting list in full and a calculator for the shelf and firing math, switch to the Comprehensive Version at the top of the page.
Score and slip
The join in full, and why a hatched field beats a ring of scratches.
Feet and foot rings
Where the ring goes on a wide piece, and how to trim one without pushing through.
Clay Hole University
Every guide, technique and project in the studio, in one place.
Compressing the floor and rim
The step that decides whether a wide floor splits, explained properly.
Slab rollers and slab molds
How to roll a slab that stays flat, and what the studio carries.
Footed serving bowls
The other big hand built serving form, and a good warm up for this one.