Pottery Date Night
 Bring All Your Friends Free Week
 Give a Month of Pottery
 Private Pottery Parties

 The Welcome Booklet
 Your First Ten Sessions
 The Pottery Process
 Finding the Studio
 Your Classes Never Expire
 The Four Tables
 Who’s Who
 The Rewards Program
 Flux Glazes
 The Calculators
 Kiln Tracker
 Holiday Kiln Deadlines

 Beginner’s Tool Set
 Fingernail Clippers
 Mayco Clay Mender
 Epoxy for Kintsugi
 Applicator Bottles
 Large Bead Rack
 Raku Workshop
 Nighttime Raku
 Horsehair and Feather Raku
 The Clay Hole T-Shirt
 Embroidered Crewneck
 Zip-Up Hoodie
 Pre-Made Bisqueware
 Glaze Catchers
 Kiln Cookies
 Clay Cubby Rental
 The Glaze Bible, Printed
 The Book of Molds, Printed
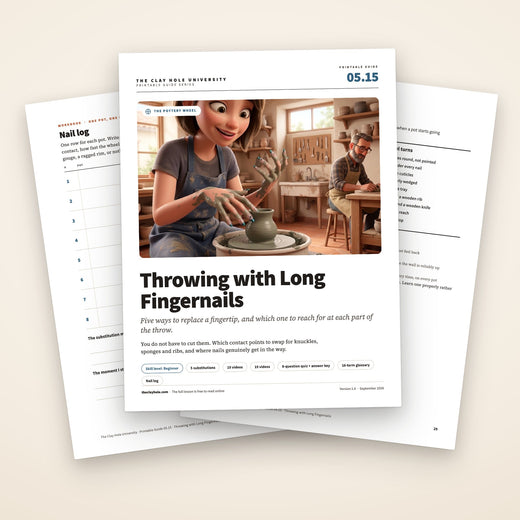
 Printable Pottery Guides
 Free Printable Trackers
 Gifts for Potters
 Christmas Pottery Ideas
 Mother’s Day Gift Ideas
 Pottery Date Night
 Studio Calendar
 2027 Studio Events
 What Should I Do Today?
 How to Throw on the Pottery Wheel
 How to Make a Pinch Pot
 How to Tap Center a Pot
 The Five Stages of Clay
 Is Pottery Hard to Learn?
 Pottery Wheel Practice Drills
 20 Easy Hand-Building Projects
 Everything That Sounds Wrong

 A Beautiful Piece, Every Time
 Slab Roller Tips
 Any Dish as a Slump Mold
 Slab Roller & Slab Mold Certification
 The Pottery Skill Tree
 Clay & Pottery Calculators
 Logging Your Pottery and Glazes
 The Pottery Dictionary
 Why Did My Pottery Do That?
 The Pottery Cone Chart
 Pottery Myths, Fact-Checked
 Is Handmade Pottery Food Safe?
 Incredible Ceramic Artist Videos
 How Dan Throws Giant Pots
 How to Dry Your Pottery
 The Pottery Wheel Introduction
 Pottery by Zodiac Sign
 Personality and the Pottery Wheel
 Pottery for Engineers
 ADHD, Hyperfocus, and Never Running Out
 Hobbies for Burnout
 Screen-Free Hobbies for Adults
 Every Addiction I Ever Had Lost to Art
 Functional Pottery Is Engineering
 How Do We Compare?
 Pottery Classes by City
 Every Pottery Studio in Utah
 Pottery in Draper
 Featured Members
 The Signature Wall
 Making Friends as an Adult Is Brutal
 The Clay Hole Commandments
 2027 Pottery Contests
 2027 Studio Parties
 Gallery Night

 Scream It Into the Void
 Destroy the Glaze Wall
 Daily Affirmation Cards
 Everything That Can Go Wrong
 Subscribe to Our Newsletters
 Contact The Clay Hole
 Corporate Team Building

 Glaze Combinations
 Glazes We Do Not Carry
 Making Glaze Test Tiles
 The Mega Glaze Tool
 How to Use the Mega Glaze Tool

 Glaze Brushing Techniques
 How to Use Underglaze
 How to Use Dipping Glazes
 Glaze Problems, Causes and Fixes
 The Dipping Glaze Guide

 Making a Glaze Catcher
 Fused or Sharp After Firing
 The Signature Wall
 His Viral Videos
 His Own Ceramics
 Meet Mud
How to Throw With Long Fingernails
Nobody has to choose between a manicure and the wheel. What has to change is which part of your hand touches the clay, because a fingernail past the pad is a cutting tool whether you meant it to be one or not. Five substitutions, five sections of the throw, and nineteen videos, ten of them from potters throwing with the nails on.
A nail past your fingertip is a cutting tool. Put something soft or something rigid between it and the clay and the problem is over. Here is the shortest route that works: a sponge inside, a knuckle outside, and a rib for everything else.

Jump to a section
One question, asked before every contact
A nail past your finger pad reaches the clay first, so the soft part that reads thickness never arrives, and the hard part that reads nothing cuts a spiral instead. That is the entire problem, and it means there is only ever one question to ask:
Is there something between the nail and the clay?
- Something soft is a sponge. It goes inside the pot.
- Something rigid is a rib. It goes outside the pot.
- Something of your own is a knuckle, which is a fingertip with the nail pointing backward.
- If the answer is nothing, do not press. More water and a slower wheel, then try again.
One route, start to finish
There are three ways to pull a wall and five ways to replace a fingertip. This is the combination with the highest chance of working on your first attempt, so it is the one we are giving you here.
Two minutes of prep that change the day
Scrape a bar of soap under your nails so clay cannot pack in, and file the free edges round rather than pointed. A point cuts like a needle tool; a round edge spreads the same force.
- Soft clay, well wedged. Stiff clay forces heavy pressure, and heavy pressure is what drives an edge in.
- Center with the heel and the outside edge of your hands, fingers curled into your palms. If you can see the backs of your nails, curl further.
- Never test the center with a fingertip. Rest the side of a knuckle against the clay instead.
- Open with a damp sponge, driven by the pad of your thumb behind it. This is the step that breaks nails, and it is the step a sponge completely solves.
- Leave the floor as thick as the bottom of your wall, checked with a needle tool rather than a nail.
- Compress the floor with a wooden rib, center to edge, two passes.
- Pull with the sponge inside and a knuckle outside. Set the squeeze at the base, climb slowly, and let the pressure fade to nothing before you leave the rim.
- Water every pull. A dry wall grabs whatever touches it.
- Finish the rim with folded chamois draped over the edge, wheel slow, two rotations.
- Rib the outside once to take the slip off, then wire off and lift with cupped hands.
Three things that will go wrong
These are the three that happen on a first attempt. Each one has a cause you can name and a fix you can do without getting up.
- A spiral groove up the inside wall. The sponge slipped and a fingertip landed. Put it back, then rib the inside once to close what is there. Do not pull again over a groove.
- A nail bends back while opening. You opened bare. There is no version of this where bare fingers are the right answer, so go back to the sponge or use a pear shaped ribbon tool.
- The pot pushes off center whenever you touch it. A hard narrow edge is concentrating your whole push into one spot. More water, slower wheel, wider contact.
If all three keep happening
Change the clay before you change anything about your hands. A bag that is too stiff causes all three at once, and softer clay fixes more first nights than technique does.
Video shows you the hand. Words hold the order still.
How we would use it
Read the list. Watch the video once without trying to memorize anything. Read the list again. Then go to the wheel with the list open, not the video.
A video is the only way to show you what a knuckle pull looks like at speed. It is a poor way to remember what happens in what order, because it runs at the maker’s pace instead of yours, and the forty seconds you actually need are buried in the middle of a fourteen minute clip. Scrubbing a timeline with a wet hand is not a real option.
There is a subtler problem too. A skilled potter makes a move look like one smooth motion, and that smoothness reads to your brain as understanding. You watch, you feel like you have it, you sit down, and you discover there were six separate decisions in there and you cannot name a single one. Reading the same move as a numbered list forces the six to stay six.
Reading also carries the things a camera cannot: how hard to press, what the clay should feel like just before it goes wrong, why the wheel wants to be slower for this pass than the last one. Those decide whether it works, and every one of them has to be said out loud.
So both are here, side by side, at the point where you need them. Every technique is written as a numbered list you can prop on a phone and read with a clay covered thumb, and most lists have a video under them from somebody who throws. None of the videos are ours. We picked them because they were the clearest demonstrations we could find, and we credit every channel.
A nail is not in the way. It is in front.
This is worth thirty seconds. Once you can picture what is happening where your hand meets the wall, you stop pressing harder and start moving the contact point instead. Every fix further down this page comes out of these six things.
- The free edge. The part of the nail past the flesh. It reaches the clay before anything else does, and it is hard, narrow and completely numb.
- The pad. Broad, soft, and the only thickness sensor you own. When the free edge lands first, the pad is not touching the pot at all, which is why the wall feels like nothing.
- The gap. Whatever your overhang measures, that is how far your sense of touch now sits from the clay. Half an inch of nail is half an inch of guessing.
- The groove. The wheel brings the same clay past that edge sixty to a hundred times a minute while your hand rises, so the cut is a spiral, not a scratch.
- The thin spot. A groove is clay removed. The wall is now thinnest exactly where you are about to stretch it hardest, which is why the tear shows up on the next pull rather than this one.
- The rotation. Dropping the wrist and rolling the hand swings the nail away from the surface and brings the side of the finger onto it. This costs nothing and fixes a surprising amount.
What all six add up to
Pressing harder does not close the gap. It drives the edge deeper. Every technique below works by putting something between the nail and the clay, or by turning the hand so a different part arrives first. So there is only one question at every contact: what is touching the clay, something soft, something rigid, or something of your own? If the answer is nothing, do not press.
How long is long, and what changes at each length
People describe their nails as long or short and mean wildly different things. Only one measurement matters here, and it is not the whole nail. Hold a finger sideways and measure from the point where the soft pad stops to the tip of the nail. That overhang is what the rest of this page is about.
- An eighth of an inch, about 3 mm. Ordinary technique still works. Use a little more water, a little less pressure, and you will mark a pot occasionally rather than every time.
- A quarter inch, about 6 mm. You will feel it opening the floor and pulling the inside wall, and nowhere else much. Two substitutions cover it: a sponge inside, a knuckle outside.
- Half an inch, about 13 mm. Fingertips are out of the job entirely. Plan on the sponge, the knuckles and the ribs from the first minute rather than switching once a pot is already scored.
- Three quarters of an inch and beyond, about 19 mm. Everything is tool work, and the tools are better at it than fingers were anyway. Add a pear shaped ribbon tool for opening and a sponge on a stick for the inside.
A quarter inch is about the width of a pencil. Half an inch is about the width of your smallest fingernail. If you are between two of these, work from the longer one.
The pad test, which takes two seconds
Press your index finger flat on a table as if you were smudging something. If the nail touches the table before the pad flattens, you are throwing with the nail whether you intend to or not, and the sections below are for you.
Shape counts as well as length. A rounded or squared free edge spreads its contact across a wider line. An almond, stiletto or coffin point concentrates the same force onto a single spot, and cuts about as well as a needle tool.
Five ways to replace a fingertip
There are only five, and the rest of this page is just deciding which one to reach for at which moment. Learn what each is good at and you can work the rest out at the wheel on your own.
The sponge
A small round sponge held between your finger and the clay. It cushions, it carries water, and it is the single most useful thing on this page.
Replaces the inside fingertip for opening, widening, the inside pull and the rim.
The knuckle
The middle joint of a curled index finger. Bone under skin, so it holds a line better than a fingertip does, and the nail points back at you.
Replaces the outside fingertip on centering, pulls and collaring.
The side of the finger
The flat of the second joint, presented by dropping your wrist and rolling the hand over. Softer than a knuckle, wider than a tip.
Replaces the inside fingertip when you want feel rather than a sponge.
The rib
A rigid edge that does not deform, does not tire and does not have a nail on it. Wood shapes, metal finishes, soft rubber smooths.
Replaces either hand, or both, for shaping, compressing and cleaning up.
The tool
A pear shaped ribbon tool for opening, a sponge on a stick for water down a narrow neck, a wooden knife for the rim, a needle tool for depth.
Replaces the jobs people usually do with a thumbnail.
Nine things to do before your hands are wet
Most of the difficulty in this whole subject is decided before the wheel turns. Once your hands are covered you are not going to get up and go find a rib, and you are certainly not going to file anything.
The one that matters most
Scrape a bar of soap under your nails first. Soft soap fills the space under the free edge so clay cannot, and it rinses out at the end instead of drying to a hard wedge you have to dig at.
- File the free edge round or square. A point concentrates the same force into one spot. Two minutes with a file is the highest return move on this list.
- Soap under the nails. Drag each nail across a wet bar until the space is packed.
- Oil or balm the cuticles before, not after. Clay pulls water out of skin the whole time you work. Putting the barrier on afterward is closing the gate late.
- Pick a softer clay body. Softer clay needs less pressure, and less pressure is the entire game. 52 Buff is the most forgiving bag in the building.
- Wedge it well. A hard lump forces you to push harder to center, and pushing harder is what drives an edge into clay.
- Set the tray before you start. Two sponges, a soft rubber rib, a wooden rib, a sponge on a stick, a wooden knife. Yellow Level Members and up have the run of the studio’s tools; Green Level Members bring their own, and there is a beginner’s set at the front desk if you arrive without.
- Slow the wheel down. Not to a crawl, just off the top. A slower wheel turns a slip into a scuff instead of a spiral.
- Decide about gloves now. Thin nitrile is genuinely good for wedging, glazing and reclaim. On the wheel it dulls the feedback you are already short of, so most people who try it go back to bare hands and a sponge.
- Keep the bucket close and use more water than you think. Water is what stops the edge grabbing.
The short nail option
Short nails are easier. We sell clippers at the front desk for $2.25 because enough people decide mid class that they would rather have the pot. Plenty of members keep the nails and throw beautifully. Both are real answers, and the only wrong one is spending six weeks fighting your own fingertips without knowing that is what you are doing.
Centering, with nothing pointed anywhere near the clay
Centering is the friendliest part of the throw for long nails, because the correct technique already uses the parts of your hand that do not have nails on them. If somebody taught you to center with fingertips, they taught you a habit you were going to have to unlearn anyway.
The tell
If you can see the backs of your own nails while you are centering, they are facing the clay. Curl the fingers until you are looking at your knuckles instead.
- Seat the clay hard and run the wheel fast. Fast is easier here, and this is the only part of the throw where that is true.
- Left hand on the side. Use the heel of the palm and the outside edge of the hand below the little finger. That whole edge is a smooth curve with no nail anywhere on it.
- Right hand on top. Heel of the palm down on the dome, fingers curled loosely into the palm so nothing sticks out past the knuckles.
- Lock in. Elbows against your hips or thighs, shoulders down. Your body holds the position, not your arms, and a shaking arm is what makes a nail skip across the surface.
- Cone up with the blades of both hands, squeezing from opposite sides. Fingertips have no job here at all.
- Cone down with the heel of the top hand while the side of the left hand stays on the wall. Push down and slightly inward.
- Repeat two or three times, then check by resting the side of a knuckle lightly against the spinning clay. A knuckle reads wobble perfectly well.
- Do not test with a fingertip. This is the moment people forget, one nail touches, and there is a ring cut into an otherwise centered lump.
If it still will not center
It is almost never the nails. It is usually clay that is too stiff, a wheel that is too slow, or arms that are not braced. Our full throwing guide covers all three.
Opening the floor, which is the hard one
This is where nails break. Opening means pressing straight down into the middle of a spinning mound, which is exactly the direction that bends a nail backward against its own bed. Every potter who has lifted a nail at the wheel lifted it here.
Never do this bare
If you take one instruction off this page, take this one. Do not open a mound with bare fingertips if you have any overhang at all. Put a sponge or a tool between you and the clay, every time, on every pot.
- Slow the wheel to medium. You need to see the hole appear, and a fast wheel opens it before you have decided where the middle is.
- Take a small round sponge, soak it, and squeeze most of the water out. Too wet and it slides off center; too dry and it drags.
- Drive it with the pad of your thumb behind it. Press the sponge into the top center and let the sponge do the pushing. Your thumb never reaches the clay, so the nail never gets near it.
- Or use a tool instead. The rounded end of a wooden modeling tool, or a pear shaped ribbon trim tool, both open cleanly and give you more reach than a thumb.
- Stop with the floor as thick as the bottom of your wall, and a quarter inch thicker again if you are trimming a foot ring. Check with a needle tool pushed straight through to the bat, pinch it where it leaves the clay, lift it out and look at the wet length. Mark the needle with the pad of your thumb rather than the tip of a long nail, which sits too far forward to show where the clay surface was. The thing a nail genuinely cannot do is read a thickness by pressing on the floor, so do not try.
- Widen with the sponge, pulling from the center outward with the sponge flat against the floor. Move slowly and stop before the width you want, because the last pull always takes more than you expect.
- Compress the floor with a wooden rib, from center to edge, two or three passes. This matters more for you than for most people, because a sponge opened floor is looser than a finger opened one.
- Clean the corner where floor meets wall with the rounded end of a wooden tool. That corner is where cracks start, and it is unreachable with a long nail on your hand.
Going deeper
We have a whole page on opening clay and setting the floor, and another on compressing the floor and the rim. Both are written for fingers, and everything in them works with a sponge in the way.
Pulling walls, three ways that all work
This is the section people arrive looking for. A pull is one hand inside and one hand outside, squeezing a ring of clay and walking it upward, and a nail on either hand cuts a spiral as it climbs. Here are the three replacements, easiest first. Learn one properly rather than all three badly.
A. The sponge pull
The sponge sits inside, your knuckle sits outside, and the two of them squeeze the wall between them. It is the gentlest of the three, it carries its own water, and it is the one to learn first at any nail length.
- Wheel slow. Slower than centering, slower than you think.
- Sponge in the inside hand, gripped between thumb and first two fingers so a flat face points at the wall.
- Knuckle of the outside index finger against the wall, slightly below the sponge, supported by the middle finger behind it.
- Squeeze at the base until you feel the wall thin, then climb at a steady speed. The squeeze is set at the bottom and never changes on the way up.
- Ease off in the last inch and let the pressure fade to nothing before you come off the rim, or you will pull the rim out of round.
- Re-wet the sponge every pull. It is your water source, and a dry sponge drags harder than a fingertip.
B. The knuckle pull
Knuckles on both sides, no tools at all. It is the fastest of the three once it clicks, it gives you back a lot of the feel you lost, and it costs nothing but a few sessions of feeling clumsy.
- Curl the outside index finger until the middle joint faces the pot and the nail faces you. Brace it with the middle finger.
- Inside hand: drop the wrist and roll the hand over so the side of the index finger, not the tip, lands on the inside wall. This is the whole trick, and it is one movement.
- Line the two contact points up, inside hand a fraction higher than outside. Both hands touching the rim first, then down to the base together, so you know they are aligned before you squeeze.
- Squeeze at the base and climb slowly. Three pulls to full height, not one heroic one.
- Check the inside surface after every pull. A spiral groove means the wrist came back up and the tip landed. Drop it again.
- Water between every pull, and never pull a dry wall with a knuckle. It grabs worse than a fingertip does.
C. The rib pull
A rigid rib on the outside, a knuckle or sponge on the inside. It is the most controlled of the three, it gives the straightest wall, and it removes the slip as it goes. It is also the least forgiving, because a rib will cut a thin wall open without warning.
- Get the wall up first with sponge or knuckles. A rib is a refining tool, not an opening one. Two pulls, then reach for it.
- Hold the rib almost flat to the wall, edge trailing, so it skims across the clay and the body of the rib follows behind it rather than digging in.
- Support directly opposite it with a knuckle or a sponge inside. A rib with nothing behind it pushes the wall inward and knocks the pot off round instead of thinning it.
- Climb slowly and steadily. Any hesitation shows as a ring, and a ring on the outside of a wall is where the next pull tears.
- Use wood or firm rubber while you are learning. Metal is the sharpest, the cleanest and the one most likely to open a wall. Save it for the last pass.
- Scrape the slip off as you finish. The slurry your hands leave is the wettest, floppiest clay on the pot, and removing it is the fastest way to stiffen the form.
Which one is yours
If your nails are under a quarter inch, learn the knuckle pull, because it gives you the most feel back. Over a quarter inch, start with the sponge pull and add the rib once the wall is reliably up. Nobody needs all three, and our rib page goes considerably deeper on the third one.
| Method | Contact inside | Contact outside | Best at | Watch out for |
|---|---|---|---|---|
| Sponge pull | Round sponge | Index knuckle | Bowls, first pots, any nail length | A dry sponge drags and a soaked one slides |
| Knuckle pull | Side of the index finger | Index knuckle | Cylinders, height, keeping the feel | The wrist creeping back up mid pull |
| Rib pull | Knuckle or sponge | Wood, rubber or metal rib | Straight walls, clean surface, no marks at all | Cutting through a wall that is already thin |
Shaping, collaring and the rim
The wall is up. Everything from here is refinement, and refinement is where long nails stop being a problem and start being irrelevant, because the tools do this better than fingers ever did.
The rim, specifically
A rim is the thinnest, wettest, most exposed clay on the pot and it is at exactly nail height for the whole throw. Finish it with a folded strip of chamois or thin plastic draped over the edge, pinched lightly, wheel slow. Two rotations and it is round, smooth and untouched by anything hard.
- Belly a form with a wooden rib outside and a knuckle or sponge pushing from inside. The rib decides the curve, so the shape stops depending on how steady your hand is.
- Collar in with the sides of both hands and the web between thumb and index finger. Make a ring of your two hands around the neck and close it slowly, wheel slow. No fingertip goes anywhere near this, which makes collaring genuinely easier with long nails than pulling is.
- Compress the rim with a soft rubber rib if you would rather not use chamois, laid flat across the top edge for two rotations.
- Sponge the water out of the bottom with a sponge on a stick rather than reaching in. On any pot taller than your hand this is the only way that does not leave marks on the way out.
- Clean the outside bottom edge with a wooden knife, held steady against the wheel head.
- Finish the surface with a metal rib on the last pass if you want the throwing rings gone. Light pressure, slow wheel, one pass.
- Wire off and lift with both hands cupped around the base, not gripped. Getting the pot off the wheel is its own skill and we have a page on it.
People throwing with the nails on
Reading a numbered list tells you the order. Watching somebody make a whole pot tells you the pace, and the pace is the thing you cannot get from words. These five are the clearest full length attempts we found, including two that go badly, which are arguably the more useful ones.
Everything that is not the wheel
The wheel is the hard case and it takes up most of this page, which gives a misleading impression of the whole craft. Here is how everything else ranks, from the parts where nails do not matter at all to the one part that is genuinely worse than throwing.
Trimming
Entirely a tool job. A loop tool does every cut and your hands only steady the pot. If anything, trimming is the part of the process where nail length is invisible.
Slab work
You roll, cut, texture and join with tools on a flat surface, so fingertips rarely touch a working face at all. If you want a session where nails are a non-event, this is it. Slab molds need the slab roller and slab mold certification first.
Carving and sgraffito
A long nail is a precision edge with your own hand behind it, which is a good description of a sgraffito tool, and some decorators do use a thumbnail deliberately. The carving lesson teaches it with a loop tool, a ribbon tool, a needle tool or a proper sgraffito tool, on mid leather hard clay. The carving page has the rest.
Wedging
Wedge with the heels of your palms, not your fingers. Done correctly your fingertips never load the clay anyway, so nothing needs to change except the habit of clawing at it when it fights back.
Coil building
Palms roll the coils and a wooden tool or a rib blends the joins. The only nail risk is blending with a thumbnail, and a serrated rib does it better. See blending coils.
Handles
Pulling a handle is a wet thumb and a wet finger sliding down a lump of clay, which is exactly the motion a nail spoils. Pull with the thumb pad and the side of the index finger, or stick a stub on the mug, turn the mug upside down and pull the handle straight off it. Handles page.
Pinch pots
Pinching drives your thumbnail straight into an interior wall with nothing to put between them. If you love them, pinch with the flat of the thumb and rotate constantly so no spot gets worked twice. Pinch pot page.
Glazing
Nails have no effect on a glaze or a firing. Bisque goes to cone 05 and glaze goes to cone 5½ regardless of what is on your hands. Nitrile gloves are worth it here for the sake of your manicure, not your pots.
A reasonable plan for a first month
If you are new and keeping the nails, spend your first sessions on slabs and coils while you get used to the clay, and bring the wheel in once you already know what leather hard feels like. Learning two hard things at once is what makes people decide the craft is not for them.
Handles, the shortcut
If pulled handles keep coming out marked, a slab handle or an extruded one gets the mug finished and looks deliberate. Nobody drinking out of it will know which method you used.
What clay does to the nails, and what to do about it
Everything above is about protecting the pot. This part is about protecting the manicure, which is the reason most people are on this page in the first place.
The physical facts
Wet clay is mildly abrasive and it is thirsty. It wears at polish, it pulls water out of skin and nail plate, and it packs into the space under the free edge and dries hard there.
Water is the bigger problem for anything glued on. Hours of wet work softens the adhesive bond on gels and acrylics the same way a long session of dishes does, so edges lift sooner than they would otherwise.
- Soap under the nails before you start. This is the whole trick and it is free. Soft soap occupies the space so clay cannot, and it rinses out.
- Barrier balm or cuticle oil before, not after. Then oil again on the way home.
- Clean with a wooden orange stick, never a metal tool. Dried clay plus a metal point is how a gel edge gets levered up and a natural nail gets scratched.
- Rinse your hands over a bucket, and give it longer than feels necessary. Half rinsed clay dries under the nail on the drive home. At The Clay Hole, our cleanup instructions show where clay water goes, which is The Wash Pit; anywhere else, ask where clay water goes before you use a sink.
- Book fills after studio days, not before. There is very little point putting a fresh set straight into a bag of wet clay.
- Expect a shorter set life if you throw weekly. That is not a failure of the salon or of the studio, it is water.
- Use nitrile gloves for the wet jobs that are not throwing: wedging, reclaim, glaze buckets, cleanup. All the exposure, none of the lost feedback.
- Check for a lifted edge before you sit down. A lifting nail catches clay underneath it, and once clay is under a lifted acrylic it is coming off before the clay does.
Hygiene, said once
Clay itself is not toxic, but it holds water and grit against skin for hours, and hours of wet work are what skin around a nail does not like. If you throw often and your fingertips are getting sore or split, that is usually the cause and a barrier balm is the fix. Leave the cuticles alone while you are at it, because that seal is what keeps water and germs out of the nail fold. If the skin beside a nail goes red, puffy or tender, that is a nail fold problem rather than dry fingertips, and it wants a doctor rather than another coat of balm.
Seven things that go wrong, and what each one means
Every one of these has a specific cause and a specific fix. None of them means you should give up on the wheel, and none of them is solved by pressing harder.
A spiral groove up the inside wall
Cause. The inside fingertip. The nail landed and the hand climbed, so the cut is a helix.
Fix. Sponge inside, or drop the wrist and roll onto the side of the finger. Then rib the inside once to close what is already there.
The wall tears on the pull after a clean one
Cause. A groove from the previous pull thinned the wall, and this pull stretched the thin part first.
Fix. Stop pulling. Rib the wall to even it out and accept the height you have. A torn wall does not come back.
A nail bends back or lifts while opening
Cause. You opened with bare fingertips. Downward force against a spinning mound is the one load a free edge cannot take.
Fix. Sponge or ribbon tool, permanently. There is no version of this where bare fingers are the right answer.
The pot pushes off center whenever you touch it
Cause. A hard narrow edge concentrating force into one spot instead of a soft pad spreading it.
Fix. More water, slower wheel, wider contact. A knuckle or a sponge spreads the same push across a much larger area.
The rim goes ragged or out of round
Cause. Nails catching the top edge at the end of a pull, usually because the pressure did not fade before the hands came off.
Fix. Ease off in the last inch, then chamois the rim. Two rotations fixes almost any rim that is only cosmetically rough.
Gouges on the outside of the pot
Cause. The outside hand, which people forget about entirely because they are watching the inside.
Fix. Curl the outside index finger until you can see your own knuckle. If you can see the back of the nail, it is facing the pot.
Clay packed hard under the free edge
Cause. No soap at the start, and a quick rinse at the end.
Fix. Soap first next time. Today, soak in warm water and work it out with a wooden stick rather than digging with anything metal.
Everything above at once
Cause. Usually clay that is too stiff, which makes every contact heavier than it needs to be.
Fix. Softer clay, more water, slower wheel. In that order, and before you change anything about your hands.
The at-the-wheel checklist
Two short lists. Read the left one before you sit down and the right one whenever a pot starts going wrong.
Before the wheel turns
- File the free edges round, not pointed
- Soap scraped under every nail
- Balm or oil on the cuticles
- Softer clay, properly wedged
- Two sponges in the tray
- Soft rubber rib and a wooden rib
- Sponge on a stick and a wooden knife
- Water bucket within reach
- Wheel speed off the top
When it starts going wrong
- Can I see the backs of my nails? Curl the fingers
- Is there a sponge inside? Put one there
- Is my inside wrist dropped, or has it crept up?
- More water before the next pull
- Slow the wheel one more notch
- Groove already there? Rib it, do not pull again
- Ease the pressure off before leaving the rim
- Chamois the rim before wiring off
The ones that come up at the tables
Do I have to cut my nails for a class here?
No. There is no rule about nail length at The Clay Hole and there never has been. The first few weeks on the wheel are easier with short nails, because centering and opening are hard enough without also relearning where your hands go. Plenty of members throw well with long ones. It is your call, and the clippers at the front desk are $2.25 if you change your mind mid class.
Will acrylics come off in the clay?
They can, and the usual culprit is water rather than force. Long wet sessions soften the adhesive bond and lift an edge, and once clay gets under a lifted edge the nail is on its way off. The two things that help most are checking for a lift before you sit down and booking fills after studio days rather than before.
Are gloves a good idea on the wheel?
They are excellent for wedging, glazing, reclaim and cleanup, and mixed on the wheel. Thin nitrile dulls the feedback from the clay, which matters most while you are learning to feel wall thickness, and it tends to drag on the surface unless everything stays very wet. If you are brand new, try a few sessions bare handed with a sponge first so you learn what the clay is supposed to feel like.
What length is actually fine?
Anything up to about an eighth of an inch past the pad and ordinary technique still works with a lighter touch. Past a quarter inch you will want a sponge inside and a knuckle outside. Past half an inch, plan the whole session around tools from the first minute. Shape matters as much as length: a rounded edge spreads its contact, a point concentrates it.
Which single tool should I buy first?
A small round sponge, and you almost certainly already have one. After that, a soft rubber rib. Those two cover opening, widening, the inside pull, the rim and the floor. Yellow Level Members and above have the run of the studio’s tools, and we stock close to every kind of rib made, so you can try four and buy none.
Is there anything long nails are better at?
Yes. Carving and sgraffito, where a nail is a precision edge with your own hand behind it, and picking a piece of grog out of a wall mid throw, which is genuinely awkward with short nails. Collaring is also easier than pulling, because collaring already uses the sides of the hands.
Does nail length change anything about firing?
Nothing at all. Bisque goes to cone 05 and glaze goes to cone 5½ whatever your hands look like. The only way nails reach the kiln is a groove that thinned a wall enough to warp or crack, and by then the problem happened at the wheel.
I keep marking pots and I am ready to give up
Change the clay before you change anything else. Almost every member who tells us this is fighting a bag that is too stiff, which forces heavy pressure, which drives the edge in. Softer clay, more water, slower wheel, sponge inside. If it is still happening after that, grab an instructor for five minutes and have them watch one pull, because it is usually one specific habit and it is much faster to see than to describe.
Where to go next
How to throw on the pottery wheel
The full throw from wedging to wiring off. Everything on this page is a substitution inside that sequence.
Read it →Using ribs while you throw
Six moves, nine rules, and which rib does which job. The deepest version of substitution number four.
Read it →Opening clay and setting the floor
The step this page calls the hard one, covered properly, including how thick to leave the floor and why.
Read it →Trimming and turning
All tools, no fingertips, and the place a marked outside wall can quietly be fixed.
Read it →Carving and sgraffito
The one place on this whole list where a long nail is a tool rather than an obstacle.
Read it →Clay Hole University
Every lesson in one place, from first day at the wheel through firing and glaze chemistry.
Start there →Nobody has to choose
The question people arrive with is whether they can do this. The answer is yes, and it has been yes for as long as people have had both clay and manicures. The more useful question is which part of your hand is going to do the job your fingertip used to do, and there are only five candidates, and you have now read all of them.
Give it three sessions before you judge it. The first one will feel clumsy in a way that has nothing to do with your nails and everything to do with unlearning a habit. By the third, the sponge is just where your hand goes, and you will have stopped thinking about it entirely.
That is the whole short version: something soft or something rigid between the nail and the clay, more water, slower wheel. Give it three sessions before you judge it, because the first one always feels clumsy.
If you want the full explanation of why any of this works, the five substitutions in detail, and nineteen videos, ten of them from potters throwing with the nails on, switch to the Comprehensive Version at the top of the page.
Which version would you like to print?
Videos come out as a labeled box with the title and channel to search for, since paper does not play them.