Pottery Date Night
 Bring All Your Friends Free Week
 Give a Month of Pottery
 Private Pottery Parties

 The Welcome Booklet
 Your First Ten Sessions
 The Pottery Process
 Finding the Studio
 Your Classes Never Expire
 The Four Tables
 Who’s Who
 The Rewards Program
 Flux Glazes
 The Calculators
 Kiln Tracker
 Holiday Kiln Deadlines

 Beginner’s Tool Set
 Fingernail Clippers
 Mayco Clay Mender
 Epoxy for Kintsugi
 Applicator Bottles
 Large Bead Rack
 Raku Workshop
 Nighttime Raku
 Horsehair and Feather Raku
 The Clay Hole T-Shirt
 Embroidered Crewneck
 Zip-Up Hoodie
 Pre-Made Bisqueware
 Glaze Catchers
 Kiln Cookies
 Clay Cubby Rental
 The Glaze Bible, Printed
 The Book of Molds, Printed
 Printable Pottery Guides
 Free Printable Trackers
 Gifts for Potters
 Christmas Pottery Ideas
 Mother’s Day Gift Ideas
 Pottery Date Night
 Studio Calendar
 2027 Studio Events
 What Should I Do Today?
 How to Throw on the Pottery Wheel
 How to Make a Pinch Pot
 How to Tap Center a Pot
 The Five Stages of Clay
 Is Pottery Hard to Learn?
 Pottery Wheel Practice Drills
 20 Easy Hand-Building Projects
 Everything That Sounds Wrong

 A Beautiful Piece, Every Time
 Slab Roller Tips
 Any Dish as a Slump Mold
 Slab Roller & Slab Mold Certification
 The Pottery Skill Tree
 Clay & Pottery Calculators
 Logging Your Pottery and Glazes
 The Pottery Dictionary
 Why Did My Pottery Do That?
 The Pottery Cone Chart
 Pottery Myths, Fact-Checked
 Is Handmade Pottery Food Safe?
 Incredible Ceramic Artist Videos
 How Dan Throws Giant Pots
 How to Dry Your Pottery
 The Pottery Wheel Introduction
 Pottery by Zodiac Sign
 Personality and the Pottery Wheel
 Pottery for Engineers
 ADHD, Hyperfocus, and Never Running Out
 Hobbies for Burnout
 Screen-Free Hobbies for Adults
 Every Addiction I Ever Had Lost to Art
 Functional Pottery Is Engineering
 How Do We Compare?
 Pottery Classes by City
 Every Pottery Studio in Utah
 Pottery in Draper
 Featured Members
 The Signature Wall
 Making Friends as an Adult Is Brutal
 The Clay Hole Commandments
 2027 Pottery Contests
 2027 Studio Parties
 Gallery Night

 Scream It Into the Void
 Destroy the Glaze Wall
 Daily Affirmation Cards
 Everything That Can Go Wrong
 Subscribe to Our Newsletters
 Contact The Clay Hole
 Corporate Team Building

 Glaze Combinations
 Glazes We Do Not Carry
 Making Glaze Test Tiles
 The Mega Glaze Tool
 How to Use the Mega Glaze Tool

 Glaze Brushing Techniques
 How to Use Underglaze
 How to Use Dipping Glazes
 Glaze Problems, Causes and Fixes
 The Dipping Glaze Guide

 Making a Glaze Catcher
 Fused or Sharp After Firing
 The Signature Wall
 His Viral Videos
 His Own Ceramics
 Meet Mud
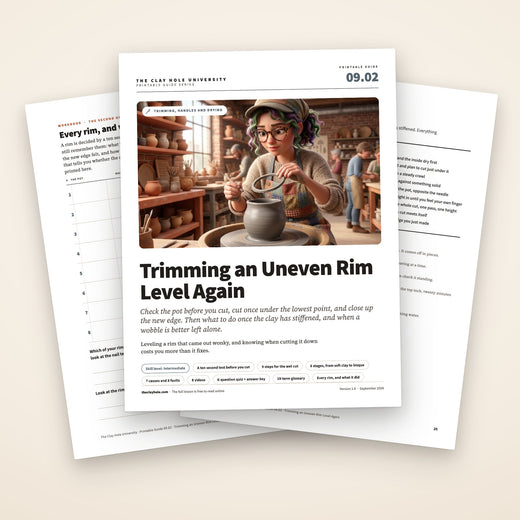
Trimming an uneven rim
Almost every rim comes off the wheel a little out of true, and almost every one of them can be fixed in about forty seconds while the pot is still wet. This page covers how to tell what is actually wrong, how to cut the rim level without folding the wall over, how to rescue one that has already gone leather hard, and how to stop putting the wobble there in the first place.
Almost every rim comes off the wheel a little out of true, and almost every one of them can be fixed in about forty seconds while the pot is still wet. Here is the cut, the one thing people skip afterward, and the three ways it goes wrong.
- Wet stage, on the wheel
- Needle tool
- About forty seconds

A rim is a record of where your hands were.
The wheel goes around. Wherever your two hands were at the moment they left the clay, that is the height the rim ends up. If one hand was a millimeter higher, or if you lifted off at one spot instead of easing off all the way around, the rim writes it down.
So the fix is not clever. You slice the wobbly part off with a needle tool while the pot is still wet and still on the wheel, and then you compress the raw edge you just made. That second half is the one people skip, and it is the one that cracks pots.
Words first, then somebody doing it.
You could have found a video of this in about four seconds, so it is fair to ask why we bothered writing it all out. The answer comes from watching people learn this exact skill in this exact building.
What video does better
Nobody can write down how fast a wheel is turning, or how hard a finger is pressing, or how much the wall gives when the needle goes in. Those are things you have to see. Every video on this page is here because it shows something a sentence cannot.
What words do better
A video runs at its own speed. Words sit still. You can stop on the one sentence that confused you, read it twice, and go on. You can also scan a list of nine steps in three seconds, which you cannot do with nine minutes of footage.
The part that actually matters. Watching feels like learning and mostly is not. You finish a video, your brain files the whole thing under done, and then you sit down at a wheel and your hands have no idea what you just agreed to. Reading the same idea and then watching somebody perform it gives you two separate handles on one skill. Two handles are much harder to drop than one.
There is a practical reason too. Your hands are wet and there is already clay on your screen, because there always is. You are not going to scrub back and forth through a fourteen minute video with a muddy thumb hunting for the eight seconds you needed. You are going to glance at a short list. So the words come first, the videos back them up, and there is a stripped down checklist near the bottom built for exactly that muddy thumb moment.
This is what we have watched happen, not a study we are citing. But we have seen it play out enough times that we build our guides this way on purpose.
Three different problems look identical from your chair.
A pot that looks wrong at the top is not always a pot with an uneven rim, and cutting the rim off a pot with the other two problems wastes half an inch of height and fixes nothing. Ten seconds of looking saves you the pot.
A pot that looks wrong at the top is not always a pot with an uneven rim. Ten seconds of looking saves you from cutting half an inch off for nothing.
One. The rim really is uneven.
High on one side and low on the other, or a slow wave all the way around. The wall is where it should be, the top edge is not. This is the one this page is about, and it is the easy one.
Two. The pot has walked off center.
The rim can be dead level and still look terrible if the whole pot is running off center. Cutting the rim will make it level with a wheel it is not concentric to, and it will still look wrong.
Three. The wall is thicker on one side.
The rim looks fine wet, and then the pot leans as it dries because the thick side shrinks later than the thin side. No amount of rim cutting touches this one.
The one test that separates them. Slow the wheel right down. Rest your hand on the splash pan and hold one fingernail steady just outside the rim, not touching. Then watch.
- The gap between your nail and the pot opens and closes: the pot is off center. Tap it back true before you do anything else.
- The rim rises and falls past your nail while the gap stays the same: that is an uneven rim. Cut it.
- Both are steady and the pot still looks wrong: the wall thickness is uneven. Feel the wall between finger and thumb all the way around and you will find the heavy side.
If the pot is off center, our tap centering guide is the fix, and it takes seconds once you have done it a few times. If the wall is uneven, this pot is going to lean and the lesson is for the next one.
Cutting it off wet, in nine steps.
Cutting it off wet, in six steps.
Pot still wet, still on the wheel, wheel still turning. A needle tool goes in through the wall, the wheel carries the cut all the way around, and the top comes away as a ring.
Sponge the rim and the inside dry first.
A needle drags and tears through slurry instead of slicing. Get the standing water out of the floor too, so the ring you are about to cut off does not land in a puddle and glue itself to the bottom.
Find the low spot and plan to cut just under it.
Spin slowly and watch the rim go past a fixed finger. The lowest point of the rim decides your height, because a cut anywhere above it will only shave the high side and leave you with the same wobble, shorter.
Slow the wheel to a steady crawl.
Fast enough that the pot comes back around to the needle without you waiting, slow enough that you could stop it with a finger. Most people go too fast here and the wall folds.
Brace both hands against something solid.
Elbows on your knees or forearms on the splash pan. The hand holding the needle rests against the hand holding the pot. Nothing in this move should be floating in mid air, because a needle that drifts up and down writes that drift straight into the new rim.
Put a finger inside the pot, opposite the needle.
This is the step that separates a clean cut from a collapsed wall. The needle pushes inward, and something has to push back. One fingertip inside the wall, directly across from where the point will enter, at the same height.
Push the point straight in until you feel your own finger.
Level, not angled up or down, and all the way through the wall. You will feel the needle touch your fingertip through the clay, which is exactly the feedback you want. Then stop pushing and hold completely still.
Let the wheel do the whole cut, one pass, one height.
Do not saw. Do not pull out and go back in. The single most common way this goes wrong is somebody withdrawing the needle halfway round and re entering a hair higher, which leaves a step in the rim that is far uglier than the wobble they started with.
Catch the ring as the cut meets itself.
When the needle comes back to where it started, the top of the pot is a loose collar of clay sitting on the rim. Lift it off with the needle, or pinch it between your inside finger and thumb. If you let it drop it will land in the wet floor and you will be repairing that instead.
Compress the raw edge you just made.
Not optional, and it gets its own section below. A freshly cut rim is the single most crack prone edge on the whole pot until you close it back up.
Sponge the rim and the floor dry.
A needle tears through slurry instead of slicing, and you do not want a puddle in the bottom for the cut ring to land in.
Cut just under the lowest point of the rim.
Spin slowly, watch the rim pass a fixed finger, and pick a height below the lowest part of it. Anything higher leaves you the same wobble, shorter.
Slow the wheel and brace both hands.
Elbows on your knees, needle hand resting on the pot hand. Nothing floating in mid air.
Finger inside, needle in until you feel it.
One fingertip inside the wall directly opposite the point, at the same height, so the wall has something to push back against. Push straight in, level, until the needle touches your finger through the clay.
Hold still for one full turn, then catch the ring.
Do not saw and do not pull out and go back in, or you get a step instead of a rim. When the cut meets itself, lift the loose collar off before it drops inside.
Compress the new edge.
Wet fingers, slow wheel, a few passes, then a chamois folded over the top. Skip this and it cracks while it dries.
Everything above is one idea. Put the needle somewhere, then do not move it. The wheel is the thing making the cut level, not your hand. Your hand's only job is to stay exactly where you put it.
If you only watch one, watch this one
The video runs almost twenty minutes because it shows five ways to level a rim. The needle comes first, at 4:51, and the rest are a turning tool, a wire, a knife and no tools at all. Gadsby does the entire move in close up on a cylinder: the inside finger, the needle going level through the wall, the wheel carrying the cut, and the ring lifting away in one piece. He also compresses the new edge afterward rather than stopping at the cut, which is the half of this job most demonstrations leave out.
Watch his hands rather than the pot. Notice how little either of them moves once the point is in, and how the cut hand is braced against the other hand the whole way round.
The player and its cookies wait until you tap. The still frames come from Google while you read, which is one request per video.
Three ways to stop the needle drifting.
Holding a point perfectly still in mid air for one full rotation is harder than it sounds, and it is the only real skill in this whole job. These are the three ways people get around it, in order of how much setup they take.
The parked hand
Rest the heel of your needle hand flat on the wheel head or the splash pan and let only the point stick out. Your hand is not holding a height any more, the wheel head is. Costs nothing and works on any pot.
The height it gives you depends on where your hand happens to sit, so it is repeatable within one pot and not between two.
The brace
Lay a stick, a wooden rib, or even a pencil flat on the wheel head, and run the needle along the top edge of it. Now the needle physically cannot go lower, and your hand only has to stop it going higher.
This is the one to use when you want two pots the same height. Cut the first, leave the brace exactly where it is, and cut the second against the same edge.
The cut guide
A scrap of square stick with a few saw cuts across it at measured heights. The needle sits in whichever slot you want and the whole thing slides along the wheel head. A cut at a slight angle gives you a beveled rim.
Ten minutes to make, and it turns a judgment call into a measurement. Worth it if you throw sets.
A cut rim is an open wound.
You have just sliced through every particle at the top of the pot and left them lying in whatever direction the needle pushed them. The rim is already the thinnest, driest and most exposed part of any thrown pot. Leave it cut and it will crack while it dries, or chip the first time it meets another pot on a shelf.
Wet your fingers and slow the wheel right down.
Dry fingers on a fresh cut edge tear it further. A little water, not a flood.
Two fingers and a thumb, three or four full turns.
One finger inside, one outside, thumb across the top, squeezing gently inward from both sides while the wheel carries the rim through your grip. You are pushing the clay back together, not shaping it.
Then a chamois folded over the top.
One or two slow rotations with a damp chamois draped over the rim rounds the edge and compresses it in the same movement, and it is far more forgiving than fingers. If the rim still feels like an edge afterward, go around again.
Look at the profile from the side.
You want a soft round, like the top of a capital D. What you do not want is a flat plateau with a sharp corner on each side, which is what a cut leaves and what a rushed compression leaves behind.
Cover it loosely overnight.
A rim that has just been cut and wetted is now the wettest part of the pot, sitting in the airiest spot. Loose plastic over the top for a night lets the moisture even out instead of racing away from the edge.
Compressing the rim is a whole subject on its own, and it is the thing that decides whether your rims crack in general, cut or not. Our full guide is compressing the floor and the rim, and a rib does a lot of this work for you if fingers feel clumsy.
What you can still do at leather hard.
Everything above assumes the pot is soft and on the wheel. Most people find the problem the next morning instead, when it is firm. You have fewer options and they are all worse than the wet one, but the pot is not lost.
| Stage | What still works | Watch out for |
|---|---|---|
| Soft leather hard | A needle still cuts, but the ring will come off in pieces rather than one collar. Re center the pot on the wheel first. | A crumbly edge. Follow it with a barely damp sponge and then a chamois. |
| Leather hard | Scrape rather than cut. A metal rib held flat across the rim with the wheel turning slowly takes the high spots down a shaving at a time. | Only fixes small wobbles. If the high spot is more than a millimeter or two you will be there a while. |
| Leather hard, badly out | Turn the pot upside down onto a flat board and work a coarse rasp or a Surform blade across the rim. The rim ends up flat relative to the board. | It flattens the rim but does not make it level with the foot, so check the pot standing up before you stop. |
| Firm but not dry | Wrap a damp paper towel around the top inch only, leave it twenty minutes, and the rim softens enough to cut properly. | Wetting the whole pot. A rewetted rim on a dry body is a crack waiting to happen, so cover the whole thing afterward and let it even out. |
| Bone dry | Nothing good. Stop. | Cutting or sanding bone dry clay puts cracks in it and puts dust in the air. Wait for the bisque. |
| Bisque | Wet sanding with a diamond pad or wet and dry silicon carbide paper, under running water. | Never sand bisque dry. Ever. That dust is silica and it does not leave your lungs again. |
The leather hard cut, done properly
About three minutes, and it shows the thing the table above can only describe: the pot re centered on the wheel, the needle going in at a firm stage, and the ring coming away in one piece anyway. He says outright that this is better done wet.
An uneven rim is really a trimming problem.
This is the reason a wobbly rim matters more than it looks like it should. When you turn the pot over to cut a foot, it stands on its rim. If that rim is not flat, the pot sits tilted, and you trim a foot that is not parallel to the top. The pot then rocks on a table for the rest of its life, and there is no fixing it after the fact.
Which is why you cut it wet
Every reason to level a rim early comes back to this one. Forty seconds at the wheel while the clay is still soft saves you an argument with a tilted pot two days later, when your options are all worse.
If you take one habit off this page, make it this: level the rim before the pot leaves the wheel, every time, whether it needs much or not.
And if it is already dry
Do not stand the pot on its rim. Use a chuck: a thrown collar of clay, a ring of soft clay, or a foam pad, so the pot rests on its widest point instead of its top edge.
Then center it by its foot, not its rim, and hold it with three lumps of soft clay pressed against the side rather than over the top.
Trimming a bowl that will not sit flat
The whole video is the problem this section describes: a bowl whose rim is out, centered and trimmed anyway. The same method covers a deliberately altered rim or a pot with a spout, which never sit flat by design.
Our full trimming and turning guide covers chucks and holding in more detail.
Seven reasons rims go out, in the order they happen.
Cutting is a repair. If you would rather not need the repair, the causes are boring and short, and almost all of them happen before you get anywhere near the top of the pot.
- The clay was never properly centered. An off center lump has a thick side and a thin side. The thin side rises faster on every single pull, so by the third one the rim is a slope. This is the cause behind most beginner rims, and no amount of care at the top fixes it.
- You lifted your hands off instead of easing them off. Whatever height your fingers were at when they lost contact is where the rim stops. Ease the pressure out over the last inch and let the wheel go round two or three more times under light contact before you leave.
- Your two hands were not at the same height. The outside hand usually leads and the inside hand lags, which puts a spiral in the rim rather than a tilt. Check them against each other at the top of every pull.
- The wheel was too fast at the top. The top of a tall wall is the least supported clay on the pot. Speed that was fine at the base turns a small wobble into a wave by the time it reaches the rim.
- You compressed the rim once at the end. Compression belongs after every pull, not as a finishing move. An uncompressed rim spreads and goes out of true on the next pull, so the last one inherits everything.
- You collared in and did not re true the top. Collaring gathers clay inward and it never gathers evenly. Any time you squeeze the diameter down, expect to level afterward.
- The clay was simply too wet. A saturated rim slumps under its own weight between the last pull and the moment you stop the wheel. Sponge the water out as you go and stop adding it once the wall is up.
Diagnosing what your hands are doing
Four problems he sees in students learning to pull cylinders, filmed slowly enough to see the hand positions that cause them. Two of the four end up as an uneven rim, which is the point: the rim is usually the symptom rather than the illness.
Worth pairing with our throwing by the numbers page if you want the wall thickness side of it.
Not every uneven rim is a mistake.
Cutting costs height, every time. Half an inch off a five inch mug leaves you a four and a half inch mug, and there is no getting it back. Before you reach for the needle, it is worth asking whether the rim is actually wrong or just handmade.
Cut it if
- You can see the wobble from across the room.
- The piece is getting a lid, where a level seat is not negotiable.
- You are making a set and one is visibly odd.
- It is a mug or a cup, where the rim meets a mouth and a high spot on one side is something you feel every time you drink.
Leave it if
- You have to spin it at eye level and squint to find the wobble.
- You altered the rim on purpose.
- The pot is already as short as you want it.
- It is a bowl or a vase, where nobody will ever put their mouth on the edge and a millimeter of movement reads as handmade rather than as broken.
There is a practical version of this too. If you know a form always needs a centimeter taken off the top, throw it a centimeter taller on purpose. That is not a workaround, it is how people who make the same thing fifty times a week do it.
Practical version: if you know a form always needs a centimeter off the top, throw it a centimeter taller on purpose.
Eight things that happen, and why.
Three things that happen, and why.
The needle went in and the wall folded over on itself.
No inside support, almost always. The needle pushes inward and if there is nothing behind the clay the wall goes with it. Put a fingertip inside the pot directly opposite the point, at the same height, before you push. Too much wheel speed and clay that is still soaking wet both make it worse.
I ended up with a step in the rim instead of a clean cut.
You withdrew the needle partway around and went back in at a slightly different height. One entry, one height, one pass. If you genuinely have to stop, take the whole ring off, then go around again lower and cut a fresh single pass under the mess.
The ring dropped inside the pot and mangled the floor.
It comes free the instant the cut meets itself, so be ready a moment before you think you need to be. Lift it clear on the needle or pinch it between your inside finger and thumb. If it has already landed, get it out with the needle rather than your fingers and then re compress the floor.
I cut it and it is still uneven.
Your cut was above the lowest point of the rim, so it only shaved the high side and left the low side untouched. The height has to sit under the lowest part of the whole rim, which always feels like more clay than it should. Find the low spot first, then cut below it.
The new rim is level but it is sharp.
That is exactly what a cut leaves, and it is normal. It is also the state that cracks and chips. Wet fingers, slow wheel, squeeze it back together over a few turns, then round it with a damp chamois until it stops feeling like an edge.
It cracked at the rim while it was drying.
Two causes and they usually arrive together. The cut edge was never compressed, so the particles at the top were left loose and open. And the rim, being wet and thin and up in the air, dried much faster than the body underneath it. Compress properly, then cover loosely overnight so the moisture evens out.
It looked level on the wheel and wobbly the next morning.
Then the rim was not the problem. Either the pot was running off center while you cut, so you made it level to a circle it is not concentric with, or the wall is thicker on one side and it has pulled itself out of true as it dried. Do the fingernail test next time before you cut.
My needle drags and tears rather than slicing.
Slurry on the rim, a bent point, or a blunt one. Sponge the rim dry, wet the needle itself, and look down the point to check it is straight. Needles bend more easily than people expect and a bent one cuts a curve.
The muddy thumb list.
This is the part to leave open on your phone. Everything above, stripped down to what your hands need.
- Fingernail test first. Gap moving means off center, rim moving means cut.
- Sponge the rim and the floor dry.
- Find the low spot. Cut under it.
- Wheel slow.
- Both hands braced, needle hand resting on the pot hand.
- Finger inside, opposite the point, same height.
- Push in level until you feel the needle through the clay. Then stop moving.
- One pass, all the way around. No sawing.
- Catch the ring before it falls in.
- Compress: wet fingers, a few turns, then chamois.
- Cover loosely overnight.
The ones that come up at the wheel.
How much can I take off?
As much as you like, as long as what is left is a pot you still want. The practical limit is not the clay, it is the form. If the low spot is more than about a third of the way down the wall, you are not leveling a rim any more, you are making a shorter and rather different pot, and throwing it again is usually faster and more satisfying.
Can I add clay to the low side instead of cutting the high side?
On a wet thrown pot, essentially never. Fresh clay added to a spinning wet rim does not bond properly, it throws the balance off, and it usually comes away in the kiln at the join. Cutting is the answer here. Adding is a hand building move.
Should I level the rim before or after I put a handle on?
Before, and ideally before the pot even leaves the wheel. Once a handle is attached the pot is awkward to re center, the handle gets in the way of your hands, and any pressure you put on the rim travels into a join that is still soft.
Do I need to take the pot off the bat first?
No. Cut it where it is, on the wheel, still attached. Moving a soft pot to level its rim is how the rim ends up needing leveling again.
Wire or needle?
Both work. A needle is easier to hold at one exact height because it is rigid, which is why it is the default. A taut wire held across the rim suits some people better, particularly on wide openings, but wire flexes and a flexing cut wanders. Try both and keep whichever one your hands trust.
Does the rim have to be perfectly level?
For anything taking a lid, yes, because a gallery that is not flat will never seat a lid properly. See our guide to throwing lids that fit. For a mug, close enough that your lip cannot feel it. For a bowl or a vase, a little movement in the rim is one of the things that tells people a human made it.
Is rim the same thing as lip?
People use both for the same edge. If anyone is being precise, the rim is the whole top edge of the pot and the lip is the profile you have given it, but nobody in a studio is going to correct you either way.
Where this one leads.
Forty seconds, at the right moment.
Almost everything on this page is one small habit wearing several hats. Before the pot leaves the wheel, spin it slowly, look at the top edge, and deal with it while the clay is still soft enough to forgive you. Do that and the leather hard table, the chuck, the rasp and the silicon carbide paper stay theoretical.
And when a rim does come out wavy, that is not a sign you are bad at this. It is a sign your hands left the clay at two different heights, which they will, for a while. Cut it off, compress the new edge, and throw the next one a little taller.
Level the rim before the pot leaves the wheel, every time, and compress the edge you just made. That is the whole habit.
There is a much longer version of this page with the leather hard rescue table, the causes, the trimming knock on effect and eight ways it goes wrong. The toggle up at the top will take you to it.
Which version would you like to print?
Videos come out as a labeled box with the title and channel to search for, since paper does not play them.