Pottery Date Night
 Bring All Your Friends Free Week
 Give a Month of Pottery
 Private Pottery Parties

 The Welcome Booklet
 Your First Ten Sessions
 The Pottery Process
 Finding the Studio
 Your Classes Never Expire
 The Four Tables
 Who’s Who
 The Rewards Program
 Flux Glazes
 The Calculators
 Kiln Tracker
 Holiday Kiln Deadlines

 Beginner’s Tool Set
 Fingernail Clippers
 Mayco Clay Mender
 Epoxy for Kintsugi
 Applicator Bottles
 Large Bead Rack
 Raku Workshop
 Nighttime Raku
 Horsehair and Feather Raku
 The Clay Hole T-Shirt
 Embroidered Crewneck
 Zip-Up Hoodie
 Pre-Made Bisqueware
 Glaze Catchers
 Kiln Cookies
 Clay Cubby Rental
 The Glaze Bible, Printed
 The Book of Molds, Printed
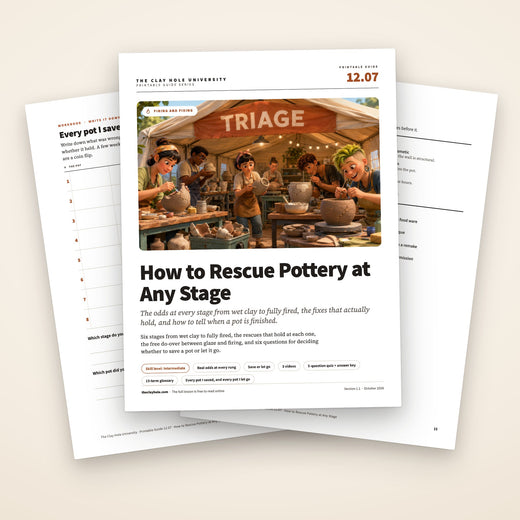
 Printable Pottery Guides
 Free Printable Trackers
 Gifts for Potters
 Christmas Pottery Ideas
 Mother’s Day Gift Ideas
 Pottery Date Night
 Studio Calendar
 2027 Studio Events
 What Should I Do Today?
 How to Throw on the Pottery Wheel
 How to Make a Pinch Pot
 How to Tap Center a Pot
 The Five Stages of Clay
 Is Pottery Hard to Learn?
 Pottery Wheel Practice Drills
 20 Easy Hand-Building Projects
 Everything That Sounds Wrong

 A Beautiful Piece, Every Time
 Slab Roller Tips
 Any Dish as a Slump Mold
 Slab Roller & Slab Mold Certification
 The Pottery Skill Tree
 Clay & Pottery Calculators
 Logging Your Pottery and Glazes
 The Pottery Dictionary
 Why Did My Pottery Do That?
 The Pottery Cone Chart
 Pottery Myths, Fact-Checked
 Is Handmade Pottery Food Safe?
 Incredible Ceramic Artist Videos
 How Dan Throws Giant Pots
 How to Dry Your Pottery
 The Pottery Wheel Introduction
 Pottery by Zodiac Sign
 Personality and the Pottery Wheel
 Pottery for Engineers
 ADHD, Hyperfocus, and Never Running Out
 Hobbies for Burnout
 Screen-Free Hobbies for Adults
 Every Addiction I Ever Had Lost to Art
 Functional Pottery Is Engineering
 How Do We Compare?
 Pottery Classes by City
 Every Pottery Studio in Utah
 Pottery in Draper
 Featured Members
 The Signature Wall
 Making Friends as an Adult Is Brutal
 The Clay Hole Commandments
 2027 Pottery Contests
 2027 Studio Parties
 Gallery Night

 Scream It Into the Void
 Destroy the Glaze Wall
 Daily Affirmation Cards
 Everything That Can Go Wrong
 Subscribe to Our Newsletters
 Contact The Clay Hole
 Corporate Team Building

 Glaze Combinations
 Glazes We Do Not Carry
 Making Glaze Test Tiles
 The Mega Glaze Tool
 How to Use the Mega Glaze Tool

 Glaze Brushing Techniques
 How to Use Underglaze
 How to Use Dipping Glazes
 Glaze Problems, Causes and Fixes
 The Dipping Glaze Guide

 Making a Glaze Catcher
 Fused or Sharp After Firing
 The Signature Wall
 His Viral Videos
 His Own Ceramics
 Meet Mud
Before you give up on that pot, read this.
Every potter has stood over a cracked, dinged, warped, or badly glazed piece doing the same silent math: save it, or let it go? This page does that math for every stage a pot can be in. Some rescues are near-guaranteed, some are long shots dressed up as hope, and one stage is a complete free do-over that beginners throw away more often than you would think, without knowing it. We will walk the whole ladder, wet clay to fully fired, with the real odds at each rung, the fixes that actually work, and permission to use the reclaim bucket without calling it failure.
Save it or let it go? Below: the rescue ladder with the odds at every stage, six questions that make the call, and one video. The long version of every fix is one toggle away.

The rescue ladder, odds and all
One law governs the raw clay: repairs get weaker as it gets drier, so while the clay is still raw the odds only fall, never rise. Bone dry is the floor, and everything after the first firing is a different sport, which is why the rungs below are not in the order a pot dries in. The ladder, best to worst:
- Glazed but not fired: perfect. Raw glaze is completely reversible. Wash it all off, let the pot dry a day or two, glaze again. A total free do-over.
- Wet clay: excellent. Compress cracks closed the moment they appear, score-and-slip torn pieces back on, or cut a collapsed rim down to level and keep going.
- Leather hard: good. The last stage where joins really hold. Open a crack slightly, fill with stiff same-clay slip, compress, then dry it slowly with plastic over the thin parts first.
- Bisque: fair, small stuff only. Patch little chips, sand sharp spots wet, in safety glasses and an N95 or better. Cracks that show after bisque will not survive the hotter glaze fire; believe them.
- Fully fired: a different game. Reglaze and refire dull spots, grind fused bits wet, in safety glasses and an N95 or better, kintsugi a clean break, or retire the pot with honors as a planter. A fired crack on a food surface always means retirement.
- Bone dry: poor. The most brittle moment of a pot’s life. Paper-slip patches occasionally win; the reclaim bucket almost always wins, and that is not a defeat.
Then stand over the pot and run the six save-or-let-go questions below. Wondering how each fix is actually done, stage by stage? The Comprehensive Version above walks all of it.
Triage: three questions and one law
Rescue attempts fail when they skip diagnosis. Before touching the pot, answer three things: Is the damage structural or cosmetic? A chip is cosmetic; a crack that goes through the wall is structural, and structural problems get worse in the kiln, never better. What stage is the clay actually in? The fix that saves a leather-hard pot ruins a bone-dry one. And the last one: would the repair take longer than making it again? Clay is the cheapest material in your studio; your time is the expensive part.
Then there is the one law that governs the raw clay: repairs get weaker as clay gets drier. Wet clay heals like skin. Leather hard joins well with effort. Bone dry barely joins at all, and everything after the first firing is a different sport entirely. While the clay is raw the odds only fall, never rise, which is why the professional habit is fixing problems the moment they appear instead of hoping the kiln will be kind. It will not. Kilns are honest machines; they exaggerate every flaw you feed them.
Here is the whole ladder at a glance, best odds to worst, before we take each rung in detail:
- Glazed but not yet fired: perfect odds. The glaze coat is completely reversible. Wash it off, dry the pot, start over. A total free do-over.
- Wet clay: excellent odds. Almost anything can be healed, reshaped, cut down, or rejoined while the clay still moves.
- Leather hard: good odds. Score-and-slip still works honestly here. This is the last stage where repairs reliably hold.
- Bisque: fair odds, small stuff only. Minor chips and rough spots can be patched or ground. Cracks mostly cannot.
- Fully fired: different game. The pot will never be unfired, but refires, grinding, kintsugi, and cold finishes can still give it a good life.
- Bone dry: poor odds. The weakest, most brittle moment in a pot’s whole existence. Some fixes exist; the reclaim bucket wins most of the time, and that is fine.
Wet clay: almost nothing here is fatal
While the clay still moves, you have superpowers. The pot that just collapsed, tore, or went hopelessly off center feels like a disaster in the moment and is usually ten minutes from a second life.
- The emergency haircut. A collapsed or wildly uneven rim does not kill the pot, it just shortens it. Take a needle tool, cut the wall down to level below the damage, recompress the new rim, and carry on. Half the bowls in the world are secretly shorter than their potter intended.
- Heal cracks the moment they appear. A crack in wet clay closes under compression: push the clay back together from both sides and rib it smooth. Rim cracks especially want compression now, because a rim crack ignored today is a wider split after the fire.
- Rejoin torn pieces properly. Score both faces, add slip made from the same clay, press firmly, and blend the seam. Wet-to-wet joins done this way are as strong as the original wall.
- Off center beyond saving? Cone up and start over. On the wheel, the clay itself is never ruined until it is waterlogged. Wedge the sponge-wet stuff back with firmer clay and it rejoins the rotation tomorrow.
- Too wet to work is a schedule problem, not a loss. A floppy piece firms up under an hour of open air. Walk away, trim something else, come back.
Leather hard: the last stage where repairs really hold
Leather hard is the deadline stage. Score-and-slip still makes honest joins, dents still push out, and cracks can still be convinced to close, but every hour of drying past this point takes options off the table.
- Cracks: open, fill, compress. Do not just smear slip across the top of a crack; that is a cosmetic bandage the kiln will remove. Widen the crack slightly with a tool so it can accept material, work in a stiff slip of the same clay body, compress it closed, and burnish over. Some potters swear by vinegar slip or magic water for extra bite, but same-body slip plus real scoring and real compression does most of the work.
- Handle and attachment cracks. The join that cracks at leather hard is telling you it was attached too dry or dried too fast. Score deeper than feels polite, slip generously, press until slip squeezes out, then dry it slowly, with a strip of plastic over the thin handle or attachment first so the thick wall can catch up and the joint and the wall shrink together. The making side lives on our handle page.
- Dents and warps. A dented wall at soft leather hard often pushes back out from inside with a rib and a supporting hand outside. A warped rim can be gently coaxed while the clay still flexes; past leather hard, forcing it means cracking it.
- Slow the drying, save the next one. Most leather-hard emergencies are drying-speed injuries: thin parts racing ahead of thick ones. Loose plastic, flipped rims, and patience prevent the repairs you are doing right now. The full doctrine is on our drying awkward pieces page.
Bone dry: the fragile hour
Bone dry clay is at the weakest, most brittle point of its entire life, weaker than it was wet and far weaker than it will be fired. It also no longer wants to bond with anything, including more of itself. This is the stage where honesty saves you the most heartbreak.
What actually works, sometimes: for a hairline crack or a cleanly snapped small part, a repair slip loaded with paper fiber, or one of the commercial patch mediums made for this exact job, can pull off the save. Work the material deep into a slightly opened crack, not just across it, let the repair dry completely, and go in knowing the odds: bone-dry fixes fail in the bisque more often than they succeed, and even the winners love to telegraph a ghost line through the glaze. If the piece matters enough to try, it matters enough to show the studio team before it goes into a firing, so they can decide where it rides.
What works every time: the reclaim bucket. Bone dry clay slakes down beautifully and returns, after a soak, a dry down and a few days of rest, as a throwing body with zero drama, which makes reclaim the one bone-dry rescue with a hundred percent success rate. The pot ends; the clay does not. Full process on our reclaim page. And before sentiment overrules physics, jump ahead to the save-or-let-go questions at the bottom of this page; they were written for exactly this moment.
Bisque: patch the small, respect the cracked
Bisque is a one-way door: the clay is ceramic now, it will never rehydrate, and score-and-slip is officially over. What survives triage here is the small stuff.
- Chips and dings. Commercial bisque-patch pastes exist for exactly this, and on a small chip or a rough spot they genuinely work: fill, let dry, smooth flush with wet sandpaper or a damp sponge, glaze over. Keep expectations sized to the product; they patch blemishes, they do not rebuild walls. Show the studio team before a patched piece goes into a firing, because some pastes are made for low fire only.
- Sharp edges and rough spots. Grinding and sanding solve more bisque problems than any paste. A rubbing stone under water or wet sandpaper takes down a sharp chip edge or a crusty foot in minutes, worked over a bucket and never dry, in safety glasses and an N95 or better; our scouring and grinding page covers the tools stage by stage.
- Cracks: believe them. A crack that shows after the bisque did not survive the bisque, it was created or revealed by it, and the glaze fire runs far hotter. Glaze does not weld cracks closed; it usually decorates them. If you fire a bisque-cracked piece anyway, call it a glaze tester, tell the studio team so they can decide where it goes, because a split can spatter a neighbor, and enjoy it as an experiment rather than a rescue.
- Diagnose before you refill the kiln. Bisque damage is a message about drying, joining, or thickness upstream. One minute of reading the crack, where it starts, what it follows, saves the next three pots from the same fate.
Glazed but not fired: the free do-over everyone forgets
Here is the best-kept secret on this page: between the glaze bucket and the glaze fire, almost everything is reversible. Beginners abandon pots at this stage all the time, and it is the one stage where nothing has actually gone wrong yet.
- Hate the glaze choice? Wash it off. Raw glaze is just minerals sitting on bisque. Rinse and gently scrub the whole coat off over a bucket, never straight down the sink, let the pot dry completely for a day or two so the wall is not waterlogged, and glaze again like nothing happened. Because nothing did.
- Drips, runs, and finger blobs. Let the glaze dry fully, then rub the spot level with a clean fingertip, never scraping or sanding it, because the dust from dry glaze should not be breathed, and smooth the edge with a barely damp sponge. If it needs more than that, ask staff.
- Bare spots and crawl-prone dust. Missed patches get a touch-up with a soft brush and two or three thin coats. Dusty or greasy bisque is why glaze crawls later, so a quick wipe-down before glazing is the cheapest insurance in ceramics.
- Wrong thickness. Too thin, brush more on. Too thick, and cracking as it dries, wash it off and restart rather than firing a coat you already distrust. The kiln turns glaze doubts into glaze certainties, and rarely in your favor.
Fully fired: four honorable futures
After the glaze fire, the pot is what it is, permanently, but permanent is not the same as finished. A fired disappointment has four honorable futures, and only one of them is the shelf of shame.
- Refire it. Underfired-looking glaze, bare patches, and dull spots can genuinely be fixed by reglazing and sending the pot back through a cone 5½ firing. The trick is getting new glaze to grip a glassy surface: apply the same glaze thin and let it dry completely, because two layers run more than one on a fired pot, and accept that fired color underneath will shift on the second trip. Tell the studio team it is a refire when you drop it off, and set it on a cookie. Diagnose the original failure first on our glaze problems page, or the refire just reprints the mistake.
- Grind it. Kiln-shelf crust, sharp glaze beads, and fused drips come off with diamond pads and patience, always wet, over a bucket, in safety glasses and an N95 or better. Fired glaze is never ground dry. The full toolkit is on our fused and sharp pottery page.
- Kintsugi it. A cleanly broken piece can come back more interesting than it left. We keep two full guides: the accessible epoxy and mica method for display pieces, and traditional urushi and gold for the patient real thing, which is food safe only when fully cured, with pure gold or silver, a food safe glaze on the pot and a month of curing. Urushi is a home craft, not something we do at the studio, with a real skin hazard, so work in nitrile gloves and safety glasses with a window open. Epoxy mending is fine at a covered table here, and a mended piece never goes back in a kiln.
- Retire it with honors. A pot that failed at holding coffee can spend thirty years holding brushes, succulents, wooden spoons, or the studio’s stray sponges. And one shelf of honestly labeled early disasters is worth keeping on purpose: nothing measures your progress like the pots that taught it to you.
One hard line, because it matters: a fired crack on a surface that holds food or drink is a retirement notice, not a repair project. Cracks harbor what sponges cannot reach, and glue has no business near a mouth. Let that pot begin its distinguished second career as a planter.
Save or let go: six questions
Stand over the pot and tap through these. The list remembers your progress on this device. If the answers lean no, the reclaim bucket is right there, and it has never once judged anybody.
Three videos worth your evening
One video worth your evening
Rescue is hand work, and this video works through a bone dry crack repair start to finish: paper clay slip with vinegar, magic water and spooze, then sanding and the finished repair. Reading gave you the odds; this shows the hands.
Rescue work is hand work, so watching it matters more here than on most pages: a bone dry crack repair, a reglaze of a fired pot and a traditional kintsugi repair. A note on why the page is still mostly words: the videos show three specific jobs, but reading is what gives you the triage, the odds, and the judgment about which rescue your pot actually needs. Watch for the hands, read for the decision.
The ones we get asked at the studio
Can I add water to bone dry clay and soften the pot back up?
Not as a pot. Water hitting bone dry clay makes it slake, crumble, and split rather than gently soften, so wetting a bone-dry piece destroys it faster than the crack would have. The clay itself, though, rehydrates perfectly once you surrender the form: break it down, slake it fully, and it returns as workable clay. Rehydration is a reclaim tool, not a rescue tool.
Is superglue or epoxy okay for fixing pottery?
For display pieces, yes; a good two-part epoxy is the backbone of the modern kintsugi method on our epoxy and mica page. Work at a covered table in nitrile gloves with fresh air moving, and keep anything with epoxy on it out of the sink and the reclaim bucket. Two hard limits: never on surfaces that touch food or drink, and never on anything headed back into a kiln, where epoxy burns away, giving off smoke and fumes and fouling the shelf and the rest of the load. Super glue will hold a break, but it is brittle, and it closes the door on traditional urushi for that piece.
Will a mended crack survive the firing?
Sometimes, and the odds track the stage: wet-clay compressions survive almost always, good leather-hard fills usually, bone-dry patches occasionally, and bisque cracks almost never. Even a survivor may show a ghost line under the glaze. Treat every mended pot as a tester: tell the studio team it is one, so they can place it where a failure stays polite, and let the kiln cast the deciding vote it was always going to cast anyway.
How do I know when to stop rescuing and just let a pot go?
Run the six questions above, then notice which answer you were rooting for. If you were hoping for permission to quit, you have it: reclaim is a full-fledged pottery skill, not a defeat, and the sunk-time trap on our critique page explains why letting go so often feels harder than it should. The next pot is already in the bag, and it is better than this one was.
Where this leads next
Rescue less by wrecking less, with company
Most rescues on this page get prevented by habits you pick up fastest around other potters: compressing rims, drying slowly, glazing clean. A Clay Hole membership gets you 29 wheels, the classes, the kilns, and a room full of people who have already broken everything you are about to break. Green, Yellow, Purple or Black, whichever fits how often you can get here.
Every video on this page belongs to the potter who made it, and none of them are ours. We link them because they show the work. The player and its cookies wait until you press play; the only thing that loads while you read is each video’s still frame.
Which version would you like to print?
Videos come out as a labeled box with the title and channel to search for, since paper does not play them.