Pottery Date Night
 Bring All Your Friends Free Week
 Give a Month of Pottery
 Private Pottery Parties

 The Welcome Booklet
 Your First Ten Sessions
 The Pottery Process
 Finding the Studio
 Your Classes Never Expire
 The Four Tables
 Who’s Who
 The Rewards Program
 Flux Glazes
 The Calculators
 Kiln Tracker
 Holiday Kiln Deadlines

 Beginner’s Tool Set
 Fingernail Clippers
 Mayco Clay Mender
 Epoxy for Kintsugi
 Applicator Bottles
 Large Bead Rack
 Raku Workshop
 Nighttime Raku
 Horsehair and Feather Raku
 The Clay Hole T-Shirt
 Embroidered Crewneck
 Zip-Up Hoodie
 Pre-Made Bisqueware
 Glaze Catchers
 Kiln Cookies
 Clay Cubby Rental
 The Glaze Bible, Printed
 The Book of Molds, Printed
 Printable Pottery Guides
 Free Printable Trackers
 Gifts for Potters
 Christmas Pottery Ideas
 Mother’s Day Gift Ideas
 Pottery Date Night
 Studio Calendar
 2027 Studio Events
 What Should I Do Today?
 How to Throw on the Pottery Wheel
 How to Make a Pinch Pot
 How to Tap Center a Pot
 The Five Stages of Clay
 Is Pottery Hard to Learn?
 Pottery Wheel Practice Drills
 20 Easy Hand-Building Projects
 Everything That Sounds Wrong

 A Beautiful Piece, Every Time
 Slab Roller Tips
 Any Dish as a Slump Mold
 Slab Roller & Slab Mold Certification
 The Pottery Skill Tree
 Clay & Pottery Calculators
 Logging Your Pottery and Glazes
 The Pottery Dictionary
 Why Did My Pottery Do That?
 The Pottery Cone Chart
 Pottery Myths, Fact-Checked
 Is Handmade Pottery Food Safe?
 Incredible Ceramic Artist Videos
 How Dan Throws Giant Pots
 How to Dry Your Pottery
 The Pottery Wheel Introduction
 Pottery by Zodiac Sign
 Personality and the Pottery Wheel
 Pottery for Engineers
 ADHD, Hyperfocus, and Never Running Out
 Hobbies for Burnout
 Screen-Free Hobbies for Adults
 Every Addiction I Ever Had Lost to Art
 Functional Pottery Is Engineering
 How Do We Compare?
 Pottery Classes by City
 Every Pottery Studio in Utah
 Pottery in Draper
 Featured Members
 The Signature Wall
 Making Friends as an Adult Is Brutal
 The Clay Hole Commandments
 2027 Pottery Contests
 2027 Studio Parties
 Gallery Night

 Scream It Into the Void
 Destroy the Glaze Wall
 Daily Affirmation Cards
 Everything That Can Go Wrong
 Subscribe to Our Newsletters
 Contact The Clay Hole
 Corporate Team Building

 Glaze Combinations
 Glazes We Do Not Carry
 Making Glaze Test Tiles
 The Mega Glaze Tool
 How to Use the Mega Glaze Tool

 Glaze Brushing Techniques
 How to Use Underglaze
 How to Use Dipping Glazes
 Glaze Problems, Causes and Fixes
 The Dipping Glaze Guide

 Making a Glaze Catcher
 Fused or Sharp After Firing
 The Signature Wall
 His Viral Videos
 His Own Ceramics
 Meet Mud
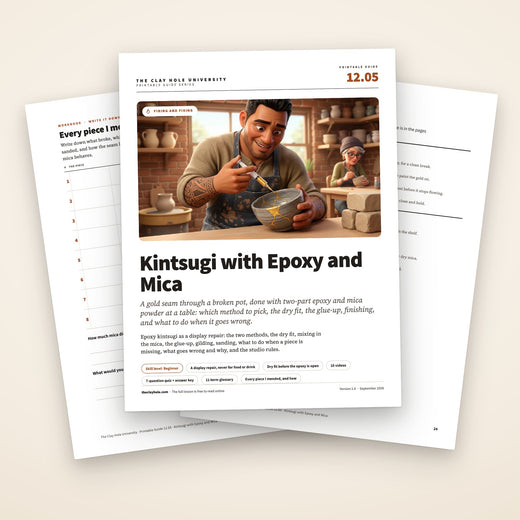
Kintsugi with epoxy and mica.
Something you made broke. You can glue it and hope nobody looks too closely, or you can run a gold seam through the break and make it the best part of the pot. This is the second one, done with two-part epoxy and a jar of mica powder.
Everything below is the epoxy version of the technique. It is fast, it is forgiving, it needs one tube of epoxy, a small jar of mica and a few things from a drawer, and it is not the same thing as traditional kintsugi. Here is the difference, and what you can and cannot do with the pot afterward.
- Two-part epoxy
- Mica powder
- One evening, plus a cure
- Decorative repair

Gold seam, two-part epoxy, one evening.
You are gluing the pot back together with epoxy that has mica powder stirred into it, so the glue line itself is the gold. It is not traditional kintsugi, which uses tree lacquer and real metal and takes months, so say so when you show somebody the pot.
The one decision: mica weakens the bond, so if the piece has to be strong, glue it clean first and paint the gold line on afterward instead. For a pot that is going to sit on a shelf, mix it all together and go.
What to grab
- Two-part epoxy. Five-minute for a simple break, thirty-minute if it is in more than two pieces.
- Mica powder in whatever color you want the seam to be.
- Nitrile gloves, safety glasses, foil to mix on, toothpicks, tape. Work with a window open, keep the alcohol away from flame, and keep epoxy and mica off anything you cook or eat from.
- A fresh razor blade, 400 and 600 grit wet or dry paper.
- Isopropyl alcohol and swabs, plus a bowl of rice to cradle the pot.
We keep the 5-minute epoxy on the shelf at $9.50. Mica powder we do not carry, so bring your own jar.
Six moves.
-
Dry fit the whole pot before you open anything
Photograph the shards, number the backs in pencil, and tape the pot together with no glue. Check that the last piece can actually drop in from a clear direction. Glue two shards in the wrong order and the final piece physically will not fit, and that is not fixable.
-
Clean the edges and build tape hinges
Brush the broken edges dry, wipe with alcohol, let it flash off. Do not soak the pot; epoxy will not bond to a damp break. Then run tape across each closed joint on the outside so it opens like a book and closes back into alignment.
-
Mix small, epoxy first, mica second
Equal beads of resin and hardener on foil. Stir a full thirty seconds and scrape the sides. Then fold in mica, starting near one part to three, until it is just short of losing its honey flow. Past that it is filler, not glue.
Mix enough for one or two joints only. Five-minute epoxy gives you about three usable minutes, and a big puddle cures faster than a small one because it holds its own heat.
-
Thin film on one edge, then close and hold
A toothpick, not a stick, and only one of the two mating edges. With five-minute epoxy, press it closed and hold three to five minutes. Thirty-minute epoxy sets later, so tape it and follow the packet. While you hold, run a fingernail across the seam from both sides. You can feel a step you cannot see, and now is the only time you can fix it.
-
Pare the squeeze-out while it is rubbery
With five-minute epoxy, eight to twenty minutes in, the bead along the seam goes firm but still cuts like a gummy candy. Lay a razor almost flat to the glaze and take it off in one stroke. Earlier and you smear it, later and it is glass.
-
Cradle it in rice and leave it a full day
Set the pot so gravity holds the joints closed rather than pulling them open, and do not touch it again. Set is minutes, cured is twenty-four hours, and a joint sanded green will show a hairline later.
A full epoxy kintsugi repair
A full epoxy repair with gold or gold colored pigment, from safety and prep through to the finished piece. How much mica your own jar needs depends entirely on the jar.
Then sand it, because that is the whole difference.
A seam that feels smooth under a fingertip reads as intentional. A seam with a ridge on it reads as broken and glued. This is the step people skip and it is the one doing most of the work.
- 400 grit used wet, then 600. Work along the seam, never across it.
- Stay on the epoxy. Sanding the glaze either side leaves a matte halo that catches the light forever.
- Sanding dulls the gold. That is expected. Buff it back with dry mica on a soft brush, in an N95 or better dust mask, or brush on a thin second coat of mica-heavy epoxy.
- Check it with your eyes shut. Fingertips find ridges that eyes walk past.
Sanding, then the rest of the repair
The title says the secret is in the sanding. The chapters run from sanding through gluing and resin to the final cleaning. If your first attempt came out lumpy, its sanding chapter is a good place to start your second.
An epoxy repair is a display repair.
General purpose epoxy is not a food-contact material, heat softens it, and under that gold line is bare unglazed clay that anything getting past the seam soaks straight into. A rim repair also sits exactly where you drink.
- Display, dry goods, or a planter with a separate liner inside it.
- Hand wash cool and gentle. No dishwasher, no microwave, no oven, no boiling water, no long soaks.
- Never put a repaired piece back in a kiln. Epoxy is a plastic. It softens and then burns away well below the temperature of our glaze firings, giving off smoke and fumes and fouling the shelf and the rest of the load.
- If the piece broke before it was glazed, stop and ask us first. Bisque and greenware have their own repair routes, and epoxy ends any chance of a firing. Staff can tell you whether a piece can be saved.
What actually goes wrong.
- It went hard before you finished. Five minutes is not five minutes of working time. Mix per joint, not per pot.
- The line is fat and lumpy. Too much epoxy, or you missed the rubbery window for the razor. Sand it flat at 400 wet and paint a fresh gold line over the top.
- The pieces do not line up. Wrong glue order, or a flake missing from an edge. This is the one you cannot fix afterward, which is why step one is dry fitting.
Two house rules.
- Work at a table, not at a wheel, and cover it. Epoxy on a shared table is somebody else’s problem an hour later and it does not wipe off once it has grabbed.
- Nothing with epoxy on it goes in a sink or a reclaim bucket. Uncured epoxy is a real plumbing problem and mica contaminates everybody’s clay. Scrape the foil into the trash and clean tools with alcohol and a paper towel.
Why this page makes you read and watch.
Epoxy sets on a clock and does not wait for a re-read. The words put the steps in order before the clock starts, the videos show the seam coming together. Read it through once before you mix anything.
This is not traditional kintsugi, and that is fine.
Both things are worth knowing about, and mixing them up is how people end up disappointed with a perfectly good repair.
Traditional kintsugi
The joint is made with urushi, a lacquer tapped from a tree, and it is finished with real powdered gold or silver. It cures in a humid box over weeks, in many thin coats, and a single bowl can take months from break to finish.
Urushi is also a skin irritant while it is wet, related to poison ivy, and learning to handle it is a real part of learning the craft. Done properly, with pure gold or silver and a cure of at least a month, it has a long record on tableware.
What we are doing
The joint is two-part epoxy. The color is mica powder, a mineral pigment that reads as metal because of how it reflects light. It is done in an evening and cured by the next day.
Call it epoxy kintsugi, kintsugi-style or a gold-effect repair. Calling it plain kintsugi misleads, especially if the piece is a gift or something you are selling. Say what is in the seam.
Mica is not gold. It is a mineral flake, usually coated with titanium dioxide or iron oxide, and the color you see is interference from the coating rather than metal. That is why cheap mica looks brassy and good mica looks warm, and why the same jar can look completely different over a dark seam than a light one. Test your color on a scrap shard before you commit it to the pot.
An epoxy repair is a display repair.
A pot repaired with hardware store epoxy should not go back into food service, and there is no trick on this page that changes that.
Why not
- General purpose epoxy is not sold as a food-contact material. The products that carry that certification are a different category with different testing behind them.
- Heat softens it. A dishwasher cycle runs hotter than most household epoxy stays rigid, and a softened seam can creep, cloud or let go.
- The break itself is bare clay. Under that gold line is unglazed body with no glass over it, so anything that gets past the epoxy is soaking into unglazed fired clay you cannot clean.
- Seams sit exactly where you drink. A rim repair puts the joint against a lip every single time.
What it is still perfect for
- Anything that lives on a shelf and gets looked at.
- Vases and planters using a separate liner or a plastic nursery pot inside.
- Dry goods. Keys, rings, hair ties, paperclips, coffee beans in a bag.
- A piece with meaning behind it that you were never going to throw away.
Hand wash cool and gentle if it needs cleaning. No dishwasher, no microwave, no oven, no boiling water, no long soaks.
One person's attempt at a food-safe mend
Alex tries three ways of mending broken pottery, then a fourth with an epoxy sold as food safe and gold food coloring.
The short answer, if you want a golden seam you can eat off, is traditional urushi with pure gold or silver, fully cured, which our traditional kintsugi lesson covers. Some epoxies are sold as food safe. We have not tested one, and nothing on this page vouches for any of them.
What you actually need.
The list is short and most of it is already in a drawer at home. The two things worth thinking about are the epoxy and the mica. Wear nitrile gloves and safety glasses, and work with a window open. Epoxy and isopropyl alcohol both give off vapor, and the alcohol is flammable, so keep it away from flame and heat. Keep epoxy and mica off anything you cook or eat from.
Two-part epoxy
The five-minute kind is the easiest to start with and it is what we keep in the studio. It gives you roughly three usable minutes once it is mixed, which is plenty for a clean break in two pieces.
If your pot is in more than two pieces, or the break is long and fussy, buy a thirty-minute epoxy instead. More working time, and it self-levels better, which gives a cleaner line.
Mica powder
Craft or cosmetic grade, in whatever color you want the seam to be. Gold is traditional. Bronze reads warmer, champagne reads softer, and copper looks extremely good against a dark glaze.
A tiny jar goes a long way. Bring your own; we do not stock it.
Everything else
- Nitrile gloves
- Foil, wax paper or a silicone mat to mix on
- Toothpicks and a craft stick
- Painter’s tape or masking tape
- A fresh razor blade or craft knife
- 400 and 600 grit wet or dry sandpaper
- Isopropyl alcohol and cotton swabs
- A bowl of rice or a folded towel to cradle the pot while it cures
We sell the epoxy. The Gorilla 5-Minute Epoxy we keep for kintsugi is $9.50, and it is on the shelf with the rest of the helpful pottery items. Mica powder, sandpaper and tape are on you.
There are two methods, and one question decides it.
Are you gluing this to be strong, or gluing it to look right? Mica in the epoxy weakens the bond, because past a certain point pigment stops being glue and starts being filler.
Method A. Mix it in.
The mica goes into the epoxy and the glue itself is gold. One pass, one session, done.
Choose this when the break is clean, the piece is in two to four parts, and the pot is going to sit on a shelf and be admired rather than carry weight.
The line is only as wide as your seam gap, so a tight break gives a thin, delicate line whether you wanted one or not.
Method B. Glue, then gild.
Glue with clean epoxy, let it cure hard, then paint a mica line over the top of the seam.
Choose this when the piece has to hold together properly, when there are a lot of pieces, or when you want a bold line that reads from across the room.
Two sessions instead of one, and you get to decide the width of the line rather than letting the break decide it.
Two ways to get a gold look
Lakeside shows real gold and a gold effect one after the other, then adds gemstones. Its choice is real gold or a gold effect, which is a different question from our Method A and Method B.
If you have nine minutes before you start, this shows two looks for the gold line. It does not choose between our Method A and Method B for you.
Dry fit the whole thing before you open the epoxy.
Almost every ruined kintsugi repair is decided here, before a drop of glue is mixed. Two failures, both permanent, both entirely avoidable.
Locking yourself out
Glue two shards together in the wrong order and the last piece will not physically go in. It needs to slide in from a direction that is now walled off on both sides, and no amount of pressure changes geometry.
Find the order dry. Build the pot with no glue, note which piece goes in last, and check that it can drop in from one clear direction with nothing in the way.
Creeping misalignment
Each joint that sits a hair proud pushes the next one further out. By the fourth piece the last gap is a wedge and nothing lines up. It is called stacking error and it is why restorers glue sub-assemblies first.
Run a fingernail across every dry joint. You can feel a step you cannot see, and a step you can feel now is a step you will be sanding forever later.
-
Photograph the pieces laid out
Take one picture of the shards arranged the way they go together. When you are three joints in and confused, that photo is the only thing that will save you.
-
Number the backs in pencil
Write the assembly order on the inside of each shard in soft pencil. It wipes off later with alcohol, and it means you are not solving the puzzle twice.
-
Assemble it dry with tape
Hold the whole pot together with tape and look at it. Any gap you see now is a gap you will have in gold later, so decide now whether you are filling it or living with it.
-
Clean every broken edge
Dust and old grit stop epoxy from wetting the surface, and a joint that does not wet does not hold. Brush the edges dry, then wipe with isopropyl alcohol on a swab and let it flash off.
Do not soak a broken pot in water. Epoxy will not bond to a damp break, so keep the edges clean and dry.
-
Build tape hinges
Run a strip of tape across the outside of a joint while the pieces are closed, then open the joint like a book. The tape holds the alignment, you glue the exposed edge, and closing it puts the piece back exactly where it was.
Alignment, from a ceramic repair channel
This is aimed at invisible repair rather than kintsugi. When the goal is for the joint to disappear, every millimeter of misalignment shows, so it is worth watching for the mixing, the gluing and the alignment before you run gold down the seam instead of hiding it.
Our own rule is a thin film on one edge only, so compare how much adhesive you use with what you see here.
Mixing the mica straight into the epoxy.
One pass, one evening. The glue and the gold are the same material, so the seam is exactly as wide as the break decided it should be.
-
Mix the epoxy first, on its own
Equal beads of resin and hardener on foil. Stir for a full thirty seconds and scrape the sides in as you go. Under-stirred epoxy cures soft and cloudy, and no amount of mica hides that.
-
Fold the mica in second
Start at roughly one part mica to three parts mixed epoxy and judge it by eye. More mica means a brighter, more opaque line and a weaker joint. Less means a translucent line that reads as glue with a shimmer in it.
Stop adding mica just before the mixture stops flowing like honey and turns to paste. Once it is paste it has become filler instead of adhesive.
-
Apply thin, to one edge only
A toothpick, not a stick. Run a thin film along one of the two mating edges. Coating both edges doubles what has to squeeze out, and squeeze-out is what turns a delicate gold line into a fat smeared one.
-
Close it and hold
Press the joint closed and hold it for three to five minutes with a five-minute epoxy. While you are holding, run a fingernail across the seam from both sides. If you feel a step, you have until the epoxy grabs to nudge it flat, and not one second longer.
-
Cradle it and walk away
Set the pot into a bowl of dry rice or a folded towel so gravity holds the joint closed rather than pulling it open. Leave it alone. Five-minute epoxy is set in minutes but nowhere near cured.
-
Slice the squeeze-out at the rubbery stage
With a five-minute epoxy, somewhere between eight and twenty minutes the bead along the seam goes firm but still cuts like a gummy candy. A thirty-minute epoxy goes rubbery later, so test the bead with a toothpick. That is the window. Lay a razor almost flat against the glaze and pare the bead off in one stroke.
Too early and you smear it into the glaze. Too late and it is glass, and now you are sanding.
-
Give it twenty-four hours before anything else
Full cure is a day, not five minutes. Sanding or handling a green joint is how a repair that looked perfect on Tuesday has a hairline in it on Thursday.
A full epoxy kintsugi repair
SallieKat repairs a broken piece with epoxy resin and gold or gold colored pigment. The chapters run from safety and prep work through a second round to the finished product. Its own warning matches this page: not for the dishwasher or microwave, and food safe only if every material is rated for it.
Watch it once before your first mix. How much mica your own jar needs depends entirely on the jar, so no ratio we write down can replace seeing the color arrive.
The glue-up itself.
Everything before this is preparation and everything after is cleanup. The joint is decided in about three minutes.
A short beginner's guide to gluing the bowl
Clara Graziolino shows a beginner's way to glue a broken bowl in under four minutes, with chapters that run from planning and numbering the pieces through mixing and gluing to final assembly. If the longer tutorials feel like a lot, start here.
Compare what you see here with our dry fit step before you open the epoxy.
Mix small. The most common wreck of an evening is mixing a puddle, getting two joints done, and watching the rest go hard on the foil. Epoxy also generates its own heat as it cures, so a big puddle actually sets faster than a small one. Mix enough for one or two joints, then mix again.
Glue it clean, then paint the gold on top.
Slower, stronger, and much more controllable. This is the route that looks the most like traditional kintsugi, because traditional kintsugi also builds the joint first and gilds it afterward.
-
Glue with clean epoxy
No mica, or a whisper of it just so you can see where the seam is. All the same rules apply: thin film, one edge, hold, cradle, pare the squeeze-out at the rubbery stage.
-
Cure hard, then flatten the seam
Twenty-four hours, then knock any remaining ridge back with 400 grit used wet. You want the seam flush with the glaze before you put anything gold on it, because a gold line over a bump reads as a mistake and a gold line over a flat surface reads as a decision.
-
Mask to the width you want
Run tape down both sides of the seam, leaving whatever gap you want the finished line to be. Somewhere between one and three millimeters looks right on most pots. Press the tape edges down hard or the line will bleed under them.
Masking is optional. Freehand looks more alive and more like the traditional article, and it is also much less forgiving. Do one pot each way before you decide which you are.
-
Mix a heavy, brushable gold
Fresh epoxy loaded with a lot more mica than you used for gluing. It does not need to hold anything together now, so you can push the pigment until it is genuinely opaque.
-
Paint it, then pull the tape while it is tacky
A small brush or a toothpick, one confident pass down the seam. Then take the tape off before the epoxy hardens, not after. Tape pulled off cured epoxy tears the edge of your line off with it.
-
Cure, then second-coat any dull patches
A thin line often dries patchy where the epoxy soaked in. A second pass over just those spots evens it out, and nobody can tell afterward.
The gold-effect route from start to finish
Lakeside follows one vessel from a controlled break to the finished gold effect, using a brass based powder rather than mica. It runs about six minutes.
Compare how flat the seam is before any gold goes on with our own advice to sand flush first.
The difference between good and homemade is sanding.
This is the step almost everybody skips, and it is the one doing most of the work. A repair that feels smooth under a fingertip reads as intentional. A repair with a ridge on it reads as broken and glued.
- Wait the full cure. Sanding uncured epoxy gums the paper and drags the seam sideways.
- 400 grit wet, then 600. Water keeps the dust down and stops the paper loading up. Work along the seam, never across it.
- Keep the paper on the epoxy. Sand the glaze either side and you will scuff a matte halo around your gold line that catches the light forever.
- Sanding will dull the gold. This is expected and it is fixable. A light second pass of mica-loaded epoxy, or a dry brush loaded with mica buffed along the line while you wear an N95 or better dust mask, brings the shine straight back.
- Check it by feel with your eyes shut. Fingertips find ridges that eyes walk straight past.
Sanding, then the rest of the repair
The title says the secret is in the sanding. The chapters run from inspection and sanding through gluing, mixing resin and gold powder to the final cleaning.
If your first attempt looked lumpy, its sanding chapter is a good place to start your second.
Chips, gaps, and the shard that went under the fridge.
A missing piece is not the end of the pot. It is just a second material and one extra day.
Small chips
Two-part epoxy putty, the kind you knead together into a gray worm, is the right tool. Press it into the chip slightly proud, let it go off, then file and wet sand it flush.
Once it is flush you have a choice: paint gold only around the boundary so the patch reads as a repair, or gold the whole patch so it reads as a deliberate gold inlay. Both look good. The second one is bolder and hides a rougher patch.
Bigger missing wedges
Tape a dam across the inside of the hole, then build the fill up in thin layers from the outside. Thin layers matter: a deep pour of epoxy heats itself as it cures, and hot epoxy yellows, bubbles and shrinks away from the edges.
Never fill a structural gap with mica-heavy epoxy. Fill it with something that is actually strong, then put the gold on the surface where it belongs.
Epoxy putty on a chipped edge
The Ceramic Repair Studio fills a chip with Milliput epoxy putty. The chapters cover choosing the filler, preparing the putty, applying it and a conclusion. Shaping it while it is still soft is far easier than filing a cured lump into shape afterward.
Rebuilding a whole missing segment
For the ambitious case, where a real chunk of the pot is gone. Lakeside shows two approaches to making the missing piece, from clay and from resin. The description calls it an abbreviated video showing some of the steps, so expect a preview of the work rather than all of it.
The whole thing, on one screen.
This is the part to leave up on a phone while your hands are busy. Nothing here is new; it is everything above with the explanations taken out.
Before you mix anything
Ten minutes here saves the whole pot.
- Photograph the shards laid out.
- Number the backs in pencil.
- Dry fit the whole pot with tape.
- Confirm the last piece can actually drop in.
- Brush the edges, wipe with alcohol, let it flash off.
- Build your tape hinges.
- Gloves on, foil down, rice bowl ready.
Gluing
Roughly three usable minutes per batch of five-minute epoxy.
- Equal beads of resin and hardener.
- Stir thirty seconds, scrape the sides.
- Fold in mica, about one part to three.
- Stop just short of paste, while it still flows like honey.
- Thin film, one edge only, on a toothpick.
- Close, hold three to five minutes (thirty-minute epoxy: tape it, follow the packet).
- Fingernail across the seam. Feel for a step.
- Cradle in rice. Mix again for the next joint.
Cleanup and finish
The rubbery window is eight to twenty minutes for five-minute epoxy.
- Razor almost flat, pare the bead in one stroke.
- Wait twenty-four hours before anything else.
- 400 grit wet, then 600, along the seam.
- Stay on the epoxy, off the glaze.
- Buff the shine back with dry mica on a brush, in an N95 or better dust mask.
- Second coat any dull patches.
Afterward
The rules that keep it looking like this.
- Display, dry goods or a lined planter.
- Hand wash cool. No dishwasher.
- No microwave, no oven, no boiling water.
- Never back into a kiln. Not once.
- Call it epoxy kintsugi when you talk about it.
Eight ways this goes sideways.
Every one of these has a cause you can name, which means every one of them is avoidable on the next pot.
| What you are looking at | Why | What to do |
|---|---|---|
| The line is brown, not gold | Not enough mica, or the epoxy yellowed as it cured and swamped a thin pigment load. | Paint a second, heavier mica pass over the top. You do not have to live with the first one. |
| The line is fat and lumpy | Too much epoxy on the edge, or the squeeze-out was left past the rubbery window. | Sand it flat at 400 wet, then re-gild. Next time, thinner film and one edge only. |
| The pieces do not line up | Glued in the wrong order, or a tiny flake is missing from an edge and the joint is riding on it. | This one you cannot fix afterward. It is why dry fitting is one of the longest sections on this page. |
| It went hard before you finished | Five-minute epoxy is not a five-minute working time, and a big puddle cures faster than a small one because it holds its own heat. | Mix per joint, not per pot. Or move to a thirty-minute epoxy. |
| Cloudy, soft or tacky after a day | Off-ratio or under-stirred. Both produce the same result and neither improves with more time. | Scrape it out, clean with alcohol, mix again with a full thirty-second stir. |
| Fingerprints set into the gold | Bare hands, or checking the joint while it was still soft. | Gloves, and leave it alone once it is cradled. Sand and re-gild the print. |
| The gold went dull after sanding | Working as intended. You have abraded the reflective flakes at the surface. | Dry mica on a soft brush, buffed along the line, or a thin second coat. |
| A joint failed weeks later | Too much mica in a structural joint, a damp or dusty edge, or the piece got hot somewhere it should not have. | Take that joint apart if you can, clean it back, and glue it clean using Method B. |
A potter trying it with a kit.
Every other video here is instructional. This one is a potter repairing a broken bowl with an epoxy kintsugi kit, which is a different and useful thing to watch.
A potter trying it with a kit
In this one a potter repairs a broken bowl with an epoxy kintsugi kit, and the description says it is something the maker had always wanted to try.
Save this one for after your first attempt. It will make a lot more sense once you have your own lumpy seam to compare it to.
Four rules for kintsugi in the studio.
Epoxy is the one material we use that does not belong anywhere near clay, water or a kiln, so it gets its own short list.
-
Never, ever put a repaired piece back in a kiln
This is the one that matters. Epoxy is a plastic. It softens and then burns away well below the temperature of our glaze firings, giving off smoke and fumes and fouling the shelf and whatever else is in the load. Once a piece has epoxy in it, its firing life is over.
If a broken piece has never been glazed, you still have options. Tell us before you reach for the glue.
-
Work at a table, not at a wheel
Cover it. Epoxy on a shared table is somebody else’s problem an hour later, and it does not wipe off once it has grabbed. Foil or a scrap of newsprint is enough.
-
Nothing epoxy goes in a sink or a reclaim bucket
Uncured epoxy in a drain is a genuine plumbing problem, and mica in a reclaim bucket contaminates everybody’s clay. Scrape the foil into the trash, and clean tools with alcohol and a paper towel that also goes in the trash. Everything else about cleaning up still applies.
-
We stock the epoxy, you bring the mica
The Gorilla 5-Minute Epoxy is $9.50 on the shelf. Mica powder we do not carry, so pick your color at home and bring the jar.
The ones we get asked.
Can I use super glue instead of epoxy?
You can glue with it, but you cannot color it. Cyanoacrylate sets far too fast to mix pigment into and it goes on far too thin to carry a visible line. It is also brittle and it yellows badly over a couple of years. If super glue is what you have, use it to hold the pot and then paint your gold line on top, which is Method B anyway.
How much mica per batch of epoxy?
Start around one part mica to three parts mixed epoxy and adjust by eye, because jars vary enormously in how strong they are. The reliable signal is texture rather than a ratio: keep adding until the mixture is just short of losing its honey flow, then stop. Past that it is filler, not glue.
For a Method B gold line, where nothing is being held together, you can go much heavier and should.
Can I drink out of it afterward?
We would not. General purpose epoxy is not a food-contact material, the seam sits on bare clay under the gold, and a rim repair puts the joint against your mouth every time. Treat a repaired piece as display, dry storage, or a planter with a liner in it.
If a food-safe golden seam is genuinely the goal, that is traditional urushi with pure gold or silver, fully cured, on a food safe glaze, and it is a much bigger project.
My pot broke before it was glazed. Same process?
No, and please do not epoxy it. Greenware and bisque have their own repair routes, and once epoxy is in, a firing is no longer an option. Ask us first.
Staff can tell you whether a piece can be saved, and some small repairs on greenware and bisque can be, though nothing is promised. A good place to start is score and slip while the clay is still leather hard, or ask us about a commercial mender for bone dry and bisque pieces.
Does it have to be gold?
Not remotely. Gold is traditional, silver and platinum have their own long history in the same craft, and mica comes in every color there is. Copper against a dark glaze is one of the best looking versions of this we have seen. So is a deliberately clashing color on a plain white pot.
Test on a scrap shard first. The same jar looks completely different over a dark break than a light one.
What if it broke into fifteen pieces?
Then you glue sub-assemblies. Join two or three shards into a unit, cure it fully, join the next unit, and only bring the units together at the end. Trying to run fifteen wet joints at once is how stacking error turns the last gap into a wedge.
Move to a thirty-minute epoxy too. Three usable minutes is not enough working time for a puzzle that size.
Can I fix somebody else’s antique this way?
Think hard before you do. Epoxy is not reversible, and reversibility is the first principle of conservation, because it leaves the next person options you did not think of. For anything with real monetary or family value, a professional restorer is the right call rather than a tube from the hardware aisle.
Should I break a pot on purpose to try this?
Plenty of people do, and it is a completely reasonable way to learn. Wrap the piece in a towel, wear eye protection, and tap it with a hammer through the towel rather than dropping it, because a drop shatters and a tap breaks. Fewer, bigger pieces make a much better first project.
Nearby on the site.
The crack is the point.
Nobody does this to hide a break. A repair that hides a break is a different craft with different tools, and it is a good craft, and it is not this one.
Here you are drawing a bright line along the exact path the pot failed, so the first thing anybody notices is the thing that went wrong. That is worth remembering when your seam comes out slightly wobbly, or a shade browner than you wanted, or three millimeters wide where you meant one. It is a record of an accident. It is allowed to look like one.
So a wobbly line is not a failed repair. If you want the reasons behind every step above, both methods side by side, and what to do when a piece is missing entirely, switch to the Comprehensive Version at the top of the page.
Make the second one better. Then break something else.
Which version would you like to print?
Videos come out as a labeled box with the title and channel to search for, since paper does not play them.