


Making ceramic mosaics
A mosaic is two crafts joined in the middle. The first half is pottery: you make the pieces and you fire them. The second half is closer to tiling: you stick them down and you fill the gaps between them. Nearly everything that goes wrong goes wrong at that join, and nearly all of it is decided before you glue a single piece.
This is also the one project where a cracked pot is raw material. The bowl that split in trimming, the mug that warped, the plate that dunted on the way down: all of it is already fired to cone 5½, already glazed, and already exactly what a mosaic wants.
Jump to a section
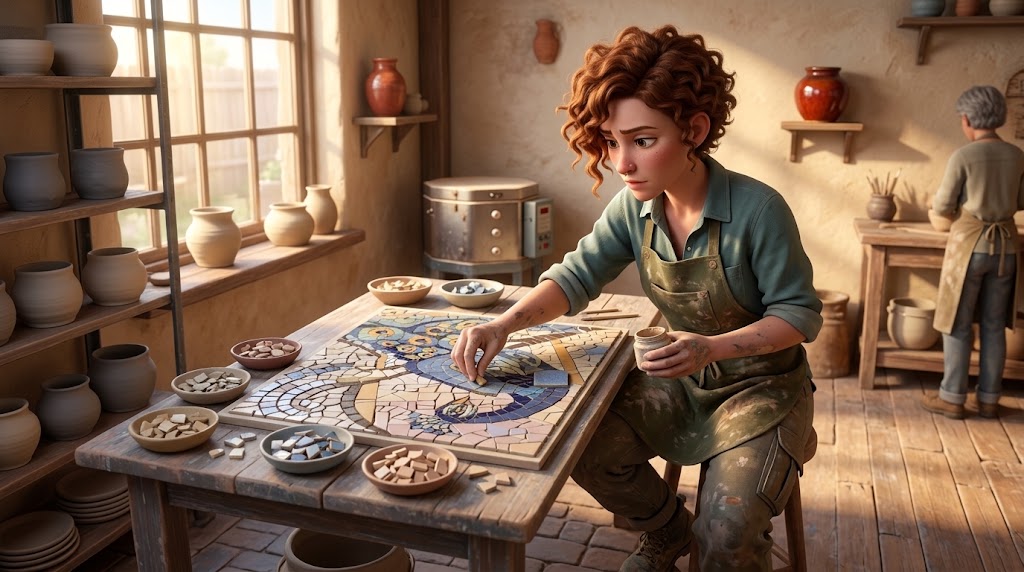
All of it, in eight moves
Pottery for the first half, tiling for the second. Make flat pieces, break them small, stick them to something rigid, fill the gaps. These eight lines are the whole job.
- Roll one slab, not a hundred tiles. A quarter inch thick, ribbed hard on both faces, one clay body from one bag. A twelve inch slab is a little over a square foot of finished mosaic, and it fires as one piece for one kiln minimum instead of as a hundred and forty four of them.
- Decorate the front. Leave the back bare. Underglaze, stamps, texture, brush-on glaze, anything you like on the face. Nothing on the back. Adhesive does not grip glaze, and a glazed back is the most common reason mosaic pieces let go a year later.
- Bisque at cone 05, glaze at cone 5½, then break it. Score the back in a grid at leather hard if you want the breaks to land somewhere predictable. Otherwise let the slab come out whole and cut it cold with nippers.
- Nibble, do not chomp. Put about a quarter inch of the nipper jaw over the edge and squeeze near the ends of the handles. Nippers crack ceramic rather than slicing it, and the crack runs in the line of the jaws. Safety glasses every time, and cut inside a box or a bag so the chips stay put.
- Sort by thickness before you lay anything. The finished surface is only as smooth as your thickest piece. Two minutes of sorting into three piles prevents the lumpy result that cannot be fixed once the glue is dry.
- Match the base and the glue to the weather. Indoors and dry: sealed wood or MDF with a white PVA glue. Outdoors, or anywhere that gets wet: cement backer board with thinset mortar, never wood and never white glue. Butter the back of each piece instead of flooding the board, or the adhesive rises into the gaps the grout needs.
- Lay the subject first, then let the background follow it. Outline the main shape one row at a time, then run the background along that line rather than filling corners at random. Even gaps beat narrow gaps. Dry lay a patch before you commit to anything.
- Cure a full day, grout, then leave it alone. Sanded grout for gaps over an eighth of an inch. Mix to peanut butter, press it in diagonally across the lines, wipe with a barely damp sponge, then let the haze dry to a film and buff it off with a dry cloth. Wet scrubbing is what pulls grout back out of the joints.
The two that actually hurt
Safety glasses, because a nipped glaze chip travels further than you expect and it is genuinely sharp. And a dust mask while you mix dry grout, because it is a cement product and the dust is silica. Neither costs anything. Both are the difference between a good evening and a bad one.
Why there is a video and a list for the same thing
Watching somebody cut a piece of tile tells you things no paragraph can. How far the jaw goes over the edge. How slowly the handles close. The sound a good cut makes against the sound of a shatter. Four seconds of video carries all of that at once.
Reading does the opposite job, and it does it better. A list holds the order of operations, the numbers and the reason a step exists, and it sits still on a screen propped against a jar while your hands are covered in adhesive. Nobody has ever scrubbed back through a twenty minute video with a gluey thumb to find the part about which direction to wipe the sponge.
There is good evidence the two together hold better than either one alone. The video gives you the picture of what it should look like. The list gives you something to rehearse against and check yourself on. Put both in front of somebody and the video stops being a thing they watched and starts being a thing they can do.
So every section here runs the same way. The written method first, because that is the part you will come back to, then one or two videos from people who make mosaics for a living. Nobody on this page is paid by us and nobody knows we linked them. They are here because they teach the thing well.
If you would rather not read all of it, the toggle at the top of the page swaps in a much shorter version that still gets you to a finished mosaic. Your choice follows you to every other page on this site.
A mosaic is four decisions, and they all have to agree
Pieces, base, adhesive, grout. That is the entire stack. The failure mode that ruins mosaics is not bad cutting or bad design. It is four materials chosen one at a time, by different logic, that then have to survive the same weather together.
A wooden panel is a perfectly good base until the piece goes on a porch, where wood swells and shrinks with every humid afternoon and quietly pushes the tesserae off over a year. White glue is a perfectly good adhesive until it gets wet. Both of those are correct choices made in isolation and wrong choices made together with an outdoor plan.
So the first question is never which tile to use. It is: where will this thing live, and will it ever get wet or freeze? Answer that once, at the start, and the other three decisions mostly make themselves.
- The base, or substrate. Rigid is the only requirement that is not negotiable. Anything that flexes will pop pieces off, and it will do it slowly enough that you blame the glue.
- The adhesive. A thin layer, buttered onto the back of each piece. Flood the board instead and it squeezes up into the gaps, where the grout is supposed to go.
- The tesserae. Your fired pieces. Note that they are different thicknesses, because handmade ones always are.
- The grout. It fills the gaps, and it also locks the pieces sideways against each other. A mosaic without grout is a collection of things glued near each other.
- The upper dashed line is your finished surface. It sits at the top of the tallest piece, not at the average. That is why one thick tesserae in a field of thin ones reads as a lump you can feel with a hand.
- The gap between the two dashed lines is the only thing you control here. Sort by thickness before laying and that gap shrinks to nothing. Skip the sorting and no amount of grout will hide it.
Making your own tesserae
This is the part a pottery studio does better than a craft store. Bought mosaic tile comes in whatever colors somebody decided to manufacture. A slab you rolled yourself can carry any underglaze, any texture, any stamp, any thickness, and it costs a fraction of what a bag of vitreous tile costs.
The method is the tile method with one important relaxation. A standalone tile has to come out of the kiln dead flat or it is scrap. A mosaic slab does not, because you are about to break it into inch wide pieces, and an inch of a warped slab is flat. That single fact makes mosaic stock far more forgiving than tile, which is why it is a good first slab project. The full flat-tile method is on the tiles page if you want it anyway.
- Roll a slab at a quarter inch. Thinner than a standalone tile, because the base is carrying the load now rather than the piece itself. Use one clay body from one bag for the whole project. Different bodies shrink by different amounts and fire to different thicknesses, and you will notice on a surface you can run a hand across. Both slab rollers here take a slab up to thirty inches, which is a lot of mosaic in one pass.
- Rib both faces, in two directions. Compressing the clay is what stops the slab curling and cracking as it dries. Rib front and back, then rib each face again at ninety degrees to the first pass. It takes ninety seconds and it is the difference between a slab and a jigsaw of dry cracks.
- Decorate the front and only the front. Stamps, roulettes, lace, sgraffito, combed lines, underglaze painting. Texture reads beautifully in a mosaic because the grout catches in it. Whatever you do, do it now while the clay is soft, and keep the back completely plain.
- Score the back into a grid, if you want predictable breaks. At leather hard, run a needle tool across the back in a grid at roughly the size you want, about a third of the way through and no more. After firing, the slab snaps along those lines like a chocolate bar. It is faster than cutting a hundred pieces individually and the edges are straighter than a random break.
- Dry it flat and slowly, between two boards. Same as any slab. A board on top keeps the edges from racing ahead of the middle. Two days is not too long. Label the boards with your name so a stack of anonymous boards does not look like studio property.
- Bisque at cone 05. Bisque firing is free here, so there is no reason to rush a slab into a glaze firing before it has been bisqued.
- Glaze the face. Leave the back raw. Brush-on glaze on the front, nothing on the back, and keep it out of the last quarter inch of any edge that will sit on a kiln shelf. A glazed back is the single most common reason mosaic pieces let go later, because adhesive grips a porous surface and slides off a glassy one. Our glaze wall and the glaze finder are the fastest way to plan a palette before you commit.
- Fire to cone 5½, then break it. One slab in the kiln is one piece for billing rather than a hundred and forty four of them. That is the whole trick, and it is covered in detail further down.
Cut soft, fire the pieces
Cut the slab into finished shapes at leather hard, then fire the pieces. Every edge is clean, every edge can be glazed, and nothing comes out sharp. It is slower, it costs more in kiln space, and every piece needs handling twice. Right for a geometric grid where the edges show.
Fire whole, break cold
Fire the slab as one sheet and cut it afterwards with nippers. Much faster, one firing charge, and the raw fracture edges read as authentic mosaic rather than as manufactured tile. The edges are unglazed and genuinely sharp until you ease them. Right for almost everything else.
Sizing, and the thing shrinkage does to your plan
Clay shrinks between rolling and cone 5½, and how much depends on the body. If a finished dimension matters, work backwards with the shrinkage calculator on the calculators page rather than guessing. If it does not matter, and for most mosaics it genuinely does not, roll the slab, fire it, and cut to fit afterwards. As a planning number: a twelve inch square of quarter inch slab, cut into roughly one inch pieces with normal grout gaps, covers a little over a square foot.
The cracked pot pile is the point
Every potter has a shelf of things that did not work. The bowl that S-cracked. The mug with the handle that let go. The plate that came out of the glaze firing with a hairline through it. All of that is fired stoneware with real glaze on it, and it is exactly what a mosaic is made of.
This style has a name, pique assiette, and Gaudi built most of a city out of it. The pieces bring something bought tile never does: the curve of a rim, a foot ring, a run of glaze that broke in an interesting place, a handle that becomes the eye of a bird. Sort your failures before you throw them out.
- Wash everything first. Old dust and old grease stop adhesive dead. Warm water, a brush, dry completely. Anything that has been outdoors in a garden gets a longer soak, because a piece that is still holding moisture will not bond.
- Sort into flat, gently curved and hopeless. Plate rims and dish bottoms are nearly flat. The wall of a mug is not. A curved shard only reads as flat once it is small enough, so the tighter the curve, the smaller the piece has to be. The test is simple: set it on the table and press one corner. If it rocks, cut it smaller or set it aside for a curved base instead.
- Keep the interesting edges whole. A finished rim gives you a clean outer edge nothing else can. Foot rings make good circles and good borders. Set those aside before you start cutting the field pieces, because once they are gone they are gone.
- Reduce big shards with nippers, not a hammer. A hammer gives you shapes you did not choose, and it makes a lot of dust and slivers. Use it only for the first reduction on a whole plate, inside a bag or under a folded towel, and go to nippers immediately after. Everything about control lives in the nippers.
- Ease every edge you will touch. A fresh break through fired glaze is sharp enough to cut you and sharp enough to cut the person who dusts the piece in five years. A diamond hand pad, a rub against a scrap of bisque, or a few seconds on a grinder takes it off. Our page on fixing sharp and fused pottery covers the tools we keep for exactly this.
Cutting, and why nippers do not cut
Nippers do not slice ceramic. They start a crack and the crack runs. Once you understand that one sentence, most of what feels random about cutting stops being random, because you are no longer trying to cut a line. You are aiming a crack.
There are two tools and they are not interchangeable. Compound or offset tile nippers have two hard carbide jaws and they crack glazed ceramic, stoneware and china along the line of the jaws. Wheeled nippers have two rotating discs and they roll a score through thinner material, which makes them better on glass, thin vitreous tile and fine china, and better at small controlled bites. Most people who do this a lot own both.
- Safety glasses, before the first cut. Not at the end when a chip has already found your cheek. Fragments come off fast and they are sharp on every edge. Cutting inside a cardboard box, a paper bag or over a folded towel keeps them where you can find them.
- Only a quarter inch of jaw over the edge. This is the tip that fixes most bad cutting immediately. Push the nippers further onto the piece and you are trying to crush it rather than crack it, the squeeze gets enormously harder, and the piece shatters instead of splitting.
- Hold near the ends of the handles. More leverage, less force, more control. Flat side of the jaws facing away from your hand.
- Aim the jaws where you want the crack to go. Square to the edge gives you a straight break across. Angled gives you an angled break. On a piece with a directional texture or ridge, your first cut should run across the ridges rather than along them.
- Squeeze slowly and evenly. A fast snap is a shatter. Slow pressure lets the crack find the line you aimed it at. If nothing has happened, do not jerk. Reset the jaws and try a slightly different angle.
- Shape by nibbling. Take small bites off an edge rather than trying to cut a curve in one go. Four small bites give you a curve. One big bite gives you two pieces and a swear word.
- Learn the keystone. To close a curved row without ugly wedge gaps, cut pieces slightly wider at the outside than the inside, so they taper like the stones of an arch. It is one small habit and it is the difference between a curved line that looks deliberate and one that looks like it ran out of room.
- Cut more than you need, in batches. Cut fifty pieces, sort them by size and thickness into a muffin tin or a few yogurt tubs, and only then start laying. Cutting one piece at a time to fit one hole is the slowest possible way to work and the results look tense.
What you stick them to, and what you stick them with
These two decisions travel together, and both of them are answered by the same question: where is this thing going to live? Get that right and nothing here is difficult. Get it wrong and the piece looks perfect for eight months.
| Where it lives | Base | Adhesive | Grout |
|---|---|---|---|
| Indoors, dry wall piece or tray | Sealed MDF, plywood, a wood panel, or a bisqued clay slab | White PVA adhesive of the Weldbond type | Standard sanded or unsanded, unsealed is fine |
| Indoors, splashes or a table top | Sealed plywood or cement backer board | Thinset mortar, or PVA if it truly never sits wet | Sanded, sealed once it has cured |
| Outdoors, or anywhere that freezes | Cement backer board, concrete, stone, terracotta. Never wood | Thinset mortar. Never a white glue | Sanded, sealed, and resealed every couple of years |
| Glass over glass, light passing through | The glass itself | Clear silicone | Often none at all |
The one rule inside that table worth memorizing: wood moves with humidity and white glue softens when it is damp. Either one alone will eventually drop your tesserae outdoors, and together they are a guarantee.
Four things about the base
- Rigid beats everything. If you can flex it across your knee, it will flex on a wall, and every flex breaks a glue joint. Thicker board, or a frame behind it.
- Seal anything porous first. Bare wood or MDF drinks the water straight out of the adhesive before it can grip. A coat of thinned PVA or a primer, dried, fixes it.
- Plan the edges before you start. The raw edge of the board is what makes a homemade mosaic look homemade. A frame, a painted edge, a run of tesserae wrapped around the side, or a routed rebate. Decide at the start, not at the end.
- A bisqued clay slab is an excellent base, and it is the one nobody thinks of in a pottery studio. Porous, rigid, dimensionally stable, and you can build a lip into it. Fire it at cone 05 and leave it unglazed.
And three about the adhesive
- Butter the piece, do not flood the board. A thin layer on the back of each tesserae. Adhesive that squeezes up between pieces occupies the space grout needs and it will not take grout color.
- Work in small areas. Enough adhesive for what you can lay in ten minutes, not for the whole panel.
- Let it cure fully before grouting. A full day for PVA, longer in a humid room, and follow the bag for thinset. Grouting onto adhesive that has not set is how a whole section slides.
Direct, indirect, or on mesh
Direct means you lay the pieces face up onto the final base, one at a time, and what you see while you work is what you get. Indirect means you lay them face down onto paper or sticky sheet, upside down and backwards, and transfer the whole thing later. Mesh is the middle option: build face up on fiberglass mesh at your kitchen table, then set the finished mesh into thinset on the real surface.
For handmade ceramic tesserae the answer is almost always direct, and the reason is thickness. Indirect gives you a dead flat face because every piece is pressed against the same sheet, which is exactly what you want for a floor made of identical machine cut tile. Your pieces are not identical. Flattening the face of a mosaic made from a handmade slab would throw away the surface variation that makes it worth making by hand, and it would leave the backs at wildly different depths in the adhesive.
Use indirect when the surface must be genuinely flat and safe to walk on, or when the piece is being installed somewhere you cannot work. Use mesh when the piece is too big to move finished, or when you want to build it at home and install it later in sections.
Whichever one you pick: dry lay first. Put twenty pieces down with no adhesive at all, stand back six feet, and look. Six feet is where a mosaic is actually read. Almost every design problem is visible from there and invisible from eight inches away.
Andamento, or why some mosaics look alive
Andamento is the Italian word for the flow of the lines in a mosaic: the direction the rows travel. It is the single biggest difference between a piece that looks composed and a piece that looks like tiles were fitted into a hole.
The classical order is worth following even on a first attempt. Lay the outline of the subject first, a single row of pieces following its contour all the way around. Then run a second row along the outside of that one, and a third, so the background ripples outward from the shape like water around a stone. The eye reads the movement before it reads the picture.
The opposite, and the default when nobody has told you otherwise, is to fill the background in tidy horizontal rows and then squeeze the subject in wherever it lands. That produces the flat, slightly dead look that people describe as their mosaic not quite working, without being able to say why.
Five things about spacing
- Even beats narrow. A consistent gap of about an eighth of an inch looks deliberate. A gap that wanders from touching to a quarter inch looks like an accident, no matter how tight the tight parts are.
- Never let pieces touch. Grout needs somewhere to go, and two pieces pressed together will chip against each other.
- Vary the size within a rhythm. All identical pieces read as manufactured. Wildly random pieces read as chaos. Three or four sizes, used deliberately, is the sweet spot.
- Cut to fit the gap, do not force the gap to fit the piece. When a hole is an awkward shape, nibble a piece into that shape. That is what the nippers are for.
- Stand back every ten minutes. Set a timer if you have to. Six feet away, and squint: squinting throws away detail and shows you value, which is what actually carries an image.
Mosaic on a pot, a planter or anything curved
A flat panel is the easy version. The moment the surface curves, flat pieces stop sitting flush and you have to think about it. The rule is short: the tighter the curve, the smaller the piece. A gentle planter belly takes inch wide tesserae happily. A mug takes half that. A sphere takes pieces the size of a fingernail.
This is also the best use for a pot that came out of the kiln fine but boring, or one with a glaze fault on one side. A terracotta pot from a garden center works too, as long as it is new and clean, because an old one holds dirt and moisture that will refuse to bond.
- Work from the rim down. The rim is the edge everybody looks at, so it gets the best pieces and the most attention. Gravity also works with you rather than against you this way.
- Do one band at a time and let it set. On a vertical curve, pieces slide. Lay a band around the pot, stop, let it grab, then come back. Trying to do the whole thing wet is how a third of it ends up on the table.
- Follow the form rather than fighting it. Rows that run around the pot horizontally read as calm and are far easier to keep even than rows that try to climb it.
- Mind the top edge and the drainage hole. Tesserae wrapped over a rim look finished. Tesserae stopping half an inch short of it look unfinished. And do not grout a drainage hole closed, which is a genuinely common and genuinely annoying mistake.
- If it is going outside, it is a thinset job. A mosaic planter that lives on a Utah porch goes through freeze and thaw all winter. Cement based adhesive, cement based grout, sealed. White glue will not survive one season.
Grouting
Grout does two jobs. It locks the pieces against each other sideways, so the mosaic becomes one object rather than a hundred glued ones. And it sets the entire mood of the piece, because it is the only color that touches every single tesserae.
That second job is the one people underestimate. Dark grout makes every piece pop as an individual shape and reads graphic and modern. Light grout softens everything and lets the colors run together, and it shows every irregular gap. Grout the color of your dominant tesserae makes the whole surface read as one field. The same mosaic with three different grouts is three different artworks, and it is worth testing on a scrap board before you commit, because there is no undo.
- Pick sanded or unsanded by gap width. Sanded for gaps wider than about an eighth of an inch, which is almost all handmade tesserae. Unsanded for finer work. Sand is what stops a wide joint shrinking and cracking as it cures.
- Seal porous faces first, if you have any. Unglazed clay, raw stoneware, anything textured or matte will absorb grout pigment and stain permanently. A grout release, or a coat of sealer on the faces only, prevents it. Fully glazed pieces do not need this.
- Mask anything you do not want grouted. Drainage holes, the back edge of a board, hardware.
- Mix to stiff peanut butter, then let it rest. Add powder to water rather than water to powder. Mix, then leave it five to ten minutes to slake, then remix without adding more water. That rest is what makes grout behave.
- Dust mask on while the powder is dry. It is a cement product. The dust is silica and it is worth the ninety cent mask.
- Press it in diagonally. Work across the joints at an angle rather than along them, with a gloved hand or a rubber float. Going along a joint drags the grout back out of it. Push, do not smear, and fill every gap including the ones at the edges.
- Scrape the excess off, then wait. Take the bulk off with the float held on edge or a gloved hand. Then leave it fifteen to twenty minutes to firm up before any water touches it.
- Wipe with a barely damp sponge, rinsed constantly. Wring it until it is almost dry. A wet sponge pulls grout straight out of the joints and floats pigment across the faces. Rinse, wring, one light pass, turn the sponge to a clean face, repeat.
- Leave the haze alone until it dries. A film will appear over everything and it will look like you ruined it. You did not. Wait for it to dry to a chalky bloom, then buff it off with a dry cloth. Attacking a haze with more water is what turns a twenty minute job into a two hour one.
- Cure before you use it or seal it. Check the bag. Two to three days is typical, longer in a cold garage.
Sealing, and living with the thing afterwards
Grout is a sponge. It is cement and sand and it will absorb water, coffee, soil and everything else unless you stop it. Your fired tesserae do not care. The grout does.
- A dry indoor wall piece does not need sealing. Nothing is landing on it. Skip it and save the money.
- Anything handled, wet, outdoors or on a table does. A penetrating sealer, applied in thin coats to fully cured grout, and wiped off the tesserae faces before it dries.
- Outdoors means resealing. Every year or two, depending on how much sun and freeze it takes. It is fifteen minutes.
- Do not seal early. Grout has to finish curing and release its own moisture. Sealing on day one traps it and the grout stays weak.
What a finished mosaic can and cannot be
A grouted mosaic is not food safe and it is not a serving surface, no matter how food safe the glaze on the individual pieces is. Grout is porous, adhesive is not rated for it, and neither one has been anywhere near cone 5½. Trivets, wall pieces, table tops, planters, house numbers, stepping stones and boxes are all fair game. Plates and bowls are not.
Hanging one: a mosaic is much heavier than the board suggests, because you have added ceramic and cement to it. Weigh the finished piece and hang it accordingly, into a stud or with an anchor rated well above what you measured.
The whole thing on one screen
Nothing new here. This is the page compressed to the lines you will actually want while your hands are busy.
Make the pieces
- One clay body, one bag, one slab. A quarter inch thick.
- Rib both faces, twice, at ninety degrees.
- Decorate the front. Nothing on the back, ever.
- Score the back in a grid at leather hard for predictable breaks.
- Dry flat between boards, slowly, with your name on the top one.
- Bisque cone 05. Glaze cone 5½. Break it afterwards.
- One twelve inch slab covers a little over a square foot.
Stick them down
- Safety glasses on. Cut inside a box or a bag.
- A quarter inch of jaw over the edge. Squeeze slow.
- Nibble small bites. Do not try to cut a curve in one go.
- Sort by thickness into three piles before you lay anything.
- Indoors and dry: sealed wood plus white PVA glue.
- Outdoors or wet: cement board plus thinset. Never wood, never glue.
- Butter each piece. Do not flood the board.
- Outline the subject first. Let the background follow it.
- Even gaps beat narrow gaps. Nothing touches.
- Stand back six feet every ten minutes and squint.
Finish it
- Let the adhesive cure a full day before grout touches it.
- Sanded grout for gaps over an eighth of an inch.
- Seal porous or unglazed faces before grouting, not after.
- Dust mask while the powder is dry.
- Mix to peanut butter. Rest five minutes. Remix. No extra water.
- Press in diagonally across the joints, not along them.
- Barely damp sponge, rinsed constantly. Wet is the enemy.
- Let the haze dry to a bloom, then buff it off dry.
- Cure two to three days before sealing or using it.
Eight ways it goes wrong, and what caused it
Four ways it goes wrong, and what caused it
Every one of these has a single most likely cause, and in almost every case the cause happened hours before the symptom showed up.
Pieces let go, months later
In order of likelihood: the backs were glazed, so the adhesive never had anything porous to grip. Or it is a wood base outdoors. Or the adhesive had not fully cured when it was grouted. All three are decided long before anything falls off.
The surface is lumpy
Thickness variation, and the sorting step got skipped. Nothing fixes it after the glue is dry. The finished surface always reads at the tallest piece, never the average.
A haze that will not come off
The sponge was too wet, which floated pigment across every face, and then it was allowed to cure. Buff hard with a dry cloth first. If that fails, a mild acidic grout haze remover, tested on a corner. Prevent it next time by wiping later and drier.
It looks busy and somehow dead
Almost always two things at once: no andamento, so the rows have no direction, and not enough value contrast, so everything is the same brightness. Squint at a photo of it. If the subject disappears when you squint, it is value, not color.
Pieces shatter instead of splitting
Too much jaw over the tile. Back off to about a quarter inch, hold nearer the handle ends, and squeeze slowly. Also check the nippers: worn carbide or a chipped wheel will crush rather than crack.
The grout cracked
Either the base flexed, or the grout was mixed too wet and shrank as it dried, or unsanded grout went into a wide joint. Rake out the cracked line, fix the cause, and regrout that section.
The grout stained the pieces
Unglazed, matte or textured faces absorbed the pigment. A grout release or a coat of sealer on the faces, applied before grouting, prevents it. Once it is in, it is usually permanent, which is why this step is worth the ten minutes.
Gaps stayed hollow
Either adhesive squeezed up and occupied the joint, or the grout was too stiff and got smeared across the top rather than pressed in. Work diagonally and push down. Refill any hollow joints while the batch is still workable.
What applies to mosaics at The Clay Hole
Worth reading before you plan anything bigger than a coaster, because one of these changes the cost of a mosaic by a factor of a hundred.
Fire the slab whole. This is the big one.
Glaze firing is five cents per cubic inch with a $4.80 minimum per piece. A small tesserae lands on that minimum, so a hundred and forty four of them fired separately is a hundred and forty four minimums. Fire the slab as one piece and cut it cold and it is one. Bisque firing is free either way.
Certification comes first
The slab rollers and the slab molds both need you signed off before you use them, which takes one sitting and lives on the slab roller and slab molds page. Both rollers are open to every Level and both will take a slab up to thirty inches.
Clay comes from us
In 25 lb bags, with a discount at Yellow, Purple and Black Level. Outside clay can destroy a kiln, so please do not bring any, and that includes anything you were planning to use as mosaic stock.
The assembly is a home job
Everything up to the fired tesserae happens here. The board, the adhesive, the grout and the sealer are all hardware store materials with their own dust and their own cleanup, so plan on gluing and grouting at home. Bring the finished piece back to show us.
Green Level Members bring their own tools
Every other Level uses the studio tools, and there are plenty of hard and soft ribs. For this project a hard rib is the one that matters, plus a needle tool for scoring the backs.
Sharp edges, before you take it home
Fresh breaks through fired glaze are sharp. We keep tools for exactly this and the method is on the fused and sharp pottery page. Ease the edges here rather than discovering them on the sofa.
The ones we get asked
Do the pieces have to be glazed at all?
No. Unglazed fired stoneware is a completely legitimate mosaic material and a lot of classical work is exactly that. It gives you a matte, stony surface instead of a glassy one. The trade is that unglazed faces will drink grout pigment, so they need a grout release or a sealer on the faces before you grout. Underglaze with a clear over it gives you color with a sealed face, which is often the easiest answer.
Do all the pieces really have to be the same thickness?
Close, not identical. Small differences disappear into the adhesive bed, because you can press a thin piece deeper and a thick piece shallower. What you cannot absorb is a quarter inch piece sitting next to an eighth inch one. Rolling the whole project from one slab solves it before it starts, and sorting into three piles handles what is left. If you are mixing in broken pot shards, sort those separately, because a plate rim and a mug wall are rarely the same thickness.
Can I use a pot that broke three years ago?
Yes, with a wash. Fired stoneware does not go off. What matters is that it is clean and completely dry, because old dust, grease or garden soil will stop the adhesive gripping. Warm water, a brush, and let it dry fully. Anything that has been sitting outdoors gets a longer dry than you think it needs.
How many pieces do I need?
For roughly one inch pieces with normal gaps, budget a little over a hundred pieces per square foot, which is about one twelve inch slab. Then make more than that, because you will reject some, break some badly, and want options while you are laying. Ten to twenty percent extra is not wasteful, it is the difference between finishing and waiting two weeks for another firing.
Is it cheaper to just buy mosaic tile?
For a plain field of one color, probably. Bought vitreous tile is cheap, uniform and instant. What you cannot buy is your own glaze combination, your own texture, a design painted across a whole slab before it was cut apart, or the piece of your own cracked bowl. Most people end up mixing: bought tile for large backgrounds, handmade tesserae for everything that carries the idea.
Can I eat off a mosaic, or set a hot pan on one?
Not eat off, no. The tesserae might be food safe individually but the grout is porous and the adhesive was never fired, so the finished surface is not. A trivet is fine for a warm dish but not for a pan straight off a burner, because thermal shock through cement grout is a real thing. Wall pieces, table tops, planters, house numbers, boxes and stepping stones are all completely fine.
My first one looks amateur and I cannot say why.
Photograph it and look at the photo, because a camera flattens a piece the way distance does. Then check three things in order: are the gaps even, do the rows have a direction, and does the subject still read when you squint. Uneven gaps are the most common answer and the easiest to fix next time. Direction is the second. Color is almost never the actual problem, even though it is what people reach for first.
Still stuck?
Ask any instructor. There is usually one on the hand-building side, and a slab question gets answered in about ninety seconds by somebody looking at the actual clay. Everything else about the studio is on the FAQs page.
Broken is a starting condition
That is the working version
Most of what makes a mosaic good is decided in the quiet parts. Which clay body. Whether the back got glazed. Whether anybody sorted by thickness. Whether the outline went down before the background. None of those are hard and none of them announce themselves at the time, which is the entire reason mosaics have a reputation for being fussy.
The other half of it is that this is the only project in the building where the shelf of failures is an asset. A studio full of potters generates cracked, warped, dunted and disappointing work constantly, and every bit of it is fired stoneware with real glaze on it. Cut it up. It was never going to hold water anyway.
Make the pieces flat and even, keep the backs bare, sort before you lay, match the glue to the weather, and let the haze dry before you touch it. That is enough to get a finished mosaic off your table and onto a wall.
There is a much longer version behind the toggle at the top, with the full base and adhesive table, andamento, curved forms, the eight ways it goes wrong, and fifteen videos.
Which version would you like to print?
Videos come out as a labelled box with the title and channel to search for, since paper does not play them.