
 Pottery Date Night
 Bring All Your Friends Free Week
 Give a Month of Pottery
 Private Pottery Parties


 The Welcome Booklet
 Your First Ten Sessions
 The Pottery Process
 Finding the Studio
 Your Classes Never Expire
 The Four Tables
 Who’s Who
 The Rewards Program

 Flux Glazes
 The Calculators
 Kiln Tracker
 Holiday Kiln Deadlines


 Beginner’s Tool Set
 Fingernail Clippers
 Mayco Clay Mender
 Epoxy for Kintsugi
 Applicator Bottles
 Large Bead Rack

 Raku Workshop
 Nighttime Raku
 Horsehair and Feather Raku

 The Clay Hole T-Shirt
 Embroidered Crewneck
 Zip-Up Hoodie
 Pre-Made Bisqueware
 Glaze Catchers
 Kiln Cookies
 Clay Cubby Rental

 The Glaze Bible, Printed
 The Book of Molds, Printed
 Printable Pottery Guides
 Free Printable Trackers

 Gifts for Potters
 Christmas Pottery Ideas
 Mother’s Day Gift Ideas
 Pottery Date Night

 Studio Calendar
 2027 Studio Events
 What Should I Do Today?

 How to Throw on the Pottery Wheel
 How to Make a Pinch Pot
 How to Tap Center a Pot
 The Five Stages of Clay

 Is Pottery Hard to Learn?
 Pottery Wheel Practice Drills
 20 Easy Hand-Building Projects
 Everything That Sounds Wrong


 A Beautiful Piece, Every Time
 Slab Roller Tips
 Any Dish as a Slump Mold
 Slab Roller & Slab Mold Certification

 The Pottery Skill Tree
 Clay & Pottery Calculators
 Pottery Paper Templates
 Logging Your Pottery and Glazes

 The Pottery Dictionary
 Why Did My Pottery Do That?
 The Pottery Cone Chart
 Pottery Myths, Fact-Checked
 Is Handmade Pottery Food Safe?

 Incredible Ceramic Artist Videos
 How Dan Throws Giant Pots
 How to Dry Your Pottery
 The Pottery Wheel Introduction

 Pottery by Zodiac Sign
 Personality and the Pottery Wheel
 Pottery for Engineers
 ADHD, Hyperfocus, and Never Running Out
 Hobbies for Burnout
 Screen-Free Hobbies for Adults
 Every Addiction I Ever Had Lost to Art
 Functional Pottery Is Engineering

 How Do We Compare?
 Pottery Classes by City
 Every Pottery Studio in Utah
 Pottery in Draper

 Featured Members
 The Signature Wall
 Making Friends as an Adult Is Brutal
 The Clay Hole Commandments

 2027 Pottery Contests
 2027 Studio Parties
 Gallery Night


 Scream It Into the Void
 Destroy the Glaze Wall
 Daily Affirmation Cards
 Everything That Can Go Wrong

 Subscribe to Our Newsletters
 Contact The Clay Hole

 Corporate Team Building


 Glaze Combinations
 Glazes We Do Not Carry
 Making Glaze Test Tiles

 The Mega Glaze Tool
 How to Use the Mega Glaze Tool


 Glaze Brushing Techniques
 How to Use Underglaze
 How to Use Dipping Glazes
 Glaze Problems, Causes and Fixes

 The Dipping Glaze Guide


 Making a Glaze Catcher
 Fused or Sharp After Firing

 The Signature Wall
 His Viral Videos
 His Own Ceramics
 Meet Mud
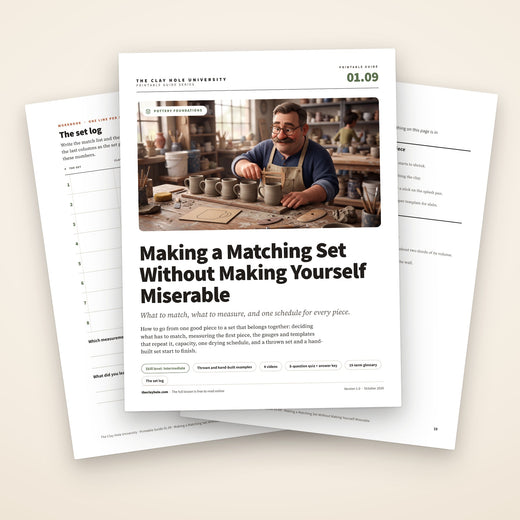
Making a Matching Set Without Making Yourself Miserable
One good mug is a design. Four that belong together is a plan: how many to start, which numbers to write down, a few tools that repeat a shape for you, and one schedule for every piece. Most of the plan is deciding what actually has to match, and letting the rest stay handmade.
Decide what has to match before the clay comes out. Make one piece, measure it while it is fresh, repeat it with a gauge or a template, and keep the whole set on one schedule from the wheel to the kiln.

Jump to a section
A set is one piece, measured and repeated
Making one good piece takes skill and a little luck. Making four that belong together takes the same skill plus a reference: one piece you measure while it is fresh, and a way to hit those measurements again on every piece after it.
Decide what has to match before you start. Picture two pieces swapped at the table. Whatever somebody would notice gets measured: the size in the hand, what it holds, how it stacks. Everything else is allowed to stay individual, and that is what makes the set handmade rather than manufactured.
Then keep the whole set on one schedule. One bag of clay, one sitting, one board, one cover. Pieces that live the same life shrink by the same amount, so a set that matched wet still matches fired.
Decide what has to match
Factory sameness is not the goal. The goal is a set where any piece can stand in for any other, and where anybody can see that all of them came from the same hands.
Use decides what has to match. Mugs get picked up and compared in the hand, plates and bowls get stacked, cups stand in a row on a shelf. Start from how the set will live, not from a wish for every piece to be identical.
| The set | Has to match | Can stay individual |
|---|---|---|
| Mugs | Height, rim width, what it holds, where the handle sits and how many fingers fit through it | Throwing lines, the exact curve of each handle, how the glaze breaks over a ridge |
| Bowls that stack | Rim width, the curve of the outside, the foot | Surface marks, decoration, how the glaze moves inside |
| Plates | Diameter, the rim, thickness, how they sit in a stack | Texture, stamps or brushwork, small differences in the glaze |
| Cups and tumblers | Height, rim width, what it holds, the weight in the hand | Finger marks, faceting or carving, a twist in the throwing lines |
- Pick three to five things. More than that and you are making factory ware the hard way. Height, rim and capacity cover most mugs; diameter, rim and thickness cover most plates.
- Give each one a check you can do in two seconds. “The calipers just touch.” “The lip meets the pointer.” “Cut from the same template.” A check that quick is a check you will actually make on every piece.
- Decide what ties the set together. One clay body, one glaze or one family of glazes, one rim treatment, one kind of foot. Eric Beavers, a studio potter writing about sets in Pottery Making Illustrated, makes the point that a set holds together through shared form, not only shared color or texture.
- Leave everything else alone on purpose. The marks your hands leave are the reason anybody wants a handmade set. You are choosing which parts you control, not trying to control all of them.
The question that settles it
Picture two pieces swapped at the table. Whatever somebody would notice has to match. Whatever nobody would notice is yours.
How many to make
Four, plus one or two spares. Small enough to keep in step, big enough to be a set.
- Four is a real set. It sets a table for four, it fits on one board under one cover, and it is the set Bill Schran gives his students in his Ceramic Arts Network article on throwing with templates.
- A spare is a choice, not an apology. Weigh out five or six for a set of four, carry every one through to the glaze firing, and pick the four that sit best together at the end. The others are good pots that happen not to be in the set.
- Every extra piece costs time at every stage. A sixth mug is a sixth trim, a sixth handle, a sixth piece to cover, check and glaze, all inside the same window. That window is the real limit on a first set, more than skill.
- Grow the set once the method works. Six, eight, twelve: everything below scales, and the numbers you write down for the first set carry straight over to the next. What does not scale is working from memory.
- Small forms go further for the same effort. Cups, tumblers, sauce dishes and lids come off a single centered mound when you throw off the hump, so a dozen of them costs far less than a dozen mugs.
Say the number before you weigh anything
Writing “four mugs, two spares” at the top of the page sounds trivial. It stops a set quietly growing to nine because there was clay left in the bag. Nine is a fine number for your third set.
Measure the first one, then copy it
Your first piece is the reference. Every number the rest of the set has to hit comes off it while it is still fresh.
Make the first piece as carefully as you would make a one-off, then stop and measure it before anything else happens to it. Clay starts giving up water the moment it is finished, and a piece that has sat for an hour has already shrunk a little. A number taken from it later is smaller than the one your next fresh piece will shrink from.
| What | Measured with | When | Why it matters |
|---|---|---|---|
| Clay weight | A scale | Every ball, before you start | The same weight is the same clay to spread. The same height from different weights means different walls and floors. |
| Rim width | Calipers | Right after the last pull | Rims sit side by side on a shelf and stack in a cupboard, so a wide one shows. |
| Height | A pointer gauge, or a stick on the splash pan | Right after the last pull | A difference in height is the easiest mismatch to see in a row. |
| Foot or base width | Calipers or a ruler | At trimming | It sets how each piece stands and how they stack. |
| Trimmed weight | A scale | After trimming | Two pots with the same outside can carry different floors. The scale finds the heavy one. |
| Handle joins | A paper strip with two marks | At soft leather hard | Handles that sit at the same height make the same mug from across a room. |
| Slab thickness | The roller's final setting, or guide sticks | Every slab | The same setting gives the same wall and the same weight. |
| Slab outline | A paper template | Every slab | Cut the template once, then every slab from it. |
- Write the numbers where you will find them again. On the board, on a card, in a notebook. The wet numbers from your first set become the starting numbers for every set after it.
- Measure wet, compare wet. Every piece is checked at the same stage the reference was measured, so the comparison is fair. Shrinkage then happens to all of them together, as long as they share a bag and a schedule.
- One bag, one day. Clay bodies on our shelves shrink anywhere from about 10 to about 14 percent between wet and fired, and even two bags of the same body can shrink slightly differently. A set split across bags can measure perfectly wet and drift apart in the kiln. Our proportions lesson lists each bag.
- Measure the finished reference too. When it comes out of the glaze firing, measure it again. The difference between its wet and fired numbers is your real shrinkage for that clay, and it is worth more than any chart for the next set.
Tools that repeat a shape for you
None of them is expensive, and three of them you can make from scrap in a few minutes. Each one replaces a judgment you would otherwise make by eye, four times over.
A scale
The cheapest consistency there is. Weigh every ball for the set to the same number. A kitchen scale that reads in ounces or grams is plenty.
Calipers
Set them to the rim of the reference, tighten the screw, and leave them alone. Let the arms just touch the clay: pressed into a wet rim they measure the dent. Wing nuts creep, so check the setting against the reference rather than your memory.
A pointer gauge
A pointer on a stand beside the wheel, set to the height and edge of the reference while it is still on the wheel. Every next wall is pulled until the lip just meets the tip. Don Adamaitis's version for Ceramic Arts Network is a hardware store T-bevel glued to a pipe fitting; a stick taped to the splash pan does the height on its own.
A profile rib
The outside curve of the reference, cut from a stiff plastic card and used on the last pass of every piece. Hold it at an angle against the turning clay, not square to it. It fixes the silhouette, which is the hardest thing to judge by eye.
Paper templates
For slab work the template does the job calipers do on the wheel. Cut it in paper, test it (wrapped around the former, or laid in the slab mold), then cut every slab from it. Card lasts longer for a set you plan to repeat.
A handle strip
A strip of paper with two marks on it, for the top and bottom joins. Hold it against each mug in the same place and prick the marks through with a needle tool. For handles cut from a slab, a cardboard template makes every one the same shape.
Set the tools from the piece, not from the plan
A plan written in inches is a good start, but the tools are set from the reference once it exists. If it came out a quarter inch taller than planned and you like it, that is the new plan.
Capacity, both kinds
What each piece holds, and how many pieces you can keep in step at once. A set needs both to be right.
- What each one holds is decided once. If every piece starts from the same weight and reaches the same height and rim, they hold close enough to the same amount that nobody pouring coffee will notice. Capacity is a decision about the reference, not a measurement you repeat on every piece.
- The inside shrinks faster than any one measurement. Clay shrinks in every direction at once, so the volume drops by much more than the width does. A clay that loses 12 percent of its width keeps about two thirds of its volume, because 0.88 × 0.88 × 0.88 is about 0.68. Sumi von Dassow, writing in Pottery Making Illustrated, turns that into a rule of thumb: make it to hold about one and a half times what you want at the end.
- Check it on the bisqued reference. Wet clay will not hold water, but bisque will. Fill the reference to the line you would really fill it to, usually about half an inch below the rim, and measure the water. The glaze firing still has work to do: in a clay that does about half its shrinking in the glaze firing, that last firing takes roughly another sixth of the volume. Adjust the plan for the next set rather than this one.
- How many you can keep in step is the other capacity. Every piece has to be trimmed, handled and covered inside the same window, and pieces made in one sitting reach that window in roughly the order you made them. If you cannot trim six in one go, make four, or close the bag on the ones that are ahead so they wait for you.
A target before you have a reference
Our proportions lesson gives one: a mug that finishes about 3¼ by 4 inches holds roughly 12 ounces filled to half an inch below the rim. Start there, then let your own fired reference correct it.
One set, one schedule
Pieces that live the same life shrink by the same amount. A set measured perfectly at the wheel can still drift apart on the shelf.
- One sitting, one board, one cover. Make the whole set together and keep it together. Handles and lids follow the same rule: the same clay, the same session and the same plastic as the pieces they go on.
- Number them in the order you made them. A needle tool mark on the base or on the bat. The first piece made is the first one ready, and working in that order at every stage keeps the set at one wetness.
- Trim in one sitting, at one stage. If some are ahead of the others, close the bag on those: a closed bag holds a piece at nearly the same stage for days. Trim to the same foot and check the height again afterwards.
- Make the handles as a batch. Pull five or six from the same lump, or throw a ring and cut them, in the same session as the mugs. Cut them to one length, mark the joins with the handle strip, and attach them all in one sitting at soft leather hard.
- Dry them side by side. Same shelf, same height, same cover, uncovered on the same day. A piece on a top shelf by the door dries faster than one low in the middle, so a set split across shelves is drying at two speeds. Flat work gets flipped every day, every piece of it.
- Glaze them in one session. The same jar or bucket, the same number of coats or the dip time on that glaze's lid, and a restir every three or four pieces so the last piece gets the same glaze as the first. Log the clay body, the glaze, the coats and the date the way you would log any piece, and put a kiln cookie under every one.
- Then the kiln has its say. Where each piece fires is the studio team's call, and a kiln does not give every shelf exactly the same heat. A glaze that pools, breaks or floats will vary a little from piece to piece. That is the material, not a fault in the set.
Which cover, and for how long
Cotton evens out thin and thick parts; a closed bag stops a piece where it is. Our lesson on cotton sheets or plastic bags has the decision table and the studio's own sheets and bags.
Four mugs on the wheel
From one piece to a set, in seven steps
Six balls, one reference, five more to match it, and the best four kept. Read it through once before you weigh anything.
The same seven steps work on the wheel and at the slab table.
- Weigh six balls from one bag. A mug usually takes a pound to a pound and a half. Pick a number and weigh every ball to it, then wedge them all before you sit down.
- Throw the reference. Your normal mug, thrown with care. Leave the wall a little thicker where the handle will go, and finish the rim exactly the way you want all four rims to look.
- Set the tools from it while it is on the wheel. Calipers to the outside of the rim. The gauge pointer to the height and edge of the rim, or a stick to its height. Write down the weight, the height and the rim width, then take it off.
- Throw the rest to the tools. The same number of pulls, starting and ending in the same places, and the profile rib on the last pass. Pull until the lip just meets the pointer, then check the rim with the calipers before the pot leaves the wheel.
- Stop at close enough. If a pot lands inside your check, leave it. Another pull to win the last sixteenth of an inch thins the wall and tires the clay, and that is the pot that sags.
- One board, numbered, one cover. All six on one board, numbered in throwing order, under one cover.
- Trim in order, to one foot. Same foot width, checked with the calipers. Weigh each one after trimming: a heavy one still has floor you missed.
- Handles as a batch, then dry together. Handles from the same clay in the same session, joins marked with the strip, all attached in one sitting. Then dry slowly and side by side.
- Glaze together, choose at the end. One session of glazing. After the glaze firing, line all six up and keep the four that sit best together.
- Write the match list. Three to five things that must match, each with a quick check. Everything else stays individual.
- Weigh out the set plus a spare or two. One bag of clay, every ball the same weight. Four and two spares is a good first set.
- Make the first piece and measure it at once. Rim width, height and weight on the wheel; the roller setting and a paper template for slab work. Write the numbers down.
- Set your tools from it. Calipers to the rim, a pointer or a stick to the height, a profile rib for the curve, a template for every slab.
- Make the rest to the tools, and stop at close enough. The same pulls or the same rolling passes every time. Inside your check is done; another pull to win the last sixteenth of an inch only thins the wall.
- Keep one schedule. One sitting, one board, one cover. Number the pieces, trim them in order, make the handles as a batch, glaze them in one session, a kiln cookie under every one.
- Choose the set at the end. Line them up after the glaze firing and keep the ones that belong together. The spare is a good pot that belongs on its own.
Three ways a set goes wrong
Throwing to size, not to weight
A gauge gets every rim to the same height whatever is in the ball. Without weighed clay, one pot gets there with a thin wall and the next with a heavy floor: they match on the shelf and feel different in the hand.
Two bags, or two weeks
Two bags of the same clay can shrink slightly differently, and pieces made days apart are never at the same wetness when you trim them or add handles. One bag and one sitting avoid both.
Chasing the last sixteenth
Re-pulling a wall that is already close thins it and tires the clay, and the pot that was a sixteenth short becomes the pot that sagged. Inside your check is the job.
Four plates on one slab mold
Here the slab mold does the job of the calipers and the template does the job of the gauge. The rest is the same discipline.
- Get certified first. The slab rollers and slab molds need the free certification, and it comes before anything else on this list.
- One slab mold for the whole set. Measure its widest point and cut one paper template at least half an inch bigger than that at its narrowest point. A full inch bigger is better.
- Roll every slab the same way. Five slabs, four and a spare, from one bag, each through the same steps to the same final setting, a quarter turn every pass and a flip at least once. A third of an inch wet suits a slab mold up to about thirteen inches across; half an inch for anything bigger.
- Cut them all from the one template. Then keep each waiting slab flat on its own board under plastic, so the last one onto the slab mold is as soft as the first.
- Do the same things to each one. The same passes with the rib, the same rim cut, and a stamp or maker's mark in the same place on every plate.
- Take each one off at the same test. Lifted by the rim, it holds its own shape. A test rather than a number of minutes is what makes all four leave the slab mold at the same stage.
- Dry them flat and together. Under cotton, side by side, each plate turned over every day so both faces lose water at the same pace.
- Glaze together, choose at the end. Exactly as with the mugs.
The same thinking works for slab mugs and tumblers: one paper template, checked around the former before the knife touches clay, one roller setting and one former size for the whole set. Our slab mug lesson has the template math.
A family, not clones
Perfect duplicates are what factories are for. A handmade set is a family: the same features, the same build, and enough difference to tell each one apart.
- Judge at the distance the set gets used. Line the pieces up on a table, step back to where somebody sitting there would be, and look. A difference you cannot see from there is not a flaw. Then pick each one up, because the hand notices weight and the handle in a way the eye does not.
- Loosen up wherever nothing touches. A difference in height shows in a row on a shelf. A difference in curve shows when plates stack. A small difference in where a glaze breaks shows to nobody but you.
- Variation by design is still a set. One form in four glazes, or one glaze across four related forms, reads as a set because one of the two stays fixed. Nesting bowls are the opposite case: graded differences, on purpose, that have to be exact.
- The kiln adds its own variation. Thickness explains most of it and position in the kiln much of the rest. Glazes that pool, break or float will not come out four times the same. Our lesson on why the same glaze looks different goes through it in order.
- When one piece stands out, it leaves. Line them up and notice which one your eye lands on first. That is the spare's moment. The one that leaves is still a good pot; it belongs on its own.
A useful test
If a flaw is not visible at the distance people will actually see it from, it is not a flaw. Spend the care on what they will see and hold.
Six ways a set falls out of step
Throwing to size, not to weight
A gauge gets every rim to the same height whatever is in the ball. Without weighed clay, one pot gets there with a thin wall and the next with a heavy floor. They match on the shelf and feel different in the hand.
A second bag halfway through
Two bags of the same clay can shrink slightly differently, and a blend of scraps shrinks like no single bag at all. A set wants one clay body, from one bag if you can manage it.
Calipers that moved
Knocked, reset, or a wing nut that crept. Check them against the reference piece rather than your memory of it, every few pieces.
A set spread over two weeks
Pieces made days apart are at different stages every time you touch them: trimmed at different wetness, handled at different wetness, dried at different speeds. One sitting avoids all of it.
Starting with twelve
The method scales; a first evening does not. Twelve pieces need twelve trims inside the same window, and the last few get trimmed too dry. Make four and two spares, then grow.
Chasing the last sixteenth
Re-pulling a wall that is already close thins it and tires the clay. The pot that was a sixteenth short becomes the pot that sagged. Inside your check is the job.
The ones that come up at the wheel
How many should I make for a set of four?
Five or six. Weigh them all out at the start, carry every one through to the glaze firing, and choose the four that belong together at the end. The others are good pots that happen not to be in the set.
Do I need a throwing gauge?
No. A scale and calipers do most of the work, and a stick taped to the splash pan at the right height does the rest. A pointer gauge is faster because it reads the height and the rim at once, which matters more at twelve pieces than at four.
Can I make a set over more than one session?
One sitting is the rule, because pieces from different days are never at the same wetness when you measure, trim or add handles. If it has to be two sessions, use the same bag, close the bag on the first batch so it waits, and make any lids and handles in the same session as the pots they go on.
Does it matter which clay I use?
Only that it is one clay, from one bag if you can manage it. The clay bodies on our shelves shrink by different amounts, and a blend of scraps shrinks like none of them, so a set made from mixed clay is mismatched before it is fired.
What if one piece comes out noticeably different?
Let it finish with the others. Height and the foot can sometimes be brought back into line at trimming; a rim width cannot. If it still stands out after the glaze firing, it is the spare's turn.
Can I add a piece to the set later?
Yes, with the numbers you wrote down: the same clay body, the same weight, the tools set to the same measurements, the same glaze. It will be a close cousin rather than a twin, because it comes from a different bag and a different firing. Make two and keep the closer one.
Do hand-built sets follow the same rules?
All of them. The template stands in for the calipers, the roller setting or the guide sticks stand in for the gauge, and one bag, one session and one drying schedule apply exactly as they do on the wheel.
Can every piece in a set have a different glaze?
Yes, as long as the forms match. One form in four glazes is a set because the shape holds it together. Four forms in four glazes is a collection, which is also lovely, and a different thing.
Where to go next
Proportions, ratios and wall thickness
Clay weights for the common forms, the shrinkage of every bag we carry, and six habits behind a repeatable pot.
Read it →Throwing and cutting handles on the wheel
Six matching handles from one thrown ring, in the same clay and at the same wetness as the mugs.
Read it →Cotton sheets or plastic bags
Which cover to use while a set waits, and how to keep thin and thick parts drying together.
Read it →Throwing off the hump
Cups, tumblers, sauce dishes and lids by the dozen from one centered mound, with calipers on every one.
Read it →Why the same glaze looks different on two pots
Thickness, clay, shape and the firing, in the order to check them when one piece will not match.
Read it →How to use slab molds, step by step
The full method behind the plate set on this page, from measuring the slab to taking the piece off.
Read it →Same hands, written down
A matching set is not a harder kind of pot. It is the same pot, made with its decisions written down: the weight, the height, the rim, the schedule. Everything you would otherwise try to hold in your head lives on a scale, a pair of calipers and a scrap of paper instead.
That leaves your attention free for the part nobody can measure for you. Pick the few things that have to match, hold them, and let the rest of the set look like a person made it. Weigh out six balls at the start of your next session here and see how far the numbers carry you.
Decide what has to match, make one reference piece, measure it while it is fresh, set your tools from it, and keep the whole set on one schedule from the wheel to the kiln. Make a spare or two and choose the set at the end.
The Comprehensive Version has the full measurement table, both kinds of capacity, the drying schedule, a thrown and a hand-built example step by step, and the questions we get asked. Switch to it at the top of the page.
Which version would you like to print?
Videos come out as a labeled box with the title and channel to search for, since paper does not play them.