Pottery Date Night
 Bring All Your Friends Free Week
 Give a Month of Pottery
 Private Pottery Parties

 The Welcome Booklet
 Your First Ten Sessions
 The Pottery Process
 Finding the Studio
 Your Classes Never Expire
 The Four Tables
 Who’s Who
 The Rewards Program
 Flux Glazes
 The Calculators
 Kiln Tracker
 Holiday Kiln Deadlines

 Beginner’s Tool Set
 Fingernail Clippers
 Mayco Clay Mender
 Epoxy for Kintsugi
 Applicator Bottles
 Large Bead Rack
 Raku Workshop
 Nighttime Raku
 Horsehair and Feather Raku
 The Clay Hole T-Shirt
 Embroidered Crewneck
 Zip-Up Hoodie
 Pre-Made Bisqueware
 Glaze Catchers
 Kiln Cookies
 Clay Cubby Rental
 The Glaze Bible, Printed
 The Book of Molds, Printed
 Printable Pottery Guides
 Free Printable Trackers
 Gifts for Potters
 Christmas Pottery Ideas
 Mother’s Day Gift Ideas
 Pottery Date Night
 Studio Calendar
 2027 Studio Events
 What Should I Do Today?
 How to Throw on the Pottery Wheel
 How to Make a Pinch Pot
 How to Tap Center a Pot
 The Five Stages of Clay
 Is Pottery Hard to Learn?
 Pottery Wheel Practice Drills
 20 Easy Hand-Building Projects
 Everything That Sounds Wrong

 A Beautiful Piece, Every Time
 Slab Roller Tips
 Any Dish as a Slump Mold
 Slab Roller & Slab Mold Certification
 The Pottery Skill Tree
 Clay & Pottery Calculators
 Logging Your Pottery and Glazes
 The Pottery Dictionary
 Why Did My Pottery Do That?
 The Pottery Cone Chart
 Pottery Myths, Fact-Checked
 Is Handmade Pottery Food Safe?
 Incredible Ceramic Artist Videos
 How Dan Throws Giant Pots
 How to Dry Your Pottery
 The Pottery Wheel Introduction
 Pottery by Zodiac Sign
 Personality and the Pottery Wheel
 Pottery for Engineers
 ADHD, Hyperfocus, and Never Running Out
 Hobbies for Burnout
 Screen-Free Hobbies for Adults
 Every Addiction I Ever Had Lost to Art
 Functional Pottery Is Engineering
 How Do We Compare?
 Pottery Classes by City
 Every Pottery Studio in Utah
 Pottery in Draper
 Featured Members
 The Signature Wall
 Making Friends as an Adult Is Brutal
 The Clay Hole Commandments
 2027 Pottery Contests
 2027 Studio Parties
 Gallery Night

 Scream It Into the Void
 Destroy the Glaze Wall
 Daily Affirmation Cards
 Everything That Can Go Wrong
 Subscribe to Our Newsletters
 Contact The Clay Hole
 Corporate Team Building

 Glaze Combinations
 Glazes We Do Not Carry
 Making Glaze Test Tiles
 The Mega Glaze Tool
 How to Use the Mega Glaze Tool

 Glaze Brushing Techniques
 How to Use Underglaze
 How to Use Dipping Glazes
 Glaze Problems, Causes and Fixes
 The Dipping Glaze Guide

 Making a Glaze Catcher
 Fused or Sharp After Firing
 The Signature Wall
 His Viral Videos
 His Own Ceramics
 Meet Mud
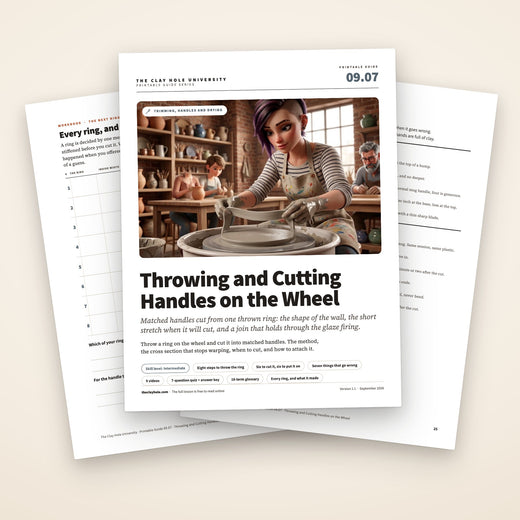
Throwing and Cutting Handles on the Wheel
Most potters learn exactly one way to make a handle, and it involves a wet arm, a lot of dripping, and some swearing. This is the other way. You throw a ring on the wheel, let it firm up, and cut it into four or six handles that are already curved, already identical, and already the same clay at the same wetness as the pot they are going on. Here is the whole job: which method suits which pot, how to throw the ring, when exactly to cut it, and how to attach something stiffer than a pulled handle without losing it in the kiln.
Throw a ring on the wheel, let it firm up, cut it into four or six matched handles. Here is the short version: the ring, the cut, the narrow window you have to hit, and the three things that lose a thrown handle after you leave.

Which version would you like to print?
Videos come out as a labeled box with the title and channel to search for, since paper does not play them.
A thrown wall is already a handle
Throw a low ring on the wheel. Let it firm up. Cut it into six arcs. Each arc, stood on edge, is a mug handle that is already curved, already the right thickness, and identical to the other five. That is the entire technique.
The one thing it asks of you that pulling does not: the ring has to stiffen before you can cut it, which takes an hour or so. So throw the ring in the same session as the pot and keep both under the same plastic. Get out of sync and the handle ends up drier than the mug, the mug shrinks around it, and the join opens up somewhere between your shelf and the kiln.
Same clay, same bag, same session, same plastic.
Throw it, then cut it
Thrown off a hump, because you only need about a pound and centering a pound on its own is more trouble than centering the top of five.
-
Center the top inch and open half an inch deep
Only the top inch. One finger into the middle, half an inch down, no deeper. Deeper gives you a small cup with a floor you cannot use.
-
Pull the opening out to three or four inches
The inside of the ring is the arc your fingers will go through, so this measurement decides the shape of all six handles. Three inches is a normal mug. Four is generous.
-
Raise a wall an inch tall and a quarter inch thick
Thicker than a pot wall. A thin ring is easy to throw and useless to cut, because the arcs go floppy the moment you lift them.
-
Curve the outer face, then round the top edge
The step everybody skips and the one that decides everything. With a rib or a fingertip, round the outside so the wall in section is a shallow C, not a flat strap. A flat handle sags at the top of the glaze firing and presses an edge into your finger. A curved one is a little arch and holds itself up. Then one sponge pass over the rim, because that edge is the part a knuckle touches forever.
-
Wire it off flat and wait for soft leather hard
Onto a board, lying flat, out of any draft. It is ready when you can lift an arc and it holds its shape, and a blade goes through without dragging. Usually somewhere between forty minutes and a few hours, so check rather than trusting a number.
-
Mark all six cuts, then make them with a sharp blade
Mark first and look at them, or you get five good handles and one runt. Use a fettling knife or a craft blade, never a needle tool, which tears instead of slicing. Angle each cut so both ends of the arc are beveled and will lie against the curve of the mug.
-
Round every cut edge straight away
One pass with a damp finger along each fresh edge while the clay still moves. A cut leaves a sharp ridge, and that ridge survives the bisque, survives the glaze and lives on the underside of the handle for good. Then rest the arcs curve side down, covered.
A thrown arc will not bend to help you
A pulled handle drapes and forgives a join that is a few degrees off. A stiff arc does not, so the fit has to be right before any slip goes on.
- Offer it up dry first. Both beveled ends should touch the mug. If only one does, recut the bevel or pick a different arc. Never bend an arc to close a gap, because that puts a crack on the outside of the bend that shows up in the bisque.
- Rounded rim faces out. The edge you smoothed on the wheel goes on the outside, under a knuckle. The cut edge faces the pot, where nobody touches it.
- Score and slip both sides, press, twist slightly, hold. A small twist as it seats squeezes slip out sideways and pulls the surfaces together. Slip squeezing out at the edge is a good sign. Count to ten before you let go.
- Blend a thin coil into both joins. That fillet is structural, not decorative. It is what stops a crack starting at a hard corner.
- Then leave it alone. Support the handle with foam or newspaper, cover it loosely for two days, keep it away from drafts, and stand it upside down at the end. Check both joins in raking light before it goes to bisque.
Neither of these is ours. Read the list, watch one of them, then put the phone face down: film shows you the speed of a thing, and a written list is what you can glance at with clay on your hands. The two are better together than either is alone.
The three that go wrong on night one
It fell off in the bisque. The handle was drier than the mug when they met. It warped in the glaze firing. The section was flat instead of curved, and stoneware goes soft near cone 5½. The edges are sharp. The cut edges never got rounded while they were still soft. All three are decided before the piece leaves your hands.
One more, because it saves a wasted ring: you cannot put a fresh handle on a bone dry pot. If the mug has finished shrinking and the handle has not, the join is under tension from the moment you make it. Leather hard or nothing.
Six handles, all the same, in about four minutes
A pulled handle is made one at a time by hand, so no two are quite alike. That is a virtue on a one off piece and a problem on a set of six mugs. A thrown handle solves the set problem in the most direct way available: you make one ring and cut it up, so every handle came off the same wall, at the same thickness, with the same curve.
There are three other things it buys you, and they are worth naming because none of them is obvious until the first time it works.
- A round cross section without pulling for one. Getting a handle that is oval or D shaped rather than flat is genuinely hard to pull and almost automatic on the wheel, because you are shaping a wall with a rib rather than squeezing clay between two fingers.
- The curve is decided before you touch the pot. The inside diameter of the ring is the arc of the handle. If you want a wider grip, throw a wider ring. You are choosing the shape with a measurement instead of hoping your thumb lands in the same place six times.
- Nothing drips. Pulling handles is a wet, messy job that a lot of people quietly avoid. Throwing one is the same motion you already use, on a wheel you are already sitting at.
The trade-off
This is not easier than pulling. It is different, and it costs you something: a thrown handle has to stiffen before you can cut it, so you cannot make the pot and the handle in one uninterrupted sitting the way you can with a pull off the mug. It also looks more formal. A ring cut into arcs reads as precise and slightly manufactured, which is exactly right on some work and completely wrong on others. If your pots are loose and gestural, a thrown handle can look like it wandered in from a different studio.
Everything on the pulled handles page still applies here. Same clay, same wetness, same thickness, room for fingers, slow dry. A thrown handle does not get to skip any of that. It just gets made a different way.
Watch somebody do it. Then read the list.
There are nine videos below, from potters who have thrown more handles this month than most of us will throw this year. They are here because film does something writing cannot. Nobody has ever successfully written down how fast a rib should travel, or what a ring looks like in the second before the wall goes too thin. You have to see it happen.
But a video is a terrible reference. You cannot scrub back through one with clay on both hands. You cannot skim it for the single number you have already forgotten. And when the ring is stiffening on the board and you are trying to remember whether you cut now or in an hour, four minutes of footage is not an answer, it is a delay.
Words hold still. That is the whole advantage, and it is a big one. A short list can be read in two seconds from a phone propped against a bucket, which is about all the attention you have spare.
There is a decent pile of research behind pairing the two, and it lands roughly where you would guess: people retain a demonstration better when it arrives with words attached, because the moving picture and the labels reach memory by different routes and each one gives the other something to hold. The video teaches your eye what the motion looks like. The list gives you the names for what you just saw. Standing at the wheel a week later, it is the names that come back first, and then the picture follows them.
So read the list, watch the person, then put the phone face down and throw four rings you fully intend to throw away.
If you would rather not scroll all of it, the Nutshell toggle at the top of the page cuts this down to what you need in your hand today, and it remembers your choice on every other page on this site.
Five ways to make a handle on the wheel
They are all the same idea, which is that a thrown wall is already a handle if you cut it in the right place. What changes is which wall you throw and which direction you cut.
The ring
Throw a low, wide ring off the hump with a curved wall. Let it stiffen, cut it into four or six arcs. Each arc stands on edge and becomes a mug handle. This is the workhorse and it is the one the rest of this page is mostly about.
The cylinder
Throw a tall thin cylinder and cut it into vertical strips. Each strip is a strap handle with a gentle outward curve already in it. Better than the ring for tall jugs and pitchers, because a strap wants to be long and straight rather than tightly curved.
The hollow tube
Throw a narrow tube, cut a length of it, and bend that length into a handle. The result is hollow, so it is light for its size and it looks substantial without being heavy. It needs a vent hole and it is the fussiest of the five.
The ring off the pot
Throw the mug an inch taller than you want it, then slice the top ring off with a wire while it is still on the wheel. That ring is guaranteed to be the same clay at the same wetness at roughly the right thickness, because it was the pot ninety seconds ago.
Lugs and side handles
Throw a small ring and cut it into short segments for casserole lugs, baking dish grips and side handles. Same technique, shorter cuts, and the piece it goes on is usually heavy enough that a fat sturdy lug is the correct answer anyway.
Bending an arc to fit
The one thing that never works. If a cut arc does not sit against the mug, cut a different one. Forcing a stiff curve open puts a crack on the outside of the bend that you will not see until it comes out of the bisque with a split in it.
| Method | Best on | Clay to start | Difficulty |
|---|---|---|---|
| The ring | Best onMugs, cups, small pitchers | Clay to startAbout a pound at the top of a hump | DifficultyIf you can throw a cup, you can do this |
| The cylinder | Best onJugs, pitchers, tall mugs | Clay to startOne to two pounds | DifficultyNeeds a decent thin even wall |
| The hollow tube | Best onLarge mugs, teapots, statement pieces | Clay to startOne to two pounds | DifficultyThe hardest of the five |
| The ring off the pot | Best onWhatever you are already throwing | Clay to startNone, it comes off the pot | DifficultyThe easiest way to start |
| Lugs | Best onCasseroles, baking dishes, planters | Clay to startHalf a pound | DifficultyVery forgiving |
If you have never done any of this, start with method four. You are already throwing the mug, the ring costs you one extra inch of height, and if it goes badly you have lost nothing but an inch of clay.
Throwing the ring, in eight steps
This is thrown off a hump rather than off the wheel head, because you only need a pound of clay and centering a pound on its own is more annoying than centering the top of five. If throwing off the hump is new, the off the hump page covers the setup.
-
Center the top inch only
Cone the hump up, bring it down, and then leave the body of it alone. Wrap your hands around the top inch and true just that. You are not centering five pounds, you are centering the little bit you are about to use.
-
Open shallow, and mean it
One finger into the center, about half an inch deep. No deeper. Half an inch gives you a ring. An inch and a half gives you a small cup, and a small cup has a floor in it that you do not want and cannot use.
-
Pull the opening out to your handle width
Drag that finger outward until the inside of the ring is the diameter you want the handle to curve around. Three inches across is a normal mug handle. Four is generous. This single measurement decides the shape of every handle you cut out of it, so it is worth stopping to look at.
-
Raise a wall about an inch high
Two or three short pulls. Keep it thicker than a pot wall, somewhere around a quarter of an inch at the base and a little less at the top. A thin ring is easy to throw and useless to cut: the arcs go floppy the moment you lift them.
-
Put a curve in the wall
The step everybody skips, and the one that decides whether this works. With a fingertip or a small rib, round the outside face so the wall in cross section is a shallow C rather than a flat strap. Two separate reasons, both below the diagram.
-
Round the top edge
A damp sponge, wheel turning slowly, one pass over the rim. That rim becomes the outside curve of the finished handle, which is the part a hand touches every single time. A sharp edge here is sharp forever, and no amount of glaze will soften it.
-
Sponge it dry and clean
Get the standing water out of the inside corner of the ring. Water pooling there keeps the base soft long after the top has firmed, and then the ring cuts unevenly. Semi damp sponge, not a wet one.
-
Wire it off onto a board
Wheel stopped, wire taut, one clean pass under the ring. Slide it onto a bat or a board and leave it flat. Do not stand it up and do not put it on a shelf where it will get a draft on one side, because a ring that stiffens unevenly cuts into arcs of different firmnesses.
How much you get out of one ring
A ring about four inches across the outside, cut into six, gives six mug handles with a little waste at each cut. A pound of clay at the top of the hump is plenty for that and usually leaves you enough to throw a second ring straight away if the first one goes wrong. Throw two. Everybody wrecks the first one.
The cross section is doing all the work
If you take one thing off this page, take this. The shape of the wall in section is what separates a thrown handle that survives from one that comes out of the glaze firing looking like a potato chip.

- The ring itself. A low wall standing on nothing, about an inch tall. The inside circle is the arc your fingers will go through.
- Six cuts, marked before you make any of them. Cutting as you go gives you five good handles and one stub, every time.
- The rounded top edge becomes the outer curve of the handle, under a knuckle. Round it on the wheel while it is easy.
- The curved outer face. A shallow C, not a flat strap. This is step five of the throwing list and it is the whole reason the section matters.
- A thicker base. That extra clay ends up at the join, which is exactly where a handle wants more material and where every failure starts.
Reason one: it will not warp
Near the top of a glaze firing, stoneware gets soft. Not liquid, but genuinely slumpy, and it is being held up by nothing but its own shape. A flat strap of clay sticking out into the air has no structure and it sags, twists or curls. A curved section is a tiny arch, and an arch holds itself up. This is the same reason a flat sheet of paper flops and a curled one stands.
Reason two: it feels better
A flat handle presses a hard edge into the side of a finger. A curved one spreads across the pad. It is the difference between carrying a shopping bag by the plastic and carrying it by a rope, and it takes about half a second to notice when you pick the mug up. Function and survival happen to want the same shape here, which is rare and worth taking advantage of.
The ring method, by people who do it every week
Four takes on the same idea. None of them is ours and none of them is the only right way. If one feels wrong after a fair try, switch to another.
Nobody on this page is affiliated with us. We link them because they are good, and because watching four takes on the same problem is the fastest way to work out which version your hands want.
Cutting the ring into handles
The throwing is the easy half. Almost every thrown handle that fails, fails because of when and how it got cut, not because of how it got thrown.
-
Wait for soft leather hard
Firm enough that you can lift an arc between two fingers and it holds its shape. Soft enough that a blade goes through without dragging or crumbling. Depending on the room and the clay this is usually somewhere between forty minutes and a few hours, so check it rather than trusting a number.
-
Mark every cut before you make one
Score six light marks around the ring with a needle tool first, and look at them. Cutting one at a time and eyeballing the next gap gives you five good handles and one runt, and the runt is always the one you notice after the set is glazed.
-
Use a thin sharp blade, not a needle tool
A fettling knife or a craft blade. A needle tool tears its way through rather than slicing, and it leaves a ragged compressed edge that opens up as a crack later. Wipe the blade between cuts so it does not drag clay through the next one.
-
Cut on a bevel at both ends
Angle the blade so each end of the arc is cut on a slant rather than square. A square end touches the mug on one line. A beveled end lies against the curve of the pot, which roughly doubles the contact area of the join for no extra work.
-
Round every cut edge immediately
One pass with a damp finger or a small sponge along each fresh edge, while it is still soft enough to move. Cutting creates a sharp ridge, and a sharp ridge survives the bisque, survives the glaze, and lives on the underside of the handle forever.
-
Rest the arcs curve side down
Lay them on a board on their outer curve, not standing on their ends, and cover them loosely. Standing them up while they are still soft flattens the arc under its own weight, which is a slow way to lose the shape you spent all that time putting in.
The one that catches everybody
A handle that is drier than the pot it goes onto will pull away as the pot shrinks around it. Sometimes that shows up as a crack at the join during drying, and sometimes it waits and the handle simply falls off in the bisque. So the ring and the pot need to be at roughly the same firmness at the moment they meet, which means the ring gets thrown at the same session as the mug, or it gets wrapped and held until the mug catches up.
Cylinders, straps and donut handles
A ring cut into arcs gives you a tight curve, which suits a mug. A jug wants something longer and straighter, and for that you cut the wall the other way.
Cutting a cylinder into straps
Throw a cylinder five or six inches tall with a wall around a quarter inch thick, slightly flared at the top if you want the handle to widen where the thumb sits. Wire it off, let it firm to soft leather hard, then cut vertically from rim to base in four or five places. Each strip peels away as a long strap with a shallow curve already in it, because it used to be part of a circle.
Cutting a donut into fat handles
Throw a closed hollow ring, a donut, rather than an open wall. Cut through it and you get a section that is round the whole way around instead of C shaped, which is about as close as the wheel will get you to an extruded handle. It is heavier, it is more clay, and on a big jug it looks completely right. A piece cut from a donut is hollow, so once it is on the pot it is a closed pocket and needs the same pinhole as the hollow handle in the next section.
Hollow handles, and the hole nobody mentions
A hollow handle is a short length of thrown tube, bent into a curve and attached at both ends. It looks like a thick heavy handle and weighs almost nothing, which is a genuinely pleasant surprise the first time somebody picks the mug up.
Throw it narrow and even
A tube around three quarters of an inch across with a thin even wall. Evenness matters more here than anywhere else on this page, because a thin patch becomes the outside of the bend and splits.
Bend it while it is soft
Softer than you would cut a ring. Support the inside of the curve with a finger as you bend so the wall buckles inward instead of tearing outward, and stop the moment you have the arc you want.
Give it a vent hole
A hollow handle is a sealed pocket once both ends are on the pot. Water still in the clay turns to steam in the kiln, and inside a sealed pocket the steam has nowhere to go. One pinhole, hidden underneath at one end, gives it a way out and lets the inside dry, and the problem disappears entirely. Do this before it dries, not after.
Lugs, side handles and things you lift with two hands
A casserole full of dinner is heavy and hot, and it gets carried by two short handles rather than one long one. Thrown lugs are the easiest win on this whole page, because the piece is already substantial and a chunky lug looks correct rather than clumsy.
What changes
Throw a smaller ring with a fatter wall, and cut it into shorter segments. Two segments per dish, cut from opposite sides so they match. Because the segments are short, the arc barely reads as a curve and the lug looks like a solid grip rather than a small handle.
The rule that is not negotiable
Room for a whole hand, in an oven mitt. Test it with a mitt on before the clay is dry, not after it is glazed. This is the single most common complaint about handmade bakeware and it is entirely avoidable at the wet stage.
There is one moment to cut, and it is not very long
Everything else on this page is technique you can practice. This part is timing, and timing is the reason thrown handles get abandoned by people who were doing everything else correctly.
Too soft
The blade smears instead of slicing. You lift an arc and it sags flat in your fingers, taking the curve with it. If the ring still feels cool and slick, it is too soft. Give it twenty more minutes and try one cut.
Right
Soft leather hard. It takes a fingernail mark without much pressure, holds its own shape when lifted, and cuts cleanly with a slight resistance. The cut edge looks smooth rather than torn or powdery.
Too dry
The blade drags and the edge crumbles. Worse, a ring this dry cannot safely go onto a softer pot, because the pot shrinks around it and the join opens. This is a real deadline, not a preference.
Throw the ring at the same session as the pot, and keep both of them under the same plastic. That single habit fixes almost all of this.
If you do get out of sync, a ring wrapped tightly with a damp paper towel inside the plastic will hold for a day or two without moving much. Rewetting a ring that has gone bone dry does not work. Reclaim it and throw another one, which takes four minutes.
Attaching a handle that will not bend to help you
A pulled handle is soft and cooperative. It drapes, it stretches a little, it forgives a join that is a few degrees off. A thrown arc does none of that, so the fit has to be right before any slip goes anywhere.
-
Offer it up dry first
Hold the arc against the mug and look at both ends. Both should touch. If only one does, adjust the bevel with a knife or pick a different arc. Do not proceed hoping slip will fill a gap, because slip in a gap is just a crack with clay in it.
-
Mark the two spots
Light pencil or needle marks on the mug where each end lands. Then check the alignment from directly above: the handle should sit on the vertical center line, and it is much easier to see that now than after it is stuck on.
-
Score and slip both sides properly
Cross hatch both the mug and both ends of the arc, then slip both. Stiffer clay means less of the join happens by itself, so this is doing more of the work than it does on a pulled handle. The score and slip page has the detail.
-
Press, twist a few degrees, and hold
Push both ends on at once and give the handle a tiny twist as it seats, which squeezes the slip out sideways and pulls the two surfaces into contact. Hold for a slow count of ten. Squeezed out slip around the edge is a good sign, not a mess.
-
Blend a small fillet at each end
Add a thin coil of soft clay around each join and blend it in with a wooden tool or a fingertip, so the handle grows out of the wall instead of being stuck onto it. This fillet is structural, not decorative. It is the part that stops a crack starting at a hard corner.
-
Support it and walk away
A rolled up piece of foam or a wad of newspaper under the handle takes the weight while the join sets. Cover the whole mug loosely and leave it alone for a couple of hours before you touch it again.
Which way up does the arc go?
The rim of the ring, the edge you rounded on the wheel, faces outward, away from the mug. That is the surface a knuckle rests against and it is the smoothest one you have. The cut inner edge faces the pot, where nobody touches it. Getting this backwards is a common first attempt and it produces a handle that is perfectly strong and slightly unpleasant to hold.
Drying and firing a thrown handle
Handles fail during drying far more often than they fail during making. A thrown one has a thicker join and a thinner arc than the pot wall, which means two different drying speeds attached to each other.
- Loose plastic for the first two days. Not tight, not sealed. The point is to slow the handle down until the mug catches up, not to keep everything wet. The handle is the thin part that runs ahead, so a strip of plastic wrapped around just the handle brakes it more precisely than a bag over everything.
- Away from moving air. A fan, a door, a heat vent. Any draft dries one side of the handle first and the join is what pays for it.
- Upside down at the end. Once it is firm enough to take its own weight, stand the mug on its rim so the thick base and the handle joins get the same air as everything else.
- Look at the joins before it goes in. A hairline at the top of the join is the classic sign, and it is easier to see on a bone dry pot in raking light than on a leather hard one. A crack found now is a reclaim. A crack found after the glaze firing is a bin.
- The curve earns its keep in the glaze firing. Bisque is a gentler ride. It is at glaze temperature that a flat strap handle sags and a curved one holds. If a handle warped, this is where it happened and the fix is back at step five of the throwing list.
What this looks like at The Clay Hole
Wheels and space
There are 29 wheels here, first come, first served, and a four minute ring is quick to throw at whichever wheel is free. If you are mid session on a mug and realize you want a handle for it, you can throw the ring at the same wheel without losing your setup.
Firings
Bisque goes to cone 05, and glaze goes to cone 5½, which is cone 5 with a twelve minute hold. That hold is part of why the cross section matters: the work spends real time at the top of the cycle, and a flat handle has that whole time to sag.
Same clay, always
Throw the ring out of the same bag the pot came from. Different clay bodies shrink by different amounts, and a handle that shrinks at a different rate than the mug is a join that opens up somewhere between the shelf and cone 5½.
Reclaim the offcuts
Cutting a ring into six produces a small pile of scrap at the cuts. It goes in the reclaim like everything else, and there is a whole page on reclaiming if you have not done it before.
Shelf discipline
A mug with a fresh handle needs to sit somewhere it will not get knocked, for longer than a plain mug does. Give it the back of your shelf rather than the front, and leave the plastic loose over it for the first couple of days.
Ask somebody
If a ring feels wrong and you cannot tell whether it is too soft or too dry, ask any member who is nearby. Judging leather hard by feel is genuinely faster to learn from somebody else's thumb than from a page like this one.
What went wrong, and what to change
Pick whichever one you are looking at.
It fell off in the bisque
Almost always a wetness mismatch. The handle was drier than the mug when they met, so the mug shrank around a piece that had already done its shrinking, and the join was under tension from the moment it was made. Next time, throw the ring in the same session as the pot and keep both under one sheet of plastic. Second most likely cause is a join that was scored but not slipped, or slipped but not pressed hard enough to squeeze slip out at the edge.
It warped in the glaze firing
The cross section was too flat. A flat strap of clay standing out in the air has nothing holding it up once the stoneware softens near the top of the firing, so it sags or twists. Go back to step five of the throwing list and put a real curve in that wall with a rib. A secondary cause is a handle that is simply too long for its thickness, which is worth checking if the curve was already there.
The edges are sharp
The cut edges were never rounded, or they were rounded too late. A blade leaves a crisp ridge, and clay does not soften that ridge on its own. Once it is bisqued you are into wet sandpaper and wet diamond pads, and never dry, because dry sanding bisque puts silica dust in the air. It works, but it is tedious. The fix is one pass with a damp finger along each edge in the ninety seconds after the cut, while the clay still moves.
The arc flattened
Either it was cut too soft, or it was stood on its ends while it was still soft and let gravity do the rest. Cut later, and rest the arcs lying on their outer curve rather than standing them up. If they flatten while you are attaching, the ring was too thin when you threw it, so add a little thickness at the base next time.
The ends will not sit flat
The ends were cut square instead of on a bevel, so a straight cut is meeting a curved wall and touching along one line. Recut the ends at an angle with a sharp blade until the arc lies against the pot on its own. Do not bend the arc to close the gap. That puts a crack on the outside of the bend that will show up in the bisque.
They look mechanical
This is a real and reasonable complaint, and it is the cost of a method built on repeatability. The fix is to put something back in by hand after the cut: press one flat facet along the outer curve, thumb a dimple where the thumb naturally lands, or run a single tool line down the length. One deliberate mark is usually enough to make a handle read as made rather than produced.
The ring cracked while cutting
Too dry, blunt blade, or both. A ring at the right firmness cuts with a little resistance and a smooth face. If it is crumbling, it went past the window, and there is no way back for that ring. If it is tearing rather than crumbling, sharpen or swap the blade and wipe it between cuts. A needle tool will do this every single time, which is why the list says to use a knife.
Thrown handles, start to shelf
Everything above, compressed to what fits on a phone propped against a water bucket.
- Same clay as the pot. Same session.
- About a pound at the top of a hump.
- Center the top inch only.
- Open half an inch deep. No deeper.
- Pull out to three or four inches inside.
- Wall about an inch tall, quarter inch thick.
- Curve the outer face. A C, not a strap.
- Round the top edge with a damp sponge.
- Sponge the inside corner dry.
- Wire off flat onto a board. Throw a spare.
- Wait for soft leather hard.
- Holds its shape lifted, cuts without dragging.
- Mark all six cuts before making any.
- Sharp thin blade. Never a needle tool.
- Bevel both ends of every arc.
- Round every cut edge straight away.
- Rest them curve down, covered.
- Handle and pot at the same firmness.
- Offer it up dry. Both ends must touch.
- Never bend an arc to fit. Cut another.
- Rounded rim faces out, cut edge faces the pot.
- Score and slip both sides.
- Press, twist slightly, hold ten seconds.
- Blend a fillet at both joins.
- Support it and leave it two hours.
- Loose plastic two days. No drafts.
- Upside down at the end. Check the joins.
Thrown handle questions, answered
Is this easier than pulling a handle?
No, and anybody who says so is selling something. It is different. The skill is one you already have, since it is just throwing, and the mess is much lower. But it costs you a waiting period in the middle, and it does not forgive a bad fit the way a soft pulled handle does. Most people who switch do it because they want matched sets, not because it is less work.
How many handles do I get from one ring?
A ring around four inches across the outside cuts comfortably into six mug handles, or four generous ones. Bigger ring, more handles, but the curve gets flatter as the ring gets wider, so at some point you are making straps rather than mug handles. That is fine if straps are what you wanted.
Can I throw the ring today and use it next week?
Only if you can hold it at the right firmness, which means wrapped tightly with a damp paper towel inside the plastic and checked every couple of days. It is possible and it is a nuisance. Throwing a fresh ring takes four minutes, so in practice it is almost always faster to reclaim the old one and throw another.
Does a hollow handle really need a hole in it?
Yes. Any fully enclosed space needs somewhere for steam to go during a firing, because water still in the clay turns to steam and can burst the wall. One pinhole tucked underneath at one end is all it takes, and it is invisible once glazed. Put it in while the clay is soft.
Can I use a different clay body for the handle?
Not unless you are deliberately experimenting and are prepared to lose the piece. Two clay bodies shrink by different percentages between wet and cone 5½, and the join is where that difference gets resolved. Sometimes it survives. Often it opens up.
How thick should the ring wall be?
Around a quarter of an inch at the base, tapering to a little less at the rim. Thinner than that and the arcs go floppy when you lift them. Much thicker and the handle gets heavy, dries slower than the mug, and starts putting stress on the join for the opposite reason.
Which way round does the arc go on the mug?
The rounded rim of the ring faces outward, away from the pot, because that is the smooth edge a knuckle sits against. The cut edge faces the mug. Backwards is strong but unpleasant to hold.
Can I add a thrown handle to a pot I made last week?
Only if the pot is still leather hard. Once it is bone dry the answer is no, whatever kind of handle you use. A bone dry pot has finished shrinking and a fresh handle has not, so the join is under tension from the start and it will let go, usually in the bisque.
My handles all look identical and I hate it
Then this method is doing exactly what it is for, and the problem is that you wanted something else. Either go back to pulling, or add one hand made mark to each arc after the cut: a facet, a dimple, a single tool line. Uniform underneath, individual on the surface, which is how a lot of production pottery has always worked.
The pages that pair with this one
Throw three rings and cut two of them badly
The first ring will be too thin. The second will be cut too soon. The third one usually works, and by then your hands have learned the thing that no page teaches, which is what soft leather hard feels like between two fingers.
Nothing on this page is difficult. It is a shallow opening, a short wall, a curve put in with a rib, and a wait. The only genuinely unforgiving part is the timing, and the only way to learn timing is to get it wrong twice on purpose while nothing is at stake. Throw the rings on a day when you have no mugs waiting for them.
Then, once it works, you have something worth having: six handles that match, made in the time it used to take you to pull one you were happy with.
The unforgiving part is the timing, and the only way to learn it is to get it wrong twice on purpose. Throw the rings on a day when no mugs are waiting for them.
There is a much longer version of this page with all five methods, nine videos, a cross section diagram and a full troubleshooting section. The toggle at the top switches to it.