
 Pottery Date Night
 Bring All Your Friends Free Week
 Give a Month of Pottery
 Private Pottery Parties


 The Welcome Booklet
 Your First Ten Sessions
 The Pottery Process
 Finding the Studio
 Your Classes Never Expire
 The Four Tables
 Who’s Who
 The Rewards Program

 Flux Glazes
 The Calculators
 Kiln Tracker
 Holiday Kiln Deadlines


 Beginner’s Tool Set
 Fingernail Clippers
 Mayco Clay Mender
 Epoxy for Kintsugi
 Applicator Bottles
 Large Bead Rack

 Raku Workshop
 Nighttime Raku
 Horsehair and Feather Raku

 The Clay Hole T-Shirt
 Embroidered Crewneck
 Zip-Up Hoodie
 Pre-Made Bisqueware
 Glaze Catchers
 Kiln Cookies
 Clay Cubby Rental

 The Glaze Bible, Printed
 The Book of Molds, Printed
 Printable Pottery Guides
 Free Printable Trackers

 Gifts for Potters
 Christmas Pottery Ideas
 Mother’s Day Gift Ideas
 Pottery Date Night

 Studio Calendar
 2027 Studio Events
 What Should I Do Today?

 How to Throw on the Pottery Wheel
 How to Make a Pinch Pot
 How to Tap Center a Pot
 The Five Stages of Clay

 Is Pottery Hard to Learn?
 Pottery Wheel Practice Drills
 20 Easy Hand-Building Projects
 Everything That Sounds Wrong


 A Beautiful Piece, Every Time
 Slab Roller Tips
 Any Dish as a Slump Mold
 Slab Roller & Slab Mold Certification

 The Pottery Skill Tree
 Clay & Pottery Calculators
 Logging Your Pottery and Glazes

 The Pottery Dictionary
 Why Did My Pottery Do That?
 The Pottery Cone Chart
 Pottery Myths, Fact-Checked
 Is Handmade Pottery Food Safe?

 Incredible Ceramic Artist Videos
 How Dan Throws Giant Pots
 How to Dry Your Pottery
 The Pottery Wheel Introduction

 Pottery by Zodiac Sign
 Personality and the Pottery Wheel
 Pottery for Engineers
 ADHD, Hyperfocus, and Never Running Out
 Hobbies for Burnout
 Screen-Free Hobbies for Adults
 Every Addiction I Ever Had Lost to Art
 Functional Pottery Is Engineering

 How Do We Compare?
 Pottery Classes by City
 Every Pottery Studio in Utah
 Pottery in Draper

 Featured Members
 The Signature Wall
 Making Friends as an Adult Is Brutal
 The Clay Hole Commandments

 2027 Pottery Contests
 2027 Studio Parties
 Gallery Night


 Scream It Into the Void
 Destroy the Glaze Wall
 Daily Affirmation Cards
 Everything That Can Go Wrong

 Subscribe to Our Newsletters
 Contact The Clay Hole

 Corporate Team Building


 Glaze Combinations
 Glazes We Do Not Carry
 Making Glaze Test Tiles

 The Mega Glaze Tool
 How to Use the Mega Glaze Tool


 Glaze Brushing Techniques
 How to Use Underglaze
 How to Use Dipping Glazes
 Glaze Problems, Causes and Fixes

 The Dipping Glaze Guide


 Making a Glaze Catcher
 Fused or Sharp After Firing

 The Signature Wall
 His Viral Videos
 His Own Ceramics
 Meet Mud
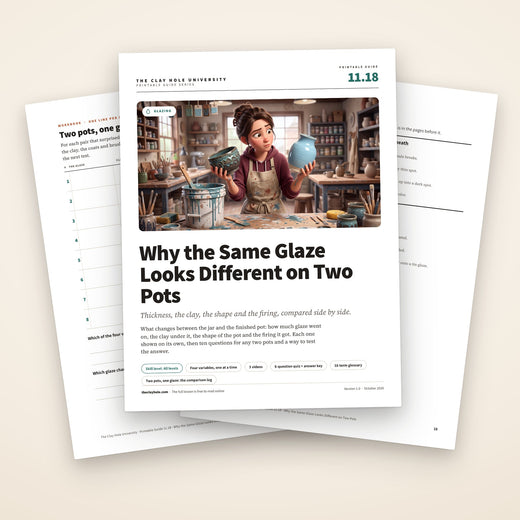
Why the Same Glaze Looks Different on Two Pots
Two pots, one jar, and they could have come off different shelves. The glaze did not change its mind. Something between the jar and the kiln changed: how much went on, the clay underneath, the shape of the pot, or the firing it got. This page puts each of those side by side, so the question stops being what the glaze did to you and becomes what changed.
One jar can fire like two different glazes. Four things change between the jar and the finished pot: how much glaze went on, the clay under it, the shape of the pot, and the firing it got. Read your two pots for each one, then test the likeliest by changing one thing.

Jump to a section
One jar, four things that change
A glaze in the jar is a recipe. It becomes glass on your pot, and how it looks depends on four things that travel with the pot, not the jar: how much went on, the clay under it, the shape it sits on, and the firing it got.
They are not equally likely. Thickness explains most surprises, then the clay, then the shape. The firing matters most for matte, satin and variegated glazes, and it is the one variable you do not set here.
So when two pots disagree, ask what was different about this pot rather than what the glaze did. A variegated glaze always varies a little. Everything else leaves clues on the pot.
Read the two pots in this order
Side by side, in daylight. Most answers turn up at the first or second step.
- Thickness. Pale rims, pale raised marks and clay showing through mean thin. Deep color, glossy pools and runs mean thick. Thin is the usual answer.
- The clay. Look at the bare feet. A different clay underneath makes a different glaze on top: white clay brightens it, speckled clay spots it, darker clay darkens it.
- The shape. Floors and grooves collect glaze, and rims and ridges shed it. A bowl and a cylinder glazed from the same cup will not match.
- The firing. A glossier or more feathered surface on a pot from a different load points to the cooling. A pink blush on a white glaze points to a neighbor in the kiln. Tell the studio team about either.
Three things worth knowing
The wall tile is one answer
One clay, a flat face and, for most of the wall, three coats. A pot that differs in any of those will look different. The clay display by the information center shows one glaze on every clay we stock.
Three coats is not one thickness
A thickened jar, a loaded fan brush or soaked bisque all change how much each coat lays down. Stir the jar, spoon it into a cup, and take a thick jar to an instructor rather than adding water.
A thin pot can often go back in
Thin and dry is a good refire candidate. Show an instructor first, then add a coat and refire it on a kiln cookie.
The jar holds a recipe, not a result
A glaze is finished on your pot, in the kiln, and everything about that pot has a say in how it turns out.
- Glaze turns into glass on the pot. In the jar it is powdered minerals in water. It only becomes glass at the top of the firing, in a layer as thick as you laid it, over the clay you chose, on the shape you made, in the heat and cooling that load got. Change any one of those and you have changed the glass.
- Four things travel with every pot. How much glaze went on. The clay underneath. The shape of the pot. The firing, meaning the spot it sat in and how fast the load cooled. Each one can make a single glaze look like two.
- Some glazes barely notice. An opaque gloss looks much the same across all four. Glazes that pool, break, float or grow crystals answer to every one of them, which is why celadons, rutile blues and soft mattes give the biggest surprises.
- The wall tile is one answer. Every glaze on our wall is fired onto a numbered tile, and each tile is one set of choices: one clay, one flat face and, for most of the wall, three coats. Your pot almost certainly differs from it in at least one of the four.
- A difference is evidence. Two pots from one jar that came out differently are a free experiment. Read them the way you would read two test tiles, and they tell you what that glaze responds to.
- Some variation is the glaze being itself. A variegated glaze rarely fires exactly the same twice, even on two pots made alike. The useful skill is telling that apart from a cause you set yourself.
The question worth asking
Not why the glaze did it, which has no useful answer, but what was different about this pot. That question always has one, and the four sections below are where to look for it.
How much glaze went on
The first suspect and the most common one. Thickness changes the color, the depth, the surface and how far a glaze moves.
The illustration holds everything else still: one glaze, one clay, one tile shape. Only the number of coats changes, from one on the left to four on the right.

- One coat, far left. A haze. The clay shows through almost everywhere and the raised texture is close to bare. Too little glaze to make a proper layer of glass, which is why a single coat so often looks dry.
- Two coats. A veil of color with the clay still reading through it. The low parts of the texture have started to fill.
- Three coats. The coat count on most tiles on our wall. Deep color in the grooves, the raised marks breaking lighter, a little gathered in the inside corner.
- Four coats, far right. The deepest and glossiest, and moving. Runs have started down the face and a pool has formed in the corner. On a tall pot that movement keeps going.
- Color is a depth of glass. A glaze darkens with thickness the way a pond looks darker where it is deep. Thin glaze lets the clay show through, and thick glaze hides it.
- Thin is the usual culprit. Most disappointing results are on the thin side. A pot that came out paler, drier or browner than the tile almost always got less glaze than the tile did.
- Thick has its own problems. Past a point, extra glaze runs, crawls or clouds. A see-through color laid on too heavily can turn cloudy and fire a different shade from the one on the tile.
- The same coat count is not the same thickness. A jar that has thickened lays down more glaze per coat. A loaded fan brush lays down more than a small round one. Bisque that soaked in water drinks less glaze than bisque given a quick rinse. Three coats means three full coats of a well mixed glaze.
- A dip is a coat too. In a dipping bucket, the coat comes from how long the pot stays in, and anywhere two dips overlap carries a double coat.
At our tables
Three coats, each dry before the next and each laid in a different direction, is the brush-on default, and fan and hake brushes often cover in two. Spoon glaze into a cup rather than dipping a brush in the jar, and if a jar looks thick, take it to an instructor rather than adding water. Every glazed piece goes on a kiln cookie, which matters most when the coat is a generous one.
The clay underneath
A glaze is not a lid on the clay. It melts into it, and the clay sends some of itself back up.
Here the glaze and the coat count stay the same, and only the clay changes. The bare foot of each tile shows which clay it is.

- White porcelain, far left. Nothing in the body to tint the glaze, so the color is at its brightest and the thin breaks go pale instead of brown.
- Buff stoneware. The warm body shows through every thin spot, and the breaks over the texture read tan.
- Speckled buff. Each dark speck in the clay bleeds up through the glaze and leaves a dark spot with a soft halo.
- Gray stoneware, far right. A darker body under the same glaze pulls the whole color darker and smokier.
Why that happens, drawn as a slice through the surface of two fired pots:

- The glaze is a layer of glass. A fired glaze is a thin sheet of glass, and a see-through one lets you look straight down to the clay.
- Glaze and clay melt together here. At temperature the bottom of the glaze and the top of the clay react and blend into a layer that belongs to both. That is why a good glaze cannot be peeled off like paint.
- White clay keeps color bright. Nothing in a white body tints the glaze, so the color reads clean.
- Color bleeds up from below. Metals in the clay, iron and manganese above all, move up into the melt and color it from underneath.
- A dark speck in the clay. One speck under the glaze becomes one dark spot in it. A speckled clay makes a speckled glaze, whatever the jar looks like.
- See-through glazes show the most. Celadons, clears and other translucent glazes are a window onto the clay. Opaque glazes hide more of it, though even they break toward the body color at their thin edges.
- A denser clay can make a glaze run. A dense, glassy body such as porcelain lets the same glaze melt more fluidly than a more open stoneware does, so a glaze that behaved on one clay can travel further on another.
- Fit changes with the clay too. A glaze that sits happily on one clay can craze on another, because the two shrink by different amounts as they cool. Fine cracks on one clay and not the other are a fit problem, not a glazing one.
- Our wall tiles are all on one clay. So a glaze on any other clay is, in effect, untested until you have seen it on that clay.
Where to check it here
The clay display by the information center shows one glaze across every clay we stock, side by side. Look at it before you pair a clay with a glaze you care about, and look at the bare feet of your two pots: if the clay under them differs, you may already have your answer. Dipping works the same way. One dipping glaze on Berlin Gray and on porcelain fires as two different-looking glazes.
The shape of the pot
Glaze is liquid at the top of the firing. It thins where the surface rises and gathers where it falls, so the shape of a pot redraws the glaze on it.
The drawing shows where one even coat ends up after it melts on a simple thrown cylinder. The glaze layer is drawn thicker than life so the differences are easy to see.

- Thinnest at the rim. A rounded edge sheds glaze as it melts, so rims fire thin, and a glaze that breaks shows the color of the clay there.
- Thin over every ridge. Raised marks lose glaze to the lower ground around them.
- Thick in every groove. The lower ground collects what the ridges lost, so throwing lines, carving and stamps all come out striped.
- Slides down the wall in the firing. On an upright wall gravity pulls the melt downward, so the lower wall carries more than the upper one, and a fluid glaze runs.
- Pools deep in the floor. A bowl's floor and the inside corner of a cylinder collect glaze from the walls above, and fire deepest and glossiest.
- Bare foot on a kiln cookie. The glaze stops above the foot so a run has room to stop, and the cookie catches anything that does not.
The same thing on two finished pots, one glaze, one clay and three coats on both:

- The bowl, left. The floor holds a deep, glassy pool, darker than anything on the walls, and the rim reads tan all the way round where the glaze ran thin.
- The cylinder, right. The throwing rings stripe it tan and blue, the lower wall is heavier, and two drips stopped short of the foot.
- A flat tile hides all of this. Our wall tiles are flat, so they show a glaze without the help or the harm of texture. A tile with your own texture on it shows what the glaze will do on your pot.
- Height changes how far a glaze travels. A test tile is a wall a few inches tall, and a vase can be four times that. A glaze that stopped short on the tile can run a long way down a tall pot.
- Inside and outside can differ. The inside of a bowl collects glaze in its floor. The outside of the same bowl sheds it toward the foot. One coat can fire two ways on one piece.
- For some glazes the shape is the point. Celadons and other glazes that break are chosen for exactly this, and on a smooth wall they have nothing to work with.
Where it fired, and how it cooled
The one variable you do not set here. It is real, and it sits further down the list than most people put it.
The same glaze on the same clay at the same three coats, with one difference: how fast each tile cooled after the firing.

- Cooled fast, left. Glossier, smoother and more even. The crystals that give a glaze its feathering had less time to grow.
- Cooled slowly, right. A softer sheen, far more variegation and crisper breaks over the texture. Same glaze, same clay, same coats.
- Our glaze firing is electric, to cone 5½. That is cone 5 with a twelve minute hold, which lands the heat work between cone 5 and cone 6, in a clean, oxygen-rich firing. The studio team loads and unloads every kiln and decides where each piece goes.
- A kiln is not one temperature. Kilns lose most of their heat through the lid and the floor, so kiln makers such as Skutt put hotter elements at the top and bottom to even it out. Potters still set witness cones on more than one shelf, because a cone reports the heat work at its own spot.
- Cooling decides much of the surface. Many glazes grow microscopic crystals as they cool. Cool fast and the crystals have less time, so the surface comes out glossier and calmer. Cool slowly and matte, satin and variegated glazes show more of their character. How much it matters depends on the glaze, and a stable gloss barely changes.
- How full the kiln is changes the cooling. A densely packed load holds its heat differently from a loose one. One potter writing for Ceramic Arts Network found his matte glazes coming out glossy in his small electric kiln when it was loosely packed. Kinley’s Corner, our kiln log, shows how much member work went into each load.
- Occasionally, a neighbor. Some colorants travel through the kiln air. Chrome is the best known: it can leave the glaze it came in and turn a nearby white or pale glaze that contains tin a shade of pink. A pink blush on a glaze that should not be pink is worth mentioning to the studio team.
What you can do about it
Firing is the one variable on this page you do not choose, so make it visible instead. Two pots from different loads had two different firings: note when each went to the glaze shelf and when it came back, and the difference between them stops being a mystery. If a glaze you love depends on its cooling, expect it to vary a little from load to load, and pick it for the pieces where that variety is welcome.
Ten questions for any two pots
Put both pots side by side in daylight and go down the list. Every yes is a lead, and the first card usually finds the answer before the second one is needed.
Look at the pots
- Is the bare clay at the foot a different color? Then the clay is your first suspect.
- Are the rims, edges and raised marks paler on one pot? That pot got less glaze, or has a shape that sheds it.
- Is the color deeper in the low spots of one pot? More glaze, or a shape that collects it.
- Is one glossier, or more feathered, than the other? Look at the coats first, then at the firing and the cooling.
- Does one have spots or a pink blush the other lacks? Spots point to a speckled clay. A pink blush points to a neighbor in the kiln.
Look at the record
- Same jar, well stirred, in the same session? A jar that thickened between sessions lays down a different coat.
- Same number of coats, with the same brush? A loaded fan brush and a small round brush do not lay down the same amount.
- Same way of applying it? Brushed, dipped and sprayed coats come out at different thicknesses.
- Fired in the same load? Two pots fired weeks apart had two different firings.
- Did you write any of it down? The kiln ticket already holds the clay and every glaze. Add the coats and the dates in your own log, and next time this list answers itself.
What the difference usually means
Six differences, the likeliest cause behind each one, and what to change on the next pot.
Paler and browner than the wall tile
Thin, by a long way the likeliest answer. Check the coat count, the brush and whether the jar was stirred. Next pot: full coats, three of them, each dry before the next.
Darker, glossier and running
Thick, or a tall wall that gave a fluid glaze room to travel. Check the coats against the tile, and remember the tile is only a few inches tall. Next pot: lighter coats on the lower third.
Spotted or smoky on one pot only
The clay. Specks bleed up through a glaze, and a darker body darkens a see-through one. Check the bare feet. Next pot: the clay you wanted the glaze on, chosen from the clay display.
Glossy where you expected satin
A thin coat of a glaze that needs thickness to develop, or a faster cool. Check the coats first, because the firing is the rarer cause.
Fine cracks on one pot only
Crazing. The glaze and that clay shrink by different amounts as they cool, and no amount of care at the table fixes it. Tell the studio team which glaze and which clay.
A pink blush on a white glaze
Chrome from a nearby glaze, carried in the kiln air onto a glaze that contains tin. Nothing you did. Tell the studio team which load it came out of.
Change one thing, then look again
Two pots that differ in four ways cannot tell you which one mattered. A test that differs in one way can.
- Pick the likeliest suspect. Thickness first, then the clay, then the shape. The firing comes last, because it is the one you cannot change.
- Make tiles that change only that. Same glaze, same jar, same brush, and one difference between them: the coat count, or the clay, or the texture. Our test tile lesson shows a tile that stands up, takes a number and carries texture on half its face.
- Use your own clay and your own texture. The wall tile already shows the glaze alone. Your tile should show it on what you actually make.
- Log it. The tile number, the clay, the glaze, the coats, the dates, and one line on what you thought. A photo of the fired tiles laid out on the page takes seconds.
- Glaze a small pot exactly like the winning tile before a big one. A tile is a short wall. A tall pot gives the same glaze far more room to move.
Half the log already exists
Every glaze firing here needs a kiln ticket with your name, the date, the clay and every glaze you used. Keep the same four things in your own notes, add the coat count and the brush, and the next two pots that disagree come with their own explanation.
The ones that come up at the glaze table
Why does my pot look nothing like the tile on the wall?
Because the tile is one set of choices: one clay, a flat face, most of them three coats, fired in one load. Your pot differs from it in at least one of those, usually more. Thickness is the likeliest, so check the coats before anything else.
Is it the kiln’s fault?
Sometimes, and rarely first. When a fired color is nothing like the tile, the cause is usually thickness, sometimes the clay, and only occasionally a neighbor in the kiln. Where the firing itself matters most is with matte, satin, variegated and crystal glazes, whose surface depends on the cooling.
Will one glaze always look the same on one clay?
Close to it, for a stable opaque glaze applied the same way. A variegated glaze will differ a little every time, even on two pots made alike, and that variety is a large part of why people choose it.
Do more coats always mean more color?
Up to a point. More glaze gives more depth and color, and past that point it runs, crawls or clouds. Most glazes have a thickness they are happiest at, and most disappointing results sit on the thin side of it.
Why is the glaze darker inside my bowl than outside it?
The inside of a bowl collects. Glaze runs down the inside walls during the firing and gathers in the floor, where it fires deepest and glossiest. The outside sheds glaze toward the foot instead, so the same coat ends up two thicknesses.
Why did my speckled clay put spots in the glaze?
The specks are dark particles in the clay body. In the firing, metals from them move up into the melting glaze and color it from below, so each speck under the glaze becomes a spot in it. On a white clay the same glaze has nothing to pick up.
Can I fix a pot that came out too thin?
Often. A thin, dry result is a good refire candidate. Show an instructor first, then add a coat and refire it on a kiln cookie. Our reglazing and refiring lesson covers getting new glaze to stick to a fired one.
Do I need to test every glaze on my own clay?
Not for choosing a glaze: the wall tiles and the clay display do that job. For anything you care about on a clay other than the wall tile’s, at a coat count other than three, or over your own texture, one tile is cheaper than one disappointing pot.
Where to go next
Making, Logging and Dialing in Test Tiles
Tiles that stand up and take a number, and the log that turns a pile of them into answers.
Read it →What a Firing Actually Does
Cones, heat work and why cooling is half the firing, from the first hour to the unload.
Read it →Glaze Brushing Techniques, Coat by Coat
How to lay down three full, even coats, which settles the most common difference on this page.
Read it →What Pottery Glaze Actually Is
Silica, flux and alumina, and why a glaze crazes on one clay and not another.
Read it →When to Use Celadon Glazes
A glaze that shows thickness, the clay and the shape of the pot in every piece, and how to put that to work.
Read it →Logging Your Pottery and Glazes
The four things worth writing down so you can make a good result again.
Read it →The answer is written on the pot
A glaze jar promises a recipe, and it keeps that promise every time. What it cannot promise is your thickness, your clay, your shape or your firing, because none of those are in the jar. They are in the pot, and the pot shows them: at the rim, in the floor, at the bare foot.
So the next time two pots disagree, set them side by side and read them before you judge the glaze. Then change one thing and look again. That is how a surprise turns into a result you can repeat. Come make something, and bring the two pots to the glaze table.
Thickness, clay, shape and firing. Read your two pots for each, in that order, test the likeliest by changing one thing, and write down what you did.
For the illustrations side by side, the section drawings and the ten questions, switch to the Comprehensive Version at the top of the page.
Which version would you like to print?
Videos come out as a labeled box with the title and channel to search for, since paper does not play them.