


Hand-building · Blended coiling
A coil pot does not have to look like a coil pot.
Blended coiling is the version where the coils disappear. You stack ropes of clay, smear them into each other until the wall reads as one continuous surface, and end up with a pot nobody can tell was built in rings. It is the oldest way humans have made pottery, it needs no wheel and no machine, and it is the only technique in the building that will let you make something taller than your forearm on your first month.
This page is the whole method in order, with a tick list at every step so you can put the phone down, do the thing, and pick the page back up with clay on your hands. The videos are here too, from potters who have nothing to do with us, for the parts where words run out.
Below is the short version. What goes on the table, the loop you repeat once per coil, and a card at the end you can leave open on your phone while your hands are covered.
Jump to a step
Read it, then watch it
Why this page is written down and filmed, both.
There is a real reason we keep building pages like this one instead of handing you a link to a video, and it is not that we dislike video. Half of this page exists because of what video is bad at. The other half exists because of what writing is bad at.
Reading draws the map. Watching fills it in.
Most coil pots do not fail on skill. They fail on sequence, because somebody blended the outside before the inside, or stacked six coils onto a base that was still wet enough to sag. Written steps hold an order in place and let you check it. Watching a pair of hands move almost never does, because the potter already knows the order and never says it out loud.
Some of this only exists on film.
How hard to press when you smear a coil down. How wet is too wet. What a properly compressed wall sounds like under a rib. None of that survives a sentence, and every attempt to write it turns into mush. You have to watch somebody do it, which is exactly what the eight videos on this page are for.
You cannot scrub a video with clay on your hands.
A twenty-six minute build is twenty-six minutes whether you need all of it or forty seconds of it. When your wall is leaning and both hands are covered, a numbered list gets you to the answer in about three seconds. Rewinding a video with a knuckle does not.
So use both, in this order.
Read the step. Watch the piece of video that covers it. Then do it with the tick list open. Almost everybody who learns this from video alone ends up replaying the same ten seconds four times, and almost everybody who learns it from text alone presses too hard somewhere. The pairing is the whole point, and it is why this page is as long as it is.
The five minute version
The whole method in nine moves.
If you already hand-build and you just want the shape of it, this is the shape of it. Everything below is these nine moves, slowed down.
Wedge it, then cover it
Air pockets in a coil become blisters in the kiln. Wedge the whole lump at once and keep everything you are not touching under plastic.
Roll coils about half an inch thick
Pinky thick. Thicker than the wall you want, because blending is going to thin it. Roll several before you start building.
Make a base and compress it
A flat disc of the same clay, the same thickness as your wall, pressed hard from the middle outward. This is where bottoms crack.
Score, slip, stack
Both faces scored, both faces slipped, coil pressed down and seated. Stagger where the ends of each coil meet so the joins never stack up.
Blend the inside first, always
Drag clay downward from the new coil into the one below it, supporting the outside with your other hand. Inside first is the rule that keeps the pot round.
Then blend the outside
Same drag, opposite direction, diagonal strokes that alternate with each coil. That alternation is what makes a blended wall stronger than a stacked one.
Shape as you climb
Each coil set slightly outside the one below widens the pot. Slightly inside brings it in. You are steering the whole time, whether you meant to or not.
Compress, then scrape
A serrated rib to knit the wall, then a metal rib, then a rubber rib. In that order. Skipping the serrated rib is why walls split apart later.
Stop and let it stiffen
Four or five coils, then walk away. A tall pot is built over two or three sessions, and the waiting is a step rather than a delay.
The honest part
Your first blended coil pot will probably lean a little and you will probably be able to find the coils if you go looking in a raking light. That is completely normal and it is not a sign you did it wrong. Round comes from turning the pot instead of walking around it, and straight comes from not stacking faster than the clay can hold. Both are habits rather than talent. Most people are making pots they are proud of by the third or fourth one.
The short version
A coil pot is a wall made entirely of joins.
A thrown pot is one continuous piece of clay. A coil pot is thirty small welds stacked on each other, and it is exactly as strong as the worst one of them. Every move below exists to make a join as strong as the clay either side of it.
Roll coils about half an inch thick
Pinky thick, and fatter than the wall you want, because blending spends some of that clay. Roll eight or ten before you build anything, and keep the spares under plastic.
Cut a base and compress it hard
A disc the same thickness as your wall, pressed firmly from the middle outward on both faces. Thirty seconds here is the reason bottoms do not crack.
Score both faces, slip both faces, seat the coil
Crosshatch both surfaces until they look scruffy, wet both with slip, press down and wiggle side to side. Start each coil a quarter turn round from the last so the ends never stack up.
Blend the inside first, then the outside
Drag clay downward across the join, supporting the far face with your other hand. Inside first every time, because that is the face you lose access to as the pot climbs.
Steer as you climb, then stop
A coil set an eighth of an inch outside the one below widens the pot. An eighth inside brings it in. Four or five coils is a sitting, then you wrap the top coil and walk away.
Serrated rib, metal rib, rubber rib
In that order, on both faces if you can reach. The serrated one is the step people skip and the one that knits the wall across its joins.
The honest part
Your first one will lean a little and you will find the coils in a raking light if you go looking. That is normal. Round comes from turning the pot instead of walking around it, and straight comes from not stacking faster than the clay can hold. Both are habits rather than talent.
Before you roll anything
What you need on the table.
Almost none of this is special, and none of it is a machine. Green Level Members bring their own tools. Every other Level uses the studio ones, and everything below lives in the building either way.
A banding wheel
The single most useful thing on this list. Build on one and turn the pot instead of walking around it. Almost every coil pot that comes out oval is a pot somebody walked around.
A serrated rib
The metal one with teeth. This is the tool that actually knits a blended wall together, and it does more for the strength of a coil pot than any other single thing you own.
Wooden modeling tools
For dragging clay downward across a join. A rounded wooden end moves more clay with less water than a fingertip does, and it can reach down inside a narrow pot when your knuckles cannot.
A metal rib and a rubber rib
Metal to true the wall and take material off, rubber to finish and burnish. Both, in that order, and both used with as little water as you can stand.
A wooden paddle
Not decoration. Paddling a leather-hard coil wall compresses it, tightens the joins from the outside and lets you flatten or swell a shape after the fact. Support the inside with your other hand while you do it.
A surform rasp, for later
Only one side of it cuts. You will want this when the rim and the wall are leather-hard and slightly uneven, which they will be. Not tonight.
A little pot of slip
Clay and water mixed to about the thickness of yogurt, made from scraps of the same clay body you are building in and never from a different one. Different bodies shrink at different rates, and a join made of two shrinkage rates is a join that opens.
A spray bottle and a sponge
For keeping the top coil workable between sessions and nothing else. Water is the enemy of a compressed wall, so you want less of it than feels right the entire way up.
A ware board, and plastic
Build on a board so the pot can move without you touching the walls. Wrap the top inch or two in plastic every time you stop, or the coil you have to join to next session will be too dry to join to.
The extruder, which is the thing people ask about
Black Level Members have the wall extruder, and it will push out coils in seconds with a consistency no hand can match. Everything on this page still applies once the coil is off the machine, because the machine only solves the rolling. It does not join anything, blend anything or compress anything, which is where coil pots are actually won and lost. Every other Level rolls by hand, and hand rolling is genuinely fine. People have been doing it for about twenty thousand years.
The heat tables are a tool, not a shortcut
A coil pot dries in stages by design, and the lamps can help you get the lower half firm enough to hold the upper half. Rotate the piece a hundred and eighty degrees every so often, because one side always dries faster, and get pieces on and off rather than parking them. Left under a lamp too long a coil pot will crack at exactly the joins you were being careful about, so you can absolutely create the problem you were trying to avoid. Last one out turns the lamps off.
The number everybody asks for
How thick should a coil be?
About half an inch. Pinky thick. Roll every coil noticeably fatter than the wall you actually want, because blending is going to spend some of that clay.
Here is the reasoning, because a number with no reasoning behind it is a number you will abandon the first time it is inconvenient. When you blend a coil, you are dragging material off it and smearing that material downward across the join. Whatever you drag away is gone from the wall thickness. Start at a half inch coil and you land somewhere near three eighths of an inch of finished wall, which is the same wall thickness we teach for a slab mug and for the same reasons: thick enough to survive drying without warping, thin enough that it does not feel like a brick, and with enough material in it to carve or stamp without punching through.
Go thicker, about three quarters of an inch, for anything over roughly ten inches tall or anything with a wide belly. Big forms carry more weight per coil, and you want surplus clay to pinch upward as you go rather than a rope that is already at final thickness the moment it lands.
What matters far more than the number
Consistency. A coil that is fat in one place and thin in another builds a wall that is fat in one place and thin in another, and the thin spot is where it cracks in the kiln, every single time. One even coil beats three coils at exactly the right diameter. If you only fix one thing about your coils, fix the evenness.
Which bag to buy
All eight of our clay bodies will coil.
There is no wrong answer here, so we are not going to pretend there is one. What changes between them is how much they shrink and how much they forgive, and both of those matter more on a coil pot than on almost anything else, because a coil pot is a wall made entirely of joins.
The number on each card is that body’s published shrinkage, wet to fired. Lower is gentler on every join you just made. Grog and sand, where a body has them, open the clay up so water leaves more evenly, which is the other thing a stack of joins wants.
The house starter and the least expensive bag in the building at $28. It shrinks less than anything else we carry, and slightly coarse clay drags beautifully under a wooden tool. If you have never coiled, this is a very easy place to start.
$32. The manufacturer calls it a more forgiving body with a slight texture, and the very fine grog through it is exactly what a tall coiled wall wants: it opens the clay so water can leave evenly instead of pulling joins apart.
A dark gray stoneware from Spain with a very fine grog through it, $49 for a 27 pound bag. Structurally one of the best-behaved bodies we stock. Its published firing shrinkage is measured hotter than we fire, so treat 12% as the safe planning number.
$40. Warm, smooth, low in sand and grog, and it fires to the desert-brown speckle a lot of members come here for. Blends smooth easily. Being low in grog it wants slower drying than the two above it.
$36. Smooth, creamy and near-porcelain. It takes a rib better than anything else here, so blended joins genuinely vanish on it. The trade is that a smooth white body shows every fingerprint and every join you did not quite close.
$36.50. The same body with dark specks that come through the glaze. The manufacturer says outright that it wants slow drying and plenty of compression, which is a coil pot’s whole list of weak points. Great clay, less margin for rushing.
$40. Half porcelain, half stoneware, slightly coarse, and a genuinely nice middle ground: whiter than a buff body but with more tooth than straight porcelain, so it holds a wall while you build up it.
$44.50, and the least forgiving thing in the studio. It shrinks the most, it slumps sooner, and it will find every join you rushed. Coil a few pots in something else first, then come back to it, and it will be worth the wait.
A word about the shrinkage numbers
Shrinkage is not a promise. Published figures come from test bars fired in a laboratory and your pot is not a test bar. The numbers are here so you understand that a pot built at twelve inches tall comes out of the kiln closer to ten and a half, and so you build a little bigger when the size actually matters. Everything on this page is fired the way we fire everything: bisque at cone 05, then glaze at cone 5½, which is cone 5 with a twelve minute hold.
All eight clay bodies, with what each one costs at your Level
Before you roll anything
Six tools, any clay, one number.
None of it is a machine and there is nothing to get certified on. Green Level Members bring their own tools. Every other Level uses the studio ones, and all of it lives in the building either way.
A banding wheel
Build on one and turn the pot instead of walking around it. Almost every coil pot that comes out oval is a pot somebody walked around.
A serrated rib
The metal one with teeth. It does more for the strength of a coil pot than anything else you will pick up.
A wooden modeling tool
A rounded wooden end drags more clay across a join with less water than a fingertip does, and it reaches inside a narrow pot when your knuckles cannot.
A metal rib and a rubber rib
Metal to true the wall and hunt for thin spots, rubber to finish. Both, in that order, both with as little water as you can stand.
A little pot of slip
Clay and water at about the thickness of yogurt, made from scraps of the body you are building in and never a different one. Two shrinkage rates in one join is a join that opens.
A ware board and plastic
Build on a board so the pot can move without you gripping the walls, and wrap the top inch or two in its own plastic every time you stop.
Even beats exact
Half an inch is the number, and three quarters for anything over about ten inches tall. But consistency matters more than either. A coil that is fat in one place and thin in another builds a wall that is fat in one place and thin in another, and the thin spot is where it cracks in the kiln.
If splits open along a coil while you roll it, the clay is already too dry. Wedge it back into fresher clay rather than fighting it, because those splits do not close and they become the crack later.
Which clay
All eight of our clay bodies will coil, so there is no wrong answer. The two things that help a coil pot are low shrinkage and a bit of grog: 52 Buff shrinks the least at about 10% and is the least expensive bag in the building at $28, and B-Mix w/Grog carries the very fine grog the manufacturer calls more forgiving. Beyond that, buy the one you like the color of. Every clay body, and what it costs at your Level.
Step one
Roll the coils, and roll them all before you build.
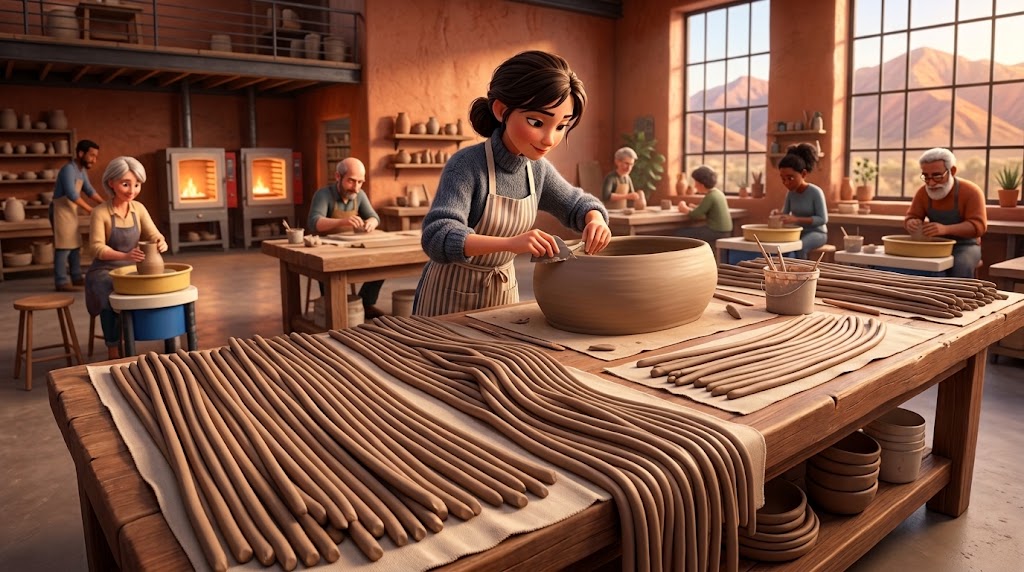
Rolling is the boring part and it is also the part that decides how the pot goes. Get eight or ten coils rolled and under plastic before you touch the base, because stopping mid-build to roll another one is how the pot below you dries past the point where it will take a join.
How to actually roll an even one
Start by squeezing a lump into a rough sausage with your hands, in the air, before it ever touches the table. Rolling a fat blob flat is what produces the classic beginner coil: flat on the bottom, round on the top, thick in the middle and pinched at both ends.
Then put it down and roll with flat, open hands, moving outward from the middle. Not fingertips. Fingertips leave ridges and dig grooves that turn into thin spots. Your hands should travel apart along the coil as it lengthens, so you are stretching the whole thing rather than thinning one section eleven times.
Roll on canvas or a wooden table rather than anything slick. A slick surface makes the coil slide instead of roll, and a coil that slides gets flattened rather than rounded.
Three things that make coils crack
Rolling clay that is too dry. If small splits open along the outside of the coil as you roll, the clay is already past it. Wedge it back into a fresher lump rather than fighting it, because those splits do not close and they become the crack later.
Rolling too fast. Speed puts all the stretch in one place. Slow and light beats fast and hard on every coil you will ever roll.
Rolling too long. A coil much over about eighteen inches gets unmanageable and starts drying at the ends before you use it. Two short coils joined properly are better than one long one that went leathery.
Watch this part
The rolling itself
Everything before the first coil
Step two
Start with a base, and compress it harder than you want to.
Most coil pots that crack do not crack at a join. They crack across the bottom, in a line or a rough S, and it happened before the first coil ever went on.
Two ways to make the base
A cut disc. Roll or press a slab the same thickness as your intended wall, about three eighths of an inch, and cut a circle. Cleanest, most even, and the one to use if you want a flat bottom.
A coil spiral. Wind a coil flat into a spiral from the middle out, then blend it into one solid disc on both faces. Slower, and it has one real advantage: the base is made of the same coils as the walls, at the same moisture, so the whole pot dries as one thing.
Either way, compress it. Press down firmly all over the disc with your thumbs or the back of a rib, working from the center outward, then flip it and do the other face. The clay particles in a rolled or cut slab are all lying the same direction, and compression is what stops them from pulling apart along that grain as the water leaves. Thirty seconds here is the cheapest insurance on this page.
Size the base for the pot you actually want
A coil pot almost always ends up wider than the base you started with, because the natural drift of stacking is outward. If you want a narrow, tall form, start narrower than feels right. If you want a bowl, start with a base that is already most of the width you are after and let the coils flare from there.
Then put it on a board on a banding wheel
Not straight onto the wheel head. A ware board underneath means you can lift the whole pot without ever gripping the walls, and gripping the walls is how a round pot becomes an oval one. Give the board a light dusting or a sheet of paper so the base does not stick down and tear as it shrinks.
Step three
Attach and blend. This is the entire technique.
Everything else on this page is setup or cleanup. This step is the one that decides whether you have made a pot or a stack of rings that will come apart in the kiln, and it is four small habits repeated once per coil.
Everything else on this page is setup or cleanup. This step is the one that decides whether you have made a pot or a stack of rings that will come apart in the kiln, and all of it is in one drawing.
Reading the drawing
- 1The new coil, about half an inch. Drawn to scale against the wall below it. It is fatter than the finished wall on purpose, because blending is about to spend some of that clay.
- 2The join, scored and slipped on both faces. Crosshatch the top of the wall and the underside of the coil until both look scruffy, then wet both with slip. Scoring one side only is the single most common version of this mistake.
- 3Inside blended first. Drag clay downward from the new coil into the one below, supporting the outside with your other hand. Downward, never upward, and never sideways.
- 4Then outside blended. Same downward drag on the outer face, supporting from the inside this time. Use diagonal strokes and alternate the diagonal with each coil.
- 5The finished wall is thinner than the coil was. The dashed circles show where the clay used to be. A half inch coil blends down to roughly three eighths of an inch of wall, which is the number to aim for.
- 1The new coil, about half an inch. Drawn to scale, and fatter than the finished wall on purpose.
- 2Scored and slipped on both faces. Not one. Scoring a single side is the most common version of this mistake.
- 3Inside blended first. Drag downward, never up and never sideways, supporting the outside with your other hand.
- 4Then the outside. Same downward drag, diagonal strokes, and alternate which way the diagonal runs with each coil.
- 5The wall ends up thinner than the coil. The dashed circles show where the clay used to be. About three eighths of an inch is the number to aim for.
The four habits, in order
Score and slip both faces, every coil
Yes, every coil, including the ones nobody will ever see. Clay does not glue itself to clay just because you pressed. Crosshatch both surfaces properly, slip both, then press the coil down and give it a small wiggle side to side to seat it. If slip squeezes out of the join, that is correct. Wipe it off and move on.
Stagger where the coil ends meet
Cut the ends of each coil at an angle rather than square, so they overlap instead of butting, and start each new coil at a different point around the pot. Stack every join in the same vertical line and you have built a seam straight up the wall, which is exactly the line a crack wants to follow.
Inside first, always
The inside is the face you cannot reach once the pot narrows, and it is the face you cannot reach at all once the pot is tall. Do it while it is easy. It also means your supporting hand is on the outside, where the shape is, so you feel the wall going out of round before you can see it.
Alternate the diagonal
Blend one coil with strokes running up to the right, the next with strokes running up to the left. It sounds like superstition and it is not. Alternating the direction the clay particles get dragged builds a wall that is knitted in two directions rather than laminated in one, and laminated walls come apart along the lamination.
Blend both faces, or accept the consequence
You can leave the outside coils showing if you want that look, and plenty of beautiful pots do. But you have to blend at least one face completely, and that face should be the inside. A pot blended on neither face is not a pot, it is a stack, and it will separate along a join somewhere between your shelf and the kiln.
The seam wants to be thicker, not thinner
People smooth a join until it is the thinnest part of the wall, which is exactly backwards. Thin join, weak join. If you have dragged material away and left a dip, add a little clay back and blend it in rather than admiring how smooth the dip is.
Watch this part
The smooth wall, start to finish
Making the join vanish
Step four
Shape as you climb, because you are steering either way.
The single best thing about this technique is that the form is not decided at the start. You are choosing the silhouette one coil at a time, and you can change your mind at coil nine.
The whole steering system
Set a coil slightly outside the one below and the pot widens. Set it slightly inside and the pot comes in. That is it. That is the entire mechanism, and every coil-built shape that has ever existed is that decision made repeatedly.
Move in small amounts. An eighth of an inch of offset per coil is a generous, confident curve. A quarter inch per coil is a shape that will sag before it is dry. If you want a dramatic belly, you get it by making the move over more coils rather than by making a bigger move.
Gravity has a schedule and you do not control it
Four or five coils is about as far as most clay will go in one sitting before the bottom starts to bulge under the weight of the top. Then you stop. Cover the pot loosely, wrap the top coil in plastic so it stays joinable, and come back in a few hours or the next day when the lower half has stiffened up enough to carry more.
This is the part beginners skip and it is not optional on anything tall. A pot built over three sessions is normal. A pot built in one sitting and found slumped the next morning is also normal, just less fun.
Narrowing, which is the tricky direction
Bringing a pot in is harder than letting it out, because you are working against the shape the clay wants. Two things help. Use a slightly thinner coil as you close in, since there is less circumference to fill and a fat coil will bunch. And collar the wall gently with both hands between coils, turning the banding wheel, rather than trying to do the whole narrowing with coil placement.
If the neck is getting too tight for your hand, that is your cue to finish the inside now. There is no version of this where you get back in there later.
Watch this part
Steering and scale
Tricks nobody tells you
Step five
Compress, scrape, refine. In that order.
Blending closes the joins. Compressing is what makes the wall behave like one piece of clay afterward, and it is the difference between a coil pot that survives and one that develops a hairline crack around its middle four weeks later.
The three ribs, in sequence
Serrated rib first. The one with teeth. Drag it across the joins, roughly at right angles to the coils, on both faces if you can reach. It looks like you are wrecking the surface you just smoothed, and you are, temporarily. What it is doing is knitting the clay across the join line rather than along it. This is the most skipped step on this page and it is the one with the biggest payoff.
Metal rib second. Now take off everything the serrated rib just raised, and true the wall while you are there. A flexible metal rib is also the fastest way to find a thin spot, because you will feel the wall give under it before you see anything.
Rubber rib last. Finish and burnish. Light pressure, minimal water, and stop before you have polished a shine onto it unless you actually want that.
Paddling, when you want the shape to change
Once the pot is firm enough to hold its own weight but is not yet leather-hard, a wooden paddle is the best tool in the building. Support the inside with your free hand or a rounded stone, and tap the outside. Tapping compresses the wall, tightens every join from the outside, and lets you swell a belly or flatten a face after the pot is already built. Tap rather than hit. You are persuading it, not punishing it.
Water is not a finishing tool
A sponge full of water will smooth a wall in about four seconds and it will also lift the surface, drag fine particles to the outside and undo the compression you just spent twenty minutes putting in. Sponged walls come out of the bisque feeling chalky and are the usual reason a coil pot looks slightly fuzzy under glaze. Use ribs. Use as little water as you can stand.
Step six
The rim, the drying, and then the kiln.
More coil pots are lost between the table and the kiln than are lost on the table, and a coil pot is a piece almost designed to dry unevenly. Drying is not waiting. It is a step, and it is one you can do badly.
Finish the rim on purpose
The top of a coil pot is never level, because the last coil started and ended somewhere. Wait until it is leather-hard, then cut it true with a needle tool held against a fixed point while you turn the banding wheel, or take it down with a surform rasp. Then compress the cut edge with a fingertip, a piece of soft leather or a rounded rib. A cut rim that never got compressed is the second most common place a coil pot cracks.
You can also just leave the last coil as the rim, unblended and visible, and a lot of very good pots do exactly that. It is a decision, not a shortcut, as long as the inside of that coil is properly joined.
Drying, slowly and above all evenly
Clay cracks when one part of a piece shrinks while another part has not caught up. A coil pot has a thick base, a thin rim and a wall made of joins, so give it more time than you think and cover it loosely for the first few days. Plastic draped over the top, not sealed around it.
Green Level and Yellow Level Members use plastic sheets. Purple Level and Black Level Members can use a cotton sheet over the piece, which lets water out more evenly and is genuinely better for anything tall. Once it is firm, turn it over on a bat if the form allows it, so the thick base can lose water from the side it has been sitting on.
Then the two firings
Bone dry goes to bisque at cone 05, and bisque firings are free, every time. After you glaze it, it goes to a glaze firing at cone 5½, which is cone 5 with a twelve minute hold. Glaze firings are five cents per cubic inch with a $4.80 minimum, and you measure the widest points of the piece. The firing calculator will give you the number before you commit.
A blended coil pot takes glaze exactly like anything else. If you have not glazed here before, the glaze finder is the fastest way to work out what you want on it.
Either side of the blending
The base, the climb, the ribs and the drying.
Four things bracket the part above, and all four are places people lose pots they had already finished building.
The base
Most coil pots that crack do not crack at a join. They crack across the bottom, and it happened before the first coil went on. Compress both faces hard from the middle outward, then set the base on a ware board on a banding wheel rather than straight on the table. Blend a thin coil around the inside corner where the wall meets the floor, so that corner is a curve instead of a right angle.
The climb
Stop before the bottom bulges under the weight of the top, cover the pot loosely, and come back in a few hours or the next day. A pot built over three sessions is normal. Bringing a pot inward is harder than letting it out, so use a slightly thinner coil as you close in, and finish the inside before the neck gets too tight for your hand.
The ribs
Drag the serrated rib across the joins at roughly right angles to the coils. It looks like you are wrecking the surface you just smoothed, and you are, temporarily. Then metal, then rubber. Do not reach for a sponge instead: water smooths a wall in four seconds and undoes the compression you spent twenty minutes putting in.
The rim, then the drying
At leather-hard, cut the top true with a needle tool held against a fixed point while you turn the banding wheel, then compress the cut edge. An uncompressed rim is the second most common place a coil pot cracks. Dry it covered loosely rather than sealed, and turn it over on a bat once it is firm if the form allows it.
Then the two firings
Bone dry goes to bisque at cone 05, free every time. After you glaze it, a glaze firing at cone 5½, which is cone 5 with a twelve minute hold, at five cents per cubic inch with a $4.80 minimum. The firing calculator gives you the number before you commit, and the glaze finder is the fastest way to work out what goes on it.
The long ones
Two whole pots, watched all the way through.
Six of the eight videos on this page are sitting next to the step they explain, which is where a short video belongs. These two are different. They are long, they are not really lessons, and you should watch them the way you would watch somebody good do anything: without trying to keep up.
This is where the technique stops being a craft exercise and starts being obviously the same thing people have been doing for thousands of years, at whatever scale they felt like.
A large pot, every minute of it
Coil and paddle, the Korean way Long, 39 min
About all eight videos
Nobody in any of them works here and none of them know we exist. Every title and channel above was checked against YouTube directly rather than copied out of a search result, because search results go stale. Videos load from youtube-nocookie.com, and nothing from YouTube loads at all until you press play. If one of them ever goes dead, tell us and we will swap it.
Eight videos from six potters: The Pottery Wheel, Andy Ward’s Ancient Pottery, Pottery to the People, Ceramic Arts Network, Black Dog Ceramics and Sae-Won Lee Ceramics. More of this sort of thing on our page of free videos from other ceramic artists.
Diagnosis
When it goes wrong, and it will.
Tap whatever happened. Every one of these has a cause, which means every one of them is something you can stop doing.
A crack opened along a coil line
What happened
That join never really joined. A horizontal crack that follows a coil is almost always dry scoring, slip that skinned over before the coil went on, or blending on one face only.
Next time
Score both faces until they look scruffy, slip both, press and wiggle to seat, and blend both faces with the serrated rib across the join afterward. If you are working slowly, mix your slip a little thicker so it does not dry out between coils.
This piece
Still wet or leather-hard: open the crack slightly, score inside it, slip it, press it closed and blend a thin coil over it on both faces. Already fired: it is decorative now. Our page on fixing pottery after a firing covers what is salvageable.
A straight crack running up the wall
What happened
You stacked the coil ends in a line. Every coil started and finished at roughly the same point around the pot, so all those joins are sitting one above the other and they have become a seam.
Next time
Start each coil at a different place on the pot, and cut the ends at an angle so they overlap rather than butt together. A quarter turn between coils is plenty.
The bottom cracked
What happened
The base was not compressed, or it was thicker than the walls and dried at a completely different rate, or it stuck to the board and could not shrink.
Next time
Compress both faces of the base from the middle outward before anything goes on it. Cut it to the same thickness as your wall. Put paper or a light dusting under it, and blend a thin coil around the inside corner where the wall meets the floor so that corner becomes a curve rather than a right angle. Sharp interior corners concentrate stress in one line, which is exactly where the crack shows up.
The whole thing slumped or bulged at the bottom
What happened
You built too far in one sitting. The lower wall was still soft and the weight above it won.
Next time
Four or five coils, then stop. Cover it, wrap the top coil in plastic, and come back when the bottom half is firm. The heat lamps can speed this up if you rotate the piece and do not park it. If you catch a bulge early you can often paddle it back with the inside supported.
It came out oval instead of round
What happened
Almost always one of two things: you walked around the pot instead of turning it, or you picked it up by the walls.
Next time
Build on a banding wheel and turn it constantly, so you are always working from the same position relative to your own hands. Build on a ware board so you can move the pot without gripping it. Check for round by spinning the wheel and watching the rim against a fixed background rather than by looking down at it.
I can still see where the coils were
What happened
Usually not a blending problem at all. It is a compression problem. The joins are closed but the wall is still slightly wavy, and a raking light finds every ripple.
Next time
Let the pot go to soft leather-hard, then take a flexible metal rib across the whole outside in long vertical strokes rather than short local ones. Long strokes level the whole wall. Short ones just polish each bump individually. Finish with the rubber rib and almost no water.
The coils crack as I roll them
What happened
The clay is too dry, you are rolling too fast, or you are rolling with fingertips instead of flat hands.
Next time
Wedge dry clay back into fresher clay rather than trying to rescue a splitting coil, because those splits do not close and they become the crack later. Slow down, use flat open hands, and travel outward from the middle as it lengthens.
I came back and the top coil is too dry to join to
What happened
The pot got covered but the top edge did not, so the one part you actually need soft is the one part that dried.
Next time
Wrap the top inch or two in its own strip of plastic before the loose cover goes over the whole pot, every single time you walk away.
This piece
Score the rim, wet it, lay a damp cloth or paper towel over it for an hour or so under plastic, and let the moisture equalise before you try. Slapping a wet coil onto a dry rim gives you a join that will open in the kiln.
The whole thing on one screen
Leave this open on your phone.
Everything above, compressed to the bit you actually need while your hands are covered.
The loop, once per coil
- Score the top of the wall and the underside of the coil
- Slip both faces, with slip made from your own clay
- Press the coil down, wiggle it side to side to seat it
- Blend the inside, dragging downward, outside supported
- Blend the outside, diagonal, alternating each coil
- Start the next coil a quarter turn around the pot
The numbers
- Coil about 1/2 inch thick, 3/4 inch for big forms
- Finished wall about 3/8 inch
- Move the silhouette 1/8 inch per coil, not more
- Four or five coils per session, then stop
- Coils no longer than about 18 inches
- Bisque cone 05, glaze cone 5½
Rib order at the end
- Serrated rib across the joins, both faces
- Metal rib to true the wall and find thin spots
- Rubber rib to finish, almost no water
- Paddle if you want the form altered, inside supported
- Cut the rim true at leather-hard, then compress it
Every time you walk away
- Wrap the top inch or two in its own plastic
- Cover the whole pot loosely, never sealed tight
- Leave it on its board, do not lift it by the walls
- Unused coils under plastic or they are gone
- Station wiped, tools away, lamps off if you are last out
Your ticks save on this device, so you can close the page halfway through a pot and pick it back up next week. Nothing is sent anywhere and nobody sees it but you.
Questions people actually ask
The ones that come up every week.
Do I need to be certified for any of this?
No. Coil building uses no machine, so there is nothing to get certified on. Every Level can walk in and start today. The only piece of equipment on this page that needs anything is the wall extruder, which is a Black Level tool, and you do not need it. Hand rolled coils are what almost everybody uses.
Can I do this on my first day?
Yes, and it is one of the better first days available. There is no wheel to fight and no machine to learn, so the only thing between you and a pot is patience. Tell an instructor it is your first coil pot and they will get you set up. Our main instructors wear pink shirts and our trade instructors wear purple, and there are instructors on the floor during every instructed class.
Is a coil pot as strong as a thrown one?
Once it is fired at cone 5½ and the joins were made properly, yes. Fired clay does not remember which direction it was formed in. What a coil pot has that a thrown pot does not is a lot of joins, and a join that was scored, slipped, blended on both faces and compressed with a serrated rib is as strong as the wall around it. A join that was pressed together dry is not, which is why step three is the longest section on this page.
How big can I actually go?
Bigger than anything you can throw at your current skill level, and considerably bigger than most people expect. Coil building has no upper limit other than the kiln, and our largest is a 42 cubic foot bell lift. What limits you is time and drying, not technique. Measure your piece and check the firing calculator before you commit to something enormous, because glaze firings are priced by volume.
Do I have to blend both sides?
You have to blend at least one face completely, and it should be the inside. Leaving the outside coils visible is a legitimate design choice and a lot of lovely pots do it. Leaving both faces unblended is not a design choice, it is a stack of rings, and it will come apart somewhere between your shelf and the kiln.
Which clay should I use for my first one?
All eight of our bodies will coil, so there is no wrong answer. If you want the two things that matter most on a coil pot, low shrinkage and a bit of grog, 52 Buff shrinks the least at about 10% and B-Mix w/Grog has the very fine grog the manufacturer describes as more forgiving. Beyond that, buy the one you like the color of. Every clay body and what it costs at your Level is on the clay page.
How long does a coil pot take?
A small one is an evening. Anything over about ten inches tall is two or three sessions across a week, because you have to let the lower half stiffen before the upper half can sit on it. Then drying, a bisque firing, glazing on another visit, and a glaze firing. The pot you start on a Tuesday is a pot you take home a few weeks later, which surprises people every single time and is true of everything made out of clay anywhere.
Can I coil on top of something I threw?
Absolutely, and it is how a lot of large pots get made. Throw a base and a lower section, let it firm up, then coil upward from the rim and blend as normal. You can even put it back on the wheel and true each new section with the wheel turning slowly. Score, slip and blend exactly as you would on a hand-built pot, because the join does not care how the clay below it was formed.
What else can I make this way?
Almost anything. Vases, planters, urns, lidded jars, utensil crocks, sculptural pieces, and the wide shallow forms that are genuinely difficult to throw. Blended coiling is the least restrictive forming method in the building, because you are not limited by what one lump of clay will do in one continuous motion. It is also the only one where you can leave the pot on the shelf and come back to it, which is why it suits people who visit twice a week rather than every day.
Go build one
No wheel, no machine, no certification. Just clay and patience.
Roll ten coils, cut a base, and go slowly. That is the whole entry fee for the oldest technique in pottery, and it is the one that will let you make something taller than anything you can throw right now.
Roll ten coils, cut a base, and go slowly. That is the whole entry fee for the oldest technique in pottery. There is a much longer version of this page behind the toggle at the top if you want the reasoning under every move.
Not a Member yet? A membership is what gets you the clay, the banding wheels, the ribs, the kilns and somebody standing next to you when the wall starts leaning. Text us at 385-241-5528 and ask anything.
Which version would you like to print?
Videos come out as a labelled box with the title and channel to search for, since paper does not play them.