Pottery Date Night
 Bring All Your Friends Free Week
 Give a Month of Pottery
 Private Pottery Parties

 The Welcome Booklet
 Your First Ten Sessions
 The Pottery Process
 Finding the Studio
 Your Classes Never Expire
 The Four Tables
 Who’s Who
 The Rewards Program
 Flux Glazes
 The Calculators
 Kiln Tracker
 Holiday Kiln Deadlines

 Beginner’s Tool Set
 Fingernail Clippers
 Mayco Clay Mender
 Epoxy for Kintsugi
 Applicator Bottles
 Large Bead Rack
 Raku Workshop
 Nighttime Raku
 Horsehair and Feather Raku
 The Clay Hole T-Shirt
 Embroidered Crewneck
 Zip-Up Hoodie
 Pre-Made Bisqueware
 Glaze Catchers
 Kiln Cookies
 Clay Cubby Rental
 The Glaze Bible, Printed
 The Book of Molds, Printed
 Printable Pottery Guides
 Free Printable Trackers
 Gifts for Potters
 Christmas Pottery Ideas
 Mother’s Day Gift Ideas
 Pottery Date Night
 Studio Calendar
 2027 Studio Events
 What Should I Do Today?
 How to Throw on the Pottery Wheel
 How to Make a Pinch Pot
 How to Tap Center a Pot
 The Five Stages of Clay
 Is Pottery Hard to Learn?
 Pottery Wheel Practice Drills
 20 Easy Hand-Building Projects
 Everything That Sounds Wrong

 A Beautiful Piece, Every Time
 Slab Roller Tips
 Any Dish as a Slump Mold
 Slab Roller & Slab Mold Certification
 The Pottery Skill Tree
 Clay & Pottery Calculators
 Logging Your Pottery and Glazes
 The Pottery Dictionary
 Why Did My Pottery Do That?
 The Pottery Cone Chart
 Pottery Myths, Fact-Checked
 Is Handmade Pottery Food Safe?
 Incredible Ceramic Artist Videos
 How Dan Throws Giant Pots
 How to Dry Your Pottery
 The Pottery Wheel Introduction
 Pottery by Zodiac Sign
 Personality and the Pottery Wheel
 Pottery for Engineers
 ADHD, Hyperfocus, and Never Running Out
 Hobbies for Burnout
 Screen-Free Hobbies for Adults
 Every Addiction I Ever Had Lost to Art
 Functional Pottery Is Engineering
 How Do We Compare?
 Pottery Classes by City
 Every Pottery Studio in Utah
 Pottery in Draper
 Featured Members
 The Signature Wall
 Making Friends as an Adult Is Brutal
 The Clay Hole Commandments
 2027 Pottery Contests
 2027 Studio Parties
 Gallery Night

 Scream It Into the Void
 Destroy the Glaze Wall
 Daily Affirmation Cards
 Everything That Can Go Wrong
 Subscribe to Our Newsletters
 Contact The Clay Hole
 Corporate Team Building

 Glaze Combinations
 Glazes We Do Not Carry
 Making Glaze Test Tiles
 The Mega Glaze Tool
 How to Use the Mega Glaze Tool

 Glaze Brushing Techniques
 How to Use Underglaze
 How to Use Dipping Glazes
 Glaze Problems, Causes and Fixes
 The Dipping Glaze Guide

 Making a Glaze Catcher
 Fused or Sharp After Firing
 The Signature Wall
 His Viral Videos
 His Own Ceramics
 Meet Mud
Advanced throwing · Sharp shoulders
A crisp turn instead of a soft curve.
A sharp shoulder is a corner in soft clay. It takes extra clay at the top of the cylinder, a dry surface, a stiff rib with a square edge, and one pass. Then nothing, because the shoulder softens again the moment you touch it twice.
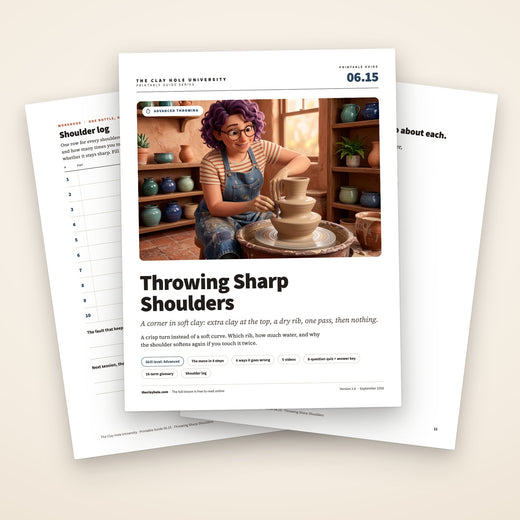
Four steps with a tick list at each: the thick-topped cylinder, bellying and collaring dry, the single pass that turns the corner, and throwing the neck behind a fence. Six fixes, five videos from potters who do not work here.
This is the short version: the thick top, the dry collar, the one pass, the fence, each with a tick list. The reasoning, the flat-shoulder variation and the questions are in the comprehensive version.
Read it, then watch it
Why this is written down and filmed, both.
A sharp shoulder is one decision and one motion. The decision is to leave extra clay at the top of the cylinder, keep it dry, and touch the corner once, and those are rules you can carry to the wheel. The motion is the rib turning a curve into an angle in a single pass, and that is a thing you have to watch, because the speed and the angle of the rib are the whole difference between a shoulder and a slump. The rules are here. The videos are the rib.
Use both, in this order
Read the rules. Watch Simon Leach turn the corner. Throw one with the tick list open, and expect to soften the first three by touching them twice.
The whole idea
Extra clay at the top, a dry rib, one pass, hands off.
Throw the top third thicker on purpose. Belly it, sponge it nearly dry, collar in slowly. Then a stiff square-cornered rib outside, a finger inside at the same point, and one pass at a slow wheel turns the curve into an angle. Then nothing. Every touch after that rounds it.
The five-minute version
The whole technique in six moves.
If you already collar and belly without thinking and you just want the shape of it, this is the shape of it. Everything below is these six moves, slowed down and with the places they fail marked.
Before you wedge
What you need at the wheel.
Six things, and one of them is extra clay. The rib is the decision: square-edged, stiff, and dry when it meets the pot.
A stiff square-edged rib, a sponge on a stick, a needle, a wooden knife, a pound more clay than usual, and a bat.
Step one
Throw the cylinder with the top third thicker, on purpose.
A shoulder is clay leaning inward, held up by its own thickness. A cylinder pulled evenly thin has nothing to make a shoulder from. Pull the bottom two thirds as normal and stop thinning early on the top third, leaving it half again as thick. That extra is the corner.
Use more clay than the same bottle would take without a shoulder, about a pound more on a mid-sized piece, and throw it a little taller than the finished height, because collaring in adds height and cutting the neck takes it back. Keep the rim thick and true from the first pull; a wobbling rim collared in becomes a neck that is off center, and there is no fixing that after the shoulder is set.
Everything below the shoulder is normal throwing, and our throwing lesson and wall thickness lesson are the method. This page starts where those stop.
Step two
Belly it, sponge it nearly dry, and collar in slowly.
The curve comes first, from inside. A hand or a rib inside pushes the belly out below the shoulder line, a dry rib outside steadying the wall. Then the water comes out: a sponge on a stick inside, a rib scraping slurry off outside. A shoulder thrown wet slumps within a minute.
Then collar. Three fingers of each hand in a ring around the wall just above the belly, wheel slow, and squeeze gently inward while lifting a fraction, so the wall moves in without buckling. Three or four small collarings, letting the clay rest a few seconds between each, bring the top in further than one big squeeze would and without the twist. No water on the hands; dry fingers grip and move the clay, wet ones slide and thin it. Our collaring lesson is the full method.
Stop collaring when the wall above the belly is leaning inward at roughly the angle the shoulder will have, with the rim still open enough to get a finger or a tool inside. That opening is what the next step needs, and it is the reason the neck is thrown after the shoulder, not before.
Step three
One pass with a dry rib. Then nothing.
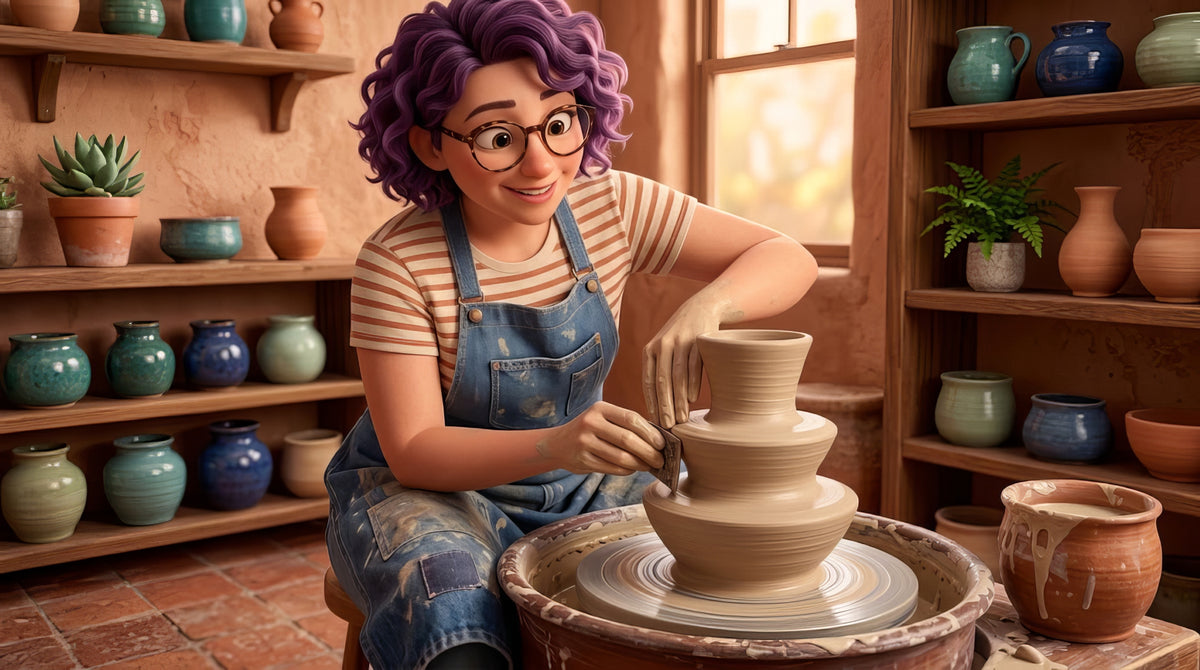
This is the whole technique. A stiff square-cornered rib outside at the angle you want. A finger, or a wooden knife if the opening is narrow, inside at the same height. Wheel slow. Bring the rib in until its corner meets the clay, hold for one revolution, lift away. The curve is now an angle.
Then hands off. Not a second pass to tidy it. Not a sponge. Not a wet fingertip to smooth the edge. A corner in soft clay is held up only by the clay’s own stiffness, and every pass of anything over it moves a little clay from the corner into the curve. The first pass makes the shoulder. The second starts unmaking it. Most people soften their first three shoulders exactly this way, by admiring them with a finger.
If you want a flatter shoulder, a true plane rather than an angle, the rib goes almost horizontal and the inside finger presses up under it, and the pass is the same: once, dry, slow. If the corner comes out soft anyway, the leather hard fix in the diagnostic below works, and it works better than a second wet pass ever would.
Step four
Throw the neck behind a fence, cut it at leather hard, dry it slowly.
The rib becomes a fence. To throw the neck above the shoulder, hold the dry rib still just below the corner and work the neck with the other hand above it. Nothing crosses the corner. The rib is standing guard.
A collared neck can be left closed and cut open at soft leather hard, which is the safest way to keep a shoulder crisp, because the arch of clay at the top holds the shoulder up while the pot is wet. Cut a wet neck open and the shoulder it was holding sags. If the design needs an open neck thrown wet, throw the shoulder thicker to compensate, and expect a softer corner. Our skinny neck lesson covers the neck itself.
Then wire it off on its bat, never lifted, and dry it slowly, covered or upside down at leather hard, so the thin neck does not race the thick shoulder and crack the corner between them. At leather hard, a rasp or a metal rib drawn once round a chuck-held pot sharpens a corner that came out soft, and a glaze that breaks on edges is what the whole discipline was for.
Watch it done
Now watch five people turn the corner.
Watch this one, then go throw a thick-topped cylinder.
None of these potters work here or know we exist. Between them they cover the corner turned with a rib in one pass, a big bottle with the extra clay left at the top, the shape decided from inside, the skinny neck above the shoulder, and a long neck bottle thrown with almost no touches. Nothing but the still frame loads until you press play.
Thirteen minutes of a cylinder collared in and turned into a flat shoulder with a rib, once. The other four videos are in the comprehensive version.
When it goes wrong
Six ways it goes wrong, and what to do about each.
The three failures that happen on the first bottle.
Pick the one that looks like your pot. The first three are water, thickness and speed. The last three are drying and the neck.
The shoulder rounded off after you had it sharp
You touched it twice, or once with a wet hand. A sharp shoulder is a corner in soft clay, and every pass of a finger, sponge or wet rib rounds it a little more.
One pass with a dry rib, then hands off. Everything above the shoulder gets thrown with the outside rib held still below the corner as a fence, never crossing it. Sponge nothing near it.
At soft leather hard, a metal rib held at the angle and drawn once round the pot on a slow wheel will bring most of the corner back. At leather hard, a rasp or a rib on a chuck can cut it crisp again.
The shoulder collapsed inward while you were forming it
Too thin at the top, too much water, or too fast. A shoulder is clay leaning inward, held up only by its own thickness; a thin, wet, fast-moving wall folds.
Top third thicker than the bottom, on purpose. Collar slowly, slow wheel, three fingers of each hand in a ring, no water. Shoulder in one pass.
Cut off the folded part with a needle, re-collar what is left, and settle for a shorter bottle. Or wire it off and try again with the top left thicker.
The neck twisted and the shoulder went off center
Collaring too fast, or with uneven pressure, or with the wheel too fast for the amount of movement. A wall that is pushed inward faster than it can move spirals.
Slow wheel, slow hands, small moves. Three or four gentle collarings rather than one big one, both hands equal and together.
Stop, let it rest a minute, then collar again very slowly with even hands; a slight twist usually comes out. A bad one is a wire-off.
It cracked along the shoulder while drying
The shoulder was the thinnest place on the pot, or the thickest, and it dried at a different rate from everything around it. A corner is where a wall changes direction, and drying stress collects there.
Even thickness through the shoulder, checked with a needle. Dry slowly, upside down or covered, so the neck does not race the body. Our drying lesson is the whole method.
A hairline at leather hard can be scored, slipped and burnished closed from inside if you can reach. Usually you cannot, and it is a vase for dried flowers.
The shoulder slumped after you cut the neck off
The neck was holding it. A closed or collared form has an arch of clay at the top that supports the shoulder; cut it open while the clay is soft and the arch is gone.
Cut the neck at soft leather hard, not wet, with the pot still on the bat. If the design needs an open neck thrown wet, throw the shoulder thicker.
If it is still soft, a rib from inside through the neck opening can push the shoulder back up while a dry rib holds the corner outside. If not, it is a lower shoulder than you planned.
The neck is off center on top of the shoulder
The shoulder was formed with the rim already wobbling, or one hand collared harder than the other, or the rim was never trued before the neck went up.
True the rim with a finger before collaring. Collar with both hands equal. Look at the neck from above, not the side, as it rises.
At soft clay, a gentle re-collar with even hands centers a mild wobble. Past that, trim the neck opening true at leather hard on a chuck and let the shoulder be what it is.
How it works here
At The Clay Hole, this is a Thursday-night wheel and a glaze that breaks.
This page is written for potters everywhere. A few things are specific to our building.
Three things to know here
All 29 wheels and the bats are open to every Level; ribs and sponges on sticks are studio tools from Yellow up, Green Level Members bring their own. A pound more clay from your own bag. A sharp shoulder wants a glaze that breaks on edges; the glaze finder knows which. Bisque is cone 05 and free; glaze firing is cone 5½.
Wheels, bats and tools
All 29 wheels and the bats are open to every Level. Stiff ribs, sponges on sticks, needles and wooden knives are studio tools for Yellow, Purple and Black Level Members; Green Level Members bring their own. A square-edged rib you carry is a rib that is always dry when you need it.
Clay
A pound more than the same bottle without a shoulder, from your own bag. All eight of our clay bodies shoulder; a smoother body holds a crisper corner, a groggy one stands up better while wet.
Glaze
The reward for the discipline is a glaze that breaks on the corner: rutile blues, iron saturates, tenmokus, celadons. Two coats, not three. Our glaze finder will find them on the wall, and a faceted or shouldered test tile tells you more than a round one.
Firing
Bisque is cone 05 and free. The glaze firing is cone 5½ at five cents a cubic inch, $4.80 minimum, on the longest dimension. A tall bottle is priced on its height. Every piece goes in on a cookie with a naked bottom.
Questions people actually ask
The ones that come up every week.
What actually makes a shoulder sharp?
Three things. Extra clay left at the top of the cylinder so there is something to turn. A stiff rib with a square edge held at the angle you want, on the outside, with a finger or a tool inside at the same point, and the wheel doing the work in one pass. And then nothing: no second pass, no sponge, no wet finger. Every touch after the first rounds it.
Which rib?
A stiff one with a true corner: wood, metal or hard plastic, not the soft red rubber kind. The corner of the rib is what makes the corner of the pot. Keep it dry; a wet rib softens the edge it is supposed to be defining.
How much water?
As little as you can get away with, and none at the shoulder. Water is what lets clay move, and at the shoulder you want the clay to stop moving the moment it is where you want it. Throw the cylinder as usual, sponge the excess out, and form the shoulder with a nearly dry surface. A shoulder thrown wet slumps within a minute.
Why does it soften when I touch it twice?
Because a corner in soft clay is held only by the clay’s own stiffness, and every pass of anything over it moves a little clay from the corner into the curve. The first pass makes the corner. The second one starts unmaking it. Sighted or not, the discipline is one pass and then hands off, which is harder than it sounds.
Can I sharpen it later at leather hard?
Yes, and many potters do: a metal rib or a rasp drawn once round the pot on a slow wheel at leather hard, or on a chuck, cuts a clean corner into a shoulder that came out a little soft. Our chucks lesson covers holding a bottle upside down for it.
Which glaze suits a sharp shoulder?
One that breaks on edges: rutile blues, iron saturates, tenmokus, celadons, anything the maker describes as breaking. The corner thins the glaze and shows the clay through in a line right round the pot, which is the whole reward for the discipline. A flat opaque glaze makes a sharp shoulder look like a mistake.
Is this an advanced page?
Yes, in the sense that it assumes you throw a cylinder, collar in and belly out without thinking about it. If any of those is still a fight, our collaring lesson and the oil bottles lesson come first.
Related lessons
Six lessons that sit next to this one.
Three to read next.
A shoulder sits between collaring and the neck, and between throwing and trimming. These are the pages on every side.
That is the whole technique
Thick top. Dry collar. One pass. Hands off.
Your first three shoulders will soften because you touched them a second time to see if they were sharp. That is normal, and everyone does it, and the fourth one will not. A crisp shoulder under a glaze that breaks is one of the few things on a wheel that reads as skill from across a room.
If you want the flat-shoulder variation, the glaze notes and the answers to the questions everybody asks, switch to the comprehensive version at the top. Otherwise, go weigh out a pound more than usual.
Written for potters everywhere. Where our studio does things differently, the page says so.
Which version would you like to print?
Both print clean, with the videos turned into labeled boxes you can search for later.