Pottery Date Night
 Bring All Your Friends Free Week
 Give a Month of Pottery
 Private Pottery Parties

 The Welcome Booklet
 Your First Ten Sessions
 The Pottery Process
 Finding the Studio
 Your Classes Never Expire
 The Four Tables
 Who’s Who
 The Rewards Program
 Flux Glazes
 The Calculators
 Kiln Tracker
 Holiday Kiln Deadlines

 Beginner’s Tool Set
 Fingernail Clippers
 Mayco Clay Mender
 Epoxy for Kintsugi
 Applicator Bottles
 Large Bead Rack
 Raku Workshop
 Nighttime Raku
 Horsehair and Feather Raku
 The Clay Hole T-Shirt
 Embroidered Crewneck
 Zip-Up Hoodie
 Pre-Made Bisqueware
 Glaze Catchers
 Kiln Cookies
 Clay Cubby Rental
 The Glaze Bible, Printed
 The Book of Molds, Printed
 Printable Pottery Guides
 Free Printable Trackers
 Gifts for Potters
 Christmas Pottery Ideas
 Mother’s Day Gift Ideas
 Pottery Date Night
 Studio Calendar
 2027 Studio Events
 What Should I Do Today?
 How to Throw on the Pottery Wheel
 How to Make a Pinch Pot
 How to Tap Center a Pot
 The Five Stages of Clay
 Is Pottery Hard to Learn?
 Pottery Wheel Practice Drills
 20 Easy Hand-Building Projects
 Everything That Sounds Wrong

 A Beautiful Piece, Every Time
 Slab Roller Tips
 Any Dish as a Slump Mold
 Slab Roller & Slab Mold Certification
 The Pottery Skill Tree
 Clay & Pottery Calculators
 Logging Your Pottery and Glazes
 The Pottery Dictionary
 Why Did My Pottery Do That?
 The Pottery Cone Chart
 Pottery Myths, Fact-Checked
 Is Handmade Pottery Food Safe?
 Incredible Ceramic Artist Videos
 How Dan Throws Giant Pots
 How to Dry Your Pottery
 The Pottery Wheel Introduction
 Pottery by Zodiac Sign
 Personality and the Pottery Wheel
 Pottery for Engineers
 ADHD, Hyperfocus, and Never Running Out
 Hobbies for Burnout
 Screen-Free Hobbies for Adults
 Every Addiction I Ever Had Lost to Art
 Functional Pottery Is Engineering
 How Do We Compare?
 Pottery Classes by City
 Every Pottery Studio in Utah
 Pottery in Draper
 Featured Members
 The Signature Wall
 Making Friends as an Adult Is Brutal
 The Clay Hole Commandments
 2027 Pottery Contests
 2027 Studio Parties
 Gallery Night

 Scream It Into the Void
 Destroy the Glaze Wall
 Daily Affirmation Cards
 Everything That Can Go Wrong
 Subscribe to Our Newsletters
 Contact The Clay Hole
 Corporate Team Building

 Glaze Combinations
 Glazes We Do Not Carry
 Making Glaze Test Tiles
 The Mega Glaze Tool
 How to Use the Mega Glaze Tool

 Glaze Brushing Techniques
 How to Use Underglaze
 How to Use Dipping Glazes
 Glaze Problems, Causes and Fixes
 The Dipping Glaze Guide

 Making a Glaze Catcher
 Fused or Sharp After Firing
 The Signature Wall
 His Viral Videos
 His Own Ceramics
 Meet Mud
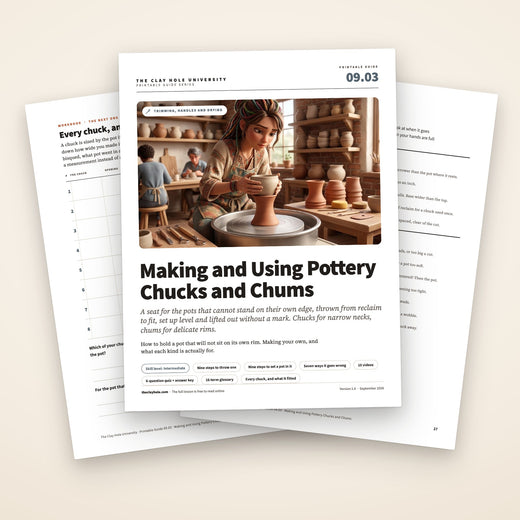
Making and Using Chucks
A bottle cannot stand on its own neck. A vase with a two inch opening cannot take its own weight on the lip. A bowl with a wavy rim will not lie flat on a wheel head. A chuck is the four minutes of clay that lets you trim all three of them anyway, and the first time you use one it stops feeling like a workaround and starts feeling like the obvious answer.
The short version. What a chuck is, how to throw one in four minutes, and how to set a pot into it without bruising the shoulder.
Part of Clay Hole University. Written for the wheel room, and meant to be read once and then kept open on a phone.

Which version would you like to print?
Videos come out as a labeled box with the title and channel to search for, since paper does not play them.
Chucks in one minute
A chuck is a stand. It holds a pot upside down on the wheel so the fragile end touches nothing while you trim the foot. A hollow one that the pot sits down inside is a chuck. A solid one the pot sits over is a chum. That is the entire vocabulary.
The question that decides it
Turn the pot upside down on the table. If it will not sit flat and still on its own rim, or the rim is thinner than a pencil, you need one. If the opening is narrower than the belly, use a chuck. If the opening is wide but the rim is delicate or wavy, use a chum.
You do not have to own anything. Four minutes of reclaim on the wheel makes a chuck that works once and goes back in the bucket. Everything below assumes that is what you are doing tonight.
What a chuck actually is
A chuck is a stand. That is the whole invention. It sits on the wheel head, it is centered and it is level, and it holds a pot upside down at a height where the delicate end of that pot is touching absolutely nothing while you cut the foot.

Cross sections. A bottle resting on a chuck on the left, its neck shown dashed where it hangs inside. A bowl sitting over a chum on the right.
- 1A base wider than the top. The chuck is ballast. If it can rock, the pot standing on it rocks further.
- 2The rim of the chuck is the only place the pot is allowed to land. Level it before you trust it.
- 3A soft coil of clay on that rim, acting as a gasket. Hard bisque against leather hard clay leaves a bruise you will not notice until it is glazed.
- 4The neck and the lip hang in free air, touching nothing at all. That is the entire reason the tool exists.
- 5A chum is the same idea inverted. A solid mound the pot goes over, gripping the inside of the wall instead of the outside.
- 6Same rule on a chum. The lip stays off every surface, and the weight rests on the wall above it.
Three words, and only three
- Chuck. Hollow. A thrown ring or cylinder, open at the top and usually open at the bottom too. The pot goes down inside it, narrow end first, and rests where its own shape gets too wide to fall through. Bottles, vases, gooseneck forms, oil bottles, anything with an opening smaller than its belly.
- Chum. Solid. A mound or a cone. The pot goes over it upside down and the chum grips the inside of the wall. Mugs, cups, bowls, anything whose opening is plenty wide but whose rim is delicate, uneven, scalloped or altered.
- Wads. Three or four small lumps of soft clay that stop the pot turning independently of the chuck. They are not glue and they are not load bearing. Gravity does the holding.
Some potters use other names. One of the videos further down introduces a third shape its maker calls a cheek, which is a chum with a straighter flank made for reshaping a rim as well as supporting it. Do not get stuck on the words. Hollow or solid is the only distinction that changes what you do.
Why it matters more than it sounds like it should
A rim is the thinnest clay on the pot. Leather hard clay is strong in compression and weak in point loads, and a wheel head is a flat, hard, unforgiving surface. Trimming pushes sideways, not down, so every pass is trying to shove the pot off whatever it is standing on. Put all of that on a narrow lip and you get a bruised rim, an oval opening, a crack you find at the bisque stage, or the pot on the floor. A chuck moves the load to the strongest part of the form and leaves the weakest part hanging in air.
Which one you need
There is one question, and everything in the table below is just that question applied to a shape you might already have on your shelf.
Ask this before you reach for a tool
Turn the pot upside down on the table. Will it sit flat and completely still, on clay that is thicker than a pencil, with nothing else touching? If yes, trim it straight on the wheel head and skip this page. If no, work out why not. A narrow opening means a chuck. A wide but fragile or uneven opening means a chum.
| The pot | What holds it | Why |
|---|---|---|
| Bottle or oil bottle | Holds itChuck | WhyThe opening is a fraction of the belly, so there is nothing under most of the pot. |
| Bud vase | Holds itChuck | WhyLight enough to survive being stood on its lip, right up until the tool catches. |
| Gooseneck or skinny neck form | Holds itChuck | WhyThe neck would fold under the weight of the belly before you cut a single curl. |
| Tall vase with a flared lip | Holds itChuck | WhyThe flare is the thinnest clay on the piece and it is the only part that would touch. |
| Enclosed or spherical form | Holds itChuck | WhyThere is no flat anywhere on it. A chuck gives it a seat that matches its curve. |
| Mug, cup or tumbler | Holds itUsually nothing | WhyA straight even rim on a wheel head is fine. Reach for a chum only when a pulled handle has dragged the rim oval. |
| Bowl with a cut or scalloped rim | Holds itChum | WhyA wavy rim touches down in three places and rocks in all the others. |
| Wide bowl or platter | Holds itChum or foam | WhyThe rim is wider than the wheel head, so nothing supports the middle of the span. |
| Anything with a handle on | Holds itEither, with the handle clear | WhyThe handle lands before the rim does and levers the whole pot off center. |
| Teapot with the spout attached | Holds itChum | WhyThe spout hangs lower than the rim, so the pot cannot sit level on anything flat. |
If a shape is not on this list, it is still the same question. What is the strongest ring of clay on this pot, and can I get the load onto it?
Read it and watch it
There are ten videos further down and we mean for you to watch them. We also wrote all of this out, on purpose, because the two do different jobs.
Video is better at speed and pressure
How fast a wheel is really turning. How hard a hand is actually pushing. The exact moment somebody stops cutting and reaches for a sponge. Nobody has ever written those down well, and watching a chuck get thrown once will teach you more about its proportions than three paragraphs.
Text is better at order and names
A video plays at its pace. A page waits at yours. Reading it first hands you the words, and once you have words like chuck, chum, wad and runout, a vague sense that something is wrong turns into a specific problem with a specific fix. Re-reading step six costs three seconds. Scrubbing back to find step six in a twenty minute video, with wet hands, costs a minute and your place.
There is also a plainer reason. Things you have read and then seen tend to stick, because you meet the same idea twice in two different shapes and your brain has to do a little work to reconcile them. Watching alone feels like learning and often is not. So read this once, watch two or three of the videos, then keep the checklist near the bottom open on your phone at the wheel.
Throwing a chuck, in nine steps
Throwing a chuck, in six steps
This is a four minute job with reclaim, and it is the version we would suggest you learn first. It gets thrown, it gets used once, and it goes back in the bucket. Nothing about it is precious, which is exactly why it is a good place to practice.
Four minutes with reclaim. Throw it, use it once, put it back in the bucket.
- 1
Take four to six pounds of reclaim
It never gets fired, so it does not matter what is in the bucket or what color it is. Wedge it properly anyway. A chuck with an air pocket or a hard lump in it will not center, and a chuck that does not center hands its wobble straight to your pot.
- 2
Slam it down and seal the edge
Wheel head or bat, either is fine. Throw it down hard enough that it sticks, then run a thumb around the bottom edge to seal it. A chuck that lifts halfway through a trim is worse than no chuck at all, because by then there is a pot balanced on it.
- 3
Center it low and wide
Cone up and down twice and finish it as a broad dome rather than a tower. The footprint you leave now is the ballast you get later, and nearly every chuck that fails in use failed because it was thrown tall and narrow.
- 4
Open it all the way down
A chuck does not need a floor. Open until you can almost see the bat through it, leaving about a quarter inch, then open outward until the inside is roughly the diameter you want. Going right through means less clay, less weight and no water pooling in the bottom while you work.
- 5
Pull thick walls, twice
Half an inch of wall is fine and heavier is better. Two pulls is plenty. You are making a stand, not a pot, and thin elegant walls are the last thing you want under something that is about to get pushed sideways by a trimming tool.
- 6
Keep the base wider than the top
Let it flare out slightly at the bottom, like a lampshade upside down. Straight is acceptable. Narrow at the base is not, ever, no matter how good it looks.
- 7
Set the opening with calipers
Measure the pot across the point where you want it to rest, which is usually just below the shoulder, then make the chuck opening a little smaller than that. About a quarter inch narrower than the pot is right, which leaves an eighth of an inch of overlap on every side. Too wide and the pot drops through. Far too tight and it wedges, and the neck cracks on the way back out.
- 8
Level the rim and soften it
Hold a needle tool against the turning rim to take the ragged bit off, then sponge it smooth and slightly rounded. An unlevel chuck rim produces an unlevel foot ring, and you will not be able to work out why.
- 9
Stiffen it until it matches the pot
Hair dryer, three to five minutes, until the chuck is the same leather hard as the piece going into it. A heat gun is quicker, but ask an instructor before you reach for one. Two things in the same condition do not mark each other. This is the step people skip and it is the step that costs pots.
- 1
Four to six pounds of reclaim, wedged
Color does not matter, it never gets fired. Wedging does. A lump or an air pocket means it will not center.
- 2
Slam it on, seal the bottom edge
Thumb around the base. A chuck that lifts mid trim has a pot balanced on it.
- 3
Center it low and wide, then open right through
Cone twice, finish as a broad dome. Open until you nearly see the bat. A chuck needs no floor.
- 4
Two thick pulls, base wider than top
Half an inch of wall, flaring slightly at the bottom. Heavy is good. You are making a stand.
- 5
Caliper the opening a quarter inch under
Measure the pot where you want it to sit, just below the shoulder, and make the opening slightly smaller than that so it rests instead of dropping through.
- 6
Level the rim, then stiffen it to match
Needle tool the rim level, sponge it round. Hair dryer for three to five minutes until the chuck is the same leather hard as the pot. A heat gun is quicker, but ask an instructor first. Same stiffness, no bruises.
The two measurements that decide whether it works
How tall. Everything below the resting point has to hang in air. Measure from the pot’s shoulder down to its lip, add an inch, and that is your minimum wall height. A chuck that is too short lets the lip touch down, which is the one thing it was built to prevent.
How wide inside. The widest part of the pot below the resting point has to clear the inside wall of the chuck all the way down. It is easy to size the opening perfectly and then discover the belly is fouling the wall two inches lower.
Different makers leave their chucks at very different heights and thicknesses. Ignore the styling and watch two things in each of these: where the base is widest, and what they do to the rim before a pot goes anywhere near it.
Building a bisqued set
Once you have thrown a few, the obvious next move is to keep some. A bisqued chuck lives on a shelf, weighs almost nothing, lasts for years and turns a four minute setup into a thirty second one. Bisque firings here are free, every time, so a set of four costs you the clay and the drying.
What changes when you plan to keep it
- Throw the whole set in one sitting. Three or four in a range of openings, because you will not go back and make the missing size later. You will just wrestle a pot into the wrong one.
- Open the bottom as well as the top, at a slightly different diameter. Now it is a two sized tool: flip it over and you have another opening. This is the single best thing you can do for a chuck you intend to keep.
- Trim the outside neat when it hits leather hard, and soften every edge with a chamois or a wet finger. A sharp bisque edge will score a pot the first time you are careless.
- Write the opening size on the outside in underglaze before it goes in the kiln, or scratch it in while it is leather hard. Four unlabeled chucks on a shelf is four chucks you try in turn.
- Dry it slowly. A tall open cylinder with no floor is the easiest thing in the studio to warp. Loose plastic for the first couple of days, out of any draft, and never on a warm shelf.
- Bisque it to cone 05 and stop there. Never glaze a chuck. Glaze makes it slippery, it chips at the rim, and a chipped glazed edge will cut into leather hard clay.
| Size | Rough opening | What it holds |
|---|---|---|
| Small chuck | OpeningAbout 2 inches | HoldsBud vases, oil bottles, small bottles, anything narrow necked and light. |
| Medium chuck | OpeningAbout 3 to 4 inches | HoldsThe workhorse. Most bottles, gooseneck forms and small vases live here. |
| Large chuck | OpeningAbout 5 to 6 inches | HoldsBig vases, enclosed forms, moon jars, anything heavy enough that a narrow chuck would tip. |
| Cone chum | OpeningAbout 3 inches tall | HoldsMugs, cups, tumblers and anything whose rim went oval when a handle was pulled onto it. |
| Dome chum | OpeningAbout 6 to 8 inches across | HoldsBowls, wide forms, cut and scalloped rims, and shapes that rock on a flat wheel head. |
The one rule that surprises people
Soak a bisqued chuck before you use it. Bisque is thirsty. A bone dry chuck pulls the water straight out of the soft coil and the wads that are holding your pot, they let go, and the pot comes off the wheel while it is turning. Keep them in a bucket of water, or run one under the tap for a minute and let it sit while you set up. A wet bisque chuck also grips far better than a dry one.
Chums, and when a solid one is better
A chum is a chuck turned inside out. Instead of the pot dropping into a hole, the pot goes over a mound and the mound takes the weight on the inside of the wall. Everything you know about chucks still applies. Only the geometry flips.
Throw it like a very fat bottle
Center three or four pounds, open only an inch or two, and pull it up into a solid tapering cone with a wide flared foot. It stays solid through the middle, which is what makes it strong enough to carry a bowl. Leave the flank a smooth continuous curve, because that curve is the seat. Any ridge you leave on a chum prints itself into the inside of every pot you put on it.
Match the flank to the pot, not the pot to the flank
The pot should touch the chum in a continuous ring, not on one high point. If you are making a chum for a shape you throw often, put the leather hard pot over it and adjust the chum until they meet all the way round. A soft coil pressed onto the chum and then trued on the wheel does the same job in thirty seconds for a one off.
Where it beats a chuck outright
Anything with a rim you have altered. Cut rims, scalloped rims, pinched or faceted rims, and any bowl wide enough that its edge overhangs the wheel head. A chuck cannot help those, because the problem is not the size of the opening. The problem is that the rim is not a flat circle any more.
Where it beats a chuck quietly
A chum will round a rim back out. Leather hard clay is still slightly persuadable, so a mug rim pulled oval by a handle will come back true when it is pushed down over a properly round chum. That is a real reason to own one even if you never trim a bowl.
The mistake to avoid
Do not push a pot down onto a chum until it stops. Push it until it seats, which is earlier. A pot forced onto a cone gets a stretched rim and sometimes a crack running down from it, and the crack does not show up until the bisque firing. It should feel like the pot found its place, not like you made it fit.
Chucks that are not clay
Clay is the best material for this and it is free, so it is what we would reach for. But the job is only holding a pot still and level, and several other things do that. Some of them are better for particular shapes.
Dense foam
A slab of upholstery foam or a foam bat. The pot presses in and the foam takes the shape, which makes it the kindest thing you can put a delicate or uneven rim against. It cannot be centered precisely, so you center the pot on top of it instead. Best for wide bowls and platters.
A short length of pipe or tube
PVC offcut or a stiff cardboard tube, stuck down to a bat with coils. Costs nothing, works if it is genuinely round, and is worth having if you throw the same size bottle over and over. Pad the top edge with a coil, always. A cut pipe edge is sharper than bisque.
A bucket or tub, rim down
For pots too big for anything else. Turn a stiff plastic bucket upside down on the wheel head and hold it with wads. It is hard to center and it flexes, so it is a last resort rather than a plan, but for a very large vase it beats the alternatives.
A rolled towel or a foam ring
An emergency donut. Fine for holding a pot steady while you clean a foot by hand, and genuinely not fine for trimming on a spinning wheel, because it compresses unevenly and the pot walks. We are listing it so you know why it feels wrong when you try it.
A grip system on the wheel head
Sliding arms that grab a pot and hold it down flat. Different tool, different problem. It solves centering and holding for a pot that can already stand on its own rim. It does nothing for a pot that has no rim to stand on, which is exactly what a chuck is for. The two are complements, not rivals.
Another pot
A bisqued cylinder from your own shelf, if the diameter happens to be right. Wad it down, coil the rim, treat it exactly like a bisqued chuck and soak it first. Plenty of studio chucks started life as something else that did not sell.
Setting one up, in nine steps
Setting one up, in seven steps
This is the part that decides whether the pot comes out right, and it is almost entirely done before you pick up a trimming tool. Rushing the setup to get to the cutting is the single most common way a chuck job goes wrong.
Almost all of the work happens before you pick up a tool. Rushing this part is how chuck jobs go wrong.
- 1
Center the chuck, or leave it alone
If you threw it two minutes ago it is already centered, so do not lift it, do not adjust it, do not tidy it. If it is bisque, set it down by eye, start the wheel slow and tap center it exactly the way you tap center a lump of clay: hold your hand still and let the high side come to you.
- 2
Wad the chuck down
Three or four soft lumps of clay pressed against the outside of the base, evenly spaced. Water suction alone is not enough once a tool is pushing sideways, and a chuck that creeps a quarter turn mid trim will take your foot ring with it.
- 3
Feel the rim for level
Wheel slow, rest one finger lightly on the rim and let it turn under you. A dip you cannot see you can absolutely feel. Fix it now with a needle tool, because you will not be able to fix it once there is a pot on top.
- 4
Wet a bisqued chuck properly
Sponge it thoroughly, or soak it if it has been sitting on a shelf. Dry bisque drinks the water out of your coil and your wads within a minute or two, and then nothing is holding anything.
- 5
Put a soft coil on the rim
Only for bisque or any other hard rim. Press a pencil thick coil around the top, then true it with a wet finger while the wheel turns so it is level and round. That coil is a gasket. It stops a hard edge printing a ring into soft clay and it grips far better than bare bisque.
- 6
Lower the pot in straight
Two hands on the widest part, straight down, no twisting on the way in. Let it find its seat and stop when it seats rather than when it stops. Twisting a pot into a snug chuck is how necks crack, and the crack usually shows up in the bisque firing rather than at the wheel.
- 7
Tap center the pot
Wheel slow. Brace your hand against something solid, hold it steady near the foot, and let the high side knock against it a little at a time. Do not grab and shove. This is the same skill as tap centering clay and it transfers directly.
- 8
Check it against a fixed point
Hold a pencil or the back of a needle tool steady, just off the foot, and watch the gap as it turns. A gap that opens and closes is your wobble, and a wobble the width of a pencil line becomes a foot ring that is thick on one side. Fix it before you cut, not after.
- 9
Wad the pot to the chuck
Three or four small wads bridging the pot and the chuck rim, evenly spaced and well clear of the area you are about to cut. They are not holding the pot up. Gravity is doing that. They are only stopping the pot from turning independently of the chuck.
- 1
Center the chuck and wad it down
Freshly thrown, it is already centered, so leave it. Bisque, tap center it like clay. Then three or four soft lumps against the base. Suction is not enough.
- 2
Feel the rim for level
Wheel slow, one finger resting on the rim. A dip you cannot see you can feel. Fix it now.
- 3
Wet it, then coil the rim
Bisque only. Sponge or soak it, press a pencil thick coil around the top and true it with a wet finger as it turns. The coil is a gasket against bruising.
- 4
Lower the pot straight down
Two hands on the widest part, no twisting. Stop when it seats, not when it stops. Forcing it cracks necks.
- 5
Tap center the pot
Slow wheel, hand braced and held still near the foot, let the high side come to you. Never grab and shove.
- 6
Check against a pencil
Hold it steady just off the foot and watch the gap. Opening and closing means wobble. Fix it before you cut.
- 7
Wad the pot to the chuck
Three or four small wads bridging pot and rim, clear of where you are cutting. They stop it turning. Gravity holds it up.
Holding the pot down
Almost every chuck disaster is a holding problem rather than a cutting problem. It is worth understanding what is actually keeping the pot where it is, because the answer is not what most people assume.
Gravity holds the pot down. The wads only stop it rotating. A trimming tool does not push a pot into the wheel, it pushes it sideways and around. So the failure you are guarding against is not the pot lifting off, it is the pot turning a few degrees while the chuck stays put. That is why three small wads work and why a big smear of clay is no better.
The soft coil
- Pencil thick, pressed all the way round the chuck rim, then trued with a wet finger while the wheel turns so it is level.
- Use it on every hard rim: bisque, pipe, another pot. Skip it on a freshly thrown leather hard chuck, where the two surfaces already match.
- If the pot has a distinct shoulder curve, shape the coil to that curve before you seat the pot. A coil that matches spreads the load over an inch instead of a line.
- Softer than the pot, always. A coil stiffer than the piece it is supporting is just a smaller hard rim.
The wads
- Three minimum, four is better, evenly spaced. Two lets the pot pivot between them.
- Soft, thumbnail sized, pressed onto both surfaces so they bridge the join. Firm them with a thumb rather than smearing them.
- Well clear of anything you are about to cut. Catching a wad with a loop tool jolts the whole pot.
- Peel them off with a wooden tool afterwards, not a fingernail, and clean up before the residue goes stiff.
Things people try that do not work
Tape. It grips leather hard clay well enough to lift the surface off when you remove it, and it leaves a mark you find at glazing.
One big ring of clay. It looks secure and it is much harder to remove cleanly. Small wads come off without argument.
Extra water. Slip on the join makes it slippery, not sticky, and it softens the exact ring of clay that is carrying the weight.
What changes at the wheel
Trimming on a chuck is normal trimming with a shorter safety margin. The pot is higher, it is heavier at the top than the bottom, and it is standing on something rather than stuck down. Eight things follow from that.
Normal trimming, shorter safety margin. The pot is higher, top heavy, and standing on something rather than stuck down.
- Run the wheel slower than you would normally. A pot sitting four inches up amplifies every bit of runout, and the whole assembly has more to throw around.
- Take smaller cuts. A tool that grabs on a pot stuck to a wheel head makes a bad line. A tool that grabs on a pot sitting in a chuck can launch it.
- Brace against the chuck, not the pot. Your steadying hand belongs low, on the chuck or the wheel head. Leaning on the pot to hold it still is pushing on the thing you are trying not to move.
- Cut downward and inward wherever you can, so the force is pressing the pot into its seat rather than trying to lift it out.
- Measure the floor early with a needle tool. You cannot judge thickness by feel the way you can on a pot flat on the wheel, and there is a lot of unsupported clay under your tool.
- Stop and re-check after the first pass. If it was going to shift, that is when it shifts, and that is the cheapest moment to find out.
- Keep a hand near it the whole time, shadowing the pot without touching it. Not a superstition. It is the difference between a catch and a broken pot.
- Lift it out straight up, by the belly. Never by the neck, never by the rim, never with a twist. Wheel stopped, wads peeled off first.
- Slower wheel, smaller cuts. A grab that would leave a bad line on the wheel head can launch a pot out of a chuck.
- Brace low, on the chuck. Leaning on the pot is pushing the thing you are trying to hold still.
- Cut downward and inward, so the force presses the pot into its seat instead of lifting it out.
- Needle tool the floor early. You cannot judge thickness by feel with the pot up in the air.
- Lift it out straight up, by the belly, wheel stopped and wads off. Never by the neck.
Everything else about trimming is unchanged, and if the basics are shaky the chuck will not rescue them. The full walk through of tools, clay state and foot rings lives on the trimming and turning page.
When it goes wrong
Three ways it goes wrong tonight
Seven things that actually happen, what causes each one, and what to do differently next time. Pick the one that matches what you are looking at.
The three failures a first chuck almost always produces, and the fix for each.
The pot flew out of the chuck
Almost always a dry bisque chuck. Bisque pulls the water out of the coil and the wads within a couple of minutes, everything lets go, and the first firm cut sends the pot off the wheel. Soak the chuck, or at minimum sponge it thoroughly and re-wet it if you have been set up for a while.
The other two causes are no wads at all, and cutting too hard. If it happened on the very first pass, it was the wads. If it happened ten minutes in, it was the chuck drying out.
A ring is bruised into the shoulder
Hard rim against soft pot. A bisque or pipe edge with no coil on it presses a line into leather hard clay, and because you are looking at the foot rather than the shoulder you do not see it until the pot comes out. Sometimes you do not see it until it is glazed and the ring shows as a change in the surface.
Put a soft coil on any hard rim, every time. If it is already bruised, a rib and a damp sponge will usually take a light ring out while the pot is still leather hard. Also consider that the pot may simply have been too soft. Another hour of stiffening solves a surprising number of chuck problems.
The foot ring came out lopsided
Something in the stack was not centered or not level, and you have three candidates. Check them in this order: is the chuck rim level, is the chuck centered, is the pot centered in the chuck. People almost always blame the last one and it is often the first.
Next time, feel the chuck rim with a finger before the pot goes on, then check the pot against a held pencil before you cut. A wobble you can only just see is a foot ring that is visibly thicker on one side.
The neck cracked
The pot went in or came out with a twist, or the opening was too tight. A neck is thin and it is the lever arm for the whole weight of the belly. Twisting a pot into a snug chuck loads it in exactly the direction it is weakest.
Make the opening a quarter inch smaller than the pot rather than a hair smaller. Lower straight down, lift straight up, and always hold the belly rather than the neck. If the crack is fine and the pot is still leather hard, score it, work slip in and compress it firmly with a rib. That works more often than people expect, though it is never as strong as uncracked clay.
The chuck itself rocks or creeps
Base too narrow, not enough wads, or a bad seal. A chuck thrown tall and elegant is a chuck that will rock. The base needs to be the widest part, and it needs three or four wads pressed against it even when it feels stuck down.
If it creeps rather than rocks, it is turning a little against the wheel head, which means suction was doing the work and the tool overcame it. More wads. If it rocks, throw the next one shorter and wider and stop admiring the profile.
Chatter marks all over the foot
The tool is bouncing, and a pot up on a chuck bounces more readily than one flat on the wheel. Three causes, usually together: the wheel is too fast, the tool is blunt, and the pot has a little wobble that is feeding the bounce.
Slow the wheel down, sharpen or swap the tool, take a lighter cut and brace your hand against the chuck rather than holding it in mid air. If the pot is drier than proper leather hard, chatter gets much worse and there is not much you can do about it at that point.
The pot is stuck in the chuck
Usually a leather hard chuck that stiffened while you worked and gripped the pot, or an opening that was slightly too tight and got wedged on the way in. Do not twist and do not pull on the neck.
Peel the wads first. Then, if it is a thrown chuck, cut the chuck away: a wire or a knife through the chuck wall costs you four minutes of reclaim and saves the pot. That is the real advantage of the throwaway version, and it is a good argument for using one whenever a piece is genuinely valuable to you.
The pot flew out
The bisque chuck was dry. It drank the water out of your coil and wads and everything let go. Soak the chuck before you use it, and put three or four wads on even when it feels secure.
A ring bruised into the shoulder
A hard rim with no coil on it, or a pot that was still too soft. Coil every hard rim, and give a soft pot another hour before you trim it.
The foot ring came out lopsided
Something in the stack was off. Check in this order: chuck rim level, chuck centered, pot centered. Most people blame the last one and it is usually the first.
Looking after them
- Store bisqued chucks wet. A bucket of water is ideal. Failing that, soak one for a minute before every use and accept that a dry chuck is a chuck that will drop your pot.
- Clean the rim before you put it away. Dried wads and coil remnants go rock hard, and the next person to pick it up gets a rim that is neither level nor smooth.
- Never glaze one. Slippery, chips at the edge, and a chipped glazed rim cuts into leather hard clay.
- Retire a cracked one. A crack that goes all the way through the wall will open under load, and it will do it with a pot on top. It is four minutes to throw another.
- Reclaim a thrown chuck the same day. Cut it off, throw it in the bucket, and do not develop a relationship with it. Treating a wet chuck as disposable is what lets you cut it apart when a pot gets stuck.
- Sand a rough bisque rim. A quick pass with a diamond pad or a piece of sandpaper, wet, takes the bite off an edge that has been chipped. Do it away from where people are working and rinse it afterwards.
On the studio’s chucks
There are some pre-made chucks here to borrow, and there is always reclaim to throw your own. Soak whichever one you take before you use it, put the coil on, and put it back on the shelf clean. Bisque firings are free, so if you throw a set worth keeping, firing them costs you nothing.
The phone checklist
Everything above, as short as it goes. Leave it up while you work, or tap the button underneath to copy it into your notes.
- Four to six pounds of reclaim, wedged.
- Slam it down. Seal the bottom edge.
- Center low and wide. Cone twice.
- Open right through. No floor needed.
- Two thick pulls. Half inch walls.
- Base wider than the top. Always.
- Caliper the opening a quarter inch under.
- Tall enough that the lip hangs free.
- Needle tool the rim level. Sponge it round.
- Hair dryer until it matches the pot.
- Just thrown, leave it. Bisque, tap center it.
- Soak a bisque chuck. Dry bisque drops pots.
- Three or four wads against the base.
- Finger on the rim. Feel for level.
- Soft coil on any hard rim. True it.
- Lower the pot straight down. No twist.
- Stop when it seats, not when it stops.
- Tap center it. Hand still, let it come to you.
- Check against a held pencil before cutting.
- Wads bridging pot and rim, clear of the cut.
- Slower wheel than usual.
- Smaller cuts. A grab can launch it.
- Brace low, on the chuck.
- Cut downward and inward.
- Needle tool the floor early.
- Stop and re-check after the first pass.
- Keep a hand shadowing the pot.
- Wheel stopped, wads off, then lift.
- Lift straight up by the belly, never the neck.
- Stuck pot? Cut the chuck off. It is reclaim.
The things people ask at the wheel
Do I have to bisque a chuck, or can I just throw one every time?
You never have to bisque one. Plenty of very good potters throw a fresh chuck for every job and reclaim it afterwards, and there are two real advantages to working that way: a leather hard chuck matches the pot exactly so it cannot bruise anything, and if a pot gets stuck you can cut the chuck off it. Bisqued chucks are about saving time, not about doing it properly.
How dry should the pot be before it goes in a chuck?
Proper leather hard, and if anything slightly on the firm side of it. Too soft and the shoulder takes a print from the chuck rim and the walls flex under the tool. Too dry and you get chatter, chips at the foot and a tool that skips rather than cuts. Press a thumbnail into the shoulder: it should mark without going in easily.
Will a chuck mark my pot?
Only if the chuck is harder than the pot and there is nothing between them. A freshly thrown chuck at the same stiffness will not mark anything. A bisque chuck with no coil on it usually will. That is the entire job of the soft coil, and it takes about twenty seconds to put on.
Can I trim a mug that already has a handle attached?
Yes, and a chum is usually the right answer. Put the mug over the chum so the handle hangs clear on the outside, well away from the wheel head. As a bonus, a round chum will push a rim that went oval when you pulled the handle back into a circle while you work.
How long does a wet chuck last?
One session, comfortably. Wrapped loosely in plastic it will hold for a couple of days, though it stiffens as it sits and eventually it is harder than the pots you want to put on it. At that point it is reclaim. There is no reason to nurse one along.
My chuck opening came out too big. Can I fix it?
While it is still wet, yes. Collar the top in with wet hands and a slow wheel, exactly as you would on a pot. If it has stiffened past that, add a thick coil around the inside of the rim, weld it in and true it. If it is bisque and too big, the coil trick is the only option, and it works better than it sounds.
Is a chuck the same thing as a grip system on the wheel head?
No, and they solve different problems. A grip system centers and clamps a pot that can already stand on its own rim, which saves time on ordinary work. A chuck exists for pots that cannot stand on their rim at all. If you have both available, you will still reach for a chuck for every bottle you make.
Can I use a chuck for anything other than trimming?
Yes. A chuck is a good stand for carving, sgraffito, adding sprigs, attaching handles to an awkward form, and holding a narrow necked pot steady while you glaze the outside of it. Any time you want a pot held upright and still without gripping it, a chuck does the job.
Where to go from here
It is four minutes of clay
Go and throw one
Most people put off making a chuck for months, throw one, and then wonder what they were avoiding. It is a lump of reclaim, two pulls and a level rim. The whole thing is over before the pot you are trying to trim has stiffened another degree, and every awkward shape you have been quietly not making becomes available to you.
A lump of reclaim, two pulls and a level rim. It is over before the pot you are trying to trim has stiffened another degree.
Throw one tonight, even if you have nothing that needs it. Get the shape into your hands while there is nothing at stake, and the first time you do have a bottle that will not stand up, it will be a five minute detour instead of a lost pot.
There is a much longer version of this page with ten videos, a diagram, a sizing table and seven things that go wrong. The toggle at the top switches to it whenever you want it.
Part of Clay Hole University. If something here does not match what you were shown at the wheel, ask whoever showed you, then tell us so we can fix the page.