
 Pottery Date Night
 Bring All Your Friends Free Week
 Give a Month of Pottery
 Private Pottery Parties


 The Welcome Booklet
 Your First Ten Sessions
 The Pottery Process
 Finding the Studio
 Your Classes Never Expire
 The Four Tables
 Who’s Who
 The Rewards Program

 Flux Glazes
 The Calculators
 Kiln Tracker
 Holiday Kiln Deadlines


 Beginner’s Tool Set
 Fingernail Clippers
 Mayco Clay Mender
 Epoxy for Kintsugi
 Applicator Bottles
 Large Bead Rack

 Raku Workshop
 Nighttime Raku
 Horsehair and Feather Raku

 The Clay Hole T-Shirt
 Embroidered Crewneck
 Zip-Up Hoodie
 Pre-Made Bisqueware
 Glaze Catchers
 Kiln Cookies
 Clay Cubby Rental

 The Glaze Bible, Printed
 The Book of Molds, Printed
 Printable Pottery Guides
 Free Printable Trackers

 Gifts for Potters
 Christmas Pottery Ideas
 Mother’s Day Gift Ideas
 Pottery Date Night

 Studio Calendar
 2027 Studio Events
 What Should I Do Today?

 How to Throw on the Pottery Wheel
 How to Make a Pinch Pot
 How to Tap Center a Pot
 The Five Stages of Clay

 Is Pottery Hard to Learn?
 Pottery Wheel Practice Drills
 20 Easy Hand-Building Projects
 Everything That Sounds Wrong


 A Beautiful Piece, Every Time
 Slab Roller Tips
 Any Dish as a Slump Mold
 Slab Roller & Slab Mold Certification

 The Pottery Skill Tree
 Clay & Pottery Calculators
 Logging Your Pottery and Glazes

 The Pottery Dictionary
 Why Did My Pottery Do That?
 The Pottery Cone Chart
 Pottery Myths, Fact-Checked
 Is Handmade Pottery Food Safe?

 Incredible Ceramic Artist Videos
 How Dan Throws Giant Pots
 How to Dry Your Pottery
 The Pottery Wheel Introduction

 Pottery by Zodiac Sign
 Personality and the Pottery Wheel
 Pottery for Engineers
 ADHD, Hyperfocus, and Never Running Out
 Hobbies for Burnout
 Screen-Free Hobbies for Adults
 Every Addiction I Ever Had Lost to Art
 Functional Pottery Is Engineering

 How Do We Compare?
 Pottery Classes by City
 Every Pottery Studio in Utah
 Pottery in Draper

 Featured Members
 The Signature Wall
 Making Friends as an Adult Is Brutal
 The Clay Hole Commandments

 2027 Pottery Contests
 2027 Studio Parties
 Gallery Night


 Scream It Into the Void
 Destroy the Glaze Wall
 Daily Affirmation Cards
 Everything That Can Go Wrong

 Subscribe to Our Newsletters
 Contact The Clay Hole

 Corporate Team Building


 Glaze Combinations
 Glazes We Do Not Carry
 Making Glaze Test Tiles

 The Mega Glaze Tool
 How to Use the Mega Glaze Tool


 Glaze Brushing Techniques
 How to Use Underglaze
 How to Use Dipping Glazes
 Glaze Problems, Causes and Fixes

 The Dipping Glaze Guide


 Making a Glaze Catcher
 Fused or Sharp After Firing

 The Signature Wall
 His Viral Videos
 His Own Ceramics
 Meet Mud
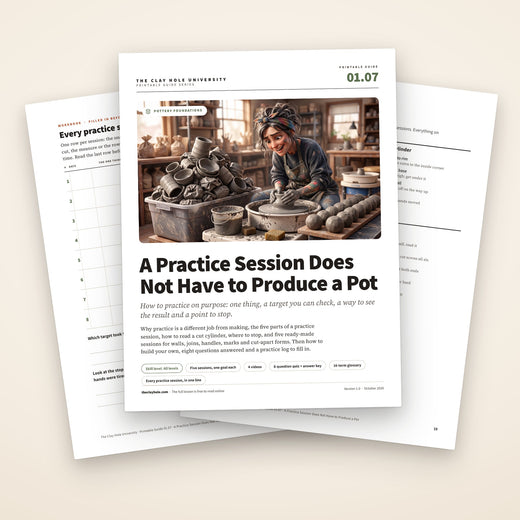
A Practice Session Does Not Have to Produce a Pot
A session that ends with nothing on your shelf can be the one that taught you the most, as long as it was built to teach. Here is how to build one: five practice sessions for walls, joins, handles, marks and cut-apart forms, each with one thing to learn, a way to see the result and a point where you stop.
Practice is a session built to teach one thing, not a pot you hope to keep. Pick one skill, decide what success looks like, cut or measure what you make so you can see it, and stop when you hit the target or your hands are spent.

Jump to a section
A practice session is for information, not for pots
A pot you mean to keep makes you careful, and careful is the opposite of what practice needs. A pot you mean to cut in half can be pushed until you find out exactly where your hands stop working.
The useful part is hidden inside the clay. Wall thickness, the floor, whether a join really welded: a finished pot hides all of it. Cut it open and you see what your hands did while they still remember doing it.
This is not the same as being relaxed about failing. Failing teaches nothing on its own. A session teaches when every attempt is aimed at one target and checked against it, so the next attempt can change one thing on purpose.
How to run a practice session
Five parts, decided before the clay comes out of the bag.
- Pick one thing. Pulling walls, or joins, or handles. One skill, and one change you are trying within it.
- Name a target you can check. “An even wall from base to rim in three pulls” can be checked. “Better walls” cannot.
- See every result. Cut it in half, cut across the join, lay the handles side by side. A result you cannot see teaches nothing.
- Set the stopping point first. The target met three times running, or the clay you set aside is used up, or your hands are tired. Whichever comes first.
- Write one line before you leave. What you changed, what happened, what to try next time.
New moves belong in a class
Learn a move in a class, where an instructor can show you, then practice it at open studio time. In a class, ask an instructor to watch one attempt and name the one thing to work on. That one thing is your next session.
Five sessions at a glance
Each one has a goal, a way to see the result and a point where you stop. Nothing from any of them needs to be kept.
The wall
Five or six one pound balls. Center, open, three pulls, then wire each cylinder in half from rim to base and read the wall against the drawing below. Stop after three even sections in a row.
The join
Six joins between leather hard slab pieces: four done with every step, two with one step left out on purpose. Cut across each one. Stop when you can tell the two shortcuts apart by the cut face alone.
The handle
Pull five or six handles off one carrot, lay them side by side and cut each through at both ends. Stop when five in a row match in length, width and curve, or after two carrots.
The mark
One tool, a row of small tiles, one mark at each stage from soft to dry leather hard. Look at them in light from the side. Stop when the row is complete, before bone dry.
The cut-apart form
Make the form you are working on, guess what its section looks like, then cut it and compare. Stop when your guess matches the cut twice in a row.
Then make something
Practice while you are fresh, then spend the rest of the session on a piece you want. If one practice piece comes out lovely, keep it. Keeping is allowed. It is just not the measure.
Practice is a different job from making
Making a pot and getting better at making pots pull in opposite directions more often than people expect. Six reasons, and every session further down is built on them.
- A keeper makes you careful. The moment a cylinder looks good, the instinct is to protect it: stop pulling, stop pushing, get it off the wheel. That is the right instinct for a pot and the wrong one for practice, because the edge of what you can do is exactly where the learning is.
- The useful information is inside the clay. Wall thickness from base to rim, the floor, the corner where they meet, whether a join actually welded. A finished pot shows you its outside and hides all of that. Cutting it open is the only way to see it.
- A kept pot answers late. It answers weeks later, after drying, a bisque and a glaze firing, when you no longer remember what your hands did. A cut cylinder answers in ten seconds, while the pull is still in your fingers.
- One result is not a pattern. A single good pot can be luck. Five sections in a row that look the same are a skill. Practice is built for repetition you can compare, which a pot you intend to keep rarely gives you.
- Unfired clay is never wasted. Until it has been through a kiln, it can always become clay again. A practice session spends a few pounds of clay and some time, and neither is wasted if the session taught you something.
- Every piece you keep costs a firing. It goes through a bisque and a glaze firing, and the glaze firing is charged by size. Keep the pieces that earned it and let the rest go back where they came from.
The sentence worth keeping
A practice session is judged by what you can do on the next one, not by what ends up on your shelf.
Deliberate, not just more
“Make lots and expect most of it to collapse” is half an idea. The other half is what makes a collapsed cylinder worth something.
Plenty of advice about getting better at pottery stops at permission: make lots, expect most of it to collapse, do not take it personally. Dan's letter Let Yourself Be Bad at Something Again is the case for that permission, and it is a good one. This page is about what to do once you have it.
A collapsed cylinder you squash without looking at teaches you very little. The same collapse, cut in half and read, tells you where the wall went thin and which pull did it. The difference is not how relaxed you were. It is whether the attempt was set up to tell you something.
The psychologist Anders Ericsson, who studied how experts get that way, called this deliberate practice: activities designed, usually by a teacher, to improve one specific part of what you do, with a clear goal and quick, informative feedback. In a 2016 paper he argued that adding up hours of any kind of practice misses the point. What matters is which practice you do.
The ceramics class story, and what it really was
The book Art & Fear (1993) tells of a ceramics teacher who graded half a class on how many pots they made and half on one perfect pot. The best pots came from the quantity half. Co-author Ted Orland later said the story was true, told with some literary license: it was Jerry Uelsmann's photography class, and the book swapped in ceramics.
The point survives the swap. In the story, the quantity group did not win by making a pile. They won because every piece told them something they used on the next one, which is the whole of this page in one sentence.
The five parts of a practice session
Every session on this page has the same five parts. Decide all five before the clay comes out of the bag, and any session you invent yourself will work the same way.
- One thing. One skill, and within it one change you are trying: starting the first pull lower, slipping both faces of a join, rotating the handle carrot more often. Change two things at once and you cannot tell which one did the work.
- A target you can check. A number, a measurement or a look you can compare against. If you cannot tell whether you hit it, it is a wish rather than a target. The table below turns the usual vague goals into checkable ones.
- A way to see the result. Cut it in half, cut across the join, measure it, lay the pieces in a row. In pottery the result is usually hidden inside the clay, so this part is often a wire or a knife.
- A stopping point, chosen before you start. The target met three times running, or a cap you set (six balls, two carrots, forty minutes), or tired hands. Whichever comes first. Where a practice session ends, further down, says why each one matters.
- One line, written down. What you changed, what you saw, what you will try next time. A phone note is enough, and so is one of the free printable trackers. Next session starts by reading it.
| The vague goal | A target you can check | How you check it |
|---|---|---|
| Better walls | An even wall from base to rim in three pulls | Wire the cylinder in half and look |
| Stronger joins | No line where the two pieces met | Cut straight across the join |
| Nicer handles | Five handles the same length, width and curve | Lay them side by side on a board |
| Cleaner carving | A crisp line with no smeared or chipped edge | Light from the side, across the tile |
| Faster centering | Five lumps centered, each in under a minute | A timer and the fingertip test |
In a class, or at open studio time
A new move belongs in a class, where an instructor can show you how it goes. Practice of a move you have already been shown can happen in a class or at open studio time. Ericsson's version of deliberate practice has a teacher designing it, and a class is where you get that: ask an instructor to watch one attempt and name the one thing to work on. That one thing is your next practice session.
How to read a cut cylinder
Stop the wheel, pull your cut-off wire straight down through the middle from rim to wheel head, and ease the halves apart. The cut face is a drawing of everything your hands did. These are the four you will see most.

- Even from base to rim. The target. Both walls the same thickness all the way up, a little extra only in the inside corner, and a rim no thinner than the wall just under it.
- Floor as thick as the wall base. Flat, compressed, and about as thick as the bottom of the wall. Leave it a little thicker if you plan to trim a foot ring into it.
- Heavy ring left at the base. The pulls started above the clay at the bottom, so that ring never came up. Get your fingers under it at the very base of the wall before you start to climb.
- Heavy rim over a thin wall. The bottom was thinned and the top was not, usually a squeeze that eased off on the way up. This is the shape that folds over. Keep the pressure steady through the middle of the pull.
- One side thicker than the other. The clay was off center when you opened it, or the gap between your hands moved during the pull. Anchor your elbows and check the centering with a fingertip before you open the next one.
Where a practice session ends
A session without an end turns into an evening of making the same mistake with more confidence. Set three stops before you start, and end at whichever arrives first.
The target, met three times running
Once is luck and twice is promising. Three in a row means your hands can do it today. Stop there and either raise the target or change the thing you are practicing.
The real test comes next visit: can you hit it cold, on the first try? If so, it has stuck.
The cap you set
Six balls of clay. Two handle carrots. Forty minutes, then the rest of the session for a piece you want. A cap keeps practice from swallowing a whole visit, and it makes each attempt count, because there are only so many of them.
Your hands, or your attention
Stop when your hands are tired, when three attempts in a row get worse, or when you can no longer say why the last one went wrong. Practice past any of those mostly rehearses the mistake.
The hands part has evidence behind it: in a 2019 lab study, people who practiced a precise finger pinch skill with a tired hand learned it worse, and were still behind the next day, rested. A pinch task is not a pot, and the lesson carries.
The wall session
The goal: an even wall from base to rim in three pulls, seen in section, three times running.
What you need. Five or six one pound balls of the same clay, wedged and made up before you sit down, your cut-off wire, a ruler and a sponge. Same weight every time, so the only thing changing between cylinders is you.
- Choose the one change. Read last session's line, or pick one from the drawing above: starting the first pull lower, keeping the outside hand under the inside one, or slowing the wheel to about half of centering speed.
- Center, open and set the floor. Do it the way you always do. This session is about the wall, so do not experiment down here.
- Pull three times, no more. Every pass adds water and takes strength out of the wall. Height you did not get in three pulls is information too.
- Measure the height. Hold the ruler against the outside, then stop the wheel and wire the cylinder in half from rim to wheel head.
- Read the cut face against the drawing. Find where it is thickest and where it is thinnest, and whether the floor is about as thick as the bottom of the wall.
- Say the one change for the next ball. Say it before you squash this one, then do exactly that, and nothing else.
Stop when
Three cut sections in a row look like the even one in the drawing, or the balls run out. If you hit the target early, the next variable is height: the same even wall, a little taller, still in three pulls.
What to keep. Nothing. The halves are too wet to wedge straight back in, so they go to scrap with the rest of the session's trimmings, by the routine on the clean-up page. For the move itself, Pulling Walls Without a Collapse has the hand positions, and The Wheel Practice Plan has thirty more wheel drills built the same way.
The join session
The goal: a join you cannot find, even when you cut straight through it.
What you need. A slab about a quarter inch thick, cut into a dozen rectangles about the size of a business card. Make them a visit ahead and bag them the way you would bag a pot you plan to trim next visit, then start when the thumbnail test says leather hard. Also: a needle tool or serrated rib, a little slip made from the same clay, a brush, a wooden tool and a sharp knife.
- Make four joins with every step. Stand one rectangle on the edge of another to make an L. Score both faces, slip both faces, press until a bead squeezes out all the way round, blend until the seam is gone. The full method is in Scoring and Slipping a Join.
- Make two with one step left out, on purpose. One slipped on one face only, one never blended. Scratch what you skipped on the underside with the needle tool.
- Cut straight across every join. Use the knife in one clean stroke, so the cut face shows both pieces and the place they met.
- Read each face. Look for a line, a gap or a pocket of air where the two pieces met. Run a fingernail across the cut. Then turn the pieces over and check your guesses against what you scratched underneath.
- Make two more full joins for each line you found. For every one of the four that still showed a line, make two more, changing the step you think was weak.
Stop when
You can tell your two shortcut joins from the full ones by the cut face alone, and three full joins in a row show no line at all. Or when the rectangles run out.
What to keep. Nothing. The session's value is that the next handle, slab seam or foot ring you attach is one you have already seen the inside of. To carry it straight into real work, attach two pulled handles to a leather hard practice cylinder and cut through both joins.
The handle session
The goal: handles that match each other in length, width and curve, with an oval section that tapers.
What you need. About a pound of wedged clay shaped into a fat carrot, a bowl of water, a board and a knife.
- Pull five or six handles off the one carrot. Rotate the carrot a quarter turn every few strokes so the section stays oval instead of going flat. How to Pull Handles has the hand positions.
- Lay them on the board in the order you pulled them. Side by side, the same way up.
- Cut each one through near both ends. Look at the two sections. An oval that gets smaller toward the tip is a taper. A flat ribbon with sharp edges means the carrot was not turning.
- Pick the best one and say why. Use one specific sentence: longer taper, fuller curve, rounder section. “It looks nicer” carries no instructions.
- Pull the next carrot, changing one thing. Take the change from that sentence, and lay the new handles under the first row so you can compare the rows.
Stop when
Five in a row match in length, width and curve closely enough that you could not pick the odd one out from a step back. Or after two carrots, whichever comes first.
What to keep. Only if leather hard mugs are waiting on your shelf: then let the best two stiffen and attach them. Otherwise every handle goes back, and the session still did its job.
The mark session
The goal: know, by feel, when one tool makes the mark you want.
What you need. A slab cut into six or eight small tiles, about three inches square, and one tool: a loop tool, a stamp, a needle tool, whatever you are trying to get good with. One tool per session, or you will not know which one taught you what.
- Mark the first tile straight away. The clay is still soft, so scratch “soft” on the back.
- Leave the rest uncovered. Mark one tile each time the clay moves on a stage: soft leather hard, mid leather hard, dry leather hard. Use the thumbnail test from Carving and Sgraffito to name each stage, and write it on the back.
- Let the crumbs firm up. Give them a few minutes before you brush them, so they flick away instead of smearing into the mark.
- Line the tiles up in order. Look at them with light coming from the side. Too soft gives a fat, blurry line with clay pushed ahead of the tool. The window gives a crisp one. Too dry chips at the edges.
- Write down the stage you liked. Add what the clay felt like under your thumbnail at that stage. That feel is what you are taking home.
Stop when
The row runs from soft to dry leather hard for one tool. Stop before bone dry: bone dry clay chips rather than cuts, and carving it makes silica dust. A row can take a long visit, or two with the tiles bagged between them.
What to keep. One tile, if seeing a glaze over the marks would teach you something, since a glaze sits differently in a carved line than on a flat surface. Like every glazed piece, it fires on a kiln cookie. The rest are scrap.
The cut-apart session
The goal: know what the inside of a form looks like before you cut it, from what your hands felt.
What you need. Clay for three or four of whatever form you are working on, your wire and a knife. This session works on the wheel and at the tables.
- Make the form the way you normally would. A bowl, a mug body, a pinch pot, a coil wall. Stop at the stage you want to check: after opening, after the first pull, after shaping.
- Guess the section first. Before the wire touches it, say out loud or write down where it is thickest, where it is thinnest and how thick the floor is.
- Cut it through the middle. On the wheel, wire it from rim to wheel head. At the tables, slice a pinch pot through its center, or cut across a coil wall to see whether the coils really blended inside.
- Compare the cut with your guess. Where you were wrong is where your hands were telling you something you did not hear yet.
- Make the next one. Change one thing, guess again, cut again.
Stop when
Your guess matches the cut twice in a row. At that point your fingers have learned to read the wall without the wire, which was the whole aim.
What to keep. Nothing from this session. For trimming, the same idea works at leather hard: cut one bowl through before you trim it and you will see exactly how much clay the trim has to take, which is the part of that video worth pausing on.
Build your own practice session
The five sessions above are examples of one method. Anything you are trying to get better at can be practiced the same way.
- Fill in the five parts before you start. The one thing. The target you can check. How you will see the result. Where you will stop. The line you will write. If one of them is blank, the session is not ready yet.
- Mix it up once it works. When you can hit a target every time with one weight or one size, practice the variations in a shuffled order instead of in blocks: a one, three and two pound ball rather than three ones, then three twos. In a 1979 study of movement skills, people who practiced in blocks looked better during practice, and people who mixed them up remembered the skill better ten days later and did better on a new, harder version. Mixed practice feels worse while you do it. That is part of how it works.
- Practice first, make second. Your hands are freshest at the start of a session. Spend that on the practice, then give the rest of the visit to a piece you actually want, and notice whether the practice shows up in it.
- Practice what your last pot told you. A 12-Point Method to Critique Your Own Pottery asks one question of every finished pot: if you made ten more of it, what one thing would you change. The answer is a practice session already written.
- Keep the line from every session. Read the last one before you start. Over a few months those lines are the clearest record you will have of how you got better, and of which changes actually worked.
When you keep making the same mistake
Stop practicing it for the day. Repetition without new information mostly grooves the mistake in deeper. Read the lesson for that move, watch someone do it, or bring it to a class and ask an instructor to watch one attempt. Then practice the one thing they name.
The ones that come up at the wheel
Is cutting good pots in half a waste of clay?
No. Until clay has been fired it can always become clay again, so nothing is lost but a few pounds from your bag. What a practice session really spends is time, and it spends it on information you cannot get any other way.
Should I practice in a class or at open studio time?
Both, for different things. Learn a new move in a class, where an instructor can show you. Practice a move you have already been shown at either. A class is also where to get your next one thing: ask an instructor to watch a single attempt and name it.
How long should a practice session be?
As long as it takes to hit the target three times running, or until the cap you set or your hands run out. A good default is twenty minutes to an hour, with the rest of the visit spent making something you want to keep.
What if I make something lovely while I am practicing?
Keep it. The point of a practice session is not that keeping is wrong, it is that keeping is not the measure. Count it as one of your attempts, set it aside uncut, and carry on with the next one.
Do I have to cut every single one?
In the wall and cut-apart sessions, yes, until your guesses start matching the cuts. After that, every third one is enough, plus any piece that surprises you. A surprise is the clay telling you something, and the wire is how you hear it.
How do I practice handles with no mugs waiting?
Pull them, compare them and cut them, exactly as the handle session describes. To practice attaching too, throw two or three plain cylinders one visit, let them reach leather hard, and use them as practice mugs the next. Then cut through the joins.
How do I know when a skill has actually stuck?
Hit the target on your first try at the start of the next visit, cold, with no warm-up attempts. Three in a row at the end of a session shows your hands can do it today. The first try a week later shows they can do it at all.
Is this only for beginners?
No. A beginner practices pulling walls. Somebody five years in practices a lid that fits on the first try, a foot ring to a measured width or a run of matching mugs. The method is the same five parts. Only the one thing changes.
Where to go next
The Wheel Practice Plan
Thirty wheel drills, each with one number to hit and a timer, starting with centering.
Read it →Your First Ten Pottery Sessions
Ten sessions on the wheel or at the tables, each with a plain test for when to move on.
Read it →Pulling Walls Without a Collapse
The offset, the speed and the six ways a wall goes wrong, for the first session on this page.
Read it →Scoring and Slipping a Join
What actually happens inside a join, the method in order, and why most joins fail on the drying shelf.
Read it →A 12-Point Method to Critique Your Own Pottery
How to turn every finished pot into one specific thing to change, which is your next practice session.
Read it →Let Yourself Be Bad at Something Again
An open letter about being a beginner in front of people, and why that part is worth having.
Read it →An empty shelf, a better pair of hands
Some of the best sessions you will ever have at a wheel end with a pile of cut halves and nothing on the shelf. That only feels like a lost evening if the shelf was the point. When the point was one even wall, one invisible join or one row of crisp marks, the evening paid for itself before you cleaned up.
Pick one thing, decide what good looks like, find a way to see it, and know where you will stop. Then come make something, and watch the practice turn up in it.
Pick one thing, name a target you can check, cut or measure every attempt, stop at the target, the cap or tired hands, and write one line before you leave. A session built like that teaches you something even when nothing comes home.
The Comprehensive Version at the top of the page has each of the five sessions in full, the research behind the method, and how to build sessions of your own.
Which version would you like to print?
Videos come out as a labeled box with the title and channel to search for, since paper does not play them.