Pottery Date Night
 Bring All Your Friends Free Week
 Give a Month of Pottery
 Private Pottery Parties

 The Welcome Booklet
 Your First Ten Sessions
 The Pottery Process
 Finding the Studio
 Your Classes Never Expire
 The Four Tables
 Who’s Who
 The Rewards Program
 Flux Glazes
 The Calculators
 Kiln Tracker
 Holiday Kiln Deadlines

 Beginner’s Tool Set
 Fingernail Clippers
 Mayco Clay Mender
 Epoxy for Kintsugi
 Applicator Bottles
 Large Bead Rack
 Raku Workshop
 Nighttime Raku
 Horsehair and Feather Raku
 The Clay Hole T-Shirt
 Embroidered Crewneck
 Zip-Up Hoodie
 Pre-Made Bisqueware
 Glaze Catchers
 Kiln Cookies
 Clay Cubby Rental
 The Glaze Bible, Printed
 The Book of Molds, Printed
 Printable Pottery Guides
 Free Printable Trackers
 Gifts for Potters
 Christmas Pottery Ideas
 Mother’s Day Gift Ideas
 Pottery Date Night
 Studio Calendar
 2027 Studio Events
 What Should I Do Today?
 How to Throw on the Pottery Wheel
 How to Make a Pinch Pot
 How to Tap Center a Pot
 The Five Stages of Clay
 Is Pottery Hard to Learn?
 Pottery Wheel Practice Drills
 20 Easy Hand-Building Projects
 Everything That Sounds Wrong

 A Beautiful Piece, Every Time
 Slab Roller Tips
 Any Dish as a Slump Mold
 Slab Roller & Slab Mold Certification
 The Pottery Skill Tree
 Clay & Pottery Calculators
 Logging Your Pottery and Glazes
 The Pottery Dictionary
 Why Did My Pottery Do That?
 The Pottery Cone Chart
 Pottery Myths, Fact-Checked
 Is Handmade Pottery Food Safe?
 Incredible Ceramic Artist Videos
 How Dan Throws Giant Pots
 How to Dry Your Pottery
 The Pottery Wheel Introduction
 Pottery by Zodiac Sign
 Personality and the Pottery Wheel
 Pottery for Engineers
 ADHD, Hyperfocus, and Never Running Out
 Hobbies for Burnout
 Screen-Free Hobbies for Adults
 Every Addiction I Ever Had Lost to Art
 Functional Pottery Is Engineering
 How Do We Compare?
 Pottery Classes by City
 Every Pottery Studio in Utah
 Pottery in Draper
 Featured Members
 The Signature Wall
 Making Friends as an Adult Is Brutal
 The Clay Hole Commandments
 2027 Pottery Contests
 2027 Studio Parties
 Gallery Night

 Scream It Into the Void
 Destroy the Glaze Wall
 Daily Affirmation Cards
 Everything That Can Go Wrong
 Subscribe to Our Newsletters
 Contact The Clay Hole
 Corporate Team Building

 Glaze Combinations
 Glazes We Do Not Carry
 Making Glaze Test Tiles
 The Mega Glaze Tool
 How to Use the Mega Glaze Tool

 Glaze Brushing Techniques
 How to Use Underglaze
 How to Use Dipping Glazes
 Glaze Problems, Causes and Fixes
 The Dipping Glaze Guide

 Making a Glaze Catcher
 Fused or Sharp After Firing
 The Signature Wall
 His Viral Videos
 His Own Ceramics
 Meet Mud
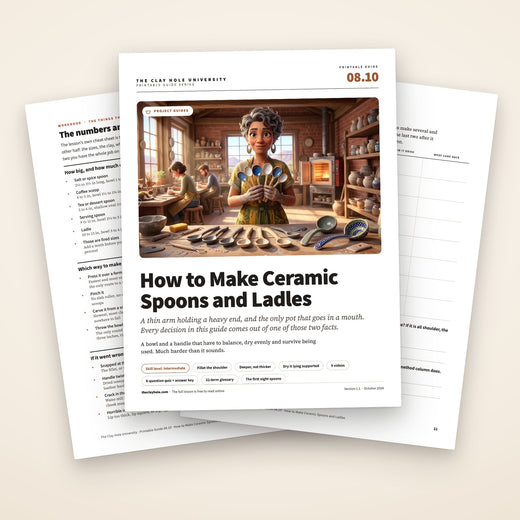
Ceramic Spoons and Ladles
A spoon is the only pot you put in your mouth, and it is the only one that has to survive being a thin arm holding a heavy end. Those two facts explain almost everything about making one. Here is the whole job: how big to make it, four ways to shape the bowl, how to build a handle that does not snap, the join that decides everything, and how to dry, glaze and fire it so it comes out of the kiln straight.
A spoon is the only pot you put in your mouth, and it is a thin arm holding a heavy end. Here is the short version: what to bring, one method start to finish, and the three things that break spoons.

Which version would you like to print?
Videos come out as a labeled box with the title and channel to search for, since paper does not play them.
What a spoon actually is
It is a thin arm holding a heavy end, and it is the only pot that goes in a mouth. Every rule below comes out of one of those two facts. They break at the shoulder, where the handle meets the bowl, and they break there every time, so that is the half inch to care about.
-
Smooth clay. Grog is crushed fired clay and it feels like sand against teeth. 52 Buff is the sensible first bag.
-
Pick a size. Coffee scoop 4 to 5 inches, serving spoon 9 to 11, ladle 10 to 13. Add a tenth to whatever you cut, because clay shrinks.
-
An eighth of an inch at the lip. Rounded, not square. That number is what decides whether it feels good to eat with.
-
Make five. A spoon is twenty minutes. The first one is research, and five blanks cost almost no extra time.
One spoon, ten steps
Pressed over a form, which is the method that gets a usable spoon on the first attempt more often than the others. Steps seven to ten are the join, and the join is the spoon.
- 1
Roll a quarter inch slab and let it rest
Ten minutes off the canvas before you cut. A slab used straight off the roller keeps stretching, and a stretched blank warps later.
- 2
Cut five blanks
A rounded teardrop for each bowl, plus a tab where the handle will land. Needle tool held vertical, so the edge is square and does not curl.
- 3
Press over the back of a metal spoon
Thin plastic or a damp paper towel over it first, as a release layer. Press with your thumb from the middle outward, never from the edges in. Slow and repeated, not hard and once.
- 4
Round the lip while it is soft
One pass with a rib or a wet fingertip all the way around the edge, at about an eighth of an inch. Four seconds now, and it cannot be properly fixed later.
- 5
Leave the bowl on the form to stiffen
Twenty minutes to an hour, until it is soft leather hard. Lift it early and it relaxes into a shallow oval.
- 6
Make the handle deeper, not thicker
Run a low spine down the underside and blend it in. Stiffness climbs with the cube of depth, so a spine is worth far more than bulk. Taper it, fat at the shoulder and thin at the tail, and give the tail a thumb rest or, on a ladle, a hook that catches the pot rim.
- 7
Match the stiffness, then score and slip
Press a fingernail into both pieces and they should give the same amount. Crosshatch both faces deep enough to catch a nail, over a wider area than the handle covers. Slip, press, and wiggle it as it seats.
- 8
Fillet the corner
Soft coil into the inside angle, blended out both ways until you cannot find the corner with a fingertip. Both sides and underneath. This is the step nearly everyone skips and it is the one that decides whether the spoon survives.
- 9
Prop the handle up while it sets
A wad of clay, a rolled newspaper, a sponge. Anything that stops gravity pulling on a fresh join for four hours. Come back in an hour and sponge off the squeezed out slip, not before.
- 10
Hang it by the tail and look
Hold the very end of the handle, let the bowl hang for a slow count of five, and watch the shoulder. Anything that opens, moves or dulls along that line means take it apart and do it again now.
If it snaps twice, change method
Cut the whole spoon, bowl and handle together, out of a slab three quarters of an inch thick and hollow the bowl out with a loop tool. It is slower and it uses more clay, and it has no join anywhere, which means it has nowhere to fail.
Two videos, and that is enough
Neither is ours. Read the ten steps, watch these, then put the phone face down. Film shows you the pressure and the speed, which writing cannot, and the list gives you the names for what you just watched.
A spoon is a lever with a weight on the end
People who can throw a perfectly good mug make their first spoon, love it, and then snap it in half in the sink four days later. That is not bad luck and it is not weak clay. It is geometry, and once you can see it you can design around it.
All the load lands in one place
Push down on the bowl and the whole force gets multiplied by the length of the handle and concentrated where the handle meets the bowl. A ten inch serving spoon multiplies a light press into something the join was never asked to hold. Nothing else you make has that shape.
It is two thicknesses in one object
The bowl wants to be thin, because it goes against a lip. The handle wants to be thick, because it is the structure. Thin and thick dry at different speeds, shrink at different times, and the seam between them is exactly where they meet. That is the same spot as above.
Fired clay does not bend
Stoneware is enormously strong in compression and poor in tension. It does not flex and warn you. It holds, holds, holds, and then goes all at once. Every design decision on this page is about keeping tension out of the shoulder rather than about making the clay tougher.
The whole page in one sentence
Round the inside corner where the handle meets the bowl, give the handle a spine instead of leaving it flat, and dry the thing lying supported along its whole length. Do those three and almost nothing else matters. Skip any one of them and it will find you in about a week.
Watch the videos. Read the lists. Both.
There are nine videos further down from potters who make spoons far better than most of us will. They are here because film does things writing cannot. You cannot describe the exact pressure that hollows a bowl without tearing it, or what a handle looks like a moment before it slumps. You have to see somebody do it.
But you cannot pause a video with clay on your hands. You cannot skim one for the single number you forgot. And when the handle is sagging off the bowl in front of you, you do not have six minutes to scrub back to the part where she said the thing about supporting it.
Words hold still. That is the whole advantage. A list of eight steps can be glanced at in a second, and a glance is all you get with wet hands.
There is a decent pile of research behind pairing the two, and it lands about where you would expect: people hold onto a demonstration better when it comes with words attached, because the picture and the labels go into memory by different routes and each one gives the other something to hang on to. The video gives you the picture. The list gives you the names for what you just watched. At the table, it is the names that come back.
So read the list, watch the person, then put the phone face down and make five bad ones.
If you would rather not scroll all of it, the Nutshell toggle at the top of the page cuts this down to what you need in your hand tonight, and remembers your choice on every other page on the site.
Seven parts, and only one of them is the bowl
Most first spoons are a good bowl stuck to an afterthought. Every part below does a job, and the numbers on the drawing match the list beside it.

- 1
The lip. The leading edge of the bowl, and the only part of any pot that touches a mouth. Aim for about an eighth of an inch, rounded rather than squared off. Smooth it with a rib before it dries and again with a sanding pad after bisque.
- 2
The bowl. Depth is what makes it a spoon instead of a paddle. Keep the walls even and the floor no thicker than the sides, or the thick middle will stay wet long after the rim is dry.
- 3
The shoulder. Where the handle meets the bowl. Almost every ceramic spoon that breaks, breaks here. It wants to be a smooth curve, not a corner. A sharp inside angle concentrates stress into a line; a fillet spreads it out.
- 4
The cross section. Compare a flat strap with the same amount of clay given a spine down the underside. Stiffness rises with the cube of depth, so doubling how deep the handle is makes it roughly eight times harder to bend. This one detail is most of the difference between a spoon that lives in a drawer and one that lives in a drawer broken.
- 5
The taper. Thickest at the shoulder where the load is, thinnest at the tail where there is none. An untapered handle is heavy in the wrong place and reads as clumsy in the hand even when it survives.
- 6
The tail. Give it a job. A dished thumb rest, a flattened paddle, a small curl, or on a ladle a hook that catches the rim of the pot so the handle does not slide in. A tail that does nothing is the part people notice is missing without knowing why.
- 7
The rest. Decide where it touches the counter. One rounded point rocks and spins. A small flat under the bowl, or a foot under the handle, holds it still and keeps the eating surface off the worktop.
How big, and how much clay to pull off the bag
Spoons are small, so people guess. Guessing is how you end up with a coffee scoop that holds two tablespoons and a serving spoon you cannot get in your mouth. These are the numbers we hand people at the table, and they are starting points rather than laws.
| What you are making | Bowl | Overall length | Wet clay |
|---|---|---|---|
| Salt or spice spoon | Bowl1 to 1¼″ across, shallow | Overall length2½ to 3½″ | Wet clayAbout 1½ oz |
| Coffee scoop | Bowl1½ to 1¾″, deep enough to hold a tablespoon | Overall length4 to 5″ | Wet clayAbout 3 oz |
| Tea or dessert spoon | Bowl1¼ to 1½″, shallow oval | Overall length5 to 6″ | Wet clayAbout 3 oz |
| Serving spoon | Bowl2½ to 3″, moderately deep | Overall length9 to 11″ | Wet clayAbout 8 oz |
| Ladle | Bowl3 to 4″ across and 1½ to 2″ deep | Overall length10 to 13″ | Wet clay1 to 1½ lb |
Those lengths are the fired size, so add roughly a tenth before you cut. Clay shrinks somewhere around ten to fourteen percent between wet and cone 5½ depending on the body, and on a three inch salt spoon that is the difference between dainty and doll sized. The exact shrinkage for the bag you bought is on its label, and there is a shrinkage calculator on the calculators page.
Pick a smooth clay
A spoon goes against teeth. Grog is fired clay, crushed and graded, and it puts hard particles right through the body. On a lip that feels like sand, even under glaze. 52 Buff is the sensible first choice: smooth, forgiving and the cheapest bag in the studio. B-Mix, Half & Half and Speckled Buff are all comfortable. The specks in B-Mix w/Specks and Speckled Buff sit in the body rather than on the surface, so they do not affect how it feels.
Two bodies to think twice about
B-Mix w/Grog and Berlin Gray are our two picks for raku, and they are picked for tooth and for surviving thermal shock rather than for how they sit on a lip. Neither is off limits, and plenty of people like the texture of a grogged serving spoon. Just handle a fired sample before you commit a set. Ask an instructor to show you one.
Porcelain is the nicest and the meanest
#16 Porcelain feels better in the mouth than anything else here and it is the least forgiving clay in the building. It also has the longest memory: any twist you leave in a porcelain handle while it dries comes back doubled in the glaze firing. Make your first three in stoneware and your fourth in porcelain.
Make five, not one
A spoon takes twenty minutes and the first one is nearly always wrong in a way you can only see once it exists. Rolling out five blanks costs almost no extra time, gives you something to compare against, and means the two that survive to the kiln are the two you actually liked. It is also the only reliable way to end up with a matching set, because a set made one at a time over three months never matches.
Four ways to make the scoop
Three of these make the bowl and the handle separately and then join them. One of them has no join at all, which is worth knowing if your spoons keep snapping. Pick one and make five that way before you try another.
Press it over a form
Roll a slab, cut a blank, press it over or into a hollow shape and let it stiffen there. The fastest method, the most repeatable, and the only one that reliably gives you six spoons that match. Good forms are a metal spoon from a kitchen drawer, a shallow dish, a divot pressed into a bag of rice, or a hollow scooped into a block of foam. There are 248 slab molds in the studio and some of the shallow ones will work as a scoop form for larger spoons, though for anything spoon sized the metal spoon is hard to beat.
Pinch it
Roll a ball, thumb into the middle, and pinch the walls out into a shallow oval. No slab roller, no form, no setup at all. Best for salt spoons and coffee scoops, where a slightly irregular hand pinched bowl reads as charming rather than as a mistake. Wall thickness is felt rather than measured, which is either the appeal or the problem depending on the day. There is a whole page on pinch pots if the technique is new.
Carve it from a solid blank
Cut the whole spoon, bowl and handle together, out of a slab half to three quarters of an inch thick. Hollow the bowl with a loop tool, then shape the outside with a metal rib and a damp finger. This is how a woodworker makes a spoon and it is by a distance the strongest method, because there is no join anywhere. It is also the slowest and it uses the most clay. If two spoons in a row have snapped at the shoulder, make the next one this way.
Throw the bowl
Throw a small round bowl off the hump, cut it free, let it stiffen, trim a little off the outside and attach a hand built handle. The only route to a genuinely round, even, symmetrical bowl, and the standard way ladles get made. Overkill for a teaspoon. Exactly right for anything bigger than about three inches.
The press method, start to finish
Eight steps. This is the one we put in front of somebody on their first evening, because it produces a usable spoon on the first attempt more often than the others do.
- 1
Roll a slab, then let it rest
About a quarter inch, a touch thicker than you would roll for a mug. Peel it off the canvas and leave it alone for ten minutes. A slab rolled and used immediately keeps stretching while you work it, and a stretched blank warps later.
- 2
Cut the blank
A rounded teardrop for the bowl, plus a tab of clay where the handle will land if you are joining one on. Cut with a needle tool held vertical rather than dragged at an angle, so the edge is square and does not want to curl.
- 3
Set up the form
Lay a scrap of thin plastic or a damp paper towel over the back of a metal spoon. That is your release layer, and without it the clay grips and tears when you lift it. Anything with a smooth curve works. Anything with a lip or a step will print that step into your bowl.
- 4
Press from the middle outward
Lay the blank over the form and press with the pad of your thumb, always starting in the center and moving out. Pressing in from the edges traps the clay and thins one spot until it splits. Slow and repeated beats hard and once.
- 5
Check the wall by feel
Pinch the edge between finger and thumb. You want about an eighth of an inch at the lip, and the floor no thinner than the walls. A bowl that is thin in the middle and thick at the rim is the wrong way round and cracks in the bisque.
- 6
Round the lip while it is soft
One pass with a soft rib, a damp chamois or a wet fingertip all the way around the edge. This takes four seconds now and cannot be fully fixed later. It is the single step that decides whether the finished spoon feels good in a mouth.
- 7
Leave it on the form to stiffen
Let it come up to soft leather hard while it is still sitting on the shape it was pressed over. Lift it early and it relaxes, and you get a shallow oval instead of a bowl. Twenty minutes to an hour, depending on the room.
- 8
Now, and only now, make the handle
Both halves need to be at the same stiffness when they meet. Make the handle while the bowl is setting up, not before, and let it come to the same leather hard state. A soft handle joined to a firm bowl pulls itself off as it shrinks.
Watch two people do it
Neither of these is ours. Both are better than a written list at the parts where the pressure matters.
Make it deeper, not thicker
The instinct when a handle snaps is to make the next one chunkier all round. That adds weight everywhere and strength nowhere in particular. What actually stops a handle bending is how deep it is from top to bottom, because bending stiffness climbs with the cube of depth. Twice as deep is about eight times stiffer for twice the clay.
Give it a spine
Run a low ridge down the center of the underside, from the shoulder to about two thirds of the way to the tail, and blend it in. A quarter inch spine on an eighth inch strap is barely visible from above and transforms the thing. This is the same trick as the rib on an I beam and the fold in a sheet of corrugated steel, and it works for the same reason.
Never leave it a flat ribbon
A flat strap has its weakest axis pointing exactly the way a spoon gets loaded, which is straight down through the bowl. It will also warp as it dries, because a wide thin sheet of clay has no reason to stay flat. Round the top, keep the section a D or an oval, and the warping mostly stops as a side effect.
Four ways to make one
Pull it like a mug handle, which gives the nicest taper and the best surface, and is covered on the handles page. Roll a coil and taper it under your palm. Cut it from the same slab as the bowl and add a spine underneath. Or carve it out of the solid blank along with the bowl, which is method three from the last section.
Do not run it long
Past about eleven inches overall a spoon starts behaving like a shovel: heavier than it looks, awkward in a pot, and multiplying every load at the shoulder. If you want reach, get it from the angle the handle leaves the bowl rather than from raw length. A ladle earns its thirteen inches. A serving spoon rarely does.
Hold it before you attach it
Pick the handle up on its own and hold it the way you would hold the finished spoon. If it feels thin and precious in your hand right now, it is thin, and it will be thinner after it shrinks. Wet clay flatters itself. Trust your hand rather than your eye at this stage, and if you are between two thicknesses, take the thicker one and taper it harder toward the tail.
Six steps, and the fourth one is the whole thing
If you take one section of this page to the table with you, take this one. A spoon fails at the shoulder, and the shoulder is made in about ninety seconds.
- 1
Match the stiffness first
Press a fingernail into the bowl and into the handle. They should give the same amount. Both leather hard, or both soft. Joining a soft piece to a firm one builds a crack in at the start, because the softer half still has shrinking left to do and the join is what pays for it.
- 2
Score both faces, properly
Crosshatch both surfaces deeply enough to catch a fingernail, not a light scratch. Score a slightly larger area than the handle actually covers, so there is somewhere for the fillet to grip in step four. The score and slip page goes deeper on why this matters.
- 3
Slip it, then press and wiggle
Slip made from the same clay body. Clay Mender is made for small repairs, so ask a staff member before you use it on a piece that is going into a glaze firing, which at The Clay Hole runs hotter than low fire. Press the handle on and give it a small twist as it seats, so the scored ridges interlock instead of sitting face to face. Slip that squeezes out is a good sign. Wipe it later, not now.
- 4
Fillet the inside corner
Roll a thin coil of soft clay, lay it into the angle where the handle meets the bowl, and blend it out in both directions until the corner is a continuous curve. Do this on both sides and underneath. This is the step almost everyone skips and it is the step that decides whether the spoon survives. A corner concentrates stress into a line. A curve spreads it across an area.
- 5
Support the handle while it sets
Prop the free end on a wad of clay, a rolled newspaper or a sponge so it sits where you want it and gravity is not pulling on a fresh join for the next four hours. A handle that droops half an inch overnight has already torn the fillet you just made, and you will not see it until the bisque.
- 6
Clean it up an hour later
Come back when the join has firmed and tidy the squeezed out slip with a damp sponge or a wooden tool. Cleaning it while it is soft smears the fillet you just built. Cleaning it when it is bone dry means sanding, and sanding a join is how you find out it was never really attached.
The test, before you walk away
Hold the spoon by the very end of the handle and let the bowl hang. Do not shake it, just let it hang for a slow count of five and look at the shoulder. If anything opens, moves or dulls along that line, take it apart now and redo it. Ten seconds here saves you three weeks of drying, two firings and $4.80.
Four more, if you want somebody else’s hands
Different clay, different tools, different opinions about nearly everything. That is the point. Watch two of these, notice where they disagree, and go with whichever one your hands liked.
None of these are ours and none of them are the only right way. Where two of them contradict each other, that is usually a sign both work and the difference is preference.
A ladle is a spoon with every problem doubled
Bigger bowl, longer handle, and it gets used full. A serving spoon lifts a few ounces of potatoes. A ladle lifts half a cup of hot soup on the end of a foot of clay, which is several times the load at the same shoulder. Everything on this page still applies, and six things get added.
- 1
Throw the bowl, do not press it
Four inches across and two deep is a lot of even wall to make by hand, and any thin patch becomes the failure. Throw a small hemisphere off the hump, cut it free, let it firm and trim the outside. If you would rather hand build it, pinch it from a ball rather than pressing a slab, because a pinched wall is compressed and a pressed one is stretched.
- 2
Decide the angle before you attach anything
Sit the bowl on the table and hold the handle where you think it goes. Somewhere around thirty to forty five degrees off the bowl is what lets you reach the bottom of a pot without turning your wrist over. Straight out from the rim looks elegant and pours down your arm.
- 3
Attach it to the wall, not to the rim
Bring the handle down onto the side of the bowl an inch or so below the rim, so the join has curved wall behind it. A handle stuck to the thin rim edge has nothing to hold and it levers that edge off. Fillet it exactly as in section seven, on both sides and underneath, and be generous.
- 4
Put a hook or a notch on the tail
A ladle that cannot hang on the rim of a pot slides in, and then somebody fishes a hot handle out of the soup. A small hook, a raised knob, or a simple notch cut across the underside of the tail all solve it. This is the one feature that separates a ladle from a large spoon.
- 5
Weigh it in your hand, full
Before it dries, hold it out at arm’s length and imagine half a cup of liquid in the bowl. Ceramic is heavy and a ladle nobody wants to lift is a decoration. If it already feels heavy empty, thin the handle from the tail end and take some weight out of the bottom of the bowl while you still can.
- 6
Support it in three places to dry
Bowl, middle of the handle, tail. A ladle is long enough to sag under its own weight over two days, and a sagged handle sets that curve permanently. Foam offcuts or rolled newspaper under all three, loose plastic over the top, and turn it daily.
Two ladles, start to finish
They all break in the same place
We have watched a lot of spoons come back in pieces, and it is almost always the shoulder. Not the lip, not the tail, not the middle of the handle. The half inch where the handle meets the bowl, nearly every time.
Which is oddly good news, because it means there is one thing to get right rather than twenty. A curve instead of a corner. A spine instead of a flat strap. Both halves at the same stiffness when they meet, and something holding the handle up while the join sets.
If you do nothing else on this page, roll a soft coil into the inside corner and blend it until the corner is gone.
And make more than one. A spoon costs twenty minutes and a few ounces of clay, and the second one is always better than the first in a way you cannot get to by thinking harder about the first.
Flat, supported, slow, and turned over
A spoon has a thin part and a thick part joined in the middle, which is the worst possible drying case. Left on a shelf overnight it will curl, twist, or open a hairline at the shoulder that you will not see until it comes out of the bisque in two pieces.
-
Support the whole length. Lay it in the same form you shaped the bowl over, or on a bed of foam, or on a folded towel. Anything that holds the handle at the same height as the bowl. A spoon dried on a flat board with the handle in the air curls toward the air.
-
Loose plastic for the first two days. Not sealed, not tight. A dry cleaner bag draped over the top slows the surface enough for the thick shoulder to keep up with the thin lip.
-
Turn it once a day. Both faces should lose water at the same rate. This is the single cheapest thing you can do about warping and almost nobody does it.
-
Keep it away from the door and the vents. A draft dries one side of a long thin object and not the other, which is a recipe for a banana.
-
Straighten it at leather hard, not later. There is one window, usually the second day, where you can still gently persuade a handle back into line. After that you are choosing between the twist and a break.
-
Give it a week before you call it dry. Small pieces feel dry early and the shoulder is the thickest part of the whole object. Hold it against your cheek: if it feels cool, there is still water in there and it is not ready for the kiln.
The porcelain warning again
#16 Porcelain remembers. Anything you let it do while it dries, it will do again more enthusiastically at cone 5½, so a handle that dried with a slight lean comes out of the glaze firing with a definite one. Support porcelain in more places than you think you need to, and check it on day two.
Three ways it goes wrong, and what to change
These are the ones that happen on a first spoon. Every one of them has a fix you apply to the next spoon rather than to the broken one.
It snapped at the shoulder
Almost always the fillet. Two flat faces pressed together leave a sharp inside corner, and a corner turns a gentle load into a concentrated one along one line. Next time, coil into the corner and blend until the corner is gone. Second most likely cause: the two halves were at different stiffnesses when they met.
The handle twisted
Drying, unsupported. Clay pulls toward whatever dries first, so a handle losing water from the top and not the bottom curls upward. Support the full length on foam or in the form the bowl was made over, loose plastic for two days, and turn it over once a day. A twist you can still feel at leather hard can be persuaded out. One that reached bone dry cannot.
It feels horrible in the mouth
The lip is too thick, or square rather than rounded, or the clay had grog in it. All three are decided before the spoon ever dries, and none of them can be fixed with glaze. Eighth of an inch, rounded with a rib while soft, sanded after bisque, smooth clay, glossy glaze inside.
Dry it, glaze it, fire it
-
Dry it lying down and supported. Foam, or the form the bowl was pressed over. Loose plastic for two days, turn it daily, keep it away from drafts, and give it a full week. Cool against your cheek means there is still water in it.
-
Sand the lip after bisque. Wet, never dry. This is the step that decides whether the finished spoon feels expensive.
-
Glaze the inside completely, glossy. No pinholes, no thin spots. A bare patch in the bowl of a spoon will not come clean. Matte is slightly toothy against a lip, so save it for the handle.
-
Wipe a bare contact patch. Under the bowl and under the tail, wherever the piece touches. Keep the flux glazes away from anything near the shelf, because the bowl of a spoon is a reservoir and a moving glaze pools in it and runs.
-
Fire it lying flat, supported at both ends. Never propped up with the handle in the air, because clay is briefly soft at the top of a cone 5½ cycle. Bisque is cone 05 and free.
-
125 cubic inches or under is a flat $4.80. Almost every spoon lands there. Small ones can share a single six inch cookie if they are roughly the same height and fit with three quarters of an inch to spare all round, which makes a whole set of scoops one firing fee.
The inside has to be perfect. The outside is up to you.
A spoon bowl is a small cup that goes in a mouth and then in a dishwasher. Everything about glazing one comes back to that. The outside is a free canvas and you can do whatever you like with it.
- 1
Sand the lip after bisque
A fine sanding pad or a piece of wet and dry, one pass around the edge and one across the inside of the bowl. Keep the pad and the spoon wet the whole way through, at a sink or over a bucket of water. Dry sanding fired clay is the one genuinely dangerous thing in this whole process, because firing turns some of the free silica into cristobalite and sanding throws it into the air as particles small enough to reach the deepest part of a lung. This is the step that decides whether the finished spoon feels expensive or feels homemade in the bad way.
- 2
Glaze the inside of the bowl completely
No bare patches, no thin spots, no pinholes. An unglazed dip in the bowl of a spoon holds whatever it last touched and will not come clean. If a brushed glaze looks thin in there after two coats, give it a third.
- 3
Dip for the time on the lid
A spoon is small, thirsty and bisque dry all over, so it takes glaze quickly. Dip for exactly the time printed on that glaze’s lid, then check the coat before you commit the rest of the set. The times on the lids were tested bucket by bucket, so the lid is the number to use. The dipping glaze page has the full routine.
- 4
Decide the contact patch now
Something has to touch the shelf. Wipe a clean bare strip on the underside of the bowl where it rests, and another under the tail if the tail touches too. Wax resist, then wipe, then check it twice with a dry finger. Glaze on a contact patch welds the spoon to the shelf and that is the end of it.
- 5
Keep the runny glazes off the underside
The bowl of a spoon is a reservoir. Any glaze that moves in the firing pools in there, runs out over the lip and down onto whatever is below. The flux glazes are beautiful and they move a lot, so if you use one, use it on the inside or on the upper handle and keep it well away from the last half inch above the shelf.
- 6
Two tone is the easy win
Glazed bowl, bare or lightly washed handle, with the clay left to show. It looks deliberate, it removes the contact patch problem from the handle entirely, and a bare stoneware handle is nicer to hold than a glassy one. Underglaze under a clear is the other route if you want pattern.
Not sure which glaze
The glaze finder will narrow the 650+ brush-on glazes down by color and finish. For the inside of a spoon, a smooth glossy glaze beats a matte one: matte surfaces are slightly toothy against a lip and they show cutlery marks and coffee staining sooner. Save the matte for the handle.
How a spoon goes in the kiln, and what it costs
Bisque is cone 05 and free, every time. Glaze is cone 5½, which is cone 5 with a twelve minute hold at peak, and that is what makes the finished spoon watertight and hard to chip. There are two things about spoons specifically that are worth knowing before you write your kiln ticket.
Lay it down and support both ends
A spoon fires lying on its side or flat on its back, never propped up on the bowl with the handle in the air. At cone 5½ the clay is soft for part of the cycle, and an unsupported foot of cantilevered handle will take a set. Everything needs a kiln cookie or a glaze catcher under it, with no exceptions, and you make your own cookie from the abandoned clay that is always lying around the studio.
Small spoons can share one cookie
This is the only time pieces get combined, and it is worth planning for. They have to be roughly the same height and all fit on a single six inch cookie with three quarters of an inch to spare on every side, and you measure by the tallest piece on the cookie. A set of four coffee scoops fits comfortably. A ten inch serving spoon does not, so it is on its own.
What it actually costs
Glaze firings are five cents per cubic inch measured at the widest points with the cookie counted in the height, and anything 125 cubic inches or under is a flat $4.80. Almost every spoon lands under that line, so a spoon is $4.80 and the math stops there.
-
One serving spoon, 10 by 3 by 1½″. Forty five cubic inches, comfortably under the line. $4.80.
-
Four coffee scoops on one six inch cookie. One measurement, one fee. $4.80 for all four, which is the single best argument on this page for making a set rather than a spoon.
-
Six serving spoons, individually. Too long to share a six inch cookie, so six separate pieces at $4.80 each. $28.80. Worth knowing before you make twelve.
-
A big ladle, 12 by 4 by 3″. A hundred and forty four cubic inches, which clears the flat rate. $7.20.
Run your own numbers on the kiln firing page, which has the calculator and the whole drop-off process on it. If you want to know what the firing is actually doing to your spoon, that is a page of its own.
What went wrong, and what to change next time
Tap whichever one happened to you. Every one of these has a cause you can do something about on the next spoon, which is the only useful kind of answer once a piece is already broken.
It snapped at the shoulder
The default failure, and nearly always the fillet. A join made by pressing one flat face onto another leaves a sharp inside corner, and a sharp corner turns a gentle load into a concentrated one along a single line. Next time, roll a soft coil into the corner on both sides and underneath and blend it until you cannot find the corner with a fingertip. Second most likely cause: the handle and the bowl were at different stiffnesses when they met, so the softer one shrank away from the join while it dried.
The handle twisted
Drying, almost certainly, and probably drying on a flat board with the handle unsupported. Clay shrinks toward whatever dries first, so a handle losing water from the top face and not the bottom curls upward. Support the full length on foam or in the form the bowl was made over, drape loose plastic for the first two days, and turn it over once a day. If it was porcelain, do all of that and add a third support point. A twist you can still feel at leather hard can usually be persuaded out. A twist that survived to bone dry is permanent.
A crack opened in the bisque
Water was still in the thick part when it went in. The shoulder is the fattest section of a spoon and it dries last, so a piece that felt bone dry at the lip can be damp in the middle. Hold the next one against your cheek before it goes on the shelf: cool means wet. Give a spoon a full week, longer for a ladle, and longer again in winter. A crack that follows the join line rather than crossing the clay is a scoring problem instead, and the answer there is deeper crosshatching over a wider area.
It feels horrible in my mouth
Three usual causes, in order. The lip is too thick, which no amount of glaze fixes and which is set in the first five minutes of making the bowl. The lip is square rather than rounded, which is the four second rib pass in step six. Or the clay has grog in it, and the hard crushed particles that make a grogged body strong feel like sand against teeth. Next spoon: eighth of an inch at the edge, rounded with a rib while soft, sanded after bisque, smooth glossy glaze inside, and a smooth clay body.
It stuck to the shelf
Either glaze reached the contact patch, or a glaze ran down and found it. Spoons are worse than most pots for this because the bowl is a reservoir: a glaze that moves at all pools in there, comes over the lip and travels. Wipe a genuinely clean bare strip wherever the piece touches, check it with a dry finger in good light rather than trusting the wax, and keep the flux glazes off anything within half an inch of the shelf. The firing fee is not refunded when a piece fuses, so this is worth two extra minutes at the glaze table.
The handle sagged in the kiln
It was fired with the handle cantilevered out over nothing. Clay is briefly soft at the top of a cone 5½ cycle and gravity uses that time productively. Fire spoons lying down, flat, with support under the bowl and under the tail, never balanced on the bowl with the handle in the air. If the handle was also thin for its length, that is the second half of the answer: deeper section, spine underneath, taper toward the tail.
It is too heavy
Almost always an untapered handle plus a thick bowl floor. The handle should be thickest at the shoulder and noticeably thinner at the tail, and the floor of the bowl should be no thicker than the walls. Both of those are easy to fix and neither costs you strength, because the strength lives in the shoulder and in the depth of the section rather than in the total mass. Also check the length: past eleven inches you are carrying clay that is doing nothing except making the shoulder work harder.
It rolls on the counter
Nothing was designed to touch the table, so it is resting on a curve and a curve has no opinion about which way up it sits. Flatten a small patch on the underside of the bowl with a rib while it is leather hard, or put a low foot under the handle near the tail. Two contact points that are not in a straight line with each other will hold it steady. It is a thirty second decision at leather hard and it is invisible on the finished spoon.
Somebody else’s failure, in full
Most tutorials show you the one that worked. This one does not, and it is more useful than several that do.
The whole page, in the order you will need it
Copy it into your notes, or hit print at the top of the page and take paper to the table. Paper does not lock, does not need clean hands, and does not ring.
- Pick a smooth clay. 52 Buff is the sensible first one.
- Decide the size. Coffee scoop 4 to 5″, serving spoon 9 to 11″.
- Add a tenth for shrinkage before you cut.
- Find a form. A metal spoon works better than most things.
- Cut five blanks, not one.
- Quarter inch slab. Rest it ten minutes before cutting.
- Press from the middle outward, never from the edges in.
- Eighth of an inch at the lip. Floor no thinner than the walls.
- Round the lip with a rib while it is soft.
- Leave the bowl on the form to stiffen.
- Handle deeper, not thicker. Spine down the underside.
- Taper it: fat at the shoulder, thin at the tail.
- Give the tail a job. A ladle needs a hook.
- Same stiffness both sides. Check with a fingernail.
- Score deep enough to catch a nail, over a wide area.
- Slip, press, wiggle.
- Fillet the corner with a soft coil. Both sides and under.
- Prop the handle up while it sets.
- Clean the squeeze-out an hour later, not now.
- Hang it by the tail for five seconds and look at the shoulder.
- Supported along the whole length. Foam or the form.
- Loose plastic for two days.
- Turn it over daily.
- No drafts, no vents, no open doors.
- Straighten at leather hard or not at all.
- A full week. Cool against your cheek means wet.
- Sand the lip after bisque. Wet, never dry.
- Inside of the bowl fully glazed, glossy, no pinholes.
- Dip for the time on the lid.
- Bare contact patch under the bowl and under the tail.
- Flux glazes nowhere near the shelf.
- Fire it lying down, supported at both ends.
- Cookie or glaze catcher under everything. No exceptions.
- The bowl is going shiny and slack under your thumb.
- You can see a line at the shoulder after joining.
- The handle feels thin and precious in your hand.
- You are still adjusting it after twenty minutes.
- It is cool against your cheek and the kiln shelf is filling.
Things people ask at the table
Is a ceramic spoon actually food safe?
Fired to cone 5½ with a glaze that is rated for food, yes. At that temperature the clay body and the glaze effectively become one dense glassy material, and the result is watertight and hard to chip. Check the glaze in the Food Safe Lookup. Dishwasher and microwave safe are separate claims with their own checks. The two things that would make a spoon unsafe are both yours to control: an unglazed patch inside the bowl that cannot be cleaned, and a crack. Neither of those is a property of the material.
Can I make one on my first evening here?
Yes, and it is one of the better first projects. It needs no wheel time, no centering and no glaze decisions on night one, and you can make five in a single class. Use the press method in section five and press over a metal spoon. Say what you are doing to whoever is teaching and they will point you at a rolling setup.
How thin should the bowl really be?
About an eighth of an inch at the lip, and the same or slightly more everywhere else. Thinner feels wonderful and chips. Thicker is safe and feels like eating with a roof tile. The floor is the part people get wrong: it should be no thicker than the walls, and on a pressed bowl it usually ends up thicker because that is where your thumb was.
What can I press the bowl into?
The back of a metal spoon from a kitchen drawer, with thin plastic or a damp paper towel over it as a release layer. Beyond that: a shallow dish, a divot pressed into a bag of rice, a hollow scooped out of foam, or your own cupped palm. There are 248 slab molds in the studio and some of the shallower ones will serve as a scoop form for larger spoons and ladle bowls. Anything with a smooth continuous curve works. Anything with a step or a lip prints that step into your spoon.
Why does mine keep breaking at the same place?
Because that is where nearly every spoon breaks, and because a join made by pressing two flat faces together leaves a sharp inside corner. Fillet it: soft coil into the corner, blended out both ways until the corner is gone. If it has happened twice, make the next one by carving it out of a solid blank instead, which has no join to fail.
How long before I can bring it to the kiln?
Give a spoon a week and a ladle two, and check it against your cheek before you commit it. The shoulder is the thickest part of the piece and it dries last, so a spoon that feels dry everywhere you can easily touch can still be holding water in the one spot that matters. There is no prize for being first onto the shelf.
Can I make a set that matches?
Yes, if you make them in one sitting from one slab over one form. A set made a spoon at a time across three months will not match, because your hands change faster than you think and so does the clay. Cut all the blanks first, press them all, then handle them all. Glaze them together too, out of the same bucket on the same night.
Does a spoon count as one piece for firing?
It does, and almost every spoon lands under 125 cubic inches, which is the flat $4.80 rate. The exception is the one worth planning around: small pieces can share a single cookie if they are roughly the same height and all fit on one six inch cookie with three quarters of an inch to spare on every side. That is the only time pieces get combined, and a set of small spoons is exactly what it was written for.
Six pages that pick up where this one stops
Three pages worth having next
Nobody is impressed by a spoon until they hold one
Spoons are the least photogenic thing in the studio and the most used. A mug gets admired on a shelf. A spoon gets picked up every single morning, and after a month somebody notices they have been reaching past four other spoons to get to yours. That is a better result than most pots ever manage.
So roll a slab, cut five blanks, and accept in advance that the first one is research. Round the lip while it is soft. Put a curve where the handle meets the bowl. Dry it lying down. Everything else on this page is detail.
So roll a slab, cut five blanks, and accept that the first one is research. Round the lip while it is soft, curve the shoulder, dry it lying down. If you want the long version with all four methods, the ladle section and the diagnosis list, the toggle at the top of the page has it.
Questions about any of this are welcome at the studio, or text us on 385-241-5528. More lessons like this one on Clay Hole University.