Pottery Date Night
 Bring All Your Friends Free Week
 Give a Month of Pottery
 Private Pottery Parties

 The Welcome Booklet
 Your First Ten Sessions
 The Pottery Process
 Finding the Studio
 Your Classes Never Expire
 The Four Tables
 Who’s Who
 The Rewards Program
 Flux Glazes
 The Calculators
 Kiln Tracker
 Holiday Kiln Deadlines

 Beginner’s Tool Set
 Fingernail Clippers
 Mayco Clay Mender
 Epoxy for Kintsugi
 Applicator Bottles
 Large Bead Rack
 Raku Workshop
 Nighttime Raku
 Horsehair and Feather Raku
 The Clay Hole T-Shirt
 Embroidered Crewneck
 Zip-Up Hoodie
 Pre-Made Bisqueware
 Glaze Catchers
 Kiln Cookies
 Clay Cubby Rental
 The Glaze Bible, Printed
 The Book of Molds, Printed
 Printable Pottery Guides
 Free Printable Trackers
 Gifts for Potters
 Christmas Pottery Ideas
 Mother’s Day Gift Ideas
 Pottery Date Night
 Studio Calendar
 2027 Studio Events
 What Should I Do Today?
 How to Throw on the Pottery Wheel
 How to Make a Pinch Pot
 How to Tap Center a Pot
 The Five Stages of Clay
 Is Pottery Hard to Learn?
 Pottery Wheel Practice Drills
 20 Easy Hand-Building Projects
 Everything That Sounds Wrong

 A Beautiful Piece, Every Time
 Slab Roller Tips
 Any Dish as a Slump Mold
 Slab Roller & Slab Mold Certification
 The Pottery Skill Tree
 Clay & Pottery Calculators
 Logging Your Pottery and Glazes
 The Pottery Dictionary
 Why Did My Pottery Do That?
 The Pottery Cone Chart
 Pottery Myths, Fact-Checked
 Is Handmade Pottery Food Safe?
 Incredible Ceramic Artist Videos
 How Dan Throws Giant Pots
 How to Dry Your Pottery
 The Pottery Wheel Introduction
 Pottery by Zodiac Sign
 Personality and the Pottery Wheel
 Pottery for Engineers
 ADHD, Hyperfocus, and Never Running Out
 Hobbies for Burnout
 Screen-Free Hobbies for Adults
 Every Addiction I Ever Had Lost to Art
 Functional Pottery Is Engineering
 How Do We Compare?
 Pottery Classes by City
 Every Pottery Studio in Utah
 Pottery in Draper
 Featured Members
 The Signature Wall
 Making Friends as an Adult Is Brutal
 The Clay Hole Commandments
 2027 Pottery Contests
 2027 Studio Parties
 Gallery Night

 Scream It Into the Void
 Destroy the Glaze Wall
 Daily Affirmation Cards
 Everything That Can Go Wrong
 Subscribe to Our Newsletters
 Contact The Clay Hole
 Corporate Team Building

 Glaze Combinations
 Glazes We Do Not Carry
 Making Glaze Test Tiles
 The Mega Glaze Tool
 How to Use the Mega Glaze Tool

 Glaze Brushing Techniques
 How to Use Underglaze
 How to Use Dipping Glazes
 Glaze Problems, Causes and Fixes
 The Dipping Glaze Guide

 Making a Glaze Catcher
 Fused or Sharp After Firing
 The Signature Wall
 His Viral Videos
 His Own Ceramics
 Meet Mud
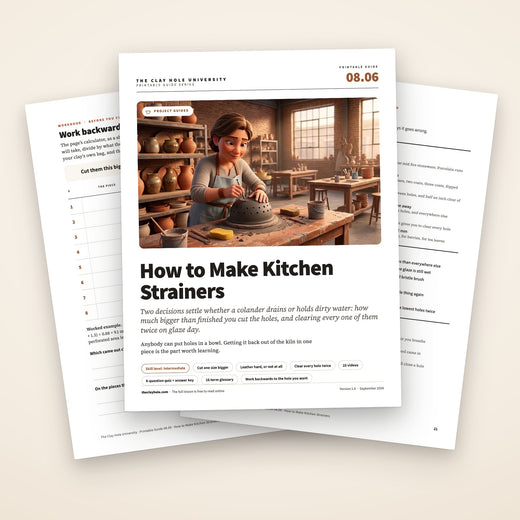
Colanders, berry bowls, strainers
Anybody can put holes in a bowl. Getting them back out of the kiln is the trick.
A strainer is the only thing in your kitchen that fails completely if one detail goes wrong. A mug with a flaw is still a mug. A colander whose holes filled with glaze is a bowl that holds dirty water.
So this page is built around the two things that actually decide whether it works: how big you cut the holes, and what you do to them on glaze day. Everything else is a bowl, and you already know how to make a bowl.

Why this page is built this way
Watching teaches your hands. Reading is what you can check.
There are ten excellent videos on this page from people who make strainers far better than most of us do. There is also a lot of writing. That is on purpose, and here is the reasoning.
What video is good at
Motion. There is no sentence that teaches you how hard to press a hole cutter, or what the clay sounds like when it is the right stiffness. You watch somebody do it, your hands get the idea, and that transfer is genuinely hard to replace with words.
What video is bad at
Being checked. You cannot scan a video. When you are elbow deep in slip and you need to remember whether the bevel came before or after the sponge, you have to scrub a timeline with a wet knuckle and guess. Text you just look at.
The plainest version: a video runs at the presenter’s pace, and a list runs at yours. Watching a strainer get built start to finish gives you the shape of the job. A numbered list next to your wheel gives you the step you are on. Those are two different needs and one does not cover both.
That is also why the lists on this page are short, flat and phone-shaped rather than buried in paragraphs. Skip to the checklist if you are already at the wheel and just need the steps.
Start here
What are you actually making?
These four get lumped together as “things with holes in them,” and they are not the same problem at all. Pick one and the numbers further down this page will follow you.
You picked: Pasta colander
A colander is the friendliest place to start. The holes are big enough that a little glaze creep does not close them, the walls are thick enough to survive a lot of hole cutting, and nobody minds if the spacing is not perfect.
The whole page in three rules
Three rules, and the rest of it is just a bowl.
Nearly every strainer that fails broke one of these.
1. Cut them bigger than you want
The clay shrinks in the kiln, which people expect. Then glaze coats the inside wall of every hole and takes a second bite, which people do not. Use the calculator below.
2. Cut at leather-hard
Firm like a bar of cold cheese. Softer and the wall flexes away from the tool and the holes go oval. Drier and the clay tears instead of moving, and the cracks open up in the bisque.
3. Open every hole on glaze day, twice
Glaze forms a skin across an opening the way water films across a small ring, and the kiln turns it into a wall. Clear every hole while the glaze is wet, then again once it has dried.
The number everything depends on
Your holes will not be the size you cut them.
Two things shrink a hole between the moment you cut it and the moment it comes out of the kiln, and almost everybody forgets the second one. The clay shrinks, which people expect. Then glaze coats the inside wall of every hole and takes another bite, which people do not expect at all.
Set the three controls to your piece and cut to the number it gives you.
Cut a quarter inch hole, glaze it with three normal coats, and the opening you are left with is nearer five thirty-seconds: about a third of the width gone, and nearly sixty percent of the open area gone with it. Let the glaze bridge across instead of clearing it and you lose the hole altogether. That is the difference between a colander and a decorative bowl.
Pasta and big berries want 6 mm and up. Blueberries fall through anything over 5 mm. Tea leaves need 2 mm or less.
Most mid-fire stoneware lands between 11% and 13% from wet to fired. Porcelain runs higher. The real number is on your clay’s spec sheet, and it is worth looking up once.
Most mid-fire stoneware lands between 11% and 13%.
These are starting estimates, not laws. A glaze coat runs somewhere around a third of a millimeter, and it lands on both walls of the hole, so it comes off the diameter twice.
Keep two hole widths of clay between holes and stay half an inch clear of the foot ring. Holes too close together is the most common reason a strainer cracks in the bisque.
The same hole, three times
The same hole at three moments, drawn in proportion to each other. The dashed outline is the size you cut.
The hole you end up with is 72% of the width you cut, and 51% of the open area.
We bisque to cone 05 and glaze fire to cone 5½, which is cone 5 with a twelve minute hold. All eight of our clay bodies are light or medium stoneware and porcelain, and shrinkage varies between them, so grab the number for the bag you are actually using rather than assuming. Ask any instructor and we will pull it up for you.
We bisque to cone 05 and glaze fire to cone 5½. Shrinkage varies across our eight clay bodies, so ask an instructor for the number on your bag.
Making the holes
Four ways to get a clean hole
Two ways to get a clean hole
All four work. They differ in speed, in how round the hole comes out, and in how much cleanup they leave behind. Most people end up owning a hole cutter and keeping a straw in their toolbox for the days they forget it.
These two will make anything on this page.
1. The hole cutter
1. The hole cutter
A thin metal tube on a handle, sold in sets from about 1/8 in to 1/2 in. Push straight in and give it a quarter turn, cut from the outside in, and support the wall from the inside with your other hand so you are not pushing the pot out of round.
Best at: round, repeatable holes with almost no burr on the entry side. Watch for: the plug packing up inside the tube. Clear it every few holes or it stops cutting and starts denting.
A thin metal tube on a handle. Push straight in, quarter turn, cut from the outside in, and support the wall from the inside with your other hand. Clear the plug out of the tube every few holes or it starts denting.
2. A cordless drill
Not a joke, and not a shortcut for lazy people. On a colander with fifty holes it is the difference between a pleasant twenty minutes and a miserable hour. Ordinary twist bits, low speed, leather-hard clay only.
Best at: volume, and larger holes in thicker walls. Watch for: stiff clay grabbing. Drill a small pilot hole first and it steers the bigger bit instead of tearing.
3. A drinking straw
2. A drinking straw
Free, already in the studio, and it makes a genuinely clean small hole. Push it through, twist, and pull back. The plug stays inside the straw, so after a dozen holes you blow the whole column out the other end at once.
Best at: small holes, soap dishes, patterns, kids. Watch for: the straw going soft and oval. Swap it out when the end stops being a circle.
Free and already in the studio. Push, twist, pull back. The plugs stack up inside and you blow the column out at once. Swap it when the end stops being a circle.
4. Needle tool and a paper template
For slab work and for anybody who wants the holes in an actual pattern rather than wherever they landed. Draw the layout on paper, lay it on the leather-hard clay, prick through every mark, lift the paper, then open each mark up to size.
Best at: even spacing and repeatable designs across a batch. Watch for: the template shifting halfway through. Tape it or hold it down properly.
Three people showing you, three different ways
Somebody showing you how it is actually done
How to cut holes in a colander and more...using a hole cutter.
The classic method from a potter who has been teaching it for decades. Watch how he supports the wall from behind on every single hole.
Watch how he supports the wall from behind on every single hole.
Day 16 – Pottery Pasta Strainer - 2 Techniques: Power Drill & a Straw
Both power methods side by side on the same pot, which is the fastest way to work out which one you want to own.
The Mechanics of Making Strainer Holes for a Tea Strainer GWENDOLYN YOPPOLO
If you are making a tea strainer, start here. Small holes are a different craft, and she covers wall thickness, timing and how to rescue a mistake.
If the piece is drying faster than you can work, wrap everything except the section you are cutting. On a big colander the far side can dry past the window while you are still on the near side.
Timing
There is one window, and it is not very wide
Cut too early and the hole closes behind the tool and the wall pushes in. Cut too late and you get cracks running out of every hole. Leather-hard is not a suggestion here, it is the whole technique.
- Too soft Fresh off the wheel The wall flexes away from the tool, holes go oval, and the pot loses its shape while you hold it. Wait.
- This is the one Leather-hard Firm like a bar of cold cheese. Holds its shape under the tool, still cuts without crumbling, still takes a bevel and a sponge.
- Too late Bone dry No give left. The clay cracks instead of moving, and the cracks radiate from the hole and open up in the bisque.
- Repair only After bisque A diamond bit and running water will get you a hole. It is slow, it is a rescue, and it is not a plan you should make on purpose.
If the piece is drying faster than you can work, wrap everything except the section you are cutting. On a big colander, cutting fifty holes takes long enough that the far side can leave the window while you are still on the near side.
Burrs, bevels and sanding
Cleanup, in the order that actually works
The mistake is trying to clean every hole the second you cut it, while the clay is still soft enough to smear. Some of this waits, on purpose.
The mistake is cleaning every hole the second you cut it. Some of this waits, on purpose.
-
Push the plug through, do not pull it back
Whatever the tool pushes into the hole should keep going in the direction it was already traveling. Dragging it back out is what tears the entry edge.
-
Clear each hole from both sides while it is leather-hard
A tapered wooden tool, twisted in gently from the inside and then from the outside, trues the hole and takes the ragged edge off both openings at once.
-
Bevel both openings
A slight chamfer on the inside and outside edge of every hole. This is the step almost nobody does and it pays off twice: it feels better in the hand, and a beveled edge gives glaze somewhere to sit instead of bridging across the opening.
-
Damp sponge, not wet
One light pass to soften everything. A soaking sponge just moves slip into the holes you spent twenty minutes opening.
-
Leave the leftover burrs alone until it is bone dry
Fighting them at leather-hard smears them flat into the surface. Once the piece is fully dry they knock off cleanly with a stiff dry brush, and most of them come off in one pass.
-
If you sand, sand wet. Always.
Dry sanding raw or bisqued clay throws respirable silica dust into the air, and that is the one genuinely dangerous thing in this whole process. Use a damp sponge or a wet green scouring pad, keep it damp the entire time, and wipe the surface down afterwards rather than blowing it off.
-
Hold it up to a light before it goes for bisque
Every hole should show daylight, cleanly, all the way around. Anything that looks fuzzy is a burr you missed, and it is far easier to fix now than after firing.
-
Push the plug through, never back
Whatever the tool pushes into the hole should keep going the way it was already traveling. Dragging it back out is what tears the entry edge.
-
True and bevel both openings at leather-hard, then one light damp sponge
A tapered wooden tool twisted in gently from each side trues the hole and takes the ragged edge off both openings. Then chamfer each edge, which almost nobody does and which gives glaze somewhere to sit instead of bridging it. Finish with one damp pass, not a wet one.
-
Leave the burrs until bone dry, then a stiff dry brush. If you sand, sand wet. Always.
Fighting burrs at leather-hard smears them into the surface. Once it is fully dry most knock off in one pass. Dry sanding raw or bisqued clay throws respirable silica dust into the air, the one genuinely dangerous thing in this whole process. Damp sponge or wet green pad, kept damp throughout.
-
Hold it up to a light before it goes for bisque
Every hole should show daylight, cleanly, all the way around. Anything fuzzy is a burr you missed.
We keep hole cutters at the studio for members to borrow, so you do not need to buy a set to find out whether you like making these. Ask at the front and we will get you sorted. Sanding is wet only, everywhere in the building, no exceptions.
We keep hole cutters at the studio for members to borrow, so ask at the front rather than buying a set. Sanding is wet only, everywhere in the building, no exceptions.
Start to finish
Six potters, six strainers, six different approaches
None of these are ours. They are here because they are good, and because watching a whole build in one sitting gives you something a list cannot: the pacing. You get to see how long each stage actually takes and where the person slows down.
Nothing loads from YouTube until you press play.
Making a ceramic colander on the pottery wheel from start to finish
Throwing, trimming, holes, a coil handle and glazing, all in one piece. The most complete single video on this page.
#19 How I Make a Colander | Start to Finish | No Wheel
The whole thing hand-built, no wheel anywhere. If you are working from a slab or over one of our slab molds, watch this one instead of the throwing videos.
How to make a BERRY BOWL!! Clay, Pottery, Ceramics Tutorial!
Berry bowl and matching saucer, explained as a production piece rather than a one-off. Good thinking on why the shape is the way it is.
Pottery throwing a ceramic colander - How to Make a Clay Pottery Colander on potter’s wheel
A traditional workshop approach, quiet and unhurried. Worth watching straight after Mae’s to see two people solve the same form differently.
How to Make a Stoneware Pottery Garlic Keeper on the Wheel.
A lidded form where the holes are for airflow rather than drainage. Same skills, completely different reason for the holes.
How to make a ceramic soap dish
Short, simple and slab-built. The easiest thing on this page to make on your first attempt, and a good way to practice holes with nothing at stake.
The hard part
Glazing it without filling in everything you just did
Here is the thing nobody warns you about: glaze does not just sit on the surface near a hole. It gets pulled into the opening and forms a skin across it, the same way water forms a film across a small ring. Then it fires, moves a little, and the film becomes a wall.
Glaze gets pulled into an opening and forms a skin across it. Then it fires and the skin becomes a wall.
Every fix below is some version of the same idea. Use less glaze near the holes, and physically open every single one before it dries.
| Route | Clog risk | Good for | The honest part |
|---|---|---|---|
| Brushing | Low | Anything with small or crowded holes. You control exactly how much glaze goes near each opening. | Slow. A fifty hole colander is a real evening, and three coats over that much surface is genuinely tiring. |
| Dipping | High | Big holes, fast even coverage, and that clean single-color look you cannot really get with a brush. | One second in the bucket floods every hole at once. You then have about a minute to clear all of them before it sets up. |
| Underglaze, then clear | Medium | Color and pattern without much thickness. The underglaze itself barely narrows a hole at all. | The clear coat on top is still a glaze and still bridges. You have not avoided the problem, you have moved it to the last step. |
| Glazed inside, bare outside | Lowest | Speckled clay bodies, and for tea strainers where the holes are too small to survive glaze at all. | The outside stays matte and slightly rough forever. Plenty of people love it. Some people look at it and think it is unfinished. |
Brush it. You control how much glaze goes near each opening. Dipping is faster and cleaner looking, but one second in the bucket floods every hole and starts a clock of about a minute. If the holes are small enough that any glaze would close them, glaze the outside and leave the perforated area bare.
The clearing drill
Do this every time, in this order, no matter which route you took above.
Do this every time, in this order.
-
Go thinner near the holes than everywhere else
Two coats within an inch of the perforated area, three coats everywhere else. Nobody will ever notice the difference in color. Everybody will notice a blocked colander.
-
Open every hole while the glaze is still wet
A needle tool through each one, pushing from the inside outward so the plug of wet glaze leaves the piece rather than getting driven deeper. This is not optional and it is not a spot check. Every hole, every time.
-
Follow with a small round bristle brush
The needle makes a channel through the middle. A stiff little brush twisted through the hole is what actually takes the glaze off the walls, which is where the bridging starts.
-
Sponge the far side
Whatever you pushed out has to land somewhere, and it forms a raised bead around the opening on the other side. Wipe it off now while it is soft.
-
Let it dry, then do the whole thing again
Glaze slumps as it dries and partially closes holes you already cleared. The second pass is faster than the first, and it is the pass that saves the piece.
-
The light test
Hold the finished piece up against a window or a lamp and look through it. Every hole should be a clean bright circle. Any hole that reads as a dim smudge is a hole that will close in the kiln.
-
Wipe the foot, and check the lowest holes twice
Glaze runs downhill in the kiln. The holes closest to the bottom of the piece are the ones most likely to catch a run and seal over, so give that bottom row an extra look.
-
Go thinner near the holes than everywhere else
Two coats within an inch of the perforated area, three everywhere else. Nobody notices the color difference. Everybody notices a blocked colander.
-
Open every hole while the glaze is still wet, then twist a brush through it
A needle tool through each one, pushing from the inside outward so the plug leaves the piece. That only clears the middle, so follow it with a small round bristle brush, which is what takes the glaze off the walls. Every hole, every time.
-
Sponge the far side
What you pushed out forms a raised bead around the opening on the other side. Wipe it off while it is soft.
-
Let it dry, then clear every hole again
Glaze slumps as it dries and partly closes holes you already cleared. The second pass is faster, and it is the one that saves the piece.
-
Light test, wipe the foot, check the bottom row twice
Hold it against a window. Every hole should be a clean bright circle, and a dim smudge is a hole that will close in the kiln. Glaze runs downhill, so check the bottom row twice.
Pick a stable glaze, not a spectacular one. This is the single biggest decision and it happens before you touch a brush. A glaze that moves in the kiln is exactly what you do not want here. Anything described as flowing, running, breaking, or pooling is doing the one thing that closes holes. Save those for a mug.
Pick a stable glaze, not a spectacular one. Anything described as flowing, running, breaking or pooling is doing the one thing that closes holes. Save those for a mug.
If you want something with visual interest, put the exciting glaze on the outside of the wall away from the holes, and keep a stable, well-behaved glaze in and around the perforated area.
How To Make A Ceramic Berry Bowl + ombre glazing technique // full pottery process
The only video here that treats the glazing of a perforated pot as the main event rather than a footnote. Worth it for that section alone.
The only one here that treats glazing a perforated pot as the main event.
Brushing is the easy recommendation here, and we have more than 650 brush-on glazes to pick from, so there is no shortage of stable options. Our seven dipping buckets are open to members who have done the dipping certification, and dipping a strainer is completely allowed. Just have your needle tool and brush already in your hand before the piece comes out of the bucket, because the clock starts immediately.
We have more than 650 brush-on glazes, so there is no shortage of stable options. Dipping buckets are open to members with the dipping certification. Have your needle tool and brush in hand before the piece leaves the bucket.
Underglaze goes on raw clay only, leather-hard or bone dry, and gets bisque fired before any glaze touches it. We stock Speedball and Amaco Velvet.
Not sure which glaze behaves itself? The glaze finder filters the whole collection, and any instructor on the floor can tell you which of ours move in the kiln.
Diagnosis
When it goes wrong
Six things that happen to almost everybody at least once. Pick whichever one is currently sitting on your shelf looking sad.
Three things that happen to almost everybody at least once. Pick whichever one is currently sitting on your shelf looking sad.
The holes closed up
Keep this open while you work
The whole thing, as two short lists
This is the part to leave up on your phone. Tap a line to cross it off. Nothing is saved, so refreshing the page starts you clean.
Making day
Glazing day
Before you put food in it
One paragraph about using the thing
Stoneware fired to cone 5½ is vitrified, and a food-safe glaze applied properly and fired properly is food safe in a strainer exactly like it is in a bowl. Nothing about drilling holes changes that.
What does change is thermal shock. A colander is a thin-walled piece full of stress risers, and every hole is a stress riser. Dumping a pot of boiling pasta water through a cold ceramic colander is the single most likely way to crack one, and it is a real risk rather than a theoretical one. Run some warm water through it first, or let it sit out of a cold cupboard for a few minutes. And if you leave the hole interiors bare, scrub them properly, because a bare wall is rougher than a glazed one and holds onto residue.
A handmade colander is not as bombproof as the steel one from the store. It is nicer to look at, it is yours, and it wants slightly more thought about temperature.
Fired to cone 5½ it is vitrified, and a food-safe glaze fired properly is food safe in a strainer exactly like it is in a bowl. What is different is thermal shock. Every hole is a stress riser, and dumping boiling pasta water through a cold colander is the most likely way anybody ever cracks one. Run warm water through it first. It is not as bombproof as the steel one from the store.
Questions
The ones we get asked
How many holes should a colander have?
Fewer than you think. Thirty to fifty in a nine inch colander drains as fast as anybody needs, and every extra hole is another place the piece can crack. Water leaves through the total open area, and doubling the hole count to get faster drainage mostly just doubles your glazing work.
Fewer than you think. Thirty to fifty in a nine inch colander drains as fast as anybody needs, and every extra hole is another place the piece can crack.
Can I put holes in the bottom, or only the sides?
Both, and the bottom is where most of the draining actually happens. The one rule is to keep them inside the foot ring and off the outer edge of the base, so the piece still sits flat and so glaze running down the wall in the kiln does not pool straight into your lowest holes.
Both, and the bottom is where most of the draining happens. Keep them inside the foot ring and off the outer edge of the base.
My glaze filled the holes. Can it be fixed after firing?
Sometimes. A thin film across a hole can often be broken through with a diamond bit or a rotary tool and water, and the result is usable if not beautiful. A hole that is genuinely full of melted glaze is finished, because you would be drilling through glass fused to the clay. Worth ten minutes of trying before you give up on the piece.
Do I need a special glaze?
No, you need a well-behaved one. Any stable, food-safe glaze that does not move much in the kiln will work. The glazes to avoid are the dramatic ones, the runners and the breakers and the ones that pool in the low spots, because pooling in a low spot is exactly what a hole is.
Should I use wax resist around the holes?
It works, and some potters swear by it. Waxing the immediate ring around each hole keeps glaze off that area entirely, which makes the clearing step much easier. The trade-off is that you end up with a small unglazed halo around every opening, which is a look you either like or you do not. Try it on one piece before committing to it on a batch.
At The Clay Hole the wax stations are a Purple Level and Black Level tool, so check your level before you plan around it.
What clay should I use?
Anything mid-fire and reasonably strong. Something with a bit of grog or sand is more forgiving of all the hole cutting and handles thermal shock slightly better, which matters more here than it does on most forms. Very smooth porcelain is beautiful and less forgiving, so it is not the one to learn on.
Can I make one without a wheel?
Absolutely, and it is one of the better hand-building projects there is. A slab draped into or over a form, a foot ring added, holes cut once it stiffens up. Studio Lukkili’s video above is a complete no-wheel build, and we have 248 slab molds if you want a shape to work over.
Why do my holes crack in the bisque?
Almost always one of three things: you cut them too dry, you put them too close together, or you dragged the tool back out and tore the edge. Cracks that radiate outward from a hole point at the drying stage. Cracks that connect two holes point at spacing.
Go put some holes in something.
Strainers are one of those forms where the first one teaches you more than reading about ten of them. If it clogs, you will know exactly why, and the second one will be right.
The first one teaches you more than reading about ten of them. If it clogs, you will know exactly why.
- Glaze finderFilter the whole collection and find something that will not run into your holes.
- More free video lessonsTwenty-four hand-picked tutorials from fifteen of the best potters on YouTube.
- Membership levelsGreen, Yellow, Purple and Black, compared side by side.
That was the short version. There is a much longer one at the top of the page.
The Clay Hole, 12896 S Pony Express Rd, Suite 100, Draper UT 84020. Questions about any of this, text the studio at 385-241-5528. Videos on this page belong to their creators and are embedded with credit; none of them are ours.
Which version would you like to print?
Videos come out as a labeled box with the title and channel to search for, since paper does not play them.