Pottery Date Night
 Bring All Your Friends Free Week
 Give a Month of Pottery
 Private Pottery Parties

 The Welcome Booklet
 Your First Ten Sessions
 The Pottery Process
 Finding the Studio
 Your Classes Never Expire
 The Four Tables
 Who’s Who
 The Rewards Program
 Flux Glazes
 The Calculators
 Kiln Tracker
 Holiday Kiln Deadlines

 Beginner’s Tool Set
 Fingernail Clippers
 Mayco Clay Mender
 Epoxy for Kintsugi
 Applicator Bottles
 Large Bead Rack
 Raku Workshop
 Nighttime Raku
 Horsehair and Feather Raku
 The Clay Hole T-Shirt
 Embroidered Crewneck
 Zip-Up Hoodie
 Pre-Made Bisqueware
 Glaze Catchers
 Kiln Cookies
 Clay Cubby Rental
 The Glaze Bible, Printed
 The Book of Molds, Printed
 Printable Pottery Guides
 Free Printable Trackers
 Gifts for Potters
 Christmas Pottery Ideas
 Mother’s Day Gift Ideas
 Pottery Date Night
 Studio Calendar
 2027 Studio Events
 What Should I Do Today?
 How to Throw on the Pottery Wheel
 How to Make a Pinch Pot
 How to Tap Center a Pot
 The Five Stages of Clay
 Is Pottery Hard to Learn?
 Pottery Wheel Practice Drills
 20 Easy Hand-Building Projects
 Everything That Sounds Wrong

 A Beautiful Piece, Every Time
 Slab Roller Tips
 Any Dish as a Slump Mold
 Slab Roller & Slab Mold Certification
 The Pottery Skill Tree
 Clay & Pottery Calculators
 Logging Your Pottery and Glazes
 The Pottery Dictionary
 Why Did My Pottery Do That?
 The Pottery Cone Chart
 Pottery Myths, Fact-Checked
 Is Handmade Pottery Food Safe?
 Incredible Ceramic Artist Videos
 How Dan Throws Giant Pots
 How to Dry Your Pottery
 The Pottery Wheel Introduction
 Pottery by Zodiac Sign
 Personality and the Pottery Wheel
 Pottery for Engineers
 ADHD, Hyperfocus, and Never Running Out
 Hobbies for Burnout
 Screen-Free Hobbies for Adults
 Every Addiction I Ever Had Lost to Art
 Functional Pottery Is Engineering
 How Do We Compare?
 Pottery Classes by City
 Every Pottery Studio in Utah
 Pottery in Draper
 Featured Members
 The Signature Wall
 Making Friends as an Adult Is Brutal
 The Clay Hole Commandments
 2027 Pottery Contests
 2027 Studio Parties
 Gallery Night

 Scream It Into the Void
 Destroy the Glaze Wall
 Daily Affirmation Cards
 Everything That Can Go Wrong
 Subscribe to Our Newsletters
 Contact The Clay Hole
 Corporate Team Building

 Glaze Combinations
 Glazes We Do Not Carry
 Making Glaze Test Tiles
 The Mega Glaze Tool
 How to Use the Mega Glaze Tool

 Glaze Brushing Techniques
 How to Use Underglaze
 How to Use Dipping Glazes
 Glaze Problems, Causes and Fixes
 The Dipping Glaze Guide

 Making a Glaze Catcher
 Fused or Sharp After Firing
 The Signature Wall
 His Viral Videos
 His Own Ceramics
 Meet Mud
Hand building, project guides
Making ceramic jewelry
Earrings, pendants, beads, buttons and pins are the smallest things you can make here, and they are the fastest way to find out what clay actually does. A mug forgives a lot. A quarter inch of clay with a hole through it forgives almost nothing, and that is exactly why a weekend of jewelry teaches more about shrinkage, drying and glaze behavior than a month of bowls.
Jump to a section

The short version
All of it, in eight lines
- Jewelry is pottery with three extra rules. It has to be small, it has to survive being worn, and it has to attach to something. That third one is the one people forget until the kiln is closed.
- Roll thinner than a tile, thicker than paper. About an eighth of an inch for earrings, a quarter inch for pendants and buttons. Thinner snaps in the bag. Thicker drags on an earlobe.
- Punch the hole while the clay is soft, and punch it bigger than looks right. Everything shrinks between 10 and 14 percent, and glaze narrows what is left.
- Leave real clay around the hole. An eighth of an inch of clay between the hole and the nearest edge, minimum. Less than that and it tears out later.
- Dry it flat, slow, and between two boards. A piece this small dries in hours, and a warped earring is warped forever.
- Underglaze goes on raw clay here, then bisque, then decide. Bare fired underglaze is fine on jewelry, because none of it touches food.
- Glaze it, then get it off the shelf. Wire it through the hole on a bead rack, or wipe one whole face bone clean and lay that face down.
- Group small pieces on a cookie. Bisque is free. Every piece is a flat $4.80, and the one time pieces combine is a six inch kiln cookie, a quarter inch apart, under 125 cubic inches together. One cookie, one $4.80.
Findings come last, and we do not sell them
Jump rings, ear wires, posts and clasps all go on after the glaze firing, and you will need to bring them yourself. Any craft store or jewelry supplier has them. We do sell Gorilla 5-Minute Epoxy , which is what you want for gluing posts onto studs.
How to use this page
Why there is a video and a list for the same thing
Watching and reading do two different jobs, and neither one covers for the other.
A video gives you the part that cannot be written down. How fast somebody pulls a cutter through a slab. How wet the clay looks when the hole punches cleanly instead of dragging. What a needle tool sounds like going through leather hard porcelain. Nobody has ever read a sentence about wrist pressure and then had good wrist pressure.
A list gives you the part video is terrible at. Video is a moving stream, and you cannot pause it with slip on both hands. It hands you fourteen things in eleven minutes and then it is over. A list holds still. It stays on the step you are on, it survives being glanced at, and it carries the numbers: the thicknesses, the hole sizes, the order of operations.
There is also a plain memory reason. The same idea arriving twice through two different doors, once as motion and once as words, gets remembered better than the same idea arriving twice through one door. Watching builds a picture of the movement. Reading builds something you can check yourself against. You end up with two ways to recall one thing instead of one way.
So use it in that order. Watch the video in a section once, all the way through, before you touch clay. Then put your phone somewhere dry with the list open and work off the list. Trying to do both at once is how a slab stiffens on the table while you scrub back through a video looking for the bit you missed.
One habit worth building
Make a test piece first. One tag of the clay you are about to use, with the hole you plan to use, fired all the way through. It costs you a week and it answers every shrinkage question on this page for your clay, in your hands, with your tools.
The whole idea
Three things that make jewelry different from every other pot
Nothing on this page is a new skill. It is all rolling, cutting, joining, drying, glazing and firing, exactly as you already do them. What changes is the tolerance. Three things get much less forgiving as a piece gets smaller.
It is small, so everything happens faster
A quarter inch of clay with air on five sides dries in an afternoon, not a week. That is genuinely useful, because you can go from wedged clay to bisque in days. It is also why jewelry warps and cracks more than anything else people make here: the piece stiffens before you have finished deciding what it is.
It gets worn, so weight and edges matter
Nobody has ever complained that a mug was slightly too heavy. An earring that is slightly too heavy comes off at lunchtime and lives in a drawer. Weight, balance, a sharp fired edge against a neck, and what the metal is made of all become design decisions, and none of them show up until somebody actually puts the thing on.
It has to attach to something
This is the one that ruins finished work. A pendant with no hole is a small flat sculpture. A hole that closed up in the fire, or filled with glaze, or sits too close to an edge and tears out, is the same thing. The hole is not a detail you add at the end. It is the first decision you make.
What firing costs
Bisque firing is free here, every time. A glaze firing is five cents per cubic inch of the box a piece fits inside, and anything 125 cubic inches or under is charged a flat $4.80 , measured at the widest points. A pendant is nowhere near 125 cubic inches, so it pays the flat charge, and so does the next one. Pieces are priced one at a time, and the one exception is the cookie deal: small pieces that fit on one six inch kiln cookie, a quarter inch apart and roughly the same height, under 125 cubic inches together, pay as one piece. One cookie, one $4.80. So jewelry is cheap to make and expensive to make one at a time, and what makes it cheap is a cookie rather than a crowded kiln. Run the numbers on the calculator if you want to see it.
Materials
Which clay, and why shrinkage suddenly matters
Every clay body shrinks as it dries and shrinks again in the fire. On a dinner plate you never think about it. On a hole the width of a matchstick, it is the difference between a pendant and a paperweight.
Here is the published average shrinkage for the eight clay bodies we stock, taken from each maker's own data. These are total figures from wet to fired at the body's rated cone, and your own drying and firing will move them a little, which is the entire argument for making a test tag before you commit to a design.
| Clay body | Published average shrinkage | How it behaves at jewelry scale |
|---|---|---|
| 52 Buff | 10.0 percent | The least movement of anything we stock, which makes it the safest choice for a design where a hole has to end up a specific size. |
| B-Mix w/Grog | 11.0 percent | Low shrinkage, but the grog tears thin cut edges and shows as grit under a thin glaze. We would not start here. |
| B-Mix | 12 percent | Smooth, forgiving, cuts cleanly, takes a stamp well. The easiest all round choice for a first batch. |
| Half & Half | 12.0 percent | Half porcelain, half stoneware. Close to a porcelain surface with more tolerance for being handled while damp. |
| Speckled Buff | 12 percent | The speckles read as texture on a big pot and as strong pattern on something an inch wide. Lovely under a clear or a pale glaze. |
| B-Mix w/Specks | 12.47 percent | B-Mix behavior with dark specks coming through. Same easy handling, more visual interest at small sizes. |
| #16 Porcelain | 13.9 percent | The most movement, and the most beautiful. Whitest ground for underglaze and the crispest cut edge, but it will find every mistake you make. |
| Berlin Gray | Published differently | A dramatic dark gray body. The maker gives 5.7 percent drying and 6.7 percent firing shrinkage, but the firing figure is measured at 1300°C, well above our glaze firing, so it will not line up with the rest of this column. Make a test tag and measure it yourself before designing a hole size around it. |
What that does to a hole
Take the size you punch, subtract the shrinkage, and that is roughly what you get out of the glaze firing. Then subtract a little more, because glaze is a physical layer and it lands on the inside of the hole too.
| You punch | At 10 percent | At 12 percent | At 13.9 percent |
|---|---|---|---|
| 1/16 inch (1.6 mm) | 1.4 mm | 1.4 mm | 1.4 mm |
| 1/8 inch (3.2 mm) | 2.9 mm | 2.8 mm | 2.7 mm |
| 3/16 inch (4.8 mm) | 4.3 mm | 4.2 mm | 4.1 mm |
| 1/4 inch (6.4 mm) | 5.7 mm | 5.6 mm | 5.5 mm |
A common jump ring is made from wire somewhere around 0.8 to 1.0 mm thick, so a hole punched at an eighth of an inch has room to spare even on porcelain. The reason people still end up with holes that will not take a ring is almost never shrinkage. It is glaze.
Picking one
- First batch ever: B-Mix. It cuts clean, it takes texture, it does not fight you, and 12 percent is an easy number to design around.
- You want white, crisp and expensive looking: #16 Porcelain. Expect more warping and more cracking while you learn it.
- You want the clay itself to be the decoration: Speckled Buff or B-Mix w/Specks under a clear or a pale glaze.
- Avoid grogged bodies. Grog is pre-fired clay, crushed and blended back in, and at this size it behaves like grit. It drags under a cutter, it leaves ragged edges on something an inch wide, and it feels rough against skin.
- Do not mix bodies in one piece. Two clays with different shrinkage joined together is a crack with a delayed fuse. The only exception is deliberate marbling with bodies that shrink at the same rate.
Reclaim is your friend here
Jewelry is the best possible use for the scraps left over from everything else you make. A single fistful of clay is a dozen earrings. See how to reclaim clay , and how to soften clay that has gone stiff .
Forming
Four ways to form a piece small enough to wear
All four start from the same place: properly wedged clay with no air in it, and a surface you can cut on without dragging.
1. Rolled slab and cutters
The workhorse. Earrings, pendants, charms, tags, anything flat.
- Roll a slab thinner than you would for a tile. An eighth of an inch for earrings, a quarter inch for pendants and buttons. Use guide sticks or the slab roller's own setting so it is even, because uneven thickness is uneven drying is a warp.
- Compress both faces. Rib the slab firmly in two directions on the top, flip it, and do the back just as thoroughly. This is the step people skip and it is the one that keeps a flat thing flat.
- Let it stiffen to soft leather hard before you cut. Wet clay smears under a cutter and stretches when you lift it. Wait until it holds an edge but still takes a fingernail easily.
- Cut on the surface you will dry on. Cookie cutters, a needle tool round a paper template, or a craft knife. Press straight down, do not twist, and do not saw.
- Lift the waste away, not the piece. Peel the surrounding slab off the board and leave the shapes where they are. Moving a soft cut shape is how it stops being the shape you cut.
- Punch the holes now. While it is still soft. The whole next section is about this.
- Clean the edges with a barely damp sponge or a fingertip. A cut edge has a tiny burr on the underside. Take it off now, or it becomes a sharp fired edge against somebody's neck.
If you want the shapes identical rather than nearly identical, cut them all in one session from one slab, in one thickness. Two slabs rolled an hour apart are two different thicknesses and two different moisture levels, and a matched pair of earrings made from them will not match.
Our slab roller and slab molds guide covers the machine itself, and there are 248 slab molds in the studio if you want a curve rather than a flat plane. A shallow slab mold gives a pendant a gentle dish that catches light completely differently from a flat one, and it costs you nothing but the press.
The slab rollers are open to every membership level, and everybody does the slab roller and slab molds certification once before using one. It takes about twenty five minutes.
2. Beads, rolled and pierced
Rounds, tubes, discs and anything that threads onto a cord.
- Roll a ball with no seams. Work it in your palm until the surface is closed. A visible fold is a crack after firing.
- Pierce from both ends, meeting in the middle. Push a bamboo skewer halfway in, pull it out, turn the bead over and come in from the other side. Going all the way through in one push blows the far side out into a ragged crater.
- Twist the skewer, do not shove it. Rotating compresses the wall of the hole instead of tearing it.
- Reshape the bead afterwards. Piercing always distorts it slightly. Roll it once more, gently, with the skewer still in place if that helps.
- Leave it on the skewer to stiffen. Rest the skewer across two blocks so the beads hang in the air, and they dry evenly with no flat spot.
Beads are the single best exercise in the whole studio for learning what shrinkage feels like, because you make twenty of them, you measure them wet, and you measure them again after the glaze firing. Nothing else gives you that many data points in one week.
Thread a strand's worth in graduated sizes and you have a necklace. Thread six identical ones and you have earrings. Either way, make more than you need, because at this size a few will always be wrong.
3. Buttons and studs, cut from a thicker slab
Two holes instead of one, and a back that has to sit flat.
- Roll a quarter inch slab and let it stiffen further than you would for earrings. Buttons take real force in use and thin ones snap.
- Cut the shape, then flatten the back deliberately. Press the cut shape gently onto a smooth board so the underside is genuinely flat, not just uncut.
- Punch two holes, well inside the edge. Space them for the thread you will use, and keep at least an eighth of an inch of clay between each hole and the rim.
- Round every edge. A button lives against fabric and skin. Soften the whole rim with a damp finger until nothing catches.
- Glaze the top only. The back sits on a shelf, so it stays bare, and a bare back also stops a button gluing itself into a buttonhole with glossy glaze.
Studs are the same object with no holes at all. Cut them, dry them, fire them, then glue a metal post to the back with five minute epoxy . Scuff the fired back wet first, with a diamond pad or a wet sanding sponge at the sink, so the epoxy has something to hold, and leave it a full day before wearing them.
Do not try to embed a metal post in raw clay. The clay shrinks around the metal by more than a tenth of its size, and the metal does not shrink at all. It cracks every time.
4. Pinched and sculpted, for anything not flat
Tiny vessels, faces, animals, charms with real volume.
- Keep the wall thickness even and keep it solid or hollow, never both. A thick lump joined to a thin edge dries at two speeds and cracks along the join. A closed hollow form needs a small hole where it will not show, so steam can leave in the kiln.
- Anything genuinely solid should be under about half an inch through. Thicker than that and you are asking a kiln to drive water out of the middle of a lump.
- Score and slip every join properly , even at this scale. See scoring and slipping . Small joins fail more often than big ones because people treat them as too small to bother with.
- Add the hanging loop as part of the form. A pulled and attached loop looks better than a drilled hole on a sculpted piece, and it is stronger if you join it properly.
- Work out how it will sit against a body. A charm that is beautiful on a table and digs in when worn is a failed charm.
The pinch pot guide is the same technique at a bigger scale, and everything in it applies. A thimble sized pinch pot with a hole in the rim is a pendant.
If you want repeatable relief decoration rather than a one off, look at sprig molds . A sprig pressed onto a flat cut shape gives you thirty identical pendants with a raised motif, which is very hard to do by hand.
Four makers, four approaches
The part that ruins finished work
Nine steps to a hole that survives
Five steps to a hole that survives
More finished jewelry gets thrown away over the hole than over anything else on this page. It closed, it filled with glaze, it sat too near an edge and tore out, or it was never there at all. All four are avoidable, and all four are decided before the piece is dry.
- Decide where the hole goes before you cut the shape. Not after. A shape designed around its hanging point looks deliberate. A hole punched into a finished shape usually lands in the wrong place and hangs crooked.
- Punch while the clay is soft leather hard. Firm enough to hold its shape, soft enough that a tool goes through without effort. Never bone dry: dry clay does not cut, it chips, and the chip usually takes the edge with it.
- Use a tool that cuts a plug, not a point that pushes. A drinking straw, a metal tube, a leather punch or a proper hole cutter removes clay. A needle tool or a toothpick shoves clay sideways, which leaves a compressed ring around the hole that shrinks differently and can crack. If a needle tool is all you have, twist it as it goes in and clean the back.
- Punch one size up from what looks right. The hole shrinks with everything else, then glaze lands inside it. What looks generously large in wet clay looks correct after firing.
- Leave at least an eighth of an inch of clay between the hole and the nearest edge. That margin is the whole strength of the piece. Everything hanging from it pulls on that little bridge of clay, and a thin one tears out the first time somebody takes a necklace off in a hurry.
- Clean the burr off the back. Every punch pushes a small collar of clay out the far side. Lay the piece face down on a soft surface and take it off with a damp fingertip. Left alone it fires into a sharp ring exactly where a cord runs.
- For a two hole dangle, punch both from one template. Cut a scrap of card with two holes at the spacing you want, lay it on every piece, and punch through it. Doing it by eye across twenty pieces guarantees twenty spacings.
- Re-check every hole at bone dry. Holes close a little as clay dries. Hold each piece up to a light before it goes in for bisque. If one has narrowed, do not force it, because bone dry clay chips. Leave it, and open it after bisque with a wet round needle file. Next batch, check the holes again at leather hard, while a gentle twist of the tool still opens them.
- Keep glaze out of the hole, and check it again after bisque. A bisque hole is easy to open with a round needle file, used wet, with safety glasses on. A glaze fired hole full of glass is not, and forcing it usually breaks the piece.
Three ways to hang a piece that has no hole
It happens to everybody once. A wire loop glued to the back with five minute epoxy , a glue on bail from a jewelry supplier, or a wrap of wire round the whole piece. The wrap is the only one that is genuinely reversible, and on a piece with an interesting silhouette it can look better than a hole would have.
Drying
Drying something the size of a coin
A flat piece curls toward whichever face dries first. The top is open to the air, the bottom is sitting on a board, so the top wins and the edges lift. On a tile that is a slow tragedy over days. On an earring it can happen while you are cleaning up.
The fix is the same at every scale and it takes no skill at all: slow the fast face down until both faces are losing water at the same rate.
- Lay the pieces on a flat, absorbent board. Plaster or drywall if you have it, a clean board if you do not. Never on plastic, which traps water underneath and dries the top only.
- Cover them loosely for the first night. A sheet of plastic laid over, not wrapped around. You are slowing the top face, not sealing the piece.
- Then sandwich them. Second board on top, directly on the pieces once they are stiff enough to take the weight. Both faces are now equally covered and equally slow.
- Give them a day or two, not a week. Something this thin is bone dry fast. Check by holding it to your cheek: cold means there is still water in it.
- Do not put them on a rack near a heater or a vent. Moving air on one side of a flat thing is exactly the problem you are trying to prevent.
The same fight, written out in full
Our ceramic tiles that stay flat page is the long version of this section, with ten videos on it. Every word of it applies to a pendant, just faster. If you are getting warping you cannot explain, read that.
Cracks specific to small work
- A crack running from the hole outward means the hole was punched into clay that was already too stiff, or the margin to the edge was too thin.
- A crack across the narrowest point of an odd shape means the piece dried unevenly. Thin sections dry first and pull against the thick ones.
- Hairlines all over one face means the surface dried much faster than the body. That is the uncovered first night.
- A piece that snapped in the bag on the way home was too thin, not badly dried. Go up a slab setting.
A crack found at greenware can sometimes be closed with Mayco Clay Mender . A crack found after bisque is a decision about whether the piece is worth the glaze firing.
Surface
The part people actually see
At this size the surface is almost the entire object. A pendant an inch across has no form to speak of, so pattern, color and texture are doing all of the work. This is the one place where jewelry is genuinely easier than pots: a technique that would take an hour on a mug takes a minute here, and you can try six of them in an afternoon.
Underglaze
The obvious first choice, and the one that suits jewelry best. It holds a line, it does not run, and it goes on raw clay here rather than on bisque. Because nothing you are making touches food, you can leave fired underglaze bare and get a soft matte surface, or clear over it for gloss. Bare is porous, which is the trade: it is fine on a pendant and worth thinking about on something that sits against skin all day. The underglaze rules are worth reading first.
Carving and sgraffito
Underglaze over the whole face, let it set, then scratch a line drawing back through to the clay. On something this small a single confident motif beats a detailed scene every time. Carving and sgraffito covers the tools and the timing.
Stamps and pressed texture
Press into the slab before you cut. Lace, leaves, bark, a bolt head, a coin, a commercial stamp. Roll over the texture rather than pressing straight down and you get an even impression across the whole slab, which means every shape you cut from it matches.
Sprig molds
A small raised motif pressed from a mold and joined to the surface. This is how you get thirty identical pendants with a relief design. How to use sprig molds . Score and slip the join even though it is tiny, or it pops off in the bisque.
Engobes
Thicker than underglaze, closer to a colored clay slip, and it goes on soft leather hard. Good for broad color fields and for a surface with a bit of relief to it. What engobes are and when to use one .
Marbled and layered clay
Two or more colored clays wedged, stacked or rolled together so the pattern runs all the way through the piece rather than sitting on it. It is the technique jewelry was made for, because a cross section an inch wide shows the whole pattern. Neriage and colored clay .
One rule that saves a batch
Whatever you decorate with, do it on the slab before you cut, not on the cut shapes. Decorating a slab is one flat surface and one continuous motion. Decorating forty small shapes is forty chances to nudge one out of true, and every nudge is a warp.
Glazing
Glazing something that must not weld itself to a shelf
Here is the problem in one sentence. A pot has a foot, and the foot is the part you leave bare. A pendant has no foot. Whichever face you lay down is the face that has to be clean, and on a piece you want glazed all over, there is no such face. Everything below is a way out of that.
- Nothing goes on a shelf with glaze on the side that touches it Glaze is glass. Glass sticks. A fired on earring takes a chip of the kiln shelf with it when it comes off, and that is a shelf we have to grind. This is the rule the other five exist to serve.
- A wire through the hole is the real answer Hang the piece on a nichrome wire so nothing touches anything. This is exactly what a bead rack is for, and it is the only method that lets you glaze a piece completely, all over, with no bare patch anywhere. Worth knowing before you commit a batch to it: a rack is not a kiln cookie, so pieces hanging on one are charged one each. Glazed all over costs more than glazed on five sides.
- No hole means one face stays bare Studs, buttons, cabochons and anything solid get glazed on the front and the sides, and the back is wiped back to clean clay. Nobody sees the back of a button. On a pendant that will be seen from behind, put a hole in it and use the wire.
- Wax resist helps and does not finish the job Wax the face and the edge that will sit down, let it dry completely, glaze, and then still wipe the waxed area with a barely damp sponge. Wax repels most of the glaze, not every last bead, and one bead is enough to fuse a piece down.
- Dipping has its own rulebook The dipping buckets are a closed system with rules of their own, including one glaze per piece and nothing unfired ever going in. Read how to use dipping glazes and get certified before you dip anything.
- Test the glaze before you commit forty pieces A glaze that behaves beautifully on the vertical wall of a mug can flood off the face of a flat pendant, because a flat piece gives it nowhere to go but sideways. Fire one before you fire the batch. Our glaze finder tells you which ones move.
The one piece of kit that changes the outcome
We sell an Amaco Large Bead-Rack in the studio for $48. Seven nichrome wires over two stoneware supports, rated to cone 10, and the whole rack goes in the kiln with your work hanging off it. It is the difference between glazing a pendant all over and always leaving one bare face.
For anything sitting down instead of hanging, a kiln cookie protects the shelf and a glaze catcher handles a glaze you know will run.
The kit that makes this easy, and what it costs
We sell an Amaco Large Bead-Rack in the studio for $48. It is seven ten inch nichrome wires suspended over two stoneware supports, about eight inches tall, rated to cone 10, and the whole rack goes into the kiln with your work hanging on it. The wires rearrange for different sized pieces. It is not for raku. If you are going to make jewelry more than once, this is the piece of equipment that changes the outcome.
For anything sitting down rather than hanging, a kiln cookie puts a sacrificial disc of clay between your piece and our shelf, and a glaze catcher handles a glaze you know is going to run. The cookie goes under every piece that sits down, every time, and the catcher is the extra for a glaze that runs. Both are cheaper than the conversation about a damaged shelf.
Applying glaze precisely to something an inch wide is much easier with a fine tip. The applicator bottle set is a good fit for this.
Firing
What the kiln does, and what it costs
Jewelry fires exactly like everything else here. Bisque at cone 05, then glaze at cone 5 with a twelve minute hold at peak, which does about the same amount of work as a cone 5½. There is no separate low fire jewelry route in this building, and that is deliberate: high fired stoneware and porcelain jewelry is durable in a way low fire jewelry simply is not.
If you want the long version of what is happening in there, read what a kiln firing actually does .
The money
- Bisque firing is free. Every time, for everybody, no measuring.
- Glaze firing is five cents per cubic inch of the box a piece fits inside, and anything 125 cubic inches or under is a flat $4.80, per piece.
- A pair of earrings is a fraction of a cubic inch. So is a pendant. So is a strand of beads. Every one of them is charged as its own piece, at the same flat $4.80 a mug pays.
- So group them on a cookie, not just in a firing. Small pieces that fit on one six inch kiln cookie, a quarter inch apart and roughly the same height, under 125 cubic inches together, pay as one piece. One cookie, one $4.80. That is the only time pieces combine, and it is the single biggest cost decision on this page. Sharing a kiln shelf with nothing underneath combines nothing: forty loose pendants are forty flat charges.
Premium glazes and dipping glazes carry their own small upcharges. See the premium glaze upcharge and the dipping glaze upcharge , or run the whole thing through the firing calculator .
How to hand a batch of jewelry in
Small work gets lost. Put the whole batch on one labeled bisque tray rather than scattered across a shelf, keep pieces from touching each other, and tell an instructor in a pink shirt that it is jewelry so it goes on a rack rather than flat on a shelf. If a piece is fused or sharp when it comes out, here is what we do about it .
Assembly
Findings, and where to get them
We do not sell jewelry findings. No jump rings, no ear wires, no posts, no clasps, no chain. Any craft store or online jewelry supplier has all of it for a few dollars, and you will want them in your bag before the glaze firing comes out, because the temptation to hang a finished pendant on something unsuitable is real.
- Buy two pairs of pliers, not one. Flat nose or chain nose, one in each hand. Every jump ring on earth needs two hands to open it properly and one hand to do it badly.
- Open a jump ring sideways, never outward. Grip each side of the split and twist one hand toward you and one away, so the ring stays round. Pulling the ends apart flattens it into an oval that never closes cleanly again.
- Thread, then twist it back the same way. Closed properly, you should not be able to feel the join with a fingernail. A gap is where a chain escapes.
- Match the metal to the wearer, not to the price. Cheap plated ear wires are the most common reason somebody stops wearing a handmade earring. Surgical stainless steel, titanium, niobium and sterling silver are the safe options for most people. Worth knowing that surgical stainless steel is not nickel free: the usual 316L grade is roughly 10 to 14 percent nickel and it can still set somebody off who already reacts, so titanium and niobium are the safer pick for them.
- Check which way the piece faces. A jump ring threaded through a flat pendant makes it hang side on unless the hole runs the right way. Hold it up before you close the ring, every time.
- For studs, scuff the fired back wet before you glue. A wet diamond pad or a wet sanding sponge gives the epoxy something to grip. Glazed glass gives it nothing. Sanding fired work is wet only, never dry, because dry sanding fired clay puts respirable silica into the air.
- Use five minute epoxy, and give it a full day anyway. Gorilla 5-Minute Epoxy sets in minutes and reaches real strength overnight. Superglue on a glazed surface fails, usually while somebody is wearing it. Wear nitrile gloves and eye protection, and keep the room ventilated while you mix and glue.
- Weigh the finished piece before you decide it is done. Everything in the next section.
A short shopping list
Two pairs of chain nose pliers, a bag of jump rings in one or two sizes, hypoallergenic ear wires, flat pad earring posts with backs, and a length of chain or cord. That is under twenty dollars and it will finish dozens of pieces.
Wearability
Making something people will actually wear
This is the section that separates jewelry from small flat sculpture, and it is the one nobody thinks about until a gift comes back unworn.
Weight
Fired stoneware is denser than almost anything else people wear. Our rule of thumb: weigh one finished earring against a US nickel, which is five grams. At or under that, most people forget they have it on. Much over it and an earring drags on the lobe by the afternoon. Pendants tolerate far more weight, because a neck is not an earlobe.
Edges
A fired edge that felt fine on greenware can be genuinely sharp. Run every edge across your inner wrist before you call a piece finished. If it catches, a diamond sanding pad or a rubbing stone takes it down in seconds, wet, at the sink.
Thickness
Thin is elegant and thin is fragile. Under about an eighth of an inch, fired pieces start snapping in bags and on floors. Over about three eighths, they get heavy for what they are. Almost everything good sits between those two.
Balance
A pendant hangs from one point, so the weight below that point decides how it sits. An off center hole makes a symmetrical piece hang crooked forever. Hold the greenware piece by the hole with a bit of thread before it dries and you will see immediately.
Skin and metal
The ceramic is inert and almost nobody reacts to it. The metal is another story, and nickel in cheap findings is the usual culprit. Say on the tag what the findings are made of if you are giving pieces away or selling them.
Pairs
Earrings have to match, and matching is harder than it looks. Cut them adjacent on one slab, dry them together, glaze them together and fire them together. Then make three pairs, because one pair will not survive all four of those steps.
Troubleshooting
Nine things that go wrong, and what each one means
The three that will get you first
| What you are looking at | What actually happened | What to do differently |
|---|---|---|
| The hole is too small, or gone | Glaze filled it, or it closed while drying, or it was punched at the finished size instead of the wet size. | Punch one size up, keep glaze out of the hole, and check every hole again at bone dry and again after bisque, while opening one is still easy. |
| The pieces curled at the edges | One face dried faster than the other. Almost always the uncovered first night. | Rib both faces, cover loosely overnight, then sandwich between two flat boards until stiff. |
| It fused to the kiln shelf | Glaze on the face that was sitting down, or a bead of glaze the wax did not repel. | Hang it on a wire through the hole, or wipe the whole down face bone clean and check it in good light before it goes in. |
| A crack runs out from the hole | The hole was punched into clay that had gone too stiff, or there was not enough clay between the hole and the edge. | Punch at soft leather hard, and keep at least an eighth of an inch of clay all the way round the hole. |
| A matched pair does not match | The two pieces were cut from different slabs, dried in different spots, or glazed on different days. | Cut a pair adjacent on one slab and keep them together through every single step. Make three pairs to get one. |
| The glaze ran off the face and pooled at the bottom | A mobile glaze on a flat piece. There is no wall for it to cling to, so it moves sideways and finds the lowest edge. | Test one piece first, use a glaze catcher under anything you know moves, and check the glaze finder before committing a batch. |
| The edge is sharp against skin | The cut burr was never cleaned off, or a thin edge fired hard and keen. | Soften every edge with a damp finger at leather hard, then check the fired piece against your inner wrist and take anything sharp down wet with a diamond pad. |
| An earring post fell off | Glue on a glossy glazed back, or superglue instead of epoxy, or it was worn too soon. | Scuff the back wet with a diamond pad, use five minute epoxy, and leave it a full day before wearing it. |
| The whole batch cost more than it should have | Every piece was charged on its own, because none of them were grouped on a kiln cookie. Sharing a firing does not combine anything. | Group small pieces on a six inch kiln cookie, a quarter inch apart and roughly the same height, and each cookie pays one flat charge. Bisque as often as you like, because bisque is free. |
The short list, for the bench
Copy it, paste it wherever you keep notes, and work off it.
Forming
- Eighth of an inch for earrings, quarter inch for pendants and buttons
- Rib both faces , in two directions
- Cut at soft leather hard , on the board you will dry on
- Lift the waste away, not the piece
- Decorate the slab, not the cut shapes
Holes and drying
- Punch one size up , while it is still soft
- Leave an eighth of an inch of clay to the nearest edge
- Clean the burr off the back
- Cover loosely one night, then sandwich between two boards
- Re-check every hole at bone dry, and again after bisque
Glaze, fire, finish
- Hang on a wire through the hole , or leave one face bone clean
- Wax, then wipe anyway
- Bisque is free. Every piece is a flat $4.80, so group them on a cookie
- Scuff wet, then five minute epoxy for posts. Wait a day
- Check every edge against your wrist before you call it done
Questions
Things people ask at the table
Is ceramic jewelry actually durable enough to wear?
Fired to cone 5½, yes. It is vitrified stoneware or porcelain, the same material as a mug you put in a dishwasher, and it does not scratch, fade or corrode. What it does do is break if you drop it on tile, so keep pieces above about an eighth of an inch thick and treat a pendant the way you would treat a thin glass bead.
Do I need a clear glaze over underglaze on jewelry?
No. Clear glaze is required on anything functional here, meaning anything that touches food, drink or a mouth. Jewelry is none of those, so fired underglaze can be left bare. Bare gives you a soft matte surface and slightly muted color. Clear gives you gloss, depth and stronger color. Both are correct, and it is worth firing one of each to see which you prefer.
Can I use polymer clay techniques with real clay?
Some of them, and the internet will not tell you which. Cutting, stamping, texture sheets and marbling all translate. Anything that relies on polymer clay staying soft indefinitely, baking in a domestic oven, or being sanded and buffed after curing does not. Ceramic clay dries on a clock, shrinks by more than a tenth, and gets fired to a temperature that would vaporize polymer. When you find a polymer tutorial you like, take the idea and not the process.
What is the cheapest way to fire a lot of jewelry?
Bisque it whenever you like, because bisque is free. Then put the glaze firing on kiln cookies. Glaze firing is five cents per cubic inch of the box a piece fits inside, and anything 125 cubic inches or under is a flat $4.80, so a pendant on its own costs exactly what a mug costs. The one exception is the cookie deal: small pieces that fit on one six inch kiln cookie, a quarter inch apart and roughly the same height, under 125 cubic inches together, pay as one piece. One cookie, one $4.80. So the number that drives your cost is how many cookies your work sits on, not how many firings it goes through.
Do you sell ear wires, jump rings or posts?
No, and we have no plans to. Findings are a whole separate supply chain with sizing, plating and allergy questions we are not set up to answer. Any craft store or online jewelry supplier stocks everything you need for a few dollars. We do sell Gorilla 5-Minute Epoxy for attaching posts, and the Amaco Large Bead-Rack for firing.
Can I fire jewelry in the raku workshop?
Small pieces do go through raku, but the bead rack does not: it is rated for kiln firing and is explicitly not designed for raku. Raku also produces a surface that is porous and not durable in the way a cone 5½ glaze firing is, which matters more for something worn against skin than it does for a decorative pot. Talk to an instructor before you plan a raku jewelry batch.
How much clay do I need for a batch?
Far less than you think. A fist of clay rolled to an eighth of an inch covers a surprising area, and a single 25 pound bag would make hundreds of pieces. This is the one project where reclaim and offcuts are genuinely the right material, so save the trimmings from everything else you make.
Can I sell what I make?
What you make here is yours. If you are going to sell it, be accurate on the tag about what the findings are made of, because that is the part people react to, and price it knowing that your real costs are clay, glaze, firings and findings rather than the hours, which is the mistake almost everybody makes first.
Where to go next
Start with twenty, not with two
Everything difficult about ceramic jewelry comes from its size, and the answer to almost all of it is volume. Twenty pieces teach you what one cannot, they fit on a few kiln cookies, they let you throw away the six that went wrong without it mattering, and they turn shrinkage from a number on a page into something you have measured with your own hands. Roll one slab, cut the whole thing up, and find out.
That is the working version. Roll one slab, cut the whole thing up, punch the holes bigger than looks right, and fire the batch together. If you want the reasoning behind any of it, the clay comparisons, the surface techniques, the troubleshooting table and ten more videos, switch to the Comprehensive Version at the top.
Which version would you like to print?
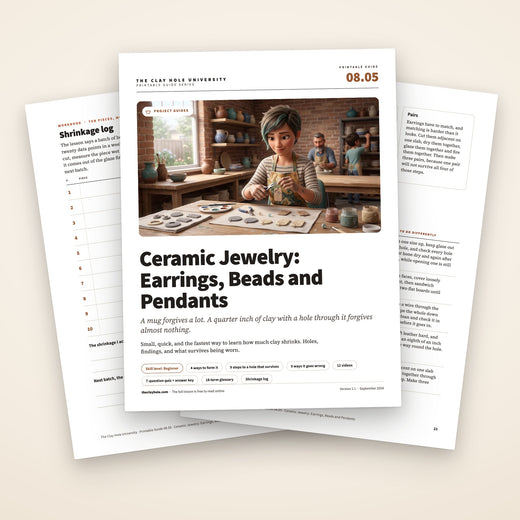
Videos come out as a labeled box with the title and channel to search for, since paper does not play them.