Pottery Date Night
 Bring All Your Friends Free Week
 Give a Month of Pottery
 Private Pottery Parties

 The Welcome Booklet
 Your First Ten Sessions
 The Pottery Process
 Finding the Studio
 Your Classes Never Expire
 The Four Tables
 Who’s Who
 The Rewards Program
 Flux Glazes
 The Calculators
 Kiln Tracker
 Holiday Kiln Deadlines

 Beginner’s Tool Set
 Fingernail Clippers
 Mayco Clay Mender
 Epoxy for Kintsugi
 Applicator Bottles
 Large Bead Rack
 Raku Workshop
 Nighttime Raku
 Horsehair and Feather Raku
 The Clay Hole T-Shirt
 Embroidered Crewneck
 Zip-Up Hoodie
 Pre-Made Bisqueware
 Glaze Catchers
 Kiln Cookies
 Clay Cubby Rental
 The Glaze Bible, Printed
 The Book of Molds, Printed
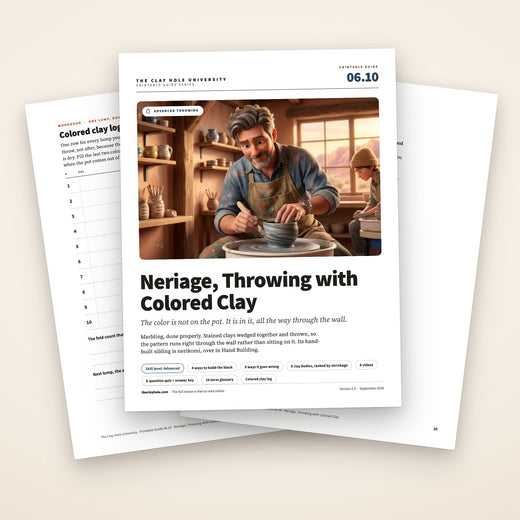
 Printable Pottery Guides
 Free Printable Trackers
 Gifts for Potters
 Christmas Pottery Ideas
 Mother’s Day Gift Ideas
 Pottery Date Night
 Studio Calendar
 2027 Studio Events
 What Should I Do Today?
 How to Throw on the Pottery Wheel
 How to Make a Pinch Pot
 How to Tap Center a Pot
 The Five Stages of Clay
 Is Pottery Hard to Learn?
 Pottery Wheel Practice Drills
 20 Easy Hand-Building Projects
 Everything That Sounds Wrong

 A Beautiful Piece, Every Time
 Slab Roller Tips
 Any Dish as a Slump Mold
 Slab Roller & Slab Mold Certification
 The Pottery Skill Tree
 Clay & Pottery Calculators
 Logging Your Pottery and Glazes
 The Pottery Dictionary
 Why Did My Pottery Do That?
 The Pottery Cone Chart
 Pottery Myths, Fact-Checked
 Is Handmade Pottery Food Safe?
 Incredible Ceramic Artist Videos
 How Dan Throws Giant Pots
 How to Dry Your Pottery
 The Pottery Wheel Introduction
 Pottery by Zodiac Sign
 Personality and the Pottery Wheel
 Pottery for Engineers
 ADHD, Hyperfocus, and Never Running Out
 Hobbies for Burnout
 Screen-Free Hobbies for Adults
 Every Addiction I Ever Had Lost to Art
 Functional Pottery Is Engineering
 How Do We Compare?
 Pottery Classes by City
 Every Pottery Studio in Utah
 Pottery in Draper
 Featured Members
 The Signature Wall
 Making Friends as an Adult Is Brutal
 The Clay Hole Commandments
 2027 Pottery Contests
 2027 Studio Parties
 Gallery Night

 Scream It Into the Void
 Destroy the Glaze Wall
 Daily Affirmation Cards
 Everything That Can Go Wrong
 Subscribe to Our Newsletters
 Contact The Clay Hole
 Corporate Team Building

 Glaze Combinations
 Glazes We Do Not Carry
 Making Glaze Test Tiles
 The Mega Glaze Tool
 How to Use the Mega Glaze Tool

 Glaze Brushing Techniques
 How to Use Underglaze
 How to Use Dipping Glazes
 Glaze Problems, Causes and Fixes
 The Dipping Glaze Guide

 Making a Glaze Catcher
 Fused or Sharp After Firing
 The Signature Wall
 His Viral Videos
 His Own Ceramics
 Meet Mud
Colored clay
Neriage: throwing with colored clay
Neriage is what happens when the color is not on the pot but in it. Two or more clays joined into one lump, thrown so the boundary between them becomes the pattern. Cut a finished neriage pot in half and the design runs all the way through the wall. It is the most satisfying thing you can do with two bags of clay, and the list of ways it goes wrong is shorter than it looks.
The short version
All of it, in six lines
- Two clays, one lump. The pattern is the boundary between them, and it runs through the entire wall rather than sitting on the surface.
- Match the shrinkage or it cracks. B-Mix, Half & Half, Speckled Buff, Berlin Gray and B-Mix w/Specks all shrink within half a point of each other. Pair inside that group and you are safe.
- Wedge to combine, not to blend. Count your folds. Three folds is a pattern. Five folds is mud, and there is no getting it back.
- Throw slow, throw dry, throw in as few passes as you can. Slip instead of water, a rib instead of fingers.
- It will look gray and ruined when you finish. That is a skin of smeared slip sitting over your pattern. It is not the pattern.
- At leather hard, scrape that skin off with a metal rib. The pattern comes back sharp. A clear glaze over the top is what makes the colors look wet again.
How to use this page
Watch it, read it, then read it again
There are excellent videos about throwing colored clay and eight of the best are sitting further down this page. Watch them. We just do not think watching alone is how anybody learns this particular thing.
Video is unbeatable for a motion. You cannot read your way into knowing how much pressure a rib wants, and thirty seconds of watching somebody do it fixes that permanently. What video is bad at is order, and neriage is almost entirely order. Weigh, mix, wedge a counted number of times, throw with fewer passes than feels right, wait, scrape, trim. Miss one of those and the failure shows up three steps later, wearing a disguise.
A list holds still. You can look at step four with wet hands, put the phone down, do step four, and pick it up again without scrubbing a video back thirty seconds with a clay-covered knuckle. So every technique on this page is written as a list you can keep open, sitting next to the video of somebody doing it.
If that is more page than you want today, hit Nutshell up at the toggle. It is the same teaching with the explanations stripped out, and it remembers your choice on every page here.
Every video on this page belongs to somebody else, every one is free, and nothing from YouTube loads until you press play.
The one idea
The pattern is in the wall, not on it
Everything else on this page is a consequence of that one sentence.
Underglaze, slip and glaze all sit on the outside of a pot. They are coatings, and a coating can be sanded off, chipped, or hidden under the wrong glaze. Neriage is not a coating. You are building the wall itself out of two colors, so the design is structural. Break the pot and the pattern is on the broken edge.
That is the whole appeal, and it is also the whole difficulty, because a wall made of two clays has a seam running through every part of it. Seams are where pots crack. Everything from here is either about keeping those two clays friendly with each other, or about keeping the pattern crisp while you push it around on a spinning wheel.
There is one more consequence, and it is the moment most people quit. Throwing smears the outside surface into a gray film that hides the very thing you built. Every neriage pot looks like a failure at the end of the wheel session. It is not. It is a pot wearing a coat, and the coat comes off later.

Three cross-sections through a pot wall
Outside of the pot is the left edge of each block.
- Surface decoration. Underglaze, slip or glaze. The color is a skin on the outside and the wall underneath is one clay. Sand through it and the pale body shows.
- Neriage, straight off the wheel. The bands run edge to edge through the whole thickness. The gray strip down the outside is smeared slip that throwing dragged across the surface, and it is the reason a finished neriage pot looks like a mistake while it is still wet.
- The same wall after a metal rib. Shave off that skin at leather hard and the bands meet the surface cleanly again. Trimming does the identical job to the foot and the lower wall.
Three words for nearly the same thing
Neriage
Japanese. Colored clays combined and then thrown on the wheel. That is this page.
Nerikomi
Japanese. Colored clays laid up into a patterned block, sliced, and the slices used to hand-build. Same materials, no wheel.
Agateware
The English name, out of Staffordshire, for the marbled result. Usually means the thrown kind.
In practice the three words get swapped around constantly, including by the potters making the work. Nobody is going to correct you, and the clay does not know the difference.
Before you touch anything
Your two clays have to shrink the same
This is the one that ruins work weeks later, long after you have forgotten what you did. Every clay body shrinks as it dries and shrinks again as it fires. Put two bodies with different shrinkage rates into one wall and they spend the entire process pulling against each other along every seam. The pot survives the wheel, survives drying, and comes out of a firing with a crack running exactly along your prettiest line.
| Clay body | Fires to | Average shrinkage | What that means for neriage |
|---|---|---|---|
| #16 Porcelain Cone 6 | White | 13.9% | The whitest ground available, and the biggest shrinkage on the shelf. Pair it only with itself, stained. |
| B-Mix w/Specks | Speckled | 12.47% | Inside the safe group. |
| B-Mix | Cream | 12% | The default pale partner, and lovely to throw. |
| Half & Half | White | 12% | White, and safe with everything else in this group. |
| Speckled Buff | Buff with specks | 12% | The strongest contrast you can get without opening a stain jar. |
| Berlin Gray Stoneware | Cement through dark gray | About 12% | Its maker reports 5.7% drying and 6.7% firing shrinkage separately, a little over 12% in total, so on shrinkage it sits with the group. It is the one body here that runs all the way to cone 10, and its absorption figure is quoted at the top of that range rather than at ours, so fire test tiles before you build a project on it. |
| B-Mix w/Grog | Off-white | 11% | One point out from the group. Usable, but test it first. |
| 52 Buff | Buff | 10% | Keep it away from the porcelain. That pairing is 3.9 points apart. |
Figures are the manufacturers' average shrinkage as published on each clay's own product page here, carrying their own tolerance of about two points. Treat them as a way to rank the bodies against each other rather than as a promise.
The rule of thumb
Within about one point of each other and you can build with confidence. Two points is a gamble that usually pays on a small pot and usually does not on a platter. Four points apart, like #16 Porcelain against 52 Buff, and you are making a crack on purpose.
So the safe set here is B-Mix, B-Mix w/Specks, Berlin Gray, Half & Half and Speckled Buff. All five sit inside half a point. Any two of them will live together happily.
Same moisture matters just as much
Two clays that shrink identically will still tear apart if one is stiff and the other is soft. The soft one moves, the stiff one does not, and the seam opens while you are still pulling the wall.
Bag both, together, for a day before you use them. If one came off the shelf drier, wrap it in a damp towel overnight rather than splashing water at it while you wedge.
The one that gets people in real trouble: no outside clay
Half the neriage videos online are made with a jet black commercial clay body. That is not an option here, and it is not a soft rule. Absolutely no outside clay. Zero tolerance, no exceptions.
This is not gatekeeping. A clay body we have not tested can destroy a kiln, the shelves, and every other member's work sitting in that firing, which runs into tens of thousands of dollars that the member who brought it in is responsible for. Everything on this page is built from the eight bodies in the table above, colored with stains from our own shelf.
Step one
Making colored clay
There are two routes into this, and they are not the same amount of work. Pick the first one for your first pot. Almost everybody who starts with the second one spends their first session weighing powder instead of throwing, gets a mediocre pot out of it, and concludes that neriage is not for them.
Route one: two clays off the shelf
Start hereNo stains, no scale, no mask, nothing to buy. Take two bodies from the safe group and wedge them together. Half & Half against Speckled Buff gives you the widest contrast available this way, white against buff with specks, and the two shrink identically.
The unflattering part: the contrast is quiet. Under a clear glaze it reads as soft marble rather than a graphic stripe, and if you came here from a video of black and white porcelain you will find it understated. Plenty of people end up preferring it. Plenty of others use it once to learn the moves and then move to stains.
Route two: mason stains
More workStains are available here. They are optional, they cost extra, and access to stains, oxides and minerals depends on your membership level, so check what your level covers before you plan a project around a particular color.
A mask and gloves are required whenever you are mixing powders. That is not advice, it is the rule, and it is worth taking seriously: these are fine powders and you do not want them in your lungs or ground into your hands for the rest of the day. It has to be a rated respirator: an N95 at the very least, and a P100 half mask for weighing dry color, because a cloth, surgical or one strap paper mask does not seal and is not protection at all.
Budget an hour before you throw anything. Weighing, mixing and wedging a batch of stained clay properly is its own session.
Mixing a stain into clay, in nine steps
- Respirator and gloves on before the jar is open. Not after you have poured.
- Decide the batch size and weigh the clay. One to two pounds per color is plenty for a first pot and small enough to wedge by hand without hating your life.
- Weigh the stain as a percentage of that. Write the color and the percentage on a piece of tape right now, while you still remember it.
- Turn the stain into a paste first. A splash of water, stirred to the thickness of cake batter. This kills most of the airborne dust and it distributes far more evenly than dry powder ever will.
- Cut the clay into slabs with a wire. Four or five slices.
- Smear paste between the slabs and stack them back up like a very ugly lasagna.
- Wedge until it looks even, then cut the ball in half and look at the cut face. Streaks mean keep going. This is the one moment in the whole technique where you genuinely want the clay completely homogeneous.
- Double bag it, with the tape label on the outside bag. Unlabeled colored clay becomes a mystery lump within a week.
- Fire a test tile before you build a project around the color. Every single time.
The percentage refers to the clay's dry weight, and bagged clay is roughly three quarters dry material, so weighing against the wet weight of what you pulled off the shelf runs your color a little stronger than the number suggests. Start there anyway. Note what you did, look at the fired tile, and correct on the next batch. That is a faster path to a palette you trust than arithmetic is.
| Look you are after | Rough starting percentage |
|---|---|
| Black, dark blue, deep green | 5 to 8% |
| Mid-tone anything | 8 to 12% |
| Pale, chalky, pastel | 4 to 6% |
| Saturated pink, yellow, purple | 12 to 18% |
Wet color is not fired color
Stained clay on the wedging table looks deep, rich and slightly alarming. It fires lighter, sometimes a lot lighter. Judge nothing until a tile has been through a glaze firing at cone 5½, and remember that a clear glaze on top will pull the color back up again.
Step two
Four ways to build the block
What you do to the two clays before they reach the wheel is what decides whether you get a soft marble, a hard stripe or a spiral. The throwing barely changes between them. The block does.
They are listed easiest first, and that order is also the order we would learn them in. Each one asks for a bit more control over something that a spinning wheel is actively trying to take away from you.
1. Random marble
The one to do first, and the one that fails least often.
- Cut both clays into rough slices about an inch thick.
- Stack them alternating, press the stack together, and slam it once to knock the air out.
- Ram's head wedge it three folds and no more, counting out loud if that is what it takes.
- Pat it into a ball and throw it.
The pattern you get is unpredictable, which is the point. Nobody can plan a marble and nobody expects you to. It also hides small mistakes, because there is no straight line for a wobble to ruin.
If it comes out too blended, you wedged too much. If the two colors are still sitting in separate lumps, you wedged too little. Three folds is the number that lands between those for most people.
2. The layered stack, for stripes
Deliberate, repeatable, and the one that makes people stop and look.
- Roll both colors into even slabs about a quarter inch thick.
- Stack them strictly alternating, pressing each layer down as it goes so no air is trapped between them.
- Compress the finished loaf firmly. Air between layers becomes a blister later.
- Cut a plug out of the loaf with a wire, roughly the size of the ball you would normally throw.
- Do not wedge it. Pat it round with your hands and put it straight on the wheel.
- Center with the fewest passes you can manage. Every rotation under pressure bends the stripes further.
3. The spiral twist
A barber pole running up the outside of the form.
- Roll each color into a thick coil, an inch and a half or so.
- Lay them side by side and twist the pair together like a rope, a few turns only.
- Compress the twisted rope down into a ball without folding it. Squeeze inward, do not knead.
- Center gently. Coning up will stretch the spiral taller and thinner, which is often exactly what you want.
This one responds enormously to how hard you cone. One firm cone up and down turns a lazy barber pole into a tight helix. Two turns it into marble. Decide before your hands are on it.
Works beautifully on a tall narrow form, where collaring in tightens the spiral further as the wall comes together.
4. The wrapped sheet
The advanced one. Attempt it after you have made the other three work.
- Build a patterned loaf and slice a thin sheet off it, no thicker than an eighth of an inch.
- Throw a plain cylinder in one of the two bodies, a little thicker than usual, and let it firm slightly.
- Score and slip, then wrap the patterned sheet around the outside and seam it.
- Shape from the inside against a rib held on the outside, so the outside surface is never dragged by fingers.
The reason to bother: the pattern stays exactly as you laid it out, because nothing ever smears it. This is how the crisp, drawn-looking neriage in galleries gets made.
The reason to wait: it is really two techniques stacked, and a seam that fails on the wheel takes the whole pot. Our score and slip page covers the join, and using ribs while you throw covers the inside-against-outside pressure this depends on.
Step three
Wedging that keeps the pattern
Every other time you wedge clay you are trying to make one thing out of many. Here you are trying to stop exactly that from happening, and the technique that has been drilled into you is now working against you.
Each fold roughly doubles the number of bands in the lump and halves their thickness. That doubling runs away from you faster than it feels like it should. Two colors become thirty-two bands in four folds, and thirty-two bands at wall thickness is not a pattern, it is a color.
So the instruction is genuinely just this: count. Say the number out loud if you have to. The temptation to give it one more fold because it does not look mixed enough is the single most common way a neriage pot dies before it reaches the wheel, and it is not recoverable. There is no unwedging.
Spiral wedging is the wrong tool here. It is a superb technique and it exists specifically to homogenize a lump and drive out air, which is precisely the job you do not want done. Use ram's head with counted folds instead, or for a stacked plug, do not wedge at all. Both of our wedging walkthroughs are worth a read if the difference between the two is fuzzy: ram's head and spiral.
You still have to get the air out, though, and that has not stopped mattering. Air in a layered stack becomes a blister on the wall or a pocket that tears open under a rib. Get it out by compressing and slamming rather than kneading: press each layer down hard as you stack it, then throw the finished loaf down on the table a few times. Force, not folding.
| Folds | Bands, roughly | What you get |
|---|---|---|
| None | 2 | Two halves and one hard line. Bolder than people expect, and worth trying once. |
| One | 4 | Wide, graphic bands. |
| Two | 8 | Clear marble. The sweet spot for most pots. |
| Three | 16 | Fine marble, still perfectly readable after throwing. |
| Four | 32 | Starting to gray out. Throwing will take it the rest of the way. |
| Five or more | 64 and up | One muddy color. Nothing you do at the wheel brings it back. |
Rough numbers on purpose. Wedging shears as well as folds, so real bands are uneven, and that unevenness is most of what makes marble look like marble. Use the table to pick a target, not to predict a result.
Remember that throwing counts as wedging
Centering, coning and pulling all shear the clay, so the lump keeps blending after it leaves the table. Wedge one step less than the pattern you actually want. If eight bands is the look you are after, stop at one fold and let the wheel do the last doubling for you.
Step four
At the wheel, in nine steps
At the wheel, in six steps
Throwing neriage is ordinary throwing with the volume turned down on everything. Less water, less speed, fewer passes, fewer touches. The clay does not behave differently. Your pattern just keeps a record of every single thing you do to it.
- Slow the wheel down. Slower than you would run it for the same pot in one clay. Every extra rotation under pressure is another lap of smearing, and speed buys you nothing here.
- Center in as few passes as you can. Two firm, committed passes beat six gentle ones. This is the opposite of the advice most people are given as beginners, and it is correct for this one job.
- Cone as little as the clay will let you. Coning is a blender. If your block is a deliberate stack or a twist, each cone is a design decision rather than a warm-up, so make it on purpose or skip it.
- Lubricate with slip, not water. Keep a bowl of slip in one of your two clays next to the wheel and use that. Plain water dissolves the surface and floats the colors into a gray film faster than anything else you will do today.
- Open and set the floor as normal, then compress it firmly, because that is the one pass worth spending, and leave it alone after that. It is the thickest part of the wall and the least visible, so it gets no more passes than that.
- Pull with fewer, more committed pulls. Three good pulls beat six timid ones, because timid pulls do not cost less smearing, they cost more.
- Finish every pull with a rib rather than your fingers. Fingers drag the surface around. A rib scrapes a fresh plane and leaves the pattern under it alone.
- Never sponge the outside. A sponge is the most efficient pattern-destroying tool in the building. If you need to move water, use the rib.
- Compress the rim once, wire off, and walk away. Fiddling with a finished neriage pot has no upside at all.
- Slow the wheel down and center in as few passes as you can. Speed and repetition both smear.
- Cone once at most. Coning is a blender, so every cone is a design decision.
- Lubricate with slip, never water. Water floats the colors into a gray film.
- Three committed pulls instead of six timid ones.
- Finish with a rib, and never sponge the outside. Fingers drag, a rib cuts.
- Compress the rim once, wire off, walk away.
Twisting hurts more here
A pot that twists on the wheel is annoying in one clay. In two, the twist is visible, permanently, as stripes that spiral where you meant them to run straight. If your pots twist, fix that first on our page about twisting, then come back to this.
Throw it thicker than you think
You are going to shave material off the outside at leather hard to bring the pattern back, and again when you trim. That is real thickness leaving the pot, and a wall thrown to your usual finish will end up thin, translucent in places, and fragile at the rim.
Leave roughly an extra sixteenth of an inch across the whole wall, and a little more at the foot where trimming takes the most. Our page on throwing proportions has the numbers we use for ordinary pots, and neriage sits one notch thicker than all of them.
The other reason to go thicker: a thick wall holds a wider cross-section of each band, so the pattern reads bigger and cleaner once the skin comes off.
Step five
Bringing the pattern back
Your pot came off the wheel looking gray and disappointing. Everybody's does. Throwing drags a thin layer of mixed slip across the whole outside surface, and that layer is sitting on top of a pattern that is completely intact underneath it. This step is just taking the coat off.
- Wait for soft leather hard. Firm enough to hold its shape under real pressure, soft enough that a rib lifts a curl instead of chattering across the surface. Too wet and you smear it all over again. Too dry and you get chatter marks you will have to live with.
- Hold a metal rib nearly flat against the wall and pull it around. You are after a shaving, not a scrape. The angle matters far more than the pressure.
- Work in overlapping passes from foot to rim, turning the pot slowly on a banding wheel or on the wheel head at its lowest speed.
- Stop the moment the colors read clean. Everything past that point is just thinning your wall for no return.
- Trim as normal, and enjoy it, because every trimming cut opens a fresh cross-section. The foot usually ends up the crispest part of the entire pot.
- Once bone dry, a green scrubby pad or fine sandpaper takes off the last haze. Do it wet if you can, with a damp pad or a damp sponge, because wet clay gives off no dust at all. If you do it dry, wear a rated respirator, an N95 at the minimum, and wipe the bench and the floor down wet afterwards rather than sweeping. Dry clay dust is bad for you at the best of times and colored clay dust carries stain with it.
Insides are a different problem
A bowl is easy: a curved metal rib reaches the whole interior and reveals it exactly the same way. A mug or a narrow vase mostly cannot be reached, which is why so much neriage you see has a plain or solidly glazed interior. That is not a compromise anybody is hiding, it is just what the shape allows.
Two pages that make this easier
The rib angle here is the same one you use for compressing and shaping, covered on using ribs while you throw. And since trimming is doing half the reveal, trimming and turning is worth reading before your first neriage foot rather than after it.
Step six
Drying and firing
If you matched your shrinkage properly, a neriage pot dries like any pot in its base body and there is nothing special to do. If you did not, this is where you find out, because a seam under tension is exactly where a drying crack chooses to start.
Either way, dry it slower and more evenly than you would a plain pot. Loose plastic for the first day or two, then uncovered. A neriage wall has more internal boundaries than a plain one, and every boundary is a place for uneven drying to concentrate stress.
Firing is completely ordinary. Bisque goes to cone 05 and glaze goes to cone 5½, the same as everything else here, and the cost is the same too: bisque firings are free, glaze firings are a flat $4.80 for anything 125 cubic inches or smaller, and five cents per cubic inch above that. The kiln has no opinion about how many clays are in your wall.
What does change in the firing is the color. Stains shift, and they almost always come out lighter and cooler than the wet clay promised. The encapsulated stains, which is where most reds, oranges and bright pinks live, are the touchy family and the most likely to surprise you. This is the entire argument for test tiles: fire one tile of every color and one of every pairing before you spend a session on a real pot.
Step seven
Glazing it, and the one glaze mistake
You spent a whole session building a pattern into the wall of this pot. It is genuinely possible to cover all of it up in about four seconds at the glaze table.
Clear, and you are done
A clear glaze wets the colors back to the depth they had on the wedging table. This is the payoff, and for most neriage it is the only correct answer. Gloss clear gives the strongest color, satin clear softens it slightly.
Bare outside, glazed inside
Left unglazed, colored clay reads dry, chalky and matte, and the pattern goes quiet and stony. Some people much prefer it. Anything that holds food or drink still needs a glazed interior, and glaze the rim as well, because that is where lips land. Do not treat a bare stained surface as food safe just because the color is in the wall rather than on it: the reds, oranges and bright pinks are encapsulated cadmium stains, and encapsulation on its own is not a food safety claim.
Anything opaque buries it
Opaque glazes, matte colors and the Flux glazes all exist to put a surface on a pot. Over neriage they do exactly that, completely, and the wall underneath might as well have been one clay.
Test the clear on the actual clay first
A clear that looks flawless over B-Mix can go faintly milky or slightly yellow over a stained body, and it will read as a haze across your pattern rather than as a glaze problem. Our glaze finder will tell you what each clear does, and how to use dipping glazes covers the application. Put a clear on one corner of your test tile at the same time you test the color, and you will have answered both questions in one firing.
Keep this open
The whole thing, on one screen
Written to be readable with wet hands and a phone propped against a bat. Copy it into your notes if that is easier than keeping a tab alive.
Before the wheel
- Pair inside the safe group: B-Mix, B-Mix w/Specks, Berlin Gray, Half & Half, Speckled Buff.
- Same softness. Bag both clays together overnight.
- Stack and slam to kill air. Do not knead.
- Count folds. Two folds is about eight bands.
- Respirator and gloves before any stain jar opens.
- Label the bag with the color and the percentage.
At the wheel
- Slower wheel than you would normally use.
- Slip in the bowl, never water.
- Two centering passes, not six.
- Three committed pulls, not six timid ones.
- Rib every pull. No sponge on the outside, ever.
- Throw a sixteenth thicker than usual.
After
- Soft leather hard: metal rib nearly flat, shave the gray skin off.
- Trim as usual. The foot ends up sharpest.
- Bone dry: scrubby pad, wet if you can, a rated respirator if dry.
- Bisque cone 05, glaze cone 5½.
- Clear glaze. Anything opaque buries the pattern.
- Colored scraps go in your own bucket.
Troubleshooting
Nine ways this goes wrong
The three that will get you tonight
- The pattern is gray and muddy Two possible causes and you should check the easy one first: you may simply not have ribbed it yet. Wait for leather hard and take a metal rib to the outside before you conclude anything. If it is still gray under the rib, you over-wedged, and that one is not recoverable.
- A crack running along a color join Shrinkage mismatch, or the two clays were at different softness when you put them together. Check your pairing against the safe group, and bag both clays together overnight next time.
- The colors bled into each other Too much water at the wheel. Water dissolves the clay surface and lets pigment travel. Switch to slip as your lubricant and cut the number of passes.
- Straight stripes came out spiraling The wheel was too fast, or the pot took too many passes, or both. It is the ordinary twisting problem made visible by the pattern rather than a separate fault.
- The pattern disappeared in the firing Either the stain percentage was too low for that color family, or an opaque glaze went over the top of it. Both are common, and the second one is the more painful.
- The wall split into layers Air trapped between the slabs of a stacked loaf, or layers that were at different moisture and never really bonded. Press each layer down as you build the stack and slam the finished loaf hard before you cut a plug from it.
- An S-crack in the base The same cause as in any pot, but likelier here because the floor is layered and you were trying not to touch it. Compressing the floor properly is still non-negotiable, and it is one of the few places you should spend the extra pass.
- The rim tore while pulling A layered wall tears along a layer rather than across it, so a rim that would have survived in one clay opens up in two. Compress the rim after every pull and keep it wetter than the rest of the wall.
- Fired colors came out pale They always do. This is not a mistake, it is the calibration step everybody has to go through. Write down what percentage you used, go up a few points, and fire another tile.
Studio policy
The rules here
All but one of these are about not ruining somebody else's day, and one of them is about not ruining a kiln.
- Absolutely no outside clay Zero tolerance, no exceptions, and it is the one rule on this page with real money attached. An untested body can take out a kiln, the shelves and everyone else's work in that firing, and the member who brought it in is liable for it. Build your colors from our eight bodies.
- Respirator and gloves whenever powder is out Required, not suggested. Put them on before the jar is opened rather than after you have poured, and keep the mixing to a paste so there is less dust in the air in the first place.
- Stains are optional and cost extra Access to stains, oxides, minerals, washes and bicarbonates depends on your membership level, so check what your level covers before you plan a piece around a specific color.
- Colored scraps go in your own bucket We do not reclaim on site. Dry scraps go into the shared barrels and any member is welcome to take from them freely and reclaim at home, which is exactly why stained trimmings should not go in. Keep a labeled container of your own and reclaim your colors separately.
- Clean the wheel pan and your tools Colored slip travels. A pan left with black slurry in it becomes gray specks in the next person's porcelain, and a stained rib does the same thing more quietly. Rinse everything before you walk away from the wheel.
- Label every bag Color and percentage, on tape, on the outside bag. Unlabeled colored clay turns into an unusable mystery lump within about a week, and there is no way to look at a bag of gray clay and know what it will fire to.
Questions
The ones we actually get
Is neriage the same thing as nerikomi?
Close enough that the words get used interchangeably, including by the people making the work. The useful distinction is that neriage generally means colored clays thrown on the wheel, and nerikomi generally means a patterned block that gets sliced and hand-built. Agateware is the English word for the same marbled result. Nobody will correct you.
Can I use underglaze to color clay instead of a stain?
We would not. Underglaze is formulated to sit on a surface and it carries fillers and flux that a clay body does not want in quantity. Getting real color into a body takes enough of it that you start changing how that body behaves in the kiln, and it costs far more per unit of color than a stain does.
Underglaze is superb at what it is for. If a painted surface is what you are after, our page on underglaze techniques, rules and firing will get you there faster than this page will.
Do I have to use porcelain?
No, and we would steer you away from it to begin with. Porcelain gives the whitest ground and the most saturated stain colors because there is no iron competing with the pigment, but #16 Porcelain has the highest shrinkage of anything on our shelf at 13.9%, which makes it the hardest body to pair with anything except itself.
Half & Half also fires white, sits at 12% with the rest of the safe group, and throws beautifully. That is the easier white by a wide margin.
Why did my pot look better before it was fired?
Because wet clay is saturated and fired unglazed clay is dry and matte, so the same colors genuinely do read weaker after a firing. A clear glaze puts most of that depth back, which is why clear is the default answer for neriage rather than a stylistic preference.
Can I try this in my first month?
If you can already center reliably and pull a wall without the pot twisting, yes, and route one needs nothing you do not already have.
If centering is still a fight, we would spend the month on centering instead. Neriage magnifies every throwing weakness you have and hands it back to you in two colors, and it is easy to read that as neriage is hard when the real answer is more hours at the wheel. Our how to throw on the pottery wheel page is the place to put those hours.
Does colored clay cost more to fire?
No. Bisque firings are free and glaze firings are a flat $4.80 for anything 125 cubic inches or smaller and five cents per cubic inch above that, whatever is in the wall. The stains themselves are the extra cost, not the firing.
Can I put colored scraps in the reclaim barrels?
Please do not. Everything in those barrels is free for any member to take home and reclaim, so a few handfuls of black trimmings turn into gray streaks in somebody else's mugs weeks later, and they will have no idea why. Keep a labeled bucket of your own. Our reclaiming clay page covers the method itself, so do it one color at a time for colored clay.
One last thing
Make the ugly one first
Almost nobody's first neriage pot is good, and the reason is nearly always the same: they spent the session weighing powder, over-wedged out of nervousness, threw it too wet, and then binned it at the gray stage without ever taking a rib to it. Every one of those is a decision, and every one of them has an easier alternative on this page.
So make the ugly one. Two bodies off the shelf, one fold, thrown slow. Rib it at leather hard and watch the pattern arrive, because that moment is the entire reason anybody keeps doing this. Then go weigh some powder, once you know what you are aiming at.
Two bodies off the shelf, one fold, thrown slow. Rib it at leather hard and watch the pattern arrive. That moment is the entire reason anybody keeps doing this, and you do not need a single thing you do not already have to get to it.
There is a much longer version of this page with the shrinkage reasoning, four ways to build a block, the stain percentages and eight videos. The toggle at the top switches to it whenever you want it.
Which version would you like to print?
Videos come out as a labeled box with the title and channel to search for, since paper does not play them.