

 Pottery Date Night
 Bring All Your Friends Free Week
 Give a Month of Pottery
 Private Pottery Parties


 The Welcome Booklet
 Your First Ten Sessions
 The Pottery Process
 Finding the Studio
 Your Classes Never Expire
 The Four Tables
 Who’s Who
 The Rewards Program

 Flux Glazes
 The Calculators
 Kiln Tracker
 Holiday Kiln Deadlines


 Beginner’s Tool Set
 Fingernail Clippers
 Mayco Clay Mender
 Epoxy for Kintsugi
 Applicator Bottles
 Large Bead Rack

 Raku Workshop
 Nighttime Raku
 Horsehair and Feather Raku

 The Clay Hole T-Shirt
 Embroidered Crewneck
 Zip-Up Hoodie
 Pre-Made Bisqueware
 Glaze Catchers
 Kiln Cookies
 Clay Cubby Rental

 The Glaze Bible, Printed
 The Book of Molds, Printed
 Printable Pottery Guides
 Free Printable Trackers

 Gifts for Potters
 Christmas Pottery Ideas
 Mother’s Day Gift Ideas
 Pottery Date Night

 Studio Calendar
 2027 Studio Events
 What Should I Do Today?

 How to Throw on the Pottery Wheel
 How to Make a Pinch Pot
 How to Tap Center a Pot
 The Five Stages of Clay

 Is Pottery Hard to Learn?
 Pottery Wheel Practice Drills
 20 Easy Hand-Building Projects
 Everything That Sounds Wrong

 Why Did My Pottery Do That?
 Glaze Problems, Causes and Fixes
 How to Rescue Pottery at Any Stage
 Reglazing and Refiring


 A Beautiful Piece, Every Time
 Slab Roller Tips
 Any Dish as a Slump Mold
 Slab Roller & Slab Mold Certification

 All Beginner Bundle
 All Intermediate Bundle

 The Pottery Skill Tree
 Clay & Pottery Calculators
 Logging Your Pottery and Glazes

 The Pottery Dictionary
 The Pottery Cone Chart
 Pottery Myths, Fact-Checked
 Is Handmade Pottery Food Safe?

 Incredible Ceramic Artist Videos
 How Dan Throws Giant Pots
 How to Dry Your Pottery
 The Pottery Wheel Introduction

 Pottery by Zodiac Sign
 Personality and the Pottery Wheel
 Pottery for Engineers
 ADHD, Hyperfocus, and Never Running Out
 Hobbies for Burnout
 Screen-Free Hobbies for Adults
 Every Addiction I Ever Had Lost to Art
 Functional Pottery Is Engineering

 How Do We Compare?
 Pottery Classes by City
 Every Pottery Studio in Utah
 Pottery in Draper

 Featured Members
 The Signature Wall
 Making Friends as an Adult Is Brutal
 The Clay Hole Commandments

 2027 Pottery Contests
 2027 Studio Parties
 Gallery Night


 Scream It Into the Void
 Destroy the Glaze Wall
 Daily Affirmation Cards
 Everything That Can Go Wrong

 Subscribe to Our Newsletters
 Contact The Clay Hole

 Corporate Team Building


 Glaze Combinations
 Glazes We Do Not Carry
 Making Glaze Test Tiles

 The Mega Glaze Tool
 How to Use the Mega Glaze Tool


 Glaze Brushing Techniques
 How to Use Underglaze
 How to Use Dipping Glazes

 The Dipping Glaze Guide


 Making a Glaze Catcher
 Fused or Sharp After Firing

 The Signature Wall
 My Viral Videos
 My Own Ceramics
 Meet Mud
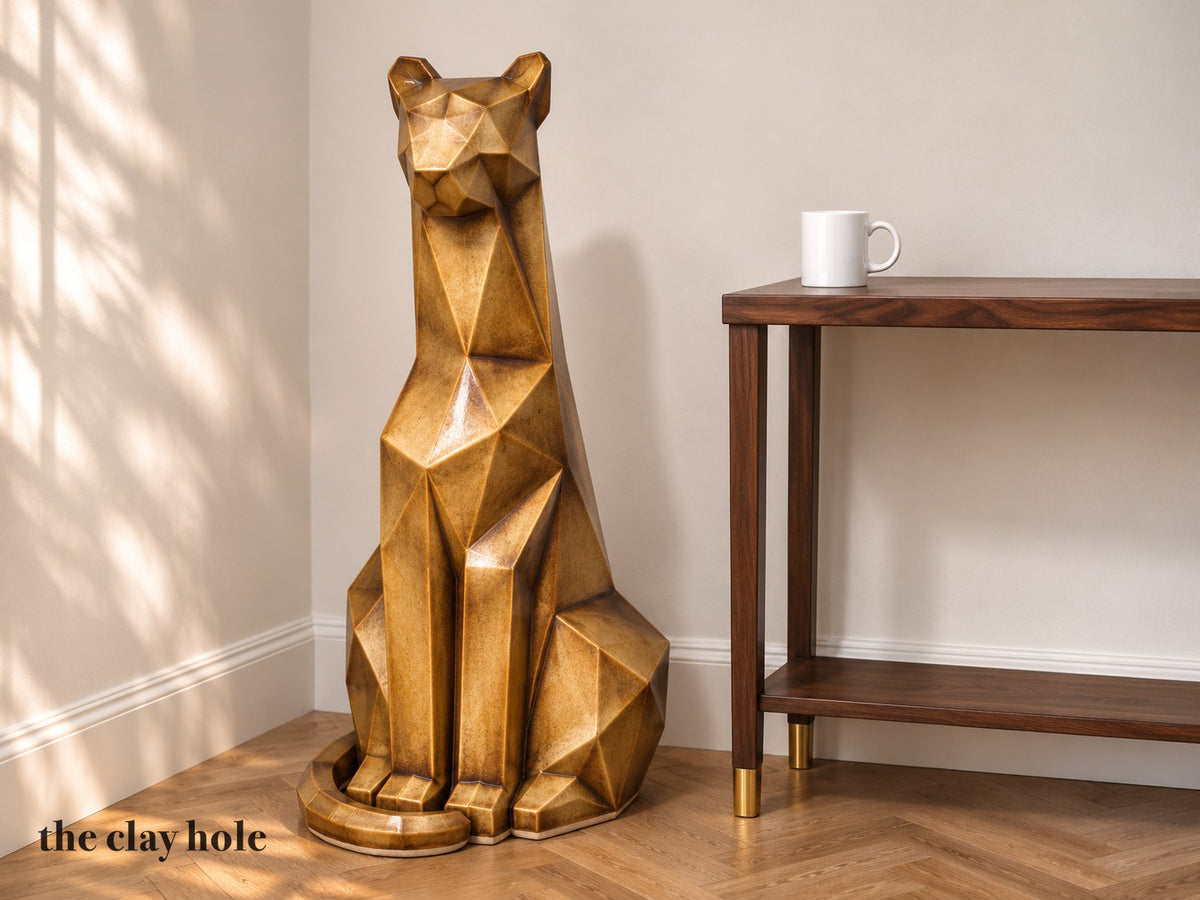

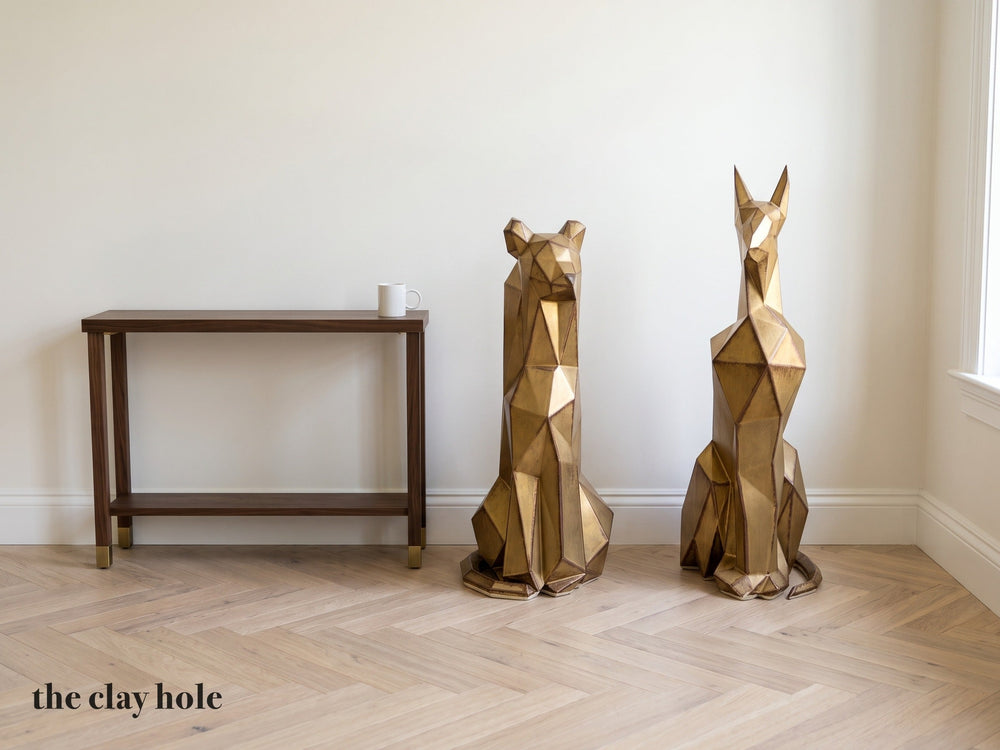
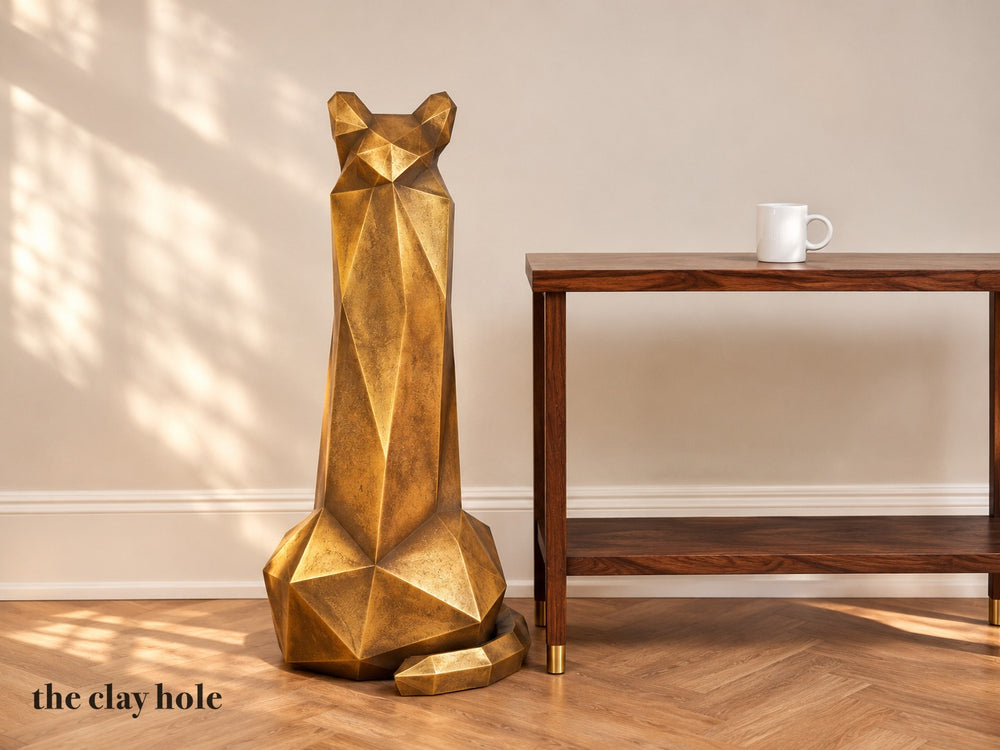
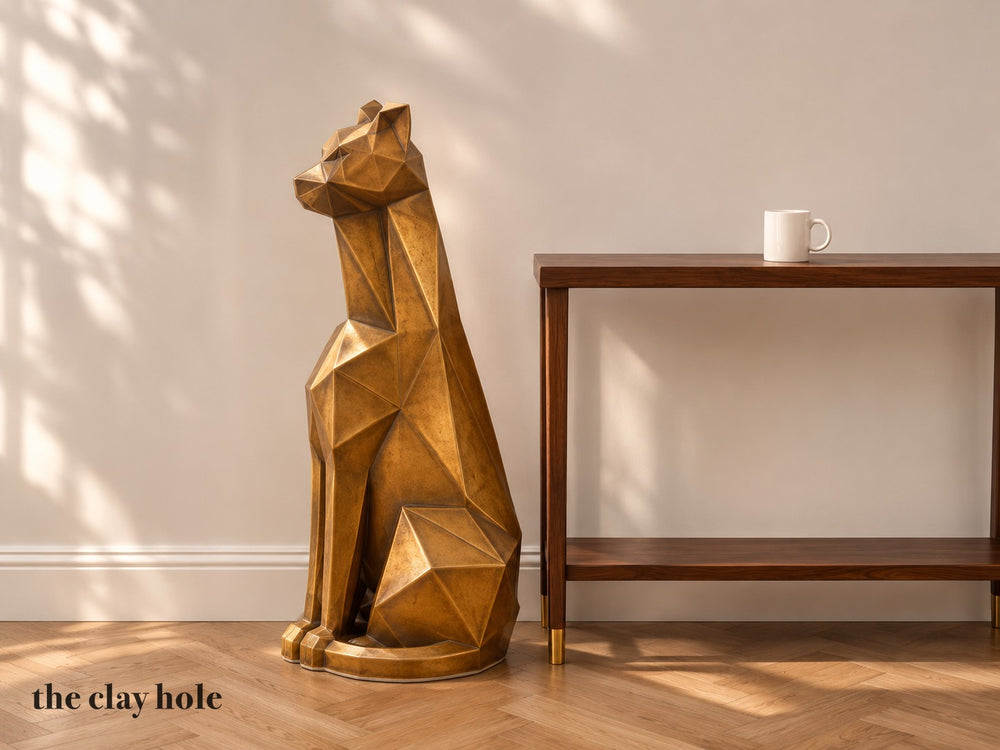
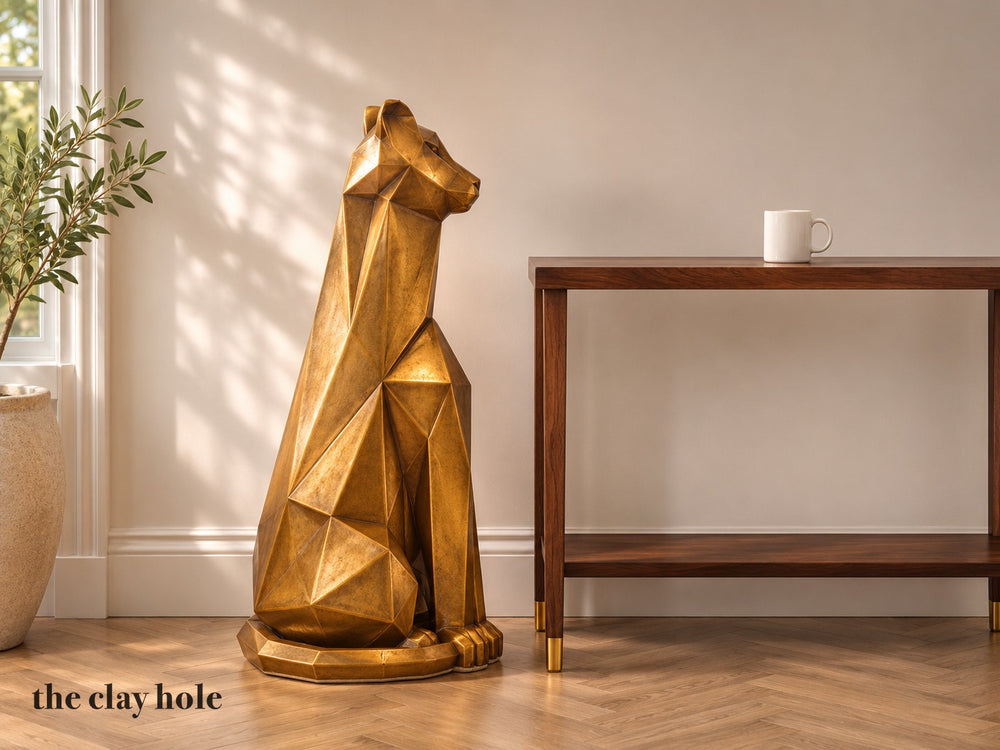
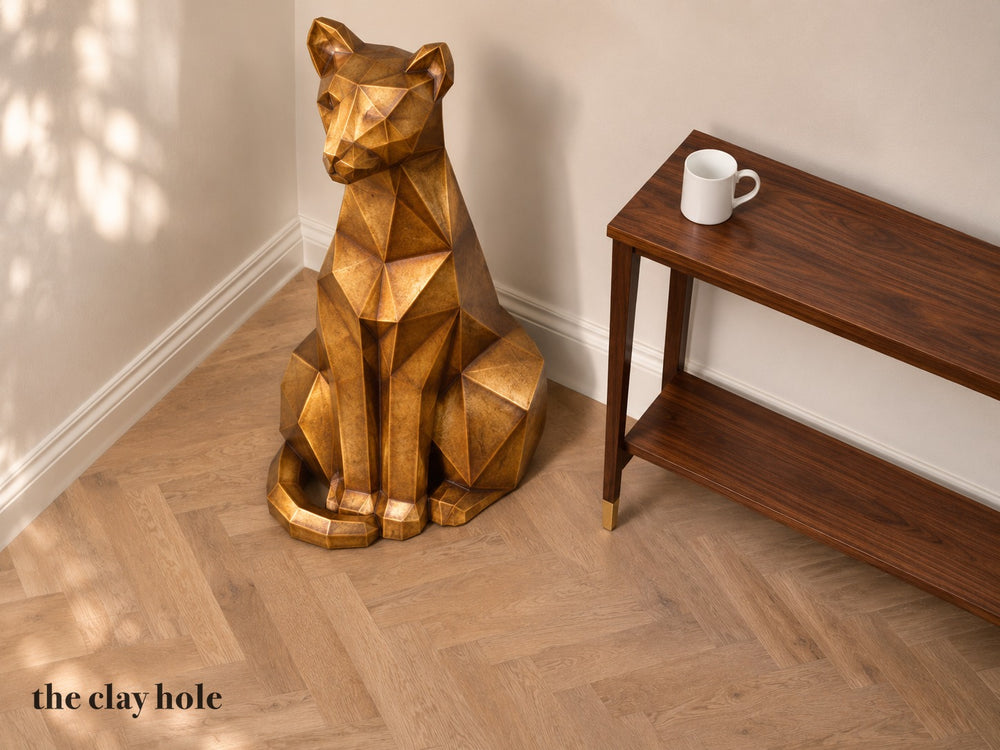
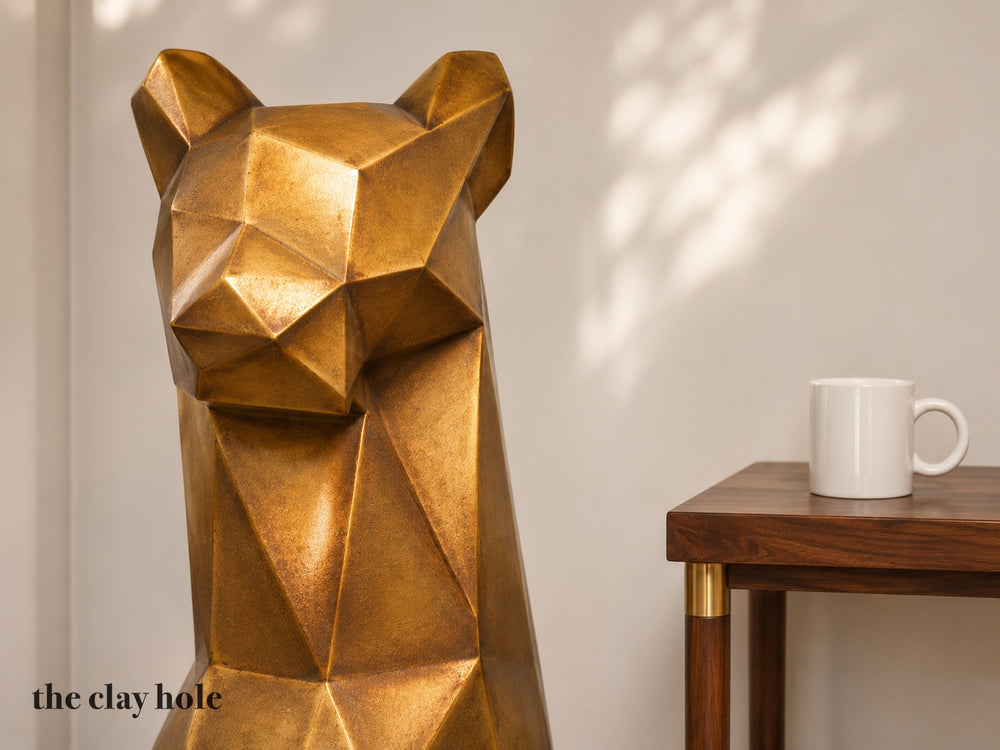
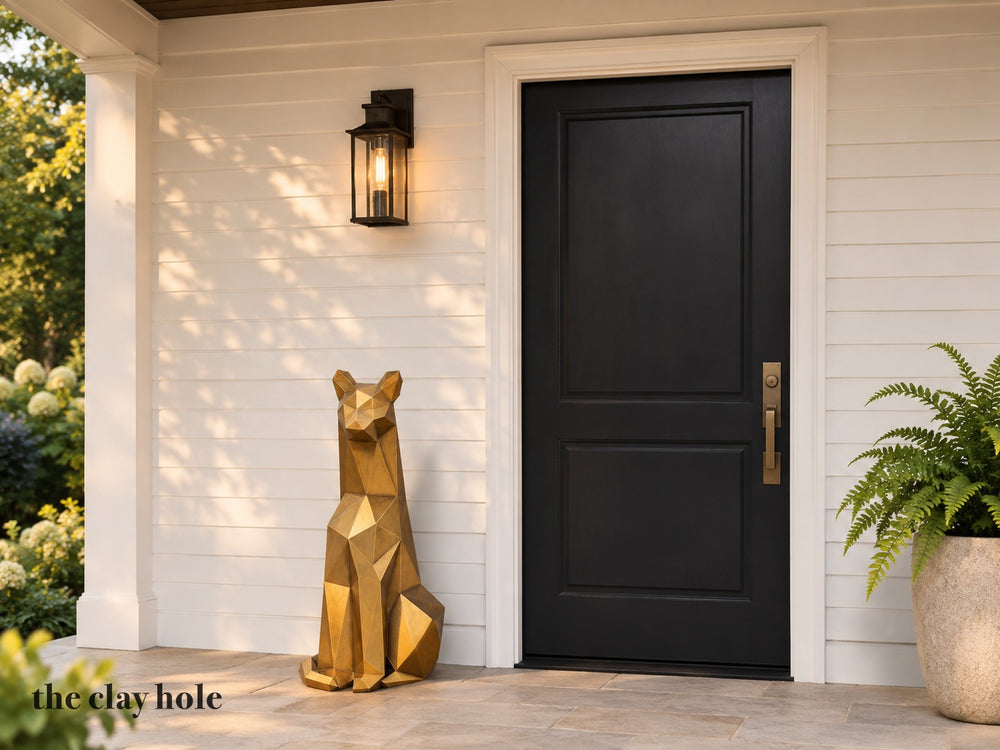
Legendary paper template 166, a Legendary showpiece
The Geometric Leopard
New: nobody has built this one yet
You can download this one with confidence. Every template has been audited at least three times for accuracy. So far every template built and every template in progress has come out 100 percent perfect, and the same will likely be true for this one.
Every template starts out in my New Pattern Program, marked NEW, until someone builds it in clay and it checks out. This one should be sound and work as drawn, so use it at your own discretion and be ready to adjust on the fly if your project needs it. Pivoting mid-build is part of the fun of pottery.
Members: be the first to show me this one fully assembled and I’ll fire that piece free, with your name on its tile for good. See which templates are still up for grabs.
Made this one? Text it to the studio or tag @theclayhole on Instagram.
A seated faceted leopard 42 in tall, in four kiln-sized slab sections joined after firing. Clean planes and sharp ridges, the head turned a little to its left and the tail curled round to its paws.
Part of Legendary Showpieces, the Legendary level, sold on its own and never in a bundle.
- Legendary
- 4 sections
- About 70 hours at the table
- About 91 lb of clay
- 204 pages
- Requires extra purchases
You will need epoxy putty and a slow-setting epoxy for the joints, and a flat display board at least 22 x 24 in, bought separately. The guide lists every tool and material.
Kiln: Every section fits a kiln at least 28 in across and 27 in deep inside, such as a Skutt KM-1227.
Buy any three Legendary templates and the fourth is on me. The cheapest of the four comes off at checkout by itself.
Flip through the free sample- Members get five templates free every month, and a Legendary one uses five of them. Log in to claim this one.
- Not a member yet: see what a membership includes.
- Delivered as a download link by email the moment the order goes through.
The Geometric Leopard, 42 in tall and 18 1/2 x 19 7/8 in with its tail
A long neck held high, the head turned a little to its left, straight front legs with the paws together, and the tail curled round to the right front paw. Spots or no spots, the shape alone already says leopard.
The hard part is the folding, and the patterns do it for you. The skin is cut into big nets of facets. You roll each one as a single slab, cut it to the printed outline and fold it on the printed lines, so every angle comes from the pattern instead of your eye. Every seam is numbered on both edges, and each section drops onto the one below on a collar, so they line up the same way every time. It comes to 123 clay pieces, each from its own pattern.
I left the spots off the patterns on purpose. Plain facets look sharp under a metallic glaze, and a leopard covered in rosettes looks sharp too. The guide has a page of ideas for the spots, the eyes, the nose and whiskers, and the toes. The photos show antique gold. Glaze yours however you like.
Four sections that each fit a kiln, joined for good at the end
Every section fits a kiln at least 28 in across and 27 in deep inside, such as a Skutt KM-1227. Each section dries, bisques and glazes on its own, then the joints close with epoxy putty once the last firing is done.
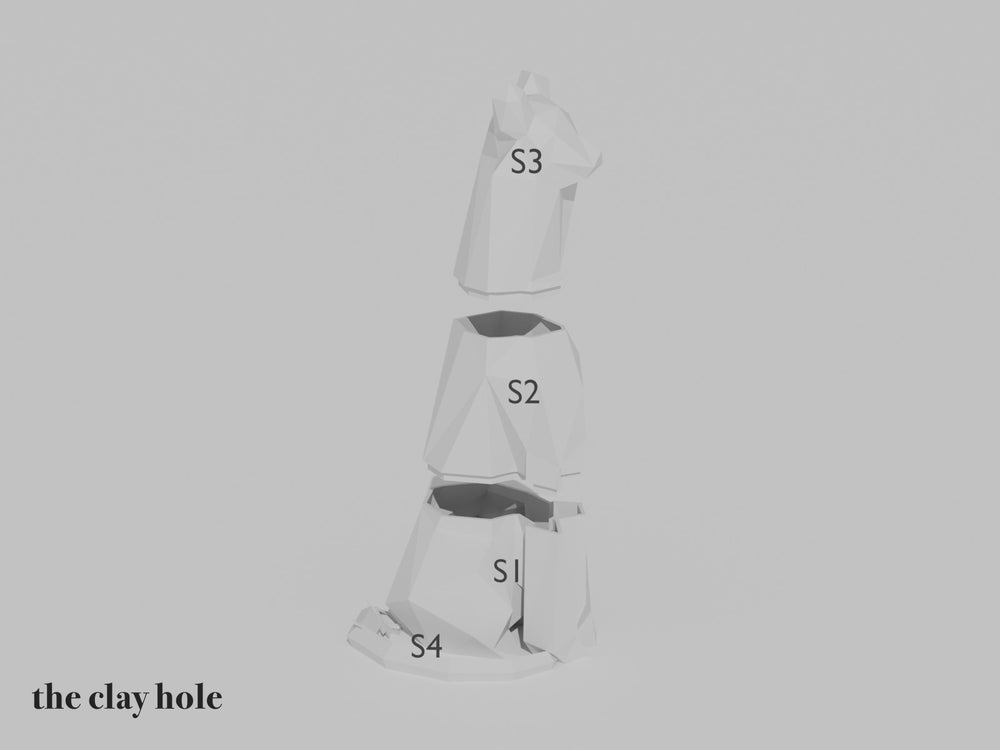
| Section | What it is | Wet, across x tall | Wet weight |
|---|---|---|---|
| S1 | Haunches, legs and paws | 22.5 x 14.0 in | About 31 lb |
| S2 | Chest and shoulders | 18.7 x 15.6 in | About 19 lb |
| S3 | Neck and head | 14.7 x 21.3 in | About 18 lb |
| S4 | The tail | 23.0 x 3.6 in | About 5 lb |
Sizes include each section's shrink slab, the clay disc it fires on. Fired, everything comes out about 12 percent smaller.

A 33 page guide and every pattern piece, 204 pages in one PDF
- The guide: tools and materials, clay, building every section step by step, keeping clay workable for weeks, drying in a dry, average or humid room, joints, firing, glazing, assembly, and what to do when something goes wrong
- Every one of the 123 pieces, cut from 123 patterns, on 170 Letter pages. The big ones print as tiles with overlap strips, tape lines, matching marks and a tile map
- A private link to the same patterns on 13 large sheets, 24 x 36 in, for a copy shop, with every piece whole. It is the easier way to print
- A 4 in check bar on every Letter page and a 10 in bar on every large sheet, so you prove the print before you cut
- A numbered section map, a checklist for every section, every joint lettered on both of its edges, and a page of ideas for your own carving

Want to see how it reads before you commit to a month of evenings? The free sample has the contents, the first pages of the guide and a pattern page.
Flip through the free sampleThe final lap is yours
I drew these so the fiddly part is already solved. The seams line up, the lid fits, and the piece comes out the size the pack says. That’s my part. Everything after the last seam belongs to you.
Press a texture into the slab before you cut it. Carve or pierce it at leather hard. Give it feet, a knob or a handle I never drew. Glaze it in something I would never pick in a million years. Two people can build the same template side by side and walk away with pieces that look nothing alike, and that’s exactly how it should go.
- Texture the slab first
- Carve, pierce or stamp
- Add feet, knobs or handles
- Sprigs and slip trailing
- Glaze it your way
One thing to keep in mind: leave the bones alone. Thinning a wall that carries weight, cutting through a seam or piling extra clay on a lid changes how the piece holds together in the kiln. Decorate the skin as much as you like.
The other Legendary templates, and the Insane builds
Pieces with dozens of numbered parts that fire whole in one kiln. Or see every template by level.


The ones that come up
What size kiln do I need
Every section fits a kiln at least 28 in across and 27 in deep inside, such as a Skutt KM-1227. That is measured with room to spare from the walls and the lid, at the wet size, which is the biggest a section ever is. A smaller kiln will not take the widest sections.
Which clay
One grogged stoneware that fires between cone 5 and cone 6, the same clay for every section, shrink slab and prop, so everything shrinks together. You need about 91 lb, which is 4 bags of 25 lb, spare clay included.
How do I print the big patterns
Take the large-format link from the guide to a copy shop and ask for 13 sheets at 24 x 36 in, printed at 100 percent. Or print the 170 Letter pages at home and tape the tiles together; the marks line up and a check bar on every page proves the size.
Do I need a membership to buy this
No. It is $225 for anyone. Current members can claim it free, and a Legendary template uses five of the month’s free picks.
Is it part of a bundle
No. Legendary templates are sold on their own and are never part of any bundle.
Can I sell what I make from it
Yes. What you make is yours to keep, give or sell. The pattern file is for your own use and is not to be shared.
A whole month of free picks, spent on one leopard
Current members of The Clay Hole pick five templates free every month, and a Legendary one takes five of them. If you build it, bring it in. I would love to see it standing.