Pottery Date Night
 Bring All Your Friends Free Week
 Give a Month of Pottery
 Private Pottery Parties

 The Welcome Booklet
 Your First Ten Sessions
 The Pottery Process
 Finding the Studio
 Your Classes Never Expire
 The Four Tables
 Who’s Who
 The Rewards Program
 Flux Glazes
 The Calculators
 Kiln Tracker
 Holiday Kiln Deadlines

 Beginner’s Tool Set
 Fingernail Clippers
 Mayco Clay Mender
 Epoxy for Kintsugi
 Applicator Bottles
 Large Bead Rack
 Raku Workshop
 Nighttime Raku
 Horsehair and Feather Raku
 The Clay Hole T-Shirt
 Embroidered Crewneck
 Zip-Up Hoodie
 Pre-Made Bisqueware
 Glaze Catchers
 Kiln Cookies
 Clay Cubby Rental
 The Glaze Bible, Printed
 The Book of Molds, Printed
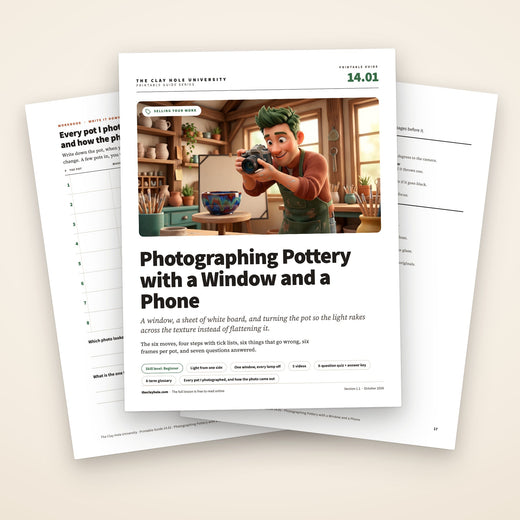
 Printable Pottery Guides
 Free Printable Trackers
 Gifts for Potters
 Christmas Pottery Ideas
 Mother’s Day Gift Ideas
 Pottery Date Night
 Studio Calendar
 2027 Studio Events
 What Should I Do Today?
 How to Throw on the Pottery Wheel
 How to Make a Pinch Pot
 How to Tap Center a Pot
 The Five Stages of Clay
 Is Pottery Hard to Learn?
 Pottery Wheel Practice Drills
 20 Easy Hand-Building Projects
 Everything That Sounds Wrong

 A Beautiful Piece, Every Time
 Slab Roller Tips
 Any Dish as a Slump Mold
 Slab Roller & Slab Mold Certification
 The Pottery Skill Tree
 Clay & Pottery Calculators
 Logging Your Pottery and Glazes
 The Pottery Dictionary
 Why Did My Pottery Do That?
 The Pottery Cone Chart
 Pottery Myths, Fact-Checked
 Is Handmade Pottery Food Safe?
 Incredible Ceramic Artist Videos
 How Dan Throws Giant Pots
 How to Dry Your Pottery
 The Pottery Wheel Introduction
 Pottery by Zodiac Sign
 Personality and the Pottery Wheel
 Pottery for Engineers
 ADHD, Hyperfocus, and Never Running Out
 Hobbies for Burnout
 Screen-Free Hobbies for Adults
 Every Addiction I Ever Had Lost to Art
 Functional Pottery Is Engineering
 How Do We Compare?
 Pottery Classes by City
 Every Pottery Studio in Utah
 Pottery in Draper
 Featured Members
 The Signature Wall
 Making Friends as an Adult Is Brutal
 The Clay Hole Commandments
 2027 Pottery Contests
 2027 Studio Parties
 Gallery Night

 Scream It Into the Void
 Destroy the Glaze Wall
 Daily Affirmation Cards
 Everything That Can Go Wrong
 Subscribe to Our Newsletters
 Contact The Clay Hole
 Corporate Team Building

 Glaze Combinations
 Glazes We Do Not Carry
 Making Glaze Test Tiles
 The Mega Glaze Tool
 How to Use the Mega Glaze Tool

 Glaze Brushing Techniques
 How to Use Underglaze
 How to Use Dipping Glazes
 Glaze Problems, Causes and Fixes
 The Dipping Glaze Guide

 Making a Glaze Catcher
 Fused or Sharp After Firing
 The Signature Wall
 His Viral Videos
 His Own Ceramics
 Meet Mud
Selling your work · Photographing your pottery
A window, a sheet of white board, and turning the pot.
Turn the pot so the light rakes across the texture instead of flattening it. Nothing else on the selling list matters if the photo is bad, and the photo is a window, a board, a phone, and one rule about which side the light comes from.
Four steps with a tick list at each: the setup, the light, the set of six frames, and the five-minute edit. Six things that go wrong, and five videos from people who photograph pottery.
This is the short version: the window, the board, the side light, the six frames, the edit, each with a tick list. The reasoning, the dark-glaze notes and the questions are in the comprehensive version.
Read it, then watch it
Why this is written down and filmed, both.
A pottery photograph is one rule and a setup. The rule is light from one side so the texture casts a shadow, and the setup is a window, a board and a phone, which is a list a page holds. What a page cannot show is a setup being built and an edit being done in real time. That is the videos, five of them from people who photograph pottery.
Use both, in this order
Read the setup and build it once. Watch how other people set up, shoot and edit. Shoot six pots the same afternoon, because the setup is the work and the photos are fast once it exists.
The whole idea
A window, a white board, and the pot turned until the light rakes across it.
One window on the shaded side, every lamp off, white board curved from the table up the wall, the phone propped level with the pot. Turn the pot until the light comes from one side and the texture casts a shadow. Six frames, one in use for scale. Five minutes of edit: straighten, crop, white balance, stop.
The five-minute version
The whole method in six moves.
If you already take photos and you just want the shape of it, this is the shape of it. Everything below is these six moves, slowed down and with the places they fail marked.
Before the first frame
What you need by the window.
Six things, and the last one is restraint. The window is the one that matters and it is free.
A window on the shaded side, a sheet of white or gray board, a phone and something to prop it on, a white card, something for scale, and five minutes.
Step one
One window, every lamp off, a board curved up the wall.
The light is the photograph. A window on the shaded side of the building, midday, every lamp off. Mixed light, a window and a bulb together, is the yellow cast that ruins most phone photos of pots. Direct sun is a spotlight; use a window without it, or hang a sheet over it.
Then the board: a sheet of white or light gray poster board, foam board or paper, laid on the table by the window and curved up the wall behind, taped at the top, so there is no line where the table ends and the wall begins. That curve is the sweep, and it is the single thing that makes a kitchen-table photo look like a catalog. White for most pots; gray for white pots and dark glazes, so the phone does not fight the background.
The setup takes ten minutes to build and thirty seconds to rebuild once you have done it, and it lives in a bag: one sheet of board, a roll of tape, a white card. Build it once and it turns any windowsill, including the ones in our building, into a studio.
Step two
Turn the pot until the light rakes across it from one side.
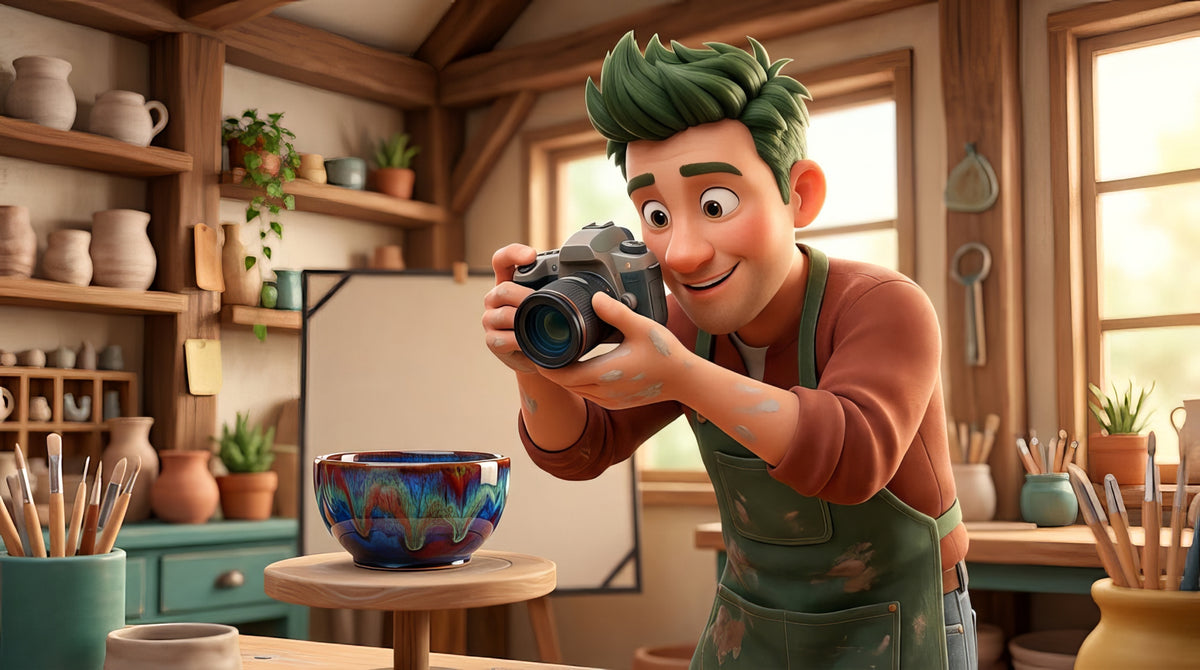
Texture is shadow. Light from the front flattens the pot. Light from one side, about forty-five degrees to the camera, catches every ridge and carving and throws a small shadow behind it, and that shadow is the difference between a photograph of a pot and a photograph of a shape.
So the window is to one side of the pot, not behind you, and the pot is turned on the board a few degrees at a time until the surface reads. Watch the shadow side as you turn: too dark and the form is lost, and a white card held on that side bounces a little light back in. For a dark glaze, the light goes further round toward behind the pot so the rim and the edges catch a highlight and the form shows against the board.
Then the camera. Propped or on a tripod, level with the middle of the pot for the front, back, foot and detail frames, rather than looking down at it (the inside frame is shot from above), a step further back than feels right, because a phone lens up close distorts a pot into a pear. Tap the pot on the screen to focus and to set exposure, drag the exposure a touch if the pot is dark, and take three tries at each view and keep the best. Florian Gadsby’s video below shows a camera and tripod doing the same job.
Glossy against matte
A glossy glaze reflects the window as a bright shape on its surface, and that reflection is either the best thing in the photograph or a white blob over the glaze color. Move the pot or the camera until the reflection sits on a curve rather than a flat, so it reads as shine and not as a window. A matte glaze has no reflection to manage and wants the light a little further to the side so its surface shows as texture; a satin sits between and usually wants the white card.
Step three
Six frames per pot, and one of them in use.
A listing is a set, not a photo. The front. The other side. The inside from above. The foot, because a buyer wants to know it was finished. A detail of the surface. And one in use, a hand, a spoon, a flower in it, because a pot alone on white has no size and no life.
The in-use frame is the one that sells, and it is the one people skip. A mug on a wooden table by the same window, with the same hand around it every time, is a photograph a buyer can put themselves into. Keep it honest: the same pot, the same glaze, no filter that changes the color, because the review is written when the box opens.
A feed wants one frame, usually the in-use one or the detail, and it wants it square or four-by-five. A listing wants the set. Shoot both in the same session while the board is up; Undseth Pottery’s video below is a full setup and edit for website and social media photos.
Step four
Five minutes of edit, then stop.
Straighten, crop, white balance, a touch of light, stop. Whatever editor your phone has. Straighten so the table is level. Crop square or four-by-five. White balance until the board reads a clean white or gray with no yellow or blue in it, which is why the board is a plain color. A touch of brightness and contrast, and put the phone down.
The one rule of the edit is that the pot in the photo is the pot in the box. Saturation, filters and anything that changes the glaze color turn a sale into a refund and a review. If the photo looks dull, the fix is the light, not the slider; go back to the window. Misha Carrasco’s video below is a beginner setup with about five minutes of editing at the end.
Then name the files with the pot and the glaze, keep the originals, and shoot the next six pots while the board is still up. The setup is the work; once it exists, a pot is three minutes of photographs, and a Saturday afternoon is a shop.
Watch it done
Now watch five people find the light.
Watch this one, then go find a window.
None of these makers work here. Between them they cover a camera and lights setup, a beginner setup with its edit, an art school studio with a white backdrop, a simple setup at home, and a full studio setup for website and social media photos. Nothing but the still frame loads until you press play.
Almost eighteen minutes on the camera, lights, backdrop and edit used for product photos. It is a camera and lights setup rather than a window and a phone. The other four videos are in the comprehensive version.
When it goes wrong
Six ways it goes wrong, and what to do about each.
The three failures that happen on the first afternoon.
Pick the one that looks like your photo. The first three are light and focus. The last three are the background, the scale, and the pot.
Pick the one that looks like your photo.
The pot looks flat and the texture has vanished
Light from the front. A flash, a ceiling light or a window behind the camera lights every surface equally and kills every shadow, and texture is shadow.
Light from one side, at about forty-five degrees, and the pot turned until the light rakes across the surface. The shadow side is where the carving lives.
Turn the pot a quarter turn and look again. Move yourself, not the window.
Everything is yellow, or everything is blue
Mixed light. A window and a lamp on at once, or a warm bulb, or the phone guessing at white balance against a colored wall. Blue usually means a window in full shade, and the white board and the white balance slider fix it.
One light source, the window, and every lamp off. A white board as the background so the phone has something true to balance against. Shoot in the middle of the day.
Turn the lamps off and shoot again. In the edit, the white balance slider fixes most of what is left; the white board is what makes that possible.
It is blurry, or only the rim is sharp
Camera shake in low light, or a phone focused on the wrong thing, or a close-up that left the back of the pot soft.
Prop the phone on something, or a tripod. Tap the pot on the screen to focus. Step back and crop rather than leaning in.
Step back, brace, tap to focus, shoot three.
The background is doing more than the pot
A kitchen, a shelf, a patterned cloth, a hand. The eye goes to whatever is busiest, and a pot is quiet.
A sweep of white or gray board curved from the table up the wall, so there is no horizon line behind the pot. Or one plain surface and a plain wall.
Clear it, or move the pot to the plainest corner of the room.
Nobody can tell how big it is
A pot alone on white has no scale. A mug and a bucket photograph the same.
One photo in the set with something for scale: a hand holding it, a spoon beside it, a flower in it. A listing is six photos, five plain and one in use.
Take the in-use photo now; it is the one that sells.
The photo is fine and the pot is not
A photograph is honest. A foot with a drip, a rim with a chip, a glaze that pinholed, all show larger on a screen than in a hand.
Grind the foot wet, over a bucket, in an N95 or better with safety glasses. Show any flaw that is left in a detail frame, or do not list it. A second-quality pot goes in a second-quality pile, sold as such at a market, and never in a listing photo.
Put it back on the shelf and photograph a better one.
How it works here
At The Clay Hole, the pickup shelf is the worst place to photograph a pot.
This page is written for potters everywhere. A few things are specific to our building, so you know before you start.
Three things to know here
The pickup shelves are under ceiling lights, which gives flat, mixed light. A sheet of white board in your bag turns any windowsill in the building into a studio. Your work is yours to sell however you like, and the photograph is the first thing a buyer sees.
Where to shoot here
Not the pickup shelf. Any table near a window, with a board from your bag and the nearest lamp off, in the middle of the day. Ask before you move anyone’s work to get to the light, and put the table back.
Selling your work
Everything you make here is yours to sell, online, at markets, to galleries, however you like. Day to day the studio does not sell or ship members’ work; studio sales and showcases like Gallery Night are the exception. Our selling lesson is the map, and this page is its first step.
Honesty
A photograph that improves on the pot is a refund waiting to happen. Grind the foot wet, over a bucket, in an N95 or better with safety glasses, before the photo, per the sanding lesson, photograph the pot you will ship, and let the light do the flattering.
The first pot
Photograph your best pot before you list anything, and look at it on a phone screen at the size a buyer sees. If the texture reads, the foot is clean and the color is true, the setup works. If not, it is the light, and the light is a window.
Questions people actually ask
The ones that come up every week.
Do I need a camera?
No. A phone made in the last five years photographs pottery well enough to sell it, if the light is right. The light is the whole thing, and a window is free. A camera helps with control and with big prints; it does not help with a bad window.
What is the setup?
A table by a window on the shaded side of the building, in the middle of the day. A sheet of white or light gray board on the table and curved up the wall behind, so there is no line where the table ends. The pot on the board, turned until the light from the window rakes across it from one side. Every lamp off. The phone propped or on a tripod, level with the middle of the pot, a step back from where you want to be.
Why white board?
Because a plain background makes the pot the only thing in the frame, and because a true white gives the phone something to balance color against. Gray works and is kinder to white pots. Colored backgrounds are for the feed, not the listing.
What about editing?
Five minutes in whatever your phone has: straighten, crop square or four-by-five, white balance until the board reads a clean white or gray, a touch of brightness, a touch of contrast, and stop. The pot has to look like the pot that arrives, or the review says so. Never change the glaze color.
How many photos per pot?
Six for a listing: the front on white, the back or the other side, the inside from above, the foot, a detail of the surface, and one in use with something for scale. One good photo for a feed. The in-use one is the one that sells.
How do I photograph a dark glaze?
Light from the side and slightly behind, so the edge catches a highlight and the form reads. A gray board rather than white, so the phone does not underexpose the pot to keep the background bright. Tap the pot on the screen and drag the exposure up a touch.
Can I photograph at The Clay Hole?
Yes, though the pickup shelves sit under ceiling lights, which gives flat, mixed light. Take the pot to a window, or better, home. A sheet of white board in your bag turns any windowsill in the building into a studio, and a plain table near daylight beats any shelf.
Related lessons
Six lessons that sit next to this one.
Three to read next.
The photograph is the first step of selling. These are the next six.
That is the whole method
One window. A board up the wall. Light from the side. Six frames. Five minutes. Stop.
Your first set will be shot under the kitchen light with the window behind you, and it will look like every pot ever listed by a beginner. The second set, by the window with the lamp off, will look like a shop. The difference is a sheet of poster board and which way you were facing.
If you want the dark-glaze notes, the feed-versus-listing notes, the edit in full and the answers to the questions everybody asks, switch to the comprehensive version at the top. Otherwise, go buy a sheet of white board.
Written for potters everywhere. Where our studio does things differently, the page says so.
Which version would you like to print?
Both print clean, with the videos turned into labeled boxes you can search for later.