Pottery Date Night
 Bring All Your Friends Free Week
 Give a Month of Pottery
 Private Pottery Parties

 The Welcome Booklet
 Your First Ten Sessions
 The Pottery Process
 Finding the Studio
 Your Classes Never Expire
 The Four Tables
 Who’s Who
 The Rewards Program
 Flux Glazes
 The Calculators
 Kiln Tracker
 Holiday Kiln Deadlines

 Beginner’s Tool Set
 Fingernail Clippers
 Mayco Clay Mender
 Epoxy for Kintsugi
 Applicator Bottles
 Large Bead Rack
 Raku Workshop
 Nighttime Raku
 Horsehair and Feather Raku
 The Clay Hole T-Shirt
 Embroidered Crewneck
 Zip-Up Hoodie
 Pre-Made Bisqueware
 Glaze Catchers
 Kiln Cookies
 Clay Cubby Rental
 The Glaze Bible, Printed
 The Book of Molds, Printed
 Printable Pottery Guides
 Free Printable Trackers
 Gifts for Potters
 Christmas Pottery Ideas
 Mother’s Day Gift Ideas
 Pottery Date Night
 Studio Calendar
 2027 Studio Events
 What Should I Do Today?
 How to Throw on the Pottery Wheel
 How to Make a Pinch Pot
 How to Tap Center a Pot
 The Five Stages of Clay
 Is Pottery Hard to Learn?
 Pottery Wheel Practice Drills
 20 Easy Hand-Building Projects
 Everything That Sounds Wrong

 A Beautiful Piece, Every Time
 Slab Roller Tips
 Any Dish as a Slump Mold
 Slab Roller & Slab Mold Certification
 The Pottery Skill Tree
 Clay & Pottery Calculators
 Logging Your Pottery and Glazes
 The Pottery Dictionary
 Why Did My Pottery Do That?
 The Pottery Cone Chart
 Pottery Myths, Fact-Checked
 Is Handmade Pottery Food Safe?
 Incredible Ceramic Artist Videos
 How Dan Throws Giant Pots
 How to Dry Your Pottery
 The Pottery Wheel Introduction
 Pottery by Zodiac Sign
 Personality and the Pottery Wheel
 Pottery for Engineers
 ADHD, Hyperfocus, and Never Running Out
 Hobbies for Burnout
 Screen-Free Hobbies for Adults
 Every Addiction I Ever Had Lost to Art
 Functional Pottery Is Engineering
 How Do We Compare?
 Pottery Classes by City
 Every Pottery Studio in Utah
 Pottery in Draper
 Featured Members
 The Signature Wall
 Making Friends as an Adult Is Brutal
 The Clay Hole Commandments
 2027 Pottery Contests
 2027 Studio Parties
 Gallery Night

 Scream It Into the Void
 Destroy the Glaze Wall
 Daily Affirmation Cards
 Everything That Can Go Wrong
 Subscribe to Our Newsletters
 Contact The Clay Hole
 Corporate Team Building

 Glaze Combinations
 Glazes We Do Not Carry
 Making Glaze Test Tiles
 The Mega Glaze Tool
 How to Use the Mega Glaze Tool

 Glaze Brushing Techniques
 How to Use Underglaze
 How to Use Dipping Glazes
 Glaze Problems, Causes and Fixes
 The Dipping Glaze Guide

 Making a Glaze Catcher
 Fused or Sharp After Firing
 The Signature Wall
 His Viral Videos
 His Own Ceramics
 Meet Mud
Hand building · The wall extruder
A lump of clay in the top. A perfect coil out the bottom.
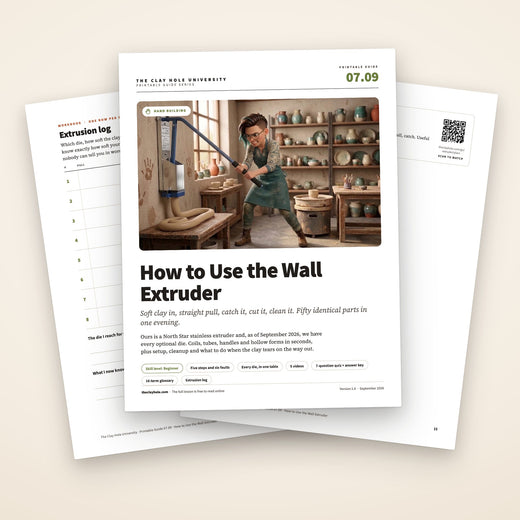
A wall extruder is a stainless barrel, a plunger, a long handle and a plate with a hole in it. Push soft clay through the hole and out comes a coil, a ribbon, a handle blank or a hollow tube, dead even along its whole length, in seconds. It is the fastest way in the building to make the parts that other pages ask you to make by hand.
This page covers what ours is and which dies it takes, how to load it and pull it without hurting yourself or the clay, the hollow dies that make tubes, what to do with everything that comes out, cleanup, six things that go wrong, and five videos.
This is the short version: load soft clay, mount the die, pull long and steady, cut and use. The die table, the reasoning, the questions and four of the five videos are in the comprehensive version.

Read it, then watch it
Why this is written down and filmed, both.
An extruder is a simple machine with two feelings in it that no paragraph can hand you: how soft the clay has to be, and what a good pull feels like through the handle. Everything else is a list. Which die, which way round, how to mask the holes you are not using, where to put your other hand. Lists are what pages are for.
So read the steps, then watch somebody load a North Star and pull it, and the words will attach themselves to what you saw. People who read first and watch second remember both better than people who do either alone. Then go do it with the tick list open on your phone, once, badly, and it will be yours.
Use both, in this order
Read the die table and step one first, because die choice is the part nobody films well. Then watch the first video. Then load it.
The whole idea
Soft clay, the right die, a long straight pull, catch and cut.
Mount the die with the screws tight and the unused holes masked. Load wedged clay that is softer than you would throw with, in one solid lump with no air. Pull the long handle down in one smooth stroke while your other hand catches the extrusion, then cut it to length with a wire or a knife. Clean the barrel and the die before the clay dries in them. That is all of it.
The wall extruder is a Black Level tool. Purple Level Members have the handheld extruders, which work the same way in miniature.
The five-minute version
The whole thing in six moves.
If you have used a handheld extruder and just want the shape of the big one, this is the shape of it. Everything below is these six moves, slowed down, with the places they fail marked.
Before you load it
What it is, and what every die does.
Ours is a North Star four inch stainless extruder, wall mounted at about waist height, with the full run of North Star dies. Knowing the dies is most of knowing the machine.
The dies, in one table
Solid dies make coils and ribbons. Hollow dies make tubes. The specialty sets make the shapes that would take an hour by hand. Wall thickness on a hollow extrusion is automatic: about a quarter inch up to three and a half inches across, five sixteenths above that.
| Die | What comes out | Best for |
|---|---|---|
| Small solid coils | Round coils at a quarter, five sixteenths, three eighths and seven sixteenths of an inch | Fine coil work, decorative rope, sprig-scale detail |
| Medium solid coils | Round coils from a half inch to eleven sixteenths | Everyday coil building, mug handles rolled from a coil |
| Large solid coils | Three quarters to an inch and a quarter | Big coil pots, planters, sculpture armatures |
| Shaped coils | A half inch square, a five eighths hexagon | Faceted handles and feet, crisp geometric coil work |
| Ribbons | Flat strips at three quarters, one, two and three inches wide | Pulled-handle blanks, strap handles, bands and belts on a form |
| Hollow rounds | Tubes at an inch and a half and two and a half inches | Cups, vases, candle holders, spouts, tube feet |
| Hollow squares and hexagons | Square and six-sided tubes, same two sizes | Boxes, pencil cups, architectural pieces |
| Coil builder set | Half-round coils from a half inch to an inch and an eighth | Coils with a flat back that stack and blend cleanly |
| Hearts, ropes and the rest | Hollow hearts, twisted rope coils and novelty profiles | Ornaments, jewelry components, decorative rims |
| The blank | A solid plate you cut your own shape into with hand tools | Any profile the shelf does not have. Taper the opening so it compresses the clay |
Why it has a place in a room full of slab rollers and wheels
Consistency. A hand-rolled coil is never quite the same thickness end to end, and a pulled handle is never quite the same twice. The extruder gives you fifty identical parts, and identical parts are what make a big coil build or a run of matching mugs possible in one evening.
Step one
Pick the die, center it, and tighten it down.
Bevel up, mask on, screws tight. Take the retainer plate off the bottom of the barrel with the hex key, set the die you want on it with the beveled side up, so the bevel faces the clay, and center it so the overhang outside the barrel is the same all round. If the die has more than one opening, lay the neoprene mask over the ones you are not using. Then tighten the retainer screws until they stop. A loose die is how clay ends up squeezing out sideways instead of through the hole.
Bevel up, mask on, screws tight. Retainer off with the hex key, die on with the bevel facing the clay, centered, mask over any unused holes, screws tightened until they stop. For a hollow die, the brace slides into the slot on top and the barrel holds it.
A hollow die has three parts: the plate, the center plug, and the stainless brace that holds the plug in position. The brace slides into a slot machined across the top of the die and is trapped there by the barrel when the retainer goes on. If the plug can wobble, the tube walls will be uneven. If the brace is not seated, the plug drops out and you extrude a solid slug.
Check the opening before you load. Run a finger round the edge for nicks. A nicked die drags a line down the whole extrusion, and the fix is thirty seconds with a fine round file or an emery board, not a new die. Never use a knife or a metal rib on the plastic; it scars.
The extension handle should be on and bolted. It lives on the machine here, so if you find it off, ask before bolting it back; somebody may be mid-repair.
Step two
Soft clay, wedged, loaded as one lump with no air.
Softer than you think. Extruder clay is softer than throwing clay. If it is stiff enough to throw a tall cylinder, it is too stiff to push through a quarter inch hole without tearing, and you will be hanging off the handle trying. Wedge it, then form it into a fat log slightly smaller than the barrel. Raise the handle, pull the plunger right out of the barrel, then lower the handle again before you load. That is the order North Star gives, and it keeps a long steel bar from standing up over you while both hands are full of clay. Push the log down into the tapered top as one piece and press it down so it fills the corners, then raise the handle to put the plunger back in. Loading in several small lumps traps air between them, and air comes out of the die as a hiss and a gap in the coil.
Softer than you think. Clay softer than throwing clay, wedged, formed into one log a little smaller than the barrel, pushed in as one piece and pressed into the corners, loaded with the plunger out of the barrel and the handle down. Wet sponge on the plunger face, then raise the handle and lower the plunger into the top of the barrel.
Wipe the face of the plunger with a wet sponge before it goes into the barrel. That thin film is what lets it retract afterwards instead of dragging the last of the clay back up with it. It also makes the next load easier.
How much? For coils, a few pounds is plenty and the pull is easy. For a hollow die you want the barrel fuller, because a tube needs a long uninterrupted pull and every reload leaves a join. Eight pounds is the practical maximum and it produces more coil than most people can catch at once, so start smaller than you think. Over-packing does not hurt the machine, it hands you more extrusion than you have hands for, and a column nobody is supporting sags, folds onto itself and goes back in the bag.
Porcelain and white stoneware are fine in this machine; that is the reason ours is the stainless model. Grogged sculpture clay extrudes too, but it wears dies faster and tears more, so keep it to the larger dies.
Step three
One long smooth stroke, and a hand underneath to catch it.
Never your body weight. Stand slightly to the side, both feet planted, one hand on the end of the long handle and the other cupped under the die. Pull the handle down in one steady stroke. Not a jerk, not a series of tugs: a stroke. The extrusion appears, and your lower hand cradles it as it grows, letting it lie into your palm and then onto the bench rather than letting it hang and stretch under its own weight. A coil that hangs unsupported for a foot thins and tears at the die. Keep pulling until the length you want is out, then stop with the handle still and cut.
Never your body weight. One hand on the end of the handle, the other cupped under the die. Pull down in one smooth stroke, cradle the extrusion as it comes so it never hangs and stretches, stop, and wire it off flush with the die. Never swing your weight from the handle: if it will not move, the clay is too stiff.
If the handle will not move with a firm pull, do not swing on it. The clay is too stiff or the die is too small for that clay, and the fix is to unload and soften, not to force it. The leverage of a thirty inch handle is enormous, and forcing it is how plungers bend and how people hurt shoulders.
Keep the free hand out of the handle’s path and away from the top of the barrel while pulling. The North Star has no ratchet precisely so there are fewer pinch points, but a long handle coming down is still a long handle coming down. Long hair and apron strings stay clear of the pivot.
To cut, hold the wire taut against the face of the die and draw it across. A cut flush with the die leaves a clean start for the next pull; a cut an inch below leaves a tail that curls. For handle blanks, cut two inches longer than the finished handle; for coils, cut to the length you can lay down without kinking.
Step four
Tubes need soft clay and a slow pull. Handles need a curve while wet.
Slow, soft, supported. A hollow die splits the clay round the center plug and relies on the beveled edges under the brace to weld it back together before it leaves the die. That weld only happens in soft clay, pulled slowly. Pull too fast or with stiff clay and you get a tube with a seam that opens in the bisque. So for tubes: softest clay you have wedged, a full barrel, and a pull at half the speed you use for coils. As the tube comes out, support it along its length on a bat or a board, not in your hand, or it flattens.
Slow, soft, supported. Hollow dies weld the clay back together after the brace splits it, and the weld only happens in soft clay pulled slowly; support the tube along a board as it comes. For handles, extrude a ribbon or a coil, cut it long, curve it on a bat immediately and let it stiffen to leather hard before it goes on the mug.
A tube straight off the die is a cup body, a vase, a candle holder or a spout. Stand it on a slab of the same clay while it is still soft and it welds itself a floor; add a coil rim and you have a beaker in five minutes. Let it stiffen before you try to alter it. Our lamp base lesson shows other ways to build a hollow form, and the teapot lesson covers what an extruded spout does and does not do.
For handles, the three quarter and one inch ribbon dies and the medium coils are the workhorses. Extrude a length, cut it two inches long, and immediately lay it into the curve you want on a clean bat, because a handle straightened at leather hard cracks on the outside of the bend. Some potters give the ribbon one gentle pull between wet fingers after extruding, which tapers it and takes the machine-made look off; that is the bridge to our pulled handles lesson.
Attach handles at leather hard, both parts the same stiffness, scored and slipped like any join. A handle from the extruder is denser than a hand-rolled one and shrinks very slightly less, so match it to a mug of the same clay and dry the two together under a sheet or a loose bag.
Step five
Clay dries in the barrel overnight, and dried clay in an extruder is somebody else’s problem.
Every scrap, tonight. Raise the handle, pull the plunger right out, lower the handle again, and push the remaining clay out of the barrel with your hand from the top, then take the retainer and die off and clear the die opening. Every scrap. A skin of clay left in the barrel dries to something like bisque by morning and has to be chipped out, and chips off the plastic die if they are on the die. Chipping dry clay puts silica dust into the air, which is the real reason this is a job for tonight rather than for whoever finds it tomorrow. Wipe the barrel and plunger with a damp sponge, rinse the die and the mask in the tool sink, and dry the stainless parts with a rag. The die goes back on its hook or in its labeled slot, and the blank goes back to the blanks.
Every scrap, tonight. Plunger out and handle down, every scrap of clay out of the barrel by hand, retainer and die off, die opening cleared. Damp sponge on the barrel and plunger, dies and mask rinsed in the tool sink, everything dried and back on its hook. Leftover clay goes to reclaim, not back in a bag.
The leftover clay is fine. It has been compressed, not damaged. It goes into the reclaim if it has picked up anything, or back onto your bat for the next load if it is clean. Not back into a fresh bag; it has been through your hands and a steel barrel.
Once every few months the handle pivot bolt wants a coat of grease, and that is the only maintenance the machine needs. That is a staff job. If the handle squeaks or binds, tell the front desk rather than oiling anything yourself; the wrong lubricant on a pivot near clay makes a mess that migrates into pots.
Then the ordinary clean-up instructions apply to the bench under it: extrusions leave a surprising amount of slurry on the wall and the floor beneath the die.
Watch it done
Now watch five people push clay through a hole.
Watch this one, then go load it.
None of these potters work here or know we exist. Between them they cover our exact machine, the dies, a second extruder and a quick cleanup tip. The still frames load while you read; the player and its cookies wait until you press play.
Fourteen minutes on a North Star four inch, coils and hollow extrusions both. The other four videos are in the comprehensive version.
When it goes wrong
Six things that go wrong, and what each one is telling you.
The three things that go wrong on the first night.
Pick the one that looks like your bench. Four of the six are the clay being too stiff, which is the whole subject.
Pick the one that looks like your bench.
A rough, torn or ragged surface on the extrusion
Stiff clay, or a nicked die. Stiff clay shears at the die edge instead of flowing through it; a nick drags a line down the whole length.
Softer clay than you would throw with, always. Run a finger round the die opening before you load and dress any nick with a fine round file or an emery board.
Unload, wedge a splash of water in, reload. Thirty seconds, and the next pull is smooth.
A firm pull and the handle stays put
The clay is too stiff for that die, or there is too much of it for a small opening. Leverage is not the answer; a thirty inch handle can bend a plunger.
Soft clay for small dies, a smaller load for small dies, and the extension handle on and bolted. If it still will not move, the die is the wrong size for the clay.
Do not swing on it. Unload, soften the clay or swap to a larger die, and try again.
The extrusion curls to one side as it comes out
The die is off center, one side of the mask is lifting, or the clay in the barrel is stiffer on one side than the other. Uneven flow makes a bend.
Center the die with even overhang, seat the mask flat, and wedge the whole load to one consistency before it goes in.
A curling coil is still a good coil; lay it into the curve you want and use it. For a tube, stop and re-seat the die.
A hollow extrusion opens along a line, on the bench or in the bisque
The weld under the brace did not take. Stiff clay, a fast pull, or a die whose bevels have been scarred by a metal tool.
Softest clay, fullest barrel, half-speed pull, and a die that has only ever met a file. Press the seam closed with a wet finger as soon as the tube is out, before it stiffens.
If it has already opened at leather hard, score and slip it closed and dry it slowly. If it opened in the bisque, it is a planter with a drainage slot.
Coils flatten under their own weight or stick together on the bench
The clay is on the soft side of right, and the coils were left in a pile. Soft is correct for the pull; it is wrong for storage.
Extrude onto a dry bat or a board dusted with a little dry clay, lay coils side by side rather than piled, and let them firm for ten minutes before handling.
Separate them now with a rib, dust the bench, and give them ten minutes under a cotton sheet.
A hiss from the die, and gaps or bubbles in the extrusion
Air trapped in the barrel, almost always from loading several lumps instead of one.
Wedge well and load one solid log pressed into the corners. If you must add clay mid-job, press it firmly onto what is already there.
Cut out the gapped section and keep going; the air is behind you now.
How it works here
One wall extruder, and it is a Black Level tool.
This page is written for potters everywhere. Here is where our studio stands.
Four things to know here
The wall extruder is available to Black Level Members. Purple Level Members and Black Level Members have the handheld extruders, which work the same way in miniature. Ask the onsite instructor to walk you through your first load. Every die goes back on its hook, and the barrel is emptied before you leave.
Who can use it
The wall extruder is one of the tools that unlocks at Black Level. Purple Level Members and Black Level Members can use the handheld extruders, which take smaller dies and hold a handful of clay, and which teach exactly the same habits.
Your first time
Ask the onsite instructor to stand with you for the first load. Die mounting and the hollow-die brace are the two things people get wrong the first time, and both are a two minute demonstration.
The dies
We have the full North Star range and every optional set. They live on hooks and in labeled slots by the machine. Take one, use it, rinse it, put it back where it came from. A die in the wrong slot is a treasure hunt for whoever needs it next.
What we do not allow
No metal tools on the dies, no forcing the handle, no leaving clay in the barrel, and no oiling or adjusting the pivot. If it squeaks or binds, tell the front desk.
Skill level
We call it Beginner, because the machine itself is simple. What you do with the extrusions is where the skill lives, and those lessons are linked below.
Cleanup
Everything on the clean-up page applies, plus the barrel, the plunger and the die. The bench and floor under the die catch more than you expect.
Questions people actually ask
The ones that come up at the machine.
Can I use the wall extruder at Purple Level?
No. The wall extruder is a Black Level tool. Purple Level Members and Black Level Members have the handheld extruders, which use the same idea at a smaller scale and are a good place to learn the habits.
How soft does the clay need to be?
Softer than throwing clay. If you could throw a tall cylinder with it, it is too stiff for the small dies and you will be hanging off the handle. Wedge a little water in until it is soft enough to dent deeply with a thumb and not spring back.
How much clay fits?
About eight pounds in a four inch barrel, which produces more coil than most people can catch at once. Start with a few pounds for coils, and fill it for a hollow die, because a tube wants one long uninterrupted pull.
Are extruded handles worse than pulled ones?
They are different. A pulled handle tapers and carries the marks of the hand; an extruded one is dead even and machine straight until you do something to it. Many potters extrude the blank and then give it one gentle pull between wet fingers, which gets the best of both.
Can I bring my own die?
A die you have cut from a blank that fits a North Star four inch is fine. Show it to the onsite instructor first. Never modify a studio die.
Why did my tube split in the bisque?
The weld under the brace did not take, which means the clay was too stiff or the pull was too fast. Softest clay, full barrel, half speed, and a wet finger along the seam while it is fresh.
What do I do with the leftover clay in the barrel?
Push it out by hand, and if it is clean it goes back on your bat for the next load. If it has picked up anything from the bench, it goes to reclaim. It never goes back into a fresh bag.
Does it work with porcelain?
Yes, and that is why ours is the stainless model rather than the painted steel one. Porcelain and white stoneware pick up rust marks from a steel barrel and none from stainless.
Related lessons
Six lessons to read next.
Three to read next.
The extruder makes parts. These are the pages that pick up from there.
That is the whole machine
Soft clay in, straight pull, catch it, cut it, clean it.
The first time you extrude a dozen identical coils in under a minute and lay them next to the ones you rolled by hand last week, something changes about how you plan a build. Use it for what it is good at, roll by hand for what it is not, and leave the barrel cleaner than you found it.
If you want the die table, the hollow-die reasoning and the other four videos, switch to the comprehensive version at the top. Otherwise, wedge up eight pounds of soft clay and go.
Written for potters everywhere. Where our studio does things differently, the page says so.
Which version would you like to print?
Both print clean, with the videos turned into labeled boxes you can search for later.