Pottery Date Night
 Bring All Your Friends Free Week
 Give a Month of Pottery
 Private Pottery Parties

 The Welcome Booklet
 Your First Ten Sessions
 The Pottery Process
 Finding the Studio
 Your Classes Never Expire
 The Four Tables
 Who’s Who
 The Rewards Program
 Flux Glazes
 The Calculators
 Kiln Tracker
 Holiday Kiln Deadlines

 Beginner’s Tool Set
 Fingernail Clippers
 Mayco Clay Mender
 Epoxy for Kintsugi
 Applicator Bottles
 Large Bead Rack
 Raku Workshop
 Nighttime Raku
 Horsehair and Feather Raku
 The Clay Hole T-Shirt
 Embroidered Crewneck
 Zip-Up Hoodie
 Pre-Made Bisqueware
 Glaze Catchers
 Kiln Cookies
 Clay Cubby Rental
 The Glaze Bible, Printed
 The Book of Molds, Printed
 Printable Pottery Guides
 Free Printable Trackers
 Gifts for Potters
 Christmas Pottery Ideas
 Mother’s Day Gift Ideas
 Pottery Date Night
 Studio Calendar
 2027 Studio Events
 What Should I Do Today?
 How to Throw on the Pottery Wheel
 How to Make a Pinch Pot
 How to Tap Center a Pot
 The Five Stages of Clay
 Is Pottery Hard to Learn?
 Pottery Wheel Practice Drills
 20 Easy Hand-Building Projects
 Everything That Sounds Wrong

 A Beautiful Piece, Every Time
 Slab Roller Tips
 Any Dish as a Slump Mold
 Slab Roller & Slab Mold Certification
 The Pottery Skill Tree
 Clay & Pottery Calculators
 Logging Your Pottery and Glazes
 The Pottery Dictionary
 Why Did My Pottery Do That?
 The Pottery Cone Chart
 Pottery Myths, Fact-Checked
 Is Handmade Pottery Food Safe?
 Incredible Ceramic Artist Videos
 How Dan Throws Giant Pots
 How to Dry Your Pottery
 The Pottery Wheel Introduction
 Pottery by Zodiac Sign
 Personality and the Pottery Wheel
 Pottery for Engineers
 ADHD, Hyperfocus, and Never Running Out
 Hobbies for Burnout
 Screen-Free Hobbies for Adults
 Every Addiction I Ever Had Lost to Art
 Functional Pottery Is Engineering
 How Do We Compare?
 Pottery Classes by City
 Every Pottery Studio in Utah
 Pottery in Draper
 Featured Members
 The Signature Wall
 Making Friends as an Adult Is Brutal
 The Clay Hole Commandments
 2027 Pottery Contests
 2027 Studio Parties
 Gallery Night

 Scream It Into the Void
 Destroy the Glaze Wall
 Daily Affirmation Cards
 Everything That Can Go Wrong
 Subscribe to Our Newsletters
 Contact The Clay Hole
 Corporate Team Building

 Glaze Combinations
 Glazes We Do Not Carry
 Making Glaze Test Tiles
 The Mega Glaze Tool
 How to Use the Mega Glaze Tool

 Glaze Brushing Techniques
 How to Use Underglaze
 How to Use Dipping Glazes
 Glaze Problems, Causes and Fixes
 The Dipping Glaze Guide

 Making a Glaze Catcher
 Fused or Sharp After Firing
 The Signature Wall
 His Viral Videos
 His Own Ceramics
 Meet Mud
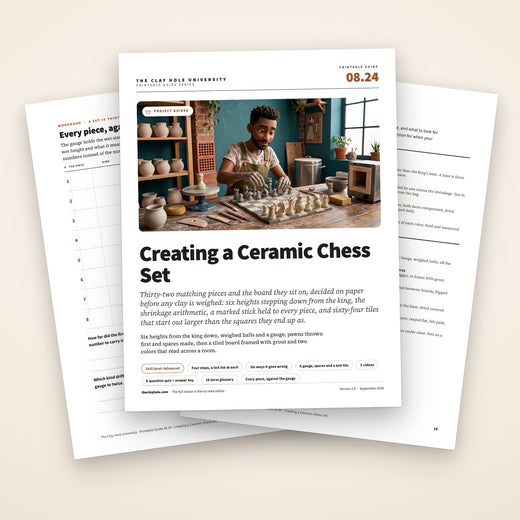
Hand building, project guides · A ceramic chess set
Thirty-two pieces that have to match each other, and a board they have to sit on.
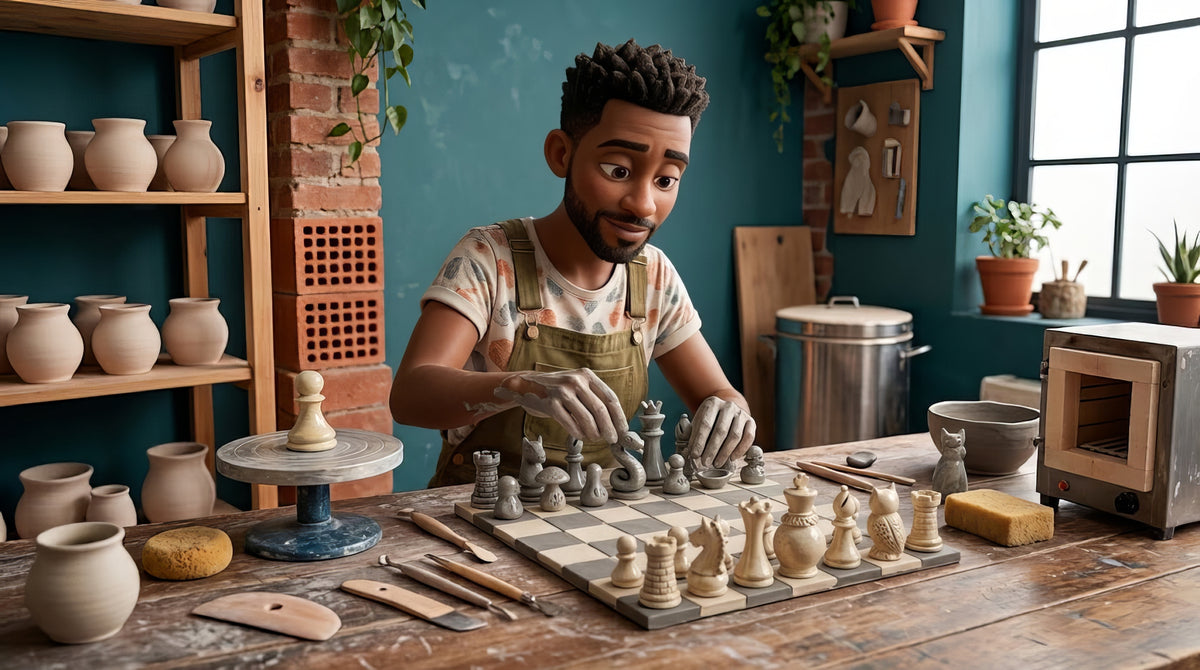
The longest project in this University, and worth it. Six heights, every piece of a kind identical, sixty-four tiles that shrink, and two colors decided before the first ball is weighed. Every step is one you already know, done thirty-two times with a gauge in your hand.
Four steps with a tick list at each: the numbers and the shrinkage arithmetic, the gauge and the pawns thrown off the hump, the tops and the knights, and the tiled board and the two colors. Six fixes and five videos from potters who have made a set.
This is the short version: the numbers, the gauge, the tops, the tiles, each with a tick list. The arithmetic in full, the color options and the questions are in the comprehensive version.
Read it, then watch it
Why this is written down and filmed, both.
A chess set is arithmetic and repetition. The arithmetic is thirty-two pieces at six heights, a square a third wider than the king’s base, and a shrinkage percentage applied to every tile, and arithmetic lives on a page you can put next to the wheel. The repetition is sixteen pawns that agree with each other, and that is a rhythm you watch someone find: weighed balls, a marked stick held to every piece, one kind at a time. The numbers are here. The rhythm is the videos.
Use both, in this order
Read the numbers and write yours on a stick. Watch how the pieces are made, and hold yours to a gauge. Make the pawns first, with the tick list open, over several visits and a bag between them.
The whole idea
Decide the numbers, make a gauge, make the pawns first, make extras.
Thirty-two pieces at six heights, every piece of a kind identical, checked against a marked stick as it comes off the wheel. Sixty-four tiles cut bigger by your clay’s shrinkage and set in a frame with grout. Two colors decided first. Twenty pawns to keep sixteen, eight knights to keep four.
The five-minute version
The whole project in six moves.
If you already throw small and you just want the shape of it, this is the shape of it. Everything below is these six moves, slowed down and with the places they fail marked.
Before the first ball
What you need on the table.
Six things, and the first is a stick with pencil marks on it. The last is time.
A gauge with six heights marked, a template per piece, a scale, clay for the hump, a slab and a straightedge for the tiles, and bags for a month.
Step one
Decide every number before the first ball is weighed.
The king decides everything. Pick a fired king height, say three and three quarter inches. The queen a little shorter, bishops and knights below, rooks squatter, pawns about half the king. The square is a third wider than the king’s base: a base an inch and a half wide wants a two-inch square, and sixty-four of those is a sixteen-inch board.
Then shrinkage, which is where sets go wrong. Clay loses ten to fourteen percent from wet to fired depending on the body, and the number is on the bag and in our clay collection. Every wet measurement, heights, base widths and tiles, is the fired number divided by one minus the shrinkage. Write the wet numbers on the gauge, not the fired ones, because the gauge is used on wet clay. Then fire one test tile and one pawn before anything else and measure them, because the bag’s number is a guide and your kiln and your rolling are the truth.
Then the two colors, decided now because they decide the clay. All eight of our clay bodies are light or medium, so two-body contrast is soft here; the reliable route is one body with a dark engobe under a clear glaze on one side and bare clay under the same clear on the other, or two glazes with real contrast. Our engobes lesson is the dark-side method.
Step two
Make a gauge, weigh the balls, and throw the pawns first.
The gauge is the project. A flat stick with the six wet heights and base widths marked in pencil, and a silhouette of each piece cut from a plastic lid. Every piece gets the stick and the template held to it before it comes off the wheel. A set made by eye drifts; a set made to a gauge matches.
Weigh the clay. Sixteen pawns from sixteen balls of the same weight, thrown off the hump one after another with the gauge in the other hand, is most of the matching done before you have tried. Our off-the-hump lesson is the method, and pawns are the perfect thing to learn it on. Throw twenty to keep sixteen; two will crack, one will warp, one will be the one you like least. Then rooks, then bishops, queens and kings, each kind in one sitting so the hands stay in the same rhythm.
Bases three quarters of the square wide, flat, and a little heavier than looks elegant, because a tall piece on a narrow foot is a domino. Rasp every base level at leather hard on a flat board. If you do not throw, the gauge works exactly the same way on hand-built pieces. Kim Norrie’s video below builds a whole set by hand, though the set is baked in a kitchen oven instead of fired in a kiln, so the video shows the shapes and not the firing.
Step three
Model the tops at soft leather hard, and make eight knights.
The thrown piece is the body; the top says which piece it is. A cross on the king, a crown on the queen, a slit miter on the bishop, battlements on the rook, a horse head on the knight. All modeled on at soft leather hard, same softness, scored, slipped, a tiny coil round the join.
The knight is the piece that fails, because it is a heavy head on a thin neck joined between two moistures. Make eight to keep four. Keep the neck as thick as the design allows, model the head directly on the base rather than making it separately, and dry the knights covered so the head does not race the base. Our figurines lesson is the method for the head, and the proportion rules apply: simplify the horse until it reads as a horse from across the board and no further.
Everything lives in bags between visits, one bag per kind, labeled. Pieces of a kind dry together and are glazed together, and you ask the studio team to fire a kind in the same load, so that whatever the kiln does, it does to all of them.
Step four
Cut the tiles bigger, dry them flat, frame the board, glaze the two sides.
Tiles, not a slab. Sixty-four squares plus spares, cut from a compressed slab against a straightedge to the fired size divided by one minus shrinkage, dried between two flat boards overnight, flipped once at leather hard and then left alone. A single slab warps, cracks and may not fit a shelf. Tiles are the safer board, though not the cheaper one to fire. Our flat tiles lesson is the method.
The fired tiles get set in a wooden frame with grout, thirty-two of each color, and the grout takes up any small shrinkage error, which is the reason to frame rather than glue edge to edge. Grout is a cement product, so the dust from the dry powder is silica. Wear a mask rated N95, P100 or FFP while you mix it; a one strap mask with no rating printed on it does not count. Color the tiles the same two ways as the pieces so the set reads as one object. Glaze the tile faces only; bare backs grout better.
Then glaze the pieces, one side at a time, from the tested pawn. An engobe goes on at bisque and needs its own bisque firing, free, before any glaze touches it, brushed or dipped, because unfired engobe lifts off into the shared jars and buckets. Then engobe and clear, or bare and clear, or the two glazes you chose, two coats, and the bases waxed so they fire naked on the cookie. Several pieces on one six-inch cookie, a quarter inch apart and 125 cubic inches or less in total, fire as one piece at the $4.80 minimum. About seven pieces with an inch and a half base fit on a cookie, so the whole set is about five cookies. Felt pads on the fired bases finish it.
Watch it done
Now watch five potters at work.
Watch this one, then go make a gauge.
None of these potters work here or know we exist. Between them they cover two sets built by hand, one piece thrown from a lump to a finish, a set that starts from a paper template, and small pieces thrown at home. Nothing but the still frame loads until you press play.
Fourteen minutes on a set built by hand rather than thrown: the pieces modeled from balls of clay and the board cut from rolled slabs. It is part one and stops before glazing. The other four videos are in the comprehensive version.
When it goes wrong
Six ways it goes wrong, and what to do about each.
The three failures that happen on the first set.
Pick the one that looks like your set. The first three are the gauge, the arithmetic and the tiles. The last three are the knights, the bases and the colors.
The pawns are all different heights and widths
Each one was made against the last one, and the differences added up. Sixteen pawns made by eye drift, and drifting pawns look like a mistake from across the room.
A gauge: a stick with each height marked, held to every piece as it comes off the wheel, and a profile template cut from a plastic lid. Weighed balls, off the hump. Twenty pawns to keep sixteen.
Line them up, pull the outliers, and make replacements against the gauge. A set with two spare pawns is a set; a set with sixteen different pawns is a lesson.
The pieces do not fit the squares, or the squares do not fit each other
Shrinkage. Clay loses ten to fourteen percent from wet to fired, so tiles cut to the finished size come out small.
Decide the fired square, then cut wet tiles bigger by the clay body’s shrinkage, which is on the bag or in our clay lesson. A king base about three quarters of the square is the rule. Fire a test tile first and measure it.
Fired tiles that came out small can be set in a wooden frame with grout gaps that take up the difference. Fired pieces that came out too big for the board get a bigger board; the pieces are the harder half.
The board tiles warped and will not sit flat
Slabs dried unevenly, one face faster than the other, or were compressed on one side only, or were moved while soft. A single-slab board warps worst of all.
Tiles, not a slab. Both faces compressed, dried slowly between boards, flipped once at leather hard. A frame with grout forgives a little; a bare board forgives nothing.
A slightly cupped fired tile can be set in a bed of grout in a frame. A badly warped one is a coaster.
The knights broke, at the neck, in the kiln or on the shelf
A knight is a horse head on a thrown base, and the neck is a join between two moistures with a heavy head on a thin stem. It is the piece that fails.
Model the head on the base at soft leather hard, both parts the same softness, scored, slipped and coiled at the neck, with the neck as thick as the design will allow. Make eight knights to keep four.
At leather hard, rejoin with score, slip and a coil. After firing, epoxy holds a knight head well; nobody will know.
The pieces tip over when the board is nudged
Bases too small or too light for the height. A tall queen on a narrow foot is a domino.
Base about three quarters of the square wide, flat and rasped level at leather hard, and the piece thrown a little heavier at the bottom than looks elegant. Felt pads on the fired base add grip.
A base rasped flat at leather hard helps. So do felt pads on the fired base. A piece that still tips wants a heavier twin in the next batch.
The two sides are too alike to tell apart in a game
Two glazes that looked different on a tile and read the same on a small piece, or a light and a dark that both went mid-tone in the kiln.
Decide the contrast first: two clay bodies, or one body with an engobe under a clear on one side and bare under a clear on the other, or a glossy black against a satin white. Test both on a pawn, not a tile, and look at them from across the room.
Underglaze a mark on the base of one side, or a band round the necks, and refire. Or call it a set for people who know the game well.
How it works here
At The Clay Hole, a chess set is a month of visits and a handful of cookies.
This page is written for potters everywhere. A few things are specific to our building, so you know before you start.
Three things to know here
All eight of our clay bodies are light or medium, so the dark side is an engobe under clear (bring your own, Mayco only) or a contrasting glaze. Several pieces fire together on one cookie at the $4.80 minimum, about seven to a cookie. A one-piece board is priced on its whole box, so tiles are the safer board and not the cheaper one. A bag with your name on for every kind, because this takes a month.
Two colors here
All eight of our clay bodies are light or medium, so a two-body set is a soft contrast. The reliable route is an engobe under clear on one side, bring-your-own and Mayco only per our engobes lesson, and bare clay under the same clear on the other. Or two glazes from the wall with real contrast, which the glaze finder can find.
Shelf space and bags
Thirty-two pieces, spares, and sixty-four tiles is a lot of shelf. One bag per kind of piece with your name and the date, tiles between boards on your shelf, and a plan for the month. Our damp box lesson is for anyone who wants the pieces to wait at home.
The board and the kiln
Tiles, not a slab. If you are set on a one-piece board, ask the studio team about the largest shelf before you roll it, because a board that does not fit a shelf is a board that does not fire. Our staff load every kiln, and sixty-four tiles on cookies are easy to load; one big warped slab is not.
Firing
Bisque is cone 05 and free. The glaze firing is cone 5½ at 5 cents a cubic inch, $4.80 minimum. Several small pieces on one six-inch cookie, a quarter inch apart and 125 cubic inches or less in total, pay as one piece. About seven fit on a cookie with an inch and a half base, so a set is about five cookies and sixty-four two-inch tiles are at least sixteen. Every piece goes in on a cookie with a naked, waxed bottom.
Questions people actually ask
The ones that come up every week.
How many pieces, and what sizes?
Thirty-two: for each side, eight pawns, two rooks, two knights, two bishops, a queen and a king. A common set has the king around three and three quarter inches tall fired, the queen a little less, bishops and knights below that, rooks shorter and squatter, pawns about half the king. The rule that makes a set look right is that heights step down in order and every piece of a kind is identical.
How big are the squares?
Whatever fits the king: a square about a third wider than the king’s base, so a base an inch and a half wide wants a square near two inches fired. Sixty-four squares at two inches is a sixteen-inch board. Cut the wet tiles bigger by your clay’s shrinkage, which is on the bag and in our clay collection, and fire one tile first to measure it.
Should the board be one slab or tiles?
Tiles, set in a wooden frame with grout, unless you enjoy heartbreak. A sixteen-inch single slab warps, cracks along the drying stress, may not fit a kiln shelf. Tiles are the safer board, though not the cheaper one to fire. Sixty-four two-inch tiles, dried between boards, are forgiving, and the grout takes up any shrinkage error. Our flat tiles lesson is the method.
Thrown or hand-built?
Either, and many sets are both: thrown bases and pawns for speed and consistency, hand-modeled knights, coiled or pinched rook tops. Throwing off the hump with weighed balls is the fastest way to get sixteen pawns that match. Hand-building suits anyone who does not throw, and Kim Norrie’s video is a whole set done that way, baked in a kitchen oven instead of fired in a kiln.
How do I get two colors?
Three ways. Two clay bodies, one light and one darker, under the same clear glaze. One body with a dark engobe under clear on one side and bare under clear on the other, which is the route here because all eight of our clay bodies are light or medium. Or two glazes with real contrast, a glossy black and a satin white, tested on a pawn and looked at from across the room.
How long does this take?
Three to five studio visits for the pieces, one or two for the board, plus drying, bisque and glaze. It is the longest project in this University, and the reason it is worth it is that every step is one you already know, done thirty-two times with a gauge in your hand.
What does it cost to fire?
Several small pieces on one six-inch cookie, a quarter inch apart and 125 cubic inches or less in total, fire as one piece at the $4.80 minimum. A cookie holds about seven pieces with a base an inch and a half wide, so a whole set is about five cookies. Bisque is cone 05 and free. A one-piece board is priced on its whole box: a sixteen-inch slab half an inch thick is 128 cubic inches, which is past the flat charge, so it pays by the cubic inch. Sixty-four two-inch tiles take at least sixteen cookies, so tiles are the safer board and not the cheaper one.
Related lessons
Six lessons that sit next to this one.
Three to read next.
A chess set is off-the-hump throwing, flat tiles, a figurine’s head and an engobe, done as one project. These are the pages for each.
That is the whole project
Decide the numbers. Make a gauge. Pawns first. Make extras. Tiles, not a slab.
Your first set will have a knight that broke and a board that came out an inch small, and you will have made eight knights and cut spare tiles, so it will still be a set. A ceramic chess set is the project people bring to the studio to show other people, and the reason it works is a stick with pencil marks on it.
If you want the shrinkage arithmetic in full, the color options and the answers to the questions everybody asks, switch to the comprehensive version at the top. Otherwise, go find a stick.
Written for potters everywhere. Where our studio does things differently, the page says so.
Which version would you like to print?
Both print clean, with the videos turned into labeled boxes you can search for later.