Pottery Date Night
 Bring All Your Friends Free Week
 Give a Month of Pottery
 Private Pottery Parties

 The Welcome Booklet
 Your First Ten Sessions
 The Pottery Process
 Finding the Studio
 Your Classes Never Expire
 The Four Tables
 Who’s Who
 The Rewards Program
 Flux Glazes
 The Calculators
 Kiln Tracker
 Holiday Kiln Deadlines

 Beginner’s Tool Set
 Fingernail Clippers
 Mayco Clay Mender
 Epoxy for Kintsugi
 Applicator Bottles
 Large Bead Rack
 Raku Workshop
 Nighttime Raku
 Horsehair and Feather Raku
 The Clay Hole T-Shirt
 Embroidered Crewneck
 Zip-Up Hoodie
 Pre-Made Bisqueware
 Glaze Catchers
 Kiln Cookies
 Clay Cubby Rental
 The Glaze Bible, Printed
 The Book of Molds, Printed
 Printable Pottery Guides
 Free Printable Trackers
 Gifts for Potters
 Christmas Pottery Ideas
 Mother’s Day Gift Ideas
 Pottery Date Night
 Studio Calendar
 2027 Studio Events
 What Should I Do Today?
 How to Throw on the Pottery Wheel
 How to Make a Pinch Pot
 How to Tap Center a Pot
 The Five Stages of Clay
 Is Pottery Hard to Learn?
 Pottery Wheel Practice Drills
 20 Easy Hand-Building Projects
 Everything That Sounds Wrong

 A Beautiful Piece, Every Time
 Slab Roller Tips
 Any Dish as a Slump Mold
 Slab Roller & Slab Mold Certification
 The Pottery Skill Tree
 Clay & Pottery Calculators
 Logging Your Pottery and Glazes
 The Pottery Dictionary
 Why Did My Pottery Do That?
 The Pottery Cone Chart
 Pottery Myths, Fact-Checked
 Is Handmade Pottery Food Safe?
 Incredible Ceramic Artist Videos
 How Dan Throws Giant Pots
 How to Dry Your Pottery
 The Pottery Wheel Introduction
 Pottery by Zodiac Sign
 Personality and the Pottery Wheel
 Pottery for Engineers
 ADHD, Hyperfocus, and Never Running Out
 Hobbies for Burnout
 Screen-Free Hobbies for Adults
 Every Addiction I Ever Had Lost to Art
 Functional Pottery Is Engineering
 How Do We Compare?
 Pottery Classes by City
 Every Pottery Studio in Utah
 Pottery in Draper
 Featured Members
 The Signature Wall
 Making Friends as an Adult Is Brutal
 The Clay Hole Commandments
 2027 Pottery Contests
 2027 Studio Parties
 Gallery Night

 Scream It Into the Void
 Destroy the Glaze Wall
 Daily Affirmation Cards
 Everything That Can Go Wrong
 Subscribe to Our Newsletters
 Contact The Clay Hole
 Corporate Team Building

 Glaze Combinations
 Glazes We Do Not Carry
 Making Glaze Test Tiles
 The Mega Glaze Tool
 How to Use the Mega Glaze Tool

 Glaze Brushing Techniques
 How to Use Underglaze
 How to Use Dipping Glazes
 Glaze Problems, Causes and Fixes
 The Dipping Glaze Guide

 Making a Glaze Catcher
 Fused or Sharp After Firing
 The Signature Wall
 His Viral Videos
 His Own Ceramics
 Meet Mud
The pottery wheel · Kick wheel
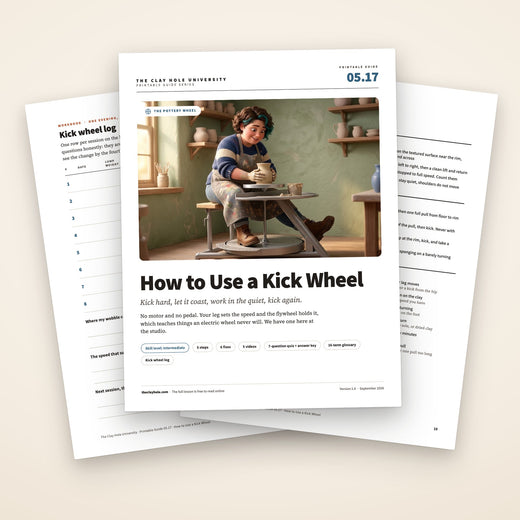
No motor and no pedal. Your leg is the engine.
A kick wheel stores the energy of your leg in a heavy flywheel and gives it back slowly, so the wheel speeds up when you kick and coasts down while you work. Learning to ride that curve teaches things an electric wheel never will, and it is why the one Lockerbie in the main throwing area is worth an evening of your time.
This page covers the wheel itself, how to sit at it, which foot does what, how to kick without wrecking your centering, and how throwing changes when the speed is always falling. Five steps with tick lists, five videos, and the rules for the one we have.
This is the short version: the seat, the kick, and the rhythm of kicking between moves rather than during them. The anatomy, the questions and four of the five videos are in the comprehensive version.

Read it, then watch it
Why this is written down and filmed, both.
A kick wheel is one idea, timing, wrapped around a hundred small physical habits. The idea reads in a paragraph: kick between the moves, never during them. The habits do not read at all. Where your foot lands on the flywheel, how your hip stays quiet while your leg swings, what a wheel sounds like at the right speed for a pull. Those you have to see, and then feel.
So the page does the thinking for you and the videos do the showing. Most people remember a written rule far better once they have watched somebody obey it, and remember the video far better once they know what they are watching for. Read a step, watch the clip that matches it, then go sit at the wheel with the tick list open on your phone.
Use both, in this order
Read the anatomy and the seat step first, because those are the two things nobody films properly. Then watch the Iowa Ceramics demo. Then kick.
The whole idea
Kick hard, let it coast, work while it slows, kick again.
The flywheel is a battery. A few hard kicks charge it, the wheel runs fast, and it slowly runs down while your hands work. Kick in the pauses between moves, with your hands off or resting still, never in the middle of a pull. Center at high speed, pull walls at low speed, and let the wheel come to a stop on its own before you wire off. That is the entire skill; the rest is your body learning to keep still above a moving leg.
The wheel turns counterclockwise like every wheel here, so your hands work exactly as they already do, and the right foot does the kicking. Bat pins are ten inches on center, so any studio bat drops on.
The five-minute version
The whole thing in six moves.
If you already throw on an electric wheel and you just want the shape of what changes, this is the shape of it. Everything below is these six moves, slowed down, with the places they fail marked.
Before you sit down
What you are sitting on.
Ours is a Lockerbie Model K, the same wheel that has sat in school and college studios since the mid 1960s. Six parts matter, and knowing them is most of knowing how to use it.
Why bother, when there are twenty eight electric wheels in the room
Because the kick wheel makes your mistakes audible. An electric wheel holds its speed no matter what your hands do; a kick wheel slows every time you press too hard, and speeds up only when you have the discipline to take your hands off and kick. After a month on it, people go back to the pedal and center in half the time. That is the whole reason it is on the floor.
Step one
Sit so your leg can swing and your torso cannot.
The seat is fixed, so you adjust. Slide onto the seat, put your left foot flat on the floor and rest the ball of your right foot on the flywheel rim, roughly at the four or five o’clock position when you look down. Your right thigh should be close to level. If your knee is up near your chest the seat is too low for you and your kicks will be short and jabby; if your leg dangles, you will be reaching for the rim and rocking your hips to find it.
The seat is fixed, so you adjust. Left foot flat on the floor, ball of the right foot on the flywheel rim, right thigh about level. A cushion raises you; sitting forward lowers you. Tools within reach without leaning, hair tied back, closed shoes.
A folded towel or a cushion on the seat raises you; sitting further forward lowers the effective height. Spend a minute here, because every wobble you get later starts in the seat. The test is simple: swing your right leg through a slow kick with your hands resting on the splash pan, and watch your shoulders in the reflection of the wheel head. If they move, keep adjusting.
Set the table before you sit. Water bucket on the right, sponge, rib, needle and wire within reach without leaning, a bat pinned to the head if you are using one. On an electric wheel you can lean for a tool with the wheel spinning; here, lifting your foot to reach breaks your rhythm and shifting your weight breaks your center.
Tie hair back and lose anything that dangles: scarves, drawstrings, long necklaces, an apron tie hanging past the seat. The steel bands shield the flywheel edge, but a 28 inch disc of concrete does not stop for fabric. Closed shoes, always; the flywheel is textured concrete and the rim is where your foot lives all night.
Step two
Kick in long strokes, and let the flywheel do the rest.
Long, not hard. Set the ball of your right foot on the textured top of the flywheel near the rim and push it away from you, left to right, in one long stroke, then lift, swing back, and land again. Not a stab, not a tap, a stroke: the more of the rim your foot travels across, the more energy goes into the concrete. Five or six good strokes take the wheel from stopped to full speed. After that, one or two strokes every so often keeps it there.
Long, not hard. Ball of the right foot on the textured flywheel near the rim, push down and across in one long stroke, lift, swing back, land again. Six strokes takes it from stopped to full speed. The knee swings; the hips and shoulders stay still.
The foot pushes down as well as across. That downward weight is what gives the sole its grip on the textured surface; a foot skating over the rim with no weight on it does almost nothing and makes the noise everybody recognizes from across the room. Weight, then sweep, then lift cleanly so you are not dragging on the return.
The mistake almost everyone makes on the first night is kicking with the whole leg from the hip, which rocks the pelvis, which moves the shoulders, which moves the hands. The kick comes from the knee down, with the thigh doing as little as it can. Watch the Iowa Ceramics demo below with your eyes on the potter’s shoulders rather than his hands: they barely move while the leg swings underneath.
Speed comes from stroke count, not from effort. If you find yourself kicking harder and harder, you are probably kicking short. Slow down, lengthen the stroke, and count six.
Step three
Kick to full speed, then center while it coasts.
Fast wheel, still body. Everything you know about centering still applies: elbows braced on your thighs or the splash pan, pressure in from the side and down from the top, cone up and cone down. What changes is that the wheel is always losing speed, and the harder you push, the faster it loses it. So the rhythm becomes kick, hands on, center for ten or fifteen seconds, hands off, kick, hands on again. Centering happens in bursts between kicks instead of in one long press.
Fast wheel, still body. Kick to full speed, hands on, center for ten or fifteen seconds while it coasts, hands fully off, kick again. If it stalls under your hands, ease the pressure rather than kicking harder. Cone up fast, cone down as it slows.
Hands come fully off before the leg moves. This is the rule the whole page keeps coming back to, and centering is where it is easiest to break, because the clay is a lump and you feel like you can get away with a kick while your hands are still on. You can, on a lump. What you are training is the habit for later, when the same reflex on a thin wall wrecks the pot. Off, kick, on.
If the wheel stalls under your hands you are pushing too hard, not kicking too little. On an electric wheel you never learn this because the motor covers for you. Here the flywheel tells you the truth: let the pressure ease and the wheel keeps its speed. Most people find their centering pressure drops by a third in the first week and their pots get better for it.
Cone up on a fast wheel and cone down as it slows. The slowing wheel actually helps the cone-down, because you want the clay to settle rather than spin out. When the lump is centered and the wheel is still turning at a walking pace, that is your cue to open.
Step four
Slow is the setting. One or two kicks per pull.
The coast is the pull. Opening, compressing the floor and pulling walls all want a slower wheel than centering did, and a kick wheel hands you that for free: it is already slowing. Give it one or two strokes, take your hands to the clay, and make one complete pull from the floor to the rim as the wheel coasts. Hands off at the rim. Kick once or twice. Next pull. The pull and the coast are the same length, and that is not a coincidence; you are throwing to the wheel’s rhythm instead of yours.
The coast is the pull. One or two strokes, then one full pull from the floor to the rim during the coast. Hands off at the rim, kick, next pull. Never kick with your hands on a wall. Too slow to finish? Stop at the rim, kick, take a second pull.
A slow wheel is safer for walls than most beginners believe. On a fast electric wheel a thin wall flares out and collapses because it cannot hold its own shape against the spin; on a coasting kick wheel the wall is never moving fast enough to run away from your fingers. Tall, narrow forms and gooseneck necks are where old potters swear by these wheels.
The one thing you cannot do is kick with your hands on a thin wall. A kicking leg moves the body about a quarter of an inch, and a quarter of an inch at the rim of a pot with a wall three sixteenths thick is a wobble you will chase for the rest of the throw. If the wheel is too slow to finish a pull, stop at the rim, kick, and take a second pull from where you left off. Two clean half pulls beat one pull with a kick in the middle.
Ribs, sponges and needle work all happen on the coast too, with the wheel barely turning. Trimming the rim level, cutting a groove, compressing with a rib: each of those is a hands-on, foot-still job.
Step five
Let it stop on its own, then wire off and clean the flywheel.
It stops when it stops. Do not brake the flywheel with your foot or your hand; two hundred and seventy pounds of wheel does not care about your shoe, and dragging on the concrete is how the textured surface gets polished smooth. Take your foot off, let it run down to a stop, and only then draw the wire under the pot. Wiring a still pot is one of the nicer things about this wheel: nothing is turning to drag the wire off line.
It stops when it stops. Foot off and let the flywheel run down on its own, then wire off the still pot. Trim on two gentle strokes and the coast that follows. Wipe the whole top of the flywheel as well as the head, and keep water away from the center bearing.
Trimming on a kick wheel is where a lot of potters fall in love with it. A leather hard pot tapped to center, the wheel given two gentle strokes, and a whole foot ring cut in the long slow coast that follows. The speed you want for trimming is exactly the speed a kick wheel settles into on its own, and you will never overshoot it. Our tap centering lesson works the same here as on an electric.
Cleanup has one extra item. Slurry and trimmings fall onto the flywheel through the gap around the shaft and off the edge of the table, and a flywheel with a skin of dried clay on it is slippery for the next foot. Wipe the head, the table, the splash pan and the whole top of the flywheel with a damp rag, then the frame, and rinse the pan in the pan rinse barrels like any wheel. Never hose or pour water at the center of the flywheel: there is a tapered roller bearing under there, and water is the one thing that kills a wheel that has otherwise run since the sixties.
Then the ordinary clean-up instructions apply, and the stool goes back where you found it.
Watch it done
Now watch five people ride the same curve.
Watch this one, then go kick.
None of these potters work here or know we exist. Between them they cover the rhythm, our specific wheel, the physics of the flywheel, and a master throwing a bowl in three minutes. The still frames load while you read; the player and its cookies wait until you press play.
Eight minutes from a studio technician whose whole job is teaching this wheel. The other four videos are in the comprehensive version.
When it goes wrong
Six things that go wrong, and what each one is telling you.
The three things that go wrong on the first night.
Pick the one that looks like your evening. Almost all of them are the body moving when it should not, or the speed being wrong for the move.
Pick the one that looks like your evening.
The pot goes off center every time your leg moves
You are kicking with your hands on the clay, or your kick is coming from the hip and rocking your shoulders. Either way the wobble is your body, not the wheel.
Hands fully off before every kick, with no exceptions, and a kick that swings from the knee with the thigh quiet. Check your seat height: a knee up near your chest makes a hip kick almost unavoidable.
Stop kicking. Let the wheel coast, get the pot back on center with slow pressure, and finish the throw on whatever speed is left. A wobbly pot on a slowing wheel is rescuable; a wobbly pot you keep kicking is not.
The wheel dies the moment you lean on the clay
Too much pressure for the speed you have. An electric wheel would have hidden this from you for years.
Kick to full speed before hands go on, and center in shorter bursts with lighter pressure. If the flywheel drops to a crawl inside ten seconds, halve the pressure, not the burst.
Hands off, six long strokes, hands on. Nothing is lost.
You are kicking and kicking and it barely turns
Short kicks with no weight on the foot. The ball of the foot is skating over the textured surface instead of gripping it.
Press down as you push across, and lengthen the stroke so your foot travels a good arc of the rim. Count six long strokes rather than twenty short ones.
Same fix, right now. Weight, sweep, lift.
Your foot slides off the rim on the return
You are landing on the smooth steel band at the edge, or your shoe has no grip, or the flywheel has a skin of dried clay on it.
Land on the textured concrete top inboard of the steel band, wear shoes with a sole, and wipe the flywheel clean before you start as well as after.
Wipe the flywheel now. A damp rag, thirty seconds.
Something aches after twenty minutes
Seat height, almost always. A leg that has to reach for the rim or fold up to find it is doing work the flywheel should be doing.
A cushion or folded towel on the seat if your knee is high, sitting further forward if your leg dangles. Swap feet for a few kicks now and then; a left-foot kick pulling toward you is weaker but it rests the right side.
Take a break. Kick wheels are not a marathon on the first night, and an ache you push through becomes a strain.
Tall walls collapse on the last pull
Usually the opposite problem from an electric wheel: not too fast, but a kick in the middle of a pull, or a wall taken up in one long pull on a wheel that had run too slow to support it.
Two clean half pulls with a kick between them beat one pull with a kick in it. And keep a little more clay in the wall than you would on an electric until the rhythm is second nature.
Collar it in, take the height down, and call it a shorter pot. The wheel will still be here tomorrow.
How it works here
One Lockerbie, in the main throwing area.
This page is written for potters everywhere. Here is where our studio stands on it.
Four things to know here
One Lockerbie kick wheel sits in the main throwing area with the electric wheels. It is available to Purple Level Members and Black Level Members, first come first served like every wheel. Ask the onsite instructor to sit with you for your first ten minutes, and clean the flywheel as well as the head when you are done.
Who can use it
The kick wheel is one of the tools that unlocks at Purple Level, so Purple Level Members and Black Level Members can sit at it any time it is free. Green Level Members and Yellow Level Members are welcome to watch and ask, and it is a reasonable thing to upgrade for.
First come, first served
There is one, and on a busy class night it is popular. Nobody books it, and nobody camps on it either. If somebody is waiting, an hour is a fair turn.
Your first time
Ask the onsite instructor to sit with you for ten minutes. Not because the wheel is dangerous, but because the seat and the kick are easier to fix by being watched than by reading, and ten minutes saves you an evening of chasing a wobble that lives in your hip.
Skill level
We call it Intermediate, which means you should already be centering and pulling reliably on an electric wheel. A kick wheel teaches a good thrower to be a better one; it teaches a brand new one to be frustrated.
Cleanup
Everything on the clean-up page applies, plus the flywheel. Wipe its whole top surface with a damp rag, keep water away from the center bearing, and rinse the splash pan in the pan rinse barrels.
What it is not
It is not faster, it is not more authentic, and it will not make your pots better by itself. It is a teacher. Learn what it has to say and take that back to the electric wheels, which is where most of your throwing will happen.
Questions people actually ask
The ones that come up at the wheel.
Which foot kicks?
The right foot, on a wheel that turns counterclockwise, because the front edge of the flywheel is traveling left to right and a right foot pushing away from the body pushes with it. Left-handed potters who throw on a clockwise wheel would mirror everything. Ours turns counterclockwise, like every wheel in the building.
Can I kick with my hands on the clay?
On a lump, during centering, you can get away with it. Do not. The habit you are building is for pulling walls, where a kicking leg moves the whole body a quarter of an inch and the pot goes with it. Hands off, kick, hands on, from the very first night, and it becomes automatic in a week.
How fast does it go?
Slower than an electric wheel at full pedal, and that is the point. A well-kicked Lockerbie runs somewhere around a hundred turns a minute at the top and drifts down from there. Centering happens near the top of that range, pulling near the bottom, and trimming slower still.
Why does it slow down so much when I press?
Because there is no motor covering for you. The energy in the flywheel is all there is, and every ounce of pressure you put on the clay takes some of it away. Most people discover in the first week that they have been centering with far more force than they needed, and their pots on the electric wheels improve.
Does it hurt your knees or hips?
Not if the seat height is right and the kick comes from the knee. It aches when people reach for the rim with a dangling leg, or fold a leg up to find a rim that is too close. Fix the seat with a cushion, swap feet now and then, and stop when something complains.
Is it good for trimming?
It is wonderful for trimming. Two gentle strokes and a long slow coast is exactly the speed a foot ring wants, and the wheel will never overshoot it. Tap centering works the same as on an electric.
Do professional potters still use kick wheels?
Plenty, especially in traditions where the wheel and the throwing style grew up together, and plenty of production potters who like the control on tall forms. Most working potters in this country throw on electric wheels most of the time and keep a kick wheel for the pieces that suit it, or for the pleasure of it.
Can I use bats on it?
Yes. The head is drilled for bat pins ten inches on center, the same as our electric wheels, so any studio bat drops straight on.
Related lessons
Six lessons that sit next to this one.
Three to read next.
The kick wheel changes the rhythm of throwing, not the throwing. These are the pages the rhythm sits on top of.
That is the whole skill
Kick hard, let it coast, work in the quiet, kick again.
Your first hour on the kick wheel will feel like learning to throw all over again, and by the second hour your centering will be quieter than it has ever been. Nobody who learns it well goes back to the pedal without noticing how much it had been hiding from them.
If you want the anatomy of the wheel, the troubleshooting and the other four videos, switch to the comprehensive version at the top. Otherwise, go claim the Lockerbie before somebody else does.
Written for potters everywhere. Where our studio does things differently, the page says so.
Which version would you like to print?
Both print clean, with the videos turned into labeled boxes you can search for later.