The Clay Hole guide to the wheel

Throwing double-walled pots

A pot with two walls and a sealed pocket of air between them. It is the form that makes people stop and pick a mug up off a shelf, and it is one of the few wheel skills where the hard part is not strength or centering. It is knowing what the clay is doing somewhere you cannot see it.

There are two ways to make one. This page teaches both, start to finish, with the videos we think teach it best, and a checklist built to sit open on your phone while your hands are covered in slip.

This is the short version. One method start to finish, the two videos worth your time, and the one hole you must not forget. There is a longer version behind the switch below, with a second method in it, if you want it.

2 methods, and they fail in completely different ways
5 videos from five potters, every one checked and timed
1 hole you have to remember, or the kiln decides for you
6 moves, and all of them happen in one sitting
2 videos, one to learn from and one to loop while you work
1 hole you have to remember, or the kiln decides for you
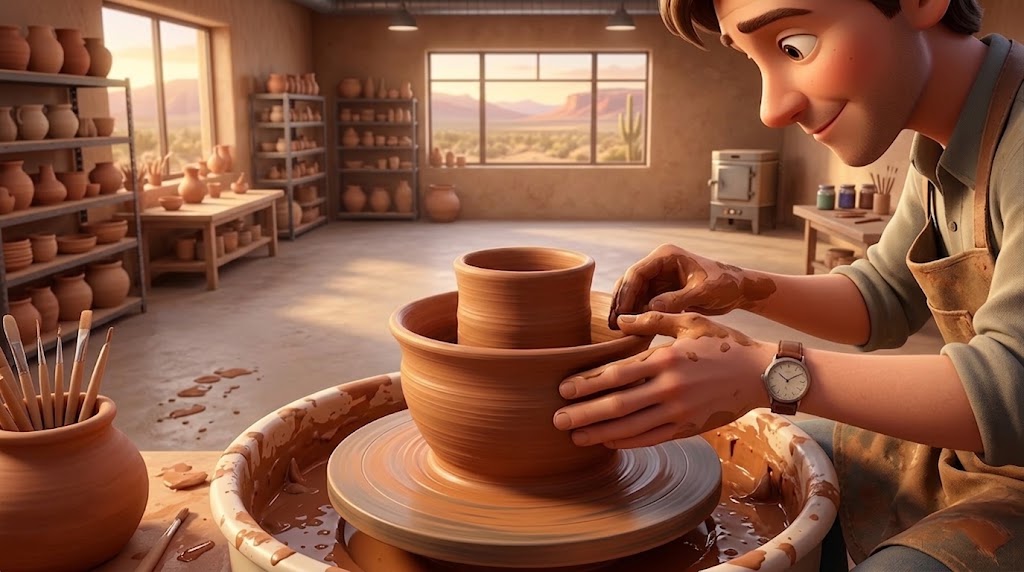
An illustration of a potter leaning in close to shape the inner and outer walls of a double-walled pot spinning on a muddy pottery wheel

Both methods, all ten steps, five videos and everything that goes wrong.

Start here

One wall, folded over on itself, with a hole in the bottom

Three ideas carry this whole form. Hold onto them while your hands are moving and most of what usually goes wrong will not.

1It is one pot

Not two pots stuck together. One wall that you fold over at the top so it comes back down the outside. Picture that and the moves stop feeling arbitrary.

2You lose your inside hand

Every pull you have ever done was a squeeze between two hands. The outer wall goes up from one side only, so brace hard, use a rib, and make more passes with less pressure.

3Air has to get out

You are sealing a pocket of air inside a wall and then heating it to the temperature of lava. One small hole through the foot at leather-hard is what stops that ending badly.

One question picks your road. Do you plan to carve or pierce right through the outer wall? If not, the six moves below are your method and the only one you need. If you do, switch to the Comprehensive Version, which teaches the two-piece method that carving needs: two pots thrown separately, stiffened, then joined at the rim.

01 · Why this page exists in this shape

Read it, then watch it. In that order.

Every one of these videos is free and has been on the internet for years. So the obvious question is why we bothered writing anything down at all. Here is the honest answer, and it is not that we think we teach it better than they do.

1Video is a river

A demonstration happens at the speed the potter works, and it does not wait for you. The single most important moment in a double-walled pot, the instant the wall divides in two, takes about four seconds and looks like almost nothing. Blink and the rim has already split. You can rewind, but rewinding is guessing where the thing you missed was.

2Text is a map

Words hold still. You can put your thumb on step four and read it three times while the wheel is off. Numbers survive in writing that never survive on film: how thick, how tall, how far apart, how many pulls. A video can show you a wall that is "about right." Only text can tell you that about right is a quarter of an inch.

3Watching is not learning

Fluent hands make hard things look easy, which is exactly the problem. When a skilled potter splits a rim, your brain files it as simple and moves on. It feels like understanding and it is not. Reading the same move first gives you something to compare the video against, so you notice the parts your eyes were about to skip.

4Only one of them survives wet hands

Here is the practical bit. You cannot scrub a video back thirty seconds with clay on your knuckles. You can glance at a list. Everything in this guide ends up in a checklist at the bottom that is built for exactly one job: sitting open on a phone, propped against a bucket, three feet from a spinning wheel.

So the order we suggest is boring and it works. Read a method through once with the wheel off. Watch the video for that method start to finish without stopping it. Then open the checklist and go make the thing. You will still ruin the first one. Everybody ruins the first one.

02 · What you are actually building

What you are actually building

A pot with a sealed pocket inside its own wall

Cut a finished one in half and this is what you get. Understanding this drawing is most of the battle, because from here on the whole job is keeping that pocket the shape you meant it to be while you cannot see into it.

Cut a finished one in half and this is what you get. From here the whole job is keeping that pocket the shape you meant it to be while you cannot see into it.

1 2 3 4 5 6
  1. 1

    The shared rim. The two walls meet and seal here. On a finished pot this is the only place they touch, and it is the single joint holding the whole thing together.

  2. 2

    The outer wall. The one people see and the one that gets carved, pierced or left alone. Keep it a touch thicker than feels necessary if you plan to cut into it later.

  3. 3

    The cavity. A sealed ring of trapped air. It is why the pot is light, why it insulates a hot drink, and why it can burst in a kiln if you forget item six.

  4. 4

    The inner wall. The one that holds the tea. It never gets carved and it can be thinner, because the outer wall is doing the structural work once the rim is joined.

  5. 5

    The shared floor. Both walls stand on it. Compress it properly, because you will never be able to reach in and fix it afterwards.

  6. 6

    The vent hole. A small hole drilled from the underside into the cavity. Not decorative. Not optional. The section on firing explains what happens without it.

  1. 1

    The shared rim. The only place the two walls touch, and the joint holding the pot together.

  2. 2

    The outer wall. The one people see. Leave it thick.

  3. 3

    The cavity. Sealed air. Why the pot is light, and why it can burst.

  4. 4

    The inner wall. Holds the tea, and can be thinner.

  5. 5

    The shared floor. Compress it early. You cannot reach it later.

  6. 6

    The vent hole. Up through the foot at leather-hard. Not optional.

Read the drawing twice before you read anything else. Almost every mistake later on this page is really a failure to picture this shape while working. When somebody's pot collapses at the rim, it is usually because they were thinking about two pots instead of one pot with a folded wall.

03 · Pick your road before you sit down

Two methods. Neither one is the beginner version.

People assume the two-piece method is the easy one because it sounds simpler. It is not easier, it is just easier at the wheel. It moves the difficulty to a different day and a different skill. Read both columns and pick the failure you would rather have.

Method one

One lump, split the wall

You open the clay all the way down to the wheel head, throw the inner wall, close it over, and raise the outer wall from the same clay. One pot, one sitting, no joins.

Hard part

All of it happens wet, in one go, and you cannot see the inner wall once you close over it. There is no undo.

Good for

Rounded and closed forms, vases, bowls, anything where you want an unbroken skin with no seam anywhere in it.

Fails as

A collapse, live, in front of you. Fast and total. You lose the pot but you lose it in ninety seconds.

Clay

Start around 3 lb. It sounds like a lot for a small pot because most of it becomes wall you never see.

Video

Plenty, and it is good. All five below show this method.

Method two

Two pots, nested and joined

Throw a bottomless outer cylinder and a normal inner cup separately. Let both stiffen, trim them, then score, slip and drop one inside the other so they seal at the rim.

Hard part

Fit. Two rims made an hour apart have to marry within about a millimetre, and calipers do the work your eyes cannot.

Good for

Straight-sided cups and anything you intend to pierce or carve right through the outer wall.

Fails as

A crack at the rim seam, days later, or a warp in the kiln. Slow, quiet, and it happens after you already liked the pot.

Clay

Two balls of roughly 10 oz each for a cup, thrown one after the other so they stiffen at the same rate.

Video

Almost none that is free and good. We say more about that below, and teach it in writing instead.

Our suggestion, for what it is worth. If you can pull a clean cylinder and close a form, start with method one, because the feedback is instant and you will learn more per ruined pot. If you are here because you want to carve the outside into something intricate, skip straight to method two, because carving through a wall you joined on purpose is far less nerve-wracking than carving through a wall you grew by accident.

04 · Method one, start to finish

One lump, split the wall

Ten steps. The whole thing happens in one sitting while the clay is still soft, so read all ten before you start rather than reading step six while step five is drying out on you.

  1. 1

    Center about 3 lb, and center it properly

    More clay than the finished pot looks like it needs, because a double wall is roughly twice the wall. Center it, cone it, center it again. Everything below assumes a lump that is genuinely true.

    Why: a wobble you can live with on a single wall becomes two walls fighting each other in opposite directions.
  2. 2

    Open all the way down to the wheel head

    Not to a floor. All the way through, until you can feel dry wheel head under your fingertip, then widen that opening into a ring of clay standing on the wheel like a thick doughnut.

    Why: the floor gets made later, out of the bottom of the walls. Leaving one now just puts clay somewhere you cannot use it.
  3. 3

    Throw the inner wall first

    Pull the inside portion of that ring up into the shape you want the drinking side to be. Take it to full height now. Keep it a little thinner than usual, around 3 to 4 mm, and get the shape finished, because this is the last time you will ever touch it.

    Why: in four steps' time this wall is sealed inside the pot forever. Anything you meant to fix, fix it here.
  4. 4

    Compress the inner floor while you still can

    Rib or sponge across the bottom of the inner wall, firmly, several full rotations. Then look at it. That is the last look you get.

    Why: an uncompressed floor cracks in a straight line weeks later on a drying shelf, and on this form you cannot reach in to save it.
  5. 5

    Close the inner wall over into a dome

    Collar the inner wall inward until it necks down and closes, the same motion as making a sealed sphere. Slow wheel, both hands, working the diameter in a little on each pass rather than a lot on one.

    Why: the closed dome is what makes the pot rigid enough to survive step seven. Air trapped inside it is holding the shape up, which is exactly why you must not pierce it yet.
  6. 6

    Divide the rim of the remaining clay

    You still have a thick collar of clay standing on the outside. Wet a fingertip, rest it on top of that collar, and let the wheel carve a groove around it, deepening a little each rotation until the rim reads as two distinct lips with a valley between.

    Why: this is the four seconds the video keeps skipping past. Nothing is being cut off. You are dividing one wall into two by pushing clay sideways in both directions at once.
  7. 7

    Raise the outer wall, one hand only

    Pull the outer lip upward and outward. Your inside hand cannot help here, so brace hard, use a rib against the outside, and go up in more passes with less pressure than you would on a normal pot.

    Why: every other pull you have ever done was a squeeze between two hands. This one is not, which is the single biggest reason people's first attempt flops outward.
  8. 8

    Bring the outer wall in and seal it to the rim

    Once it has height, collar the outer wall back inward until its lip meets the closed dome, then blend the two together and compress the joint. Take your time and use very little water.

    Why: this seam is the only thing holding the outer wall on. A joint that looks smooth but was never actually compressed will open up as a crack while it dries.
  9. 9

    Refine the rim, then stop touching it

    Chamois or a strip of soft plastic, gently, a couple of rotations. Wire off and move the pot with a bat rather than your hands if you possibly can.

    Why: a fresh double-walled pot is far more fragile than it looks, because it is mostly air. Ingleton Pottery finished the one in the video below and then knocked it over an hour later.
  10. 10

    Drill the vent hole at leather-hard

    When the pot is firm enough to turn over, put a small hole through the foot into the cavity. Then trim. Section 08 covers exactly where and how big.

    Why: the air you sealed in at step five has to be able to get out of the kiln. This is the step people forget, and the kiln is not forgiving about it.

The method, start to finish

Six moves, one sitting

All of it happens while the clay is still soft, so read all six before you sit down rather than reading move four while move three dries out on you.

  1. 1

    Center about 3 lb, then open all the way through to the wheel head

    More clay than the finished pot looks like it needs, because a double wall is roughly twice the wall. Center it, cone it, center it again. Then open past where a floor would be, until you can feel dry wheel head under your fingertip, and widen that opening into a thick ring of clay standing on the wheel. The floor gets made later out of the bottom of the walls.

  2. 2

    Throw the inner wall, compress its floor, close it into a dome

    Pull the inside of that ring up to full height in the shape you want the drinking side to be, a little thinner than usual, around 3 to 4 mm. Rib the floor firmly, several full rotations. Then collar that wall inward until it necks down and closes, slow wheel, both hands, a little on each pass rather than a lot on one. Everything you just made is about to be sealed inside the pot forever, so finish it before you close it.

  3. 3

    Divide the rim of the collar still standing outside

    Wet a fingertip, rest it on top of that thick outer collar, and hold absolutely still while the wheel carves a groove around it, deepening a little each rotation until the rim reads as two distinct lips with a valley between. Nothing is being cut off. You are pushing one wall sideways into two. It takes about four seconds and it is the move every video skips past.

  4. 4

    Raise the outer wall, one hand only

    Pull the outer lip upward and outward. Your inside hand cannot help here, so brace your outside arm against something solid, run a rib up the outside, and go up in more passes with less pressure than you would use on a normal pot. This is the single biggest reason a first attempt flops outward.

  5. 5

    Collar the outer wall in, seal it to the dome, finish the rim and wire off

    Once it has height, bring the outer lip back inward until it meets the closed dome, blend the two together and compress that joint for several full rotations. Smoothing is not joining, and this seam is the only thing holding the outer wall on. Then chamois the rim gently, wire off, and move it on a bat if there is one within reach, because the pot is mostly air and far more fragile than it looks.

  6. 6

    At leather-hard, drill the vent hole, then trim

    A small hole up through the foot into the cavity, somewhere between a needle tool hole and a pencil width. Drill it before you trim, and drill it every single time. The air you sealed in at move two has to be able to get out of the kiln, and there is no adding this later.

05 · Now watch the hands

Now watch the hands

Five potters, five ways, same ten steps

Two videos. Learn from one, loop the other.

None of these are ours and none of these people know we exist. They are simply the clearest free demonstrations of this form we could find, and we checked every one of them start to finish. Each card says what that particular video is good for and what to watch for while it plays.

Neither of these is ours. They are the two clearest free demonstrations of this form we could find, and we watched both of them start to finish. Read the six moves first, then watch.

Nothing loads from YouTube until you press play, so no player and no YouTube cookies arrive with the page. Every title, channel and runtime below was verified against YouTube directly rather than copied from a search result.

Start with this one Narrated Throwing and trimming

How To Throw a Double Wall Bowl, Narrated Pottery Throwing / Clay Trimming Tutorial

Beyond the Clay Wall · Jaime Salles

Search YouTube for: How To Throw a Double Wall Bowl, narrated, by Beyond the Clay Wall

The one to watch if you only watch one. He talks the whole way through and the video is chaptered, so you can go straight to whichever of our ten steps you are stuck on. It is also the only one here that carries on past the wheel and shows you the trimming, which is where a lot of these pots actually die.

The one to watch if you only watch one. He talks the whole way through and the video is chaptered, so you can go straight to whichever move you are stuck on. It is also the only one here that carries on past the wheel and shows you the trimming, which is where a lot of these pots actually die.

  • His chapters map almost exactly onto our steps 2 through 10.
  • His chapters line up almost exactly with our six moves.
  • Watch how little water he uses once the outer wall starts rising.
  • The trimming section at the end is worth the whole runtime on its own.
18 min 13 sec Posted 2022 Watch on YouTube
Shortest No talking

Throwing a Double Walled pot on the Wheel

Ingleton Pottery

Search YouTube for: Throwing a Double Walled pot on the Wheel, by Ingleton Pottery

A production potter doing it in six minutes with no explanation whatsoever, which is exactly why it is the one to loop while you work. Once you have read the steps you do not need words any more, you need to see the shape of the movement over and over. Put this on repeat.

  • Best view on the page of the rim actually dividing.
  • Note how braced his outside hand is during the one-sided pull.
  • He says in his own notes these are a real pain to make, and that he knocked this one over an hour after finishing it. Comforting.
6 min 25 sec Posted 2013 Watch on YouTube
Second angle Real time

Throwing Double Walled Pot! WHAT?!?!?

Mudgirl Pottery · Melanie Tomaszewski

Search YouTube for: Throwing Double Walled Pot, by Mudgirl Pottery

A different potter, a different set of habits, and the same ten steps underneath. This is here on purpose. Watching two people do this differently is how you work out which parts are physics and which parts are just somebody's preference, and on this form that distinction matters a lot.

  • Compare her rim split directly against Ingleton's. Same result, different hands.
  • Good look at how tall the outer wall gets before it is collared back in.
13 min 4 sec Posted 2021 Watch on YouTube
A reason to build one Cup sized

Throwing “Double Walled Thermo Cup” on the potter’s wheel

Alchemy Ceramic

Search YouTube for: Throwing a Double Walled Thermo Cup, by Alchemy Ceramic

The only one here that starts from a problem instead of a technique. A yunomi has no handle, so a hot drink makes it painful to hold, and a double wall fixes that. If you have been wondering why anybody goes to this much trouble, the answer is in the first minute of this video.

  • Smaller and shorter than the other forms here, which makes it a sane first attempt.
  • He says plainly that it takes a few tries before it becomes fun. He is right.
17 min 44 sec Posted 2023 Watch on YouTube
Where this goes next Advanced

66. Throwing / Making an 8-Sided Double Wall Vessel with Hsin-Chuen Lin

Hsinchuen Lin

Search YouTube for: Throwing an 8-Sided Double Wall Vessel, by Hsin-Chuen Lin

Do not start here. Come back to it in a year. This is the double wall thrown round and then faceted into eight flat sides, which means altering the outer wall while the inner one sits sealed and untouchable underneath it. It is the clearest possible demonstration of why the outer wall wants to be thick.

  • Longest video here, and worth every minute once the basic form is reliable.
  • Watch how much clay he leaves in the outer wall before he cuts into it.
22 min 36 sec Posted 2011 Watch on YouTube

Five, and that is deliberate. We could have padded this out to twenty. Every extra video of the same technique costs you an hour and teaches you less than the hour before it, and past a certain point people watch instead of throwing. These five cover the method, a second opinion, a reason to bother, and a destination. That is the whole job.

06 · Method two, start to finish

Two pots, nested and joined

This is the method behind almost every carved and pierced double-walled cup you have seen. The throwing is ordinary. The skill is in the measuring and in the joint, and it happens over two or three days rather than one sitting.

There is no video in this section, and that is on purpose. We went looking for a free demonstration of this method that was clear enough to learn from and could not find one worth your time. The good instruction for it is written, in Pottery Making Illustrated, and the good video instruction is behind a paid workshop. Rather than embed a weak clip to make the section look complete, here are the steps.

  1. 1

    Weigh two equal balls and throw them back to back

    Around 10 oz each for a cup. Throw both in the same session, minutes apart, and set them down side by side.

    Why: they have to reach leather-hard at the same moment. Two pieces at different stiffnesses will not take a joint cleanly, and one thrown the next day is already a different pot.
  2. 2

    Throw the outer one bottomless

    Open straight through to the wheel head and throw a plain cylinder with no floor at all, shaped with a rib. If you want a thrown foot rather than a trimmed one, put it in now.

    Why: the inner cup supplies the floor for the finished piece. A floor on the outer piece as well would just be dead weight sealed inside the pot.
  3. 3

    Throw the inner one as a normal cup, walls left thick

    A quarter of an inch is the number to aim for on both pieces. Thicker than you would normally leave a cup.

    Why: the outer wall has to hold the weight of the inner one hanging off the rim, and if you are piercing it you are about to remove a lot of what is holding it up.
  4. 4

    Caliper the rims so the inner one is slightly too wide to fit

    Deliberately too wide. A hair. Think of a jar lid that does not quite drop on. Flare the inner rim out a little so it catches on the outer rim rather than sliding all the way to the bottom.

    Why: scoring removes material. A pair that fits perfectly now will be loose by the time you have scored both rims, and a loose joint is a crack waiting for the kiln.
  5. 5

    Let both stiffen to nearly leather-hard, then trim

    Trim the outer piece like a normal footed cup but leave the foot wide, about half an inch. Trim the inner piece into a smooth dome, like trimming a bowl with no foot on it.

    Why: trimming is your last chance to adjust the fit. Once these are joined, the underside of the inner cup becomes part of what people see through the gap.
  6. 6

    Check the nested gap before you commit

    Drop one inside the other dry, without slip, and look at it. You want a little under half an inch of gap at the rims and the inner base hanging just clear of the outer floor line.

    Why: this is the only free look you get. Once slip is on, you have about a minute to be happy with the fit.
  7. 7

    Score, slip and seat

    Score the inside of the outer rim and the outside of the inner rim, both properly, with a serrated rib. Wet the scoring, score again, add slip, then press the inner piece down until the rims marry. Compress the joint and smooth it.

    Why: if the pieces suddenly seem not to fit, scoring harder usually solves it, because scoring is removing exactly the material that is in the way.
  8. 8

    Carve now, while it is medium leather-hard

    If you are piercing or carving the outer wall, this is the window. Keep the whole piece damp with a sponge and a soft brush as you work, and soften every cut edge inside and out.

    Why: too soft and the wall drags out of shape under the tool. Too dry and every pierced edge chips. The window is narrower than you expect and closes while you work.
  9. 9

    Vent it, then dry it slowly over days

    If the outer wall is pierced right through, the cavity is already vented. If it is solid, drill the hole. Then dry it slowly, loosely covered, for considerably longer than a normal cup.

    Why: these warp. The seam and the pierced areas shrink at different rates from the solid parts, and speed is what turns that into a crooked rim.

Nobody tells you how slow this is. One potter who made thirty-one double-walled cups as part of a challenge later admitted the video made it look like she was breezing through, when in truth those cups ate three days out of her thirty. Budget accordingly, and do not measure your first attempt against a video's runtime.

07 · The ways these actually fail

The ways these actually fail

Nine things that go wrong, and what caused each one

Three things that go wrong on a first attempt

Find the symptom, read the cause. Almost none of these are fixed by trying harder next time. They are fixed by changing one specific thing several steps earlier than where the problem showed up.

These are the three that happen at the wheel, in front of you, tonight. Each one is fixed by changing something several steps earlier than where it showed up.

What you are looking atWhat actually caused itWhat to change
The outer wall flops outward as it rises You are pulling it with one hand and no counter-pressure, the way you would pull a normal wall. More passes, far less pressure, and a rib against the outside doing the job your inside hand normally does.
The rim split wandered off center The lump was not truly centered, or your finger was riding the clay instead of resting still and letting the wheel cut. Re-center before you divide. Anchor your wrist against something solid and hold absolutely still.
The whole pot collapsed at the rim Too much water, too many pulls, or the inner dome was not closed and firm before the outer wall went up. Finish and close the inner wall completely first. Dry your hands. Water is a lubricant, not an ingredient.
A crack opened along the rim seam while drying The joint looked smooth but was never compressed. Smoothing is not joining. Work that seam with a rib for several full rotations, and on method two score both sides properly rather than lightly.
A straight crack across the floor, weeks later The floor was never compressed at step four, and on this form you cannot reach in to save it afterwards. Rib the inner floor firmly before you close the dome. It costs twenty seconds and it is not optional.
The rim went crooked as it dried Uneven wall thickness, or drying too fast, or both. The two walls shrink at different rates and the rim is where they argue. Even walls, dry slowly and loosely covered, and stand it somewhere with no draft.
It blew apart in the bisque No vent hole. Air sealed in the cavity expanded with nowhere to go. Drill the hole at leather-hard, every single time. Section 08 has the where and the how big.
The pieces will not nest, method two They were thrown to fit rather than thrown deliberately slightly too tight. Score harder. It removes real material and usually solves it. Next time, caliper the inner rim a hair wider than the opening.
A pierced outer wall sagged or tore The wall was too thin to survive having holes cut in it, or the clay had gone past leather-hard. Leave a quarter inch of wall, keep the piece damp with a sponge as you carve, and stop when the clay stops cutting cleanly.

08 · Drying and firing a pot full of air

Drying and firing a pot full of air

The vent hole, and three other things nobody warns you about

The vent hole, and drying it slower than you want to

A double-walled pot is a sealed container that is about to be heated to the temperature of lava. Everything in this section follows from that one sentence.

The vent hole

Drill it at leather-hard, before trimming, from the underside of the foot straight up into the cavity. Somewhere between a needle tool hole and a pencil width is plenty. One is enough, and it wants to be tucked into the foot ring where nobody looks.

Air expands when it is heated. In a sealed cavity with no exit, that pressure has exactly one way out, and it takes the wall with it. The failure is not gentle and it can take neighboring pots on the shelf with it.

Keep glaze out of the cavity too, and off the hole itself. You cannot see in there and you cannot wipe it out, and glaze pooled in a hidden pocket will fuse the pot to whatever it reaches.

If your outer wall is pierced right through as decoration, the cavity is already open and you do not need a separate hole. Everything else needs one.

Dry it slower than you want to

Two walls of different thicknesses, joined only at the rim, drying at different rates. That is a warp and a seam crack looking for an excuse. Loosely covered, out of any draft, for noticeably longer than the same size cup with one wall.

The vent hole helps here too, because it lets the cavity dry from the inside rather than only through the clay.

Glaze the outside of the gap, not the inside

Do not let glaze run down into the cavity. You cannot see in there, you cannot wipe it out, and glaze pooled in a hidden pocket will fuse the pot to whatever it reaches. Keep the vent hole clear of glaze as well.

If something does fuse, we have a whole page on rescuing it, linked at the bottom.

It will cost more to fire than it looks like it should

Glaze firing here is charged by the space a piece takes up on the shelf, at five cents per cubic inch with a $4.80 minimum. A double-walled pot is mostly air, so it is light in your hand and full sized on the shelf. The scale does not care that the middle is hollow.

Bisque firing is free, and stays free. Glaze fires here run between cone 5 and cone 6, at what we call cone 5½.

Write it on your hand if you have to. Of everything on this page, the vent hole is the one that turns a good pot into a bad afternoon for everyone sharing the kiln. It takes four seconds and there is no way to add it after the pot is dry.

09 · The bit to keep open on your phone

The whole method, in one screen

No explanations, no reasons, nothing to scroll past. Just the moves in order. Tap a line to cross it off as you go, pick your method with the switch, and reset it when you start the next pot.

Ticks live in your browser for as long as this tab is open and are not saved anywhere. Reloading the page clears them.

0 of 10 done

One more time, because it is the one people skip. The vent hole goes in at leather-hard, through the foot, into the cavity. There is no adding it later and there is no getting away with it.

10 · Questions we actually get

Questions we actually get

The things people ask at the wheel

Am I good enough to try this yet?

If you can center reliably, pull an even cylinder, and close a form into a dome without it collapsing, you are ready to fail at this productively. If closing a form is still new, spend a session throwing sealed spheres first. That single skill is most of method one.

How many attempts before I get one?

More than you would like. Even the people in the videos above say so in their own notes, and one of them describes losing three days of a thirty day project to these. Throw three small ones in a session rather than one careful big one. You learn far more from three quick failures.

Which of your clay bodies works best for this?

Anything with some grog in it will hold a thin unsupported wall better and warp less while drying, so a B-Mix with Grog is a kind starting point. Smooth porcelain gives the crispest carved edges on method two and is considerably less forgiving on method one. All eight of our clay bodies will do it.

Can I do this without a bat?

You can throw it without one, but moving it is the problem. A finished double-walled pot is very light and very easy to distort with your fingers, so lifting it off the wheel head by hand is a real risk. Use a bat if there is one within reach.

Does the cavity have to be sealed, or can it be open at the bottom?

Both exist. A sealed cavity with a small vent hole is the classic version and insulates best. Leaving the underside of the gap open turns the outer wall into more of a decorative sleeve, which is easier and needs no vent hole, but it collects water when you wash it and it is weaker at the foot.

Will one small vent hole really be enough?

Yes. Air escapes through a surprisingly small opening, and this is standard practice for every closed form. What matters is that the hole genuinely reaches the cavity and that no glaze seals it shut later.

Why is my firing fee so high for such a light pot?

Glaze firing is charged by volume, not weight, at five cents per cubic inch with a $4.80 minimum. A hollow pot occupies exactly as much kiln shelf as a solid one of the same size. Bisque firing is free.

Can somebody at the studio show me instead?

Ask an instructor during a class. This is exactly the sort of thing worth using class time on, because the rim split is much easier to understand when somebody is doing it eighteen inches from your face and can stop halfway. Bring this page up on your phone so they know which version you are after.

Keep going

The rest of the wheel, written the same way

Every one of these is the same deal: read it once properly instead of watching a video eleven times. They open in a new tab so you keep your place here.

That is the short version. There is a longer one behind the switch at the top of this page: a second method for carved and pierced walls, ten steps instead of six, five videos, nine ways these fail, and a tickable checklist built for your phone. Either way, double-walled pots are not a beginner project and there is no version of this where the first one comes out well. Ruin a few. It is worth it.

A last honest word. Double-walled pots are not a beginner project and there is no version of this where the first one comes out well. What they are is the fastest way we know to stop thinking about clay as a surface and start thinking about it as a volume, and that shift makes every other pot you throw better. Ruin a few. It is worth it.