Pottery Date Night
 Bring All Your Friends Free Week
 Give a Month of Pottery
 Private Pottery Parties

 The Welcome Booklet
 Your First Ten Sessions
 The Pottery Process
 Finding the Studio
 Your Classes Never Expire
 The Four Tables
 Who’s Who
 The Rewards Program
 Flux Glazes
 The Calculators
 Kiln Tracker
 Holiday Kiln Deadlines

 Beginner’s Tool Set
 Fingernail Clippers
 Mayco Clay Mender
 Epoxy for Kintsugi
 Applicator Bottles
 Large Bead Rack
 Raku Workshop
 Nighttime Raku
 Horsehair and Feather Raku
 The Clay Hole T-Shirt
 Embroidered Crewneck
 Zip-Up Hoodie
 Pre-Made Bisqueware
 Glaze Catchers
 Kiln Cookies
 Clay Cubby Rental
 The Glaze Bible, Printed
 The Book of Molds, Printed
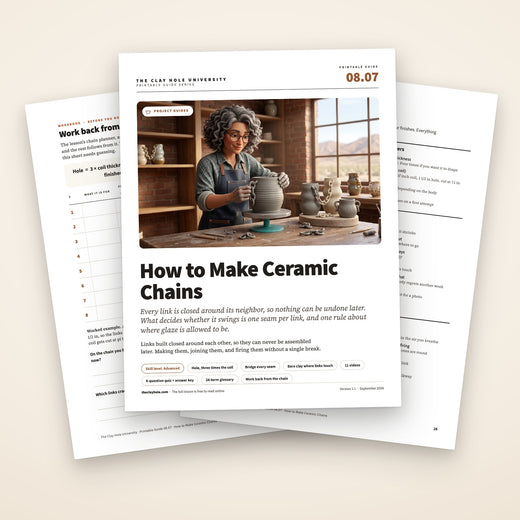
 Printable Pottery Guides
 Free Printable Trackers
 Gifts for Potters
 Christmas Pottery Ideas
 Mother’s Day Gift Ideas
 Pottery Date Night
 Studio Calendar
 2027 Studio Events
 What Should I Do Today?
 How to Throw on the Pottery Wheel
 How to Make a Pinch Pot
 How to Tap Center a Pot
 The Five Stages of Clay
 Is Pottery Hard to Learn?
 Pottery Wheel Practice Drills
 20 Easy Hand-Building Projects
 Everything That Sounds Wrong

 A Beautiful Piece, Every Time
 Slab Roller Tips
 Any Dish as a Slump Mold
 Slab Roller & Slab Mold Certification
 The Pottery Skill Tree
 Clay & Pottery Calculators
 Logging Your Pottery and Glazes
 The Pottery Dictionary
 Why Did My Pottery Do That?
 The Pottery Cone Chart
 Pottery Myths, Fact-Checked
 Is Handmade Pottery Food Safe?
 Incredible Ceramic Artist Videos
 How Dan Throws Giant Pots
 How to Dry Your Pottery
 The Pottery Wheel Introduction
 Pottery by Zodiac Sign
 Personality and the Pottery Wheel
 Pottery for Engineers
 ADHD, Hyperfocus, and Never Running Out
 Hobbies for Burnout
 Screen-Free Hobbies for Adults
 Every Addiction I Ever Had Lost to Art
 Functional Pottery Is Engineering
 How Do We Compare?
 Pottery Classes by City
 Every Pottery Studio in Utah
 Pottery in Draper
 Featured Members
 The Signature Wall
 Making Friends as an Adult Is Brutal
 The Clay Hole Commandments
 2027 Pottery Contests
 2027 Studio Parties
 Gallery Night

 Scream It Into the Void
 Destroy the Glaze Wall
 Daily Affirmation Cards
 Everything That Can Go Wrong
 Subscribe to Our Newsletters
 Contact The Clay Hole
 Corporate Team Building

 Glaze Combinations
 Glazes We Do Not Carry
 Making Glaze Test Tiles
 The Mega Glaze Tool
 How to Use the Mega Glaze Tool

 Glaze Brushing Techniques
 How to Use Underglaze
 How to Use Dipping Glazes
 Glaze Problems, Causes and Fixes
 The Dipping Glaze Guide

 Making a Glaze Catcher
 Fused or Sharp After Firing
 The Signature Wall
 His Viral Videos
 His Own Ceramics
 Meet Mud
Ceramic chains: links that still move after the kiln.
A chain is the only thing in pottery you have to build inside itself. Every link closes around the one before it, so there is no going back and no laying it flat again. Then the kiln gets a vote. Here is how to make one that swings when you pick it up, instead of a very heavy sculpture of a chain.
- Hand building
- No wheel needed
- Intermediate
- Two evenings, plus drying

Watching teaches your hands. Reading teaches your memory.
Video is unbeatable for anything with a rhythm to it. You see how fast a coil gets rolled, how hard a thumb presses, what the clay looks like at the moment it is ready. None of that survives being written down.
What video is bad at is the thing you need three days later, with wet hands, at ten at night, trying to remember whether the joint gets scored before or after it goes around its neighbor. Nobody scrubs back through forty minutes of footage for one sentence. A numbered list you can hold up on a phone answers it in four seconds.
So both live here, side by side. Watch a maker do it once so your hands know what they are aiming at. Then work off the lists, because the lists are the part that comes back to you at the table. The videos are all from outside makers, credited by name, and none of them are ours.
No player until you press play. Every video below is a still frame until you tap it. The YouTube player, and the cookies that come with it, do not load unless you ask for one. The still frame itself is served by YouTube’s image host, so that one request does happen while you read. If a video ever refuses to play here, the link under it opens the same video on YouTube.
Ten moves, and the two that actually decide it.
Two things break ceramic chains, and neither one is your sculpting. The joints crack, or the links fuse. Every move below exists to stop one of those.
Roll one test coil and measure it.
Whatever thickness it lands at, that is your coil thickness. Everything else sizes off it.
Make the inside hole at least three times that thickness.
Half inch coil, inch and a half hole, minimum. Any tighter and the chain will not swing.
Cut every coil to the same length.
Mark the length on a strip of paper and cut against it. Same length in, same size link out.
Build it 12 percent bigger than you want it.
Stoneware loses roughly a tenth of itself between wet and fired. A 24 inch chain gets built at about 27.
Cut both ends at a matching slant, not square.
A slanted overlap has about twice the glued area of two flat ends pushed together at a shallow angle.
Score both faces, slip them, press, twist, then blend across the seam.
Blend clay from each side over onto the other. A butted joint that was never bridged is a crack waiting.
Add a collar over every joint.
A thin band of clay wrapped around the seam and blended in. It hides the join and doubles the clay there.
Thread the next coil through before you close it.
This is the whole trick, and the one people forget on link four. Through first. Close second.
Dry it flat and slow, on sand, under plastic.
A week minimum. Links shrink and drag on each other, and sand lets them slide instead of tearing.
Keep bare clay wherever links touch.
Color or glaze only the outer faces and leave every inner face bare, or the glaze welds your chain into one solid object.
The one number to keep. Inside hole at least three times your coil thickness, and build the whole thing about 12 percent oversized. Get those two right and the rest is patience.
Forty minutes, one whole chain, start to finish
A 40 minute video from a home pottery studio. Its chapters cover rolling the coils, cutting and shaping links, joining them and final assembly. If you are short on time, the joining chapter starts at 16:05.
A chain has exactly two enemies.
Everything on this page is one of these two problems wearing a different hat. Once you can name which one you are fighting, the fix is usually obvious.
One. The joint.
Every link you close has a seam, and that seam is the thinnest, most stressed spot on the whole piece. It is the last part you touched, so it is wetter than the clay around it, and wetter clay has more shrinking left to do. Then the chain gets picked up and every joint takes the weight of everything hanging below it.
Joints do not usually fail in the kiln. They fail on the shelf, quietly, three days later, and you find a hairline at the seam that was not there when you left. That hairline is almost never a firing problem. It is a joint that was pressed together rather than blended together.
Two. The glaze.
Glaze is glass. At cone 5½ it is genuinely molten, and any two glazed surfaces touching in that state weld permanently. Two links touching at one point come out of the kiln as one object with a beautiful seam of glass at the join.
This is not a thing you can be careful about. It is not about how much glaze you put on or how neatly. If glaze is present where two links touch, they fuse. The only reliable answer is bare clay at every contact point, which shapes every surface decision further down this page.
Say it back before you start: bridge every seam, and keep glass off every place clay meets clay. A chain that fails did one of those two things wrong, and it is worth knowing which before you make the next one.
Chains are a technique, not an object.
Once you can make a link that closes around another link, a surprising amount opens up. The scale changes everything about how it is made, so decide what you are building before you roll a single coil.
Decorative table chain
Thick, chunky, three or four links, sitting in a bowl or on a shelf. Forgiving, fast, and the best possible first attempt. Half inch coils and an inch and a half hole dry evenly and survive handling.
Hanging wall pieces
Long runs of smaller links, hung from a wooden dowel or a metal rod so the wall carries the weight rather than the top link. Reads as fabric from across the room.
Chains on a pot
Draped across a vase, swagged between two lugs, or standing in for a handle on a decorative piece. Made separately, fired separately, added at the end so the pot is never at risk.
Jewelry and small work
Quarter inch coils and under. Genuinely difficult, because tiny links dry in minutes and the joints are the size of a grain of rice. Porcelain gives the crispest result and punishes you most.
Chain mail and fabric
Hundreds of small interlocked rings that behave like cloth. This is a long project measured in months, not evenings, and it is one of the most striking things clay can do.
Keychains, pulls and fidgets
Three or four small links with a hole at one end. Fast, useful, and a good way to test a clay body and a firing setup before you commit to something long.
Where this goes if you keep going
A 25 second time lapse with no speech. The description says close to 300 clay rings were cast and cleaned for this vessel, and it shows rings laid out into a mesh. The rings were cast, so it is a different method from the chain on this page. We include it to show how far linked clay can go.
Three bits of arithmetic, and then you can stop thinking.
Chains are one of the few things in clay where doing the sums first genuinely saves you a week. Guessing the link size is how people end up with a stiff chain, and a stiff chain cannot be fixed after it is built.
1. The hole has to be big enough to swing in
A link has to pass its neighbor through the hole and leave room for it to move. The neighbor takes up one coil thickness on each side of the hole, so the absolute floor is an inside diameter of twice your coil thickness. That gives you a chain that technically articulates and practically does not. Three times the coil thickness is the working number. Four if you want it to drape.
2. Coil length decides link size
Wrap a coil into a ring and the length you cut becomes the circumference of the ring measured down the middle of the coil. So the coil you need is pi times the inside diameter plus one coil thickness. For a one and a half inch hole in a half inch coil, that is 3.14 times 2, which is about 6.3 inches. Cut every coil to that same length and every link comes out the same size without you eyeballing anything.
3. Everything shrinks, including the gaps
Clay gives up around a tenth of itself between the wet coil and the finished piece, and it does it in every direction at once. A chain built at exactly the length you want comes out short. Build it oversized by your clay body’s shrinkage and it lands where you meant it to. Our clay bodies run from 10 percent for 52 Buff up to 13.9 percent for #16 Porcelain, and the calculators page has the full table.
Link count assumes each link advances the chain by roughly its own inside diameter, which is close enough to plan by and always a little conservative. Shrinkage figures are manufacturer averages. Roll one or two spare links; you will want them.
Make a shrink ruler once and skip the sum
A shrinkage ruler is a strip marked so that reading it gives you the wet size for a finished size, with no calculator. A 6 and a half minute clip from a longer Ceramic Arts Network course, with a chapter on using a custom shrink rule. For chains it is worth making one, because you are sizing the same two numbers over and over across dozens of links.
Grog is your friend here, and porcelain is not.
A chain is a lot of thin joins drying at slightly different rates, which is the exact situation grog exists for. The particles interrupt shrinkage cracks and give the clay more green strength, meaning a leather hard chain survives being picked up. Smooth, high shrinkage bodies do the opposite.
| Clay body | Shrinks | For a chain | Verdict |
|---|---|---|---|
| B-Mix w/Grog | 11% | Grog interrupts cracks, strong when leather hard, very forgiving joints | Start here |
| 52 Buff | 10% | Lowest shrinkage we stock, smooth, a little soft when leather hard | Good, cheapest |
| Speckled Buff | 12% | Handles well, and the specks read beautifully on an unglazed chain | Good |
| B-Mix | 12% | Smooth and lovely to roll, but joints want more attention than the grogged version | Fine, be careful |
| #16 Porcelain | 13.9% | Crispest links and the most translucent, highest shrinkage, least forgiving joints | Advanced only |
Our first pick: B-Mix w/Grog, for a first chain and for most chains after that. It shrinks 11 percent, holds a joint, and forgives an evening where you got distracted and let one end stiffen. If you want the crisp white and you already know your joints are good, #16 Porcelain will give you the best looking chain in the building and will also punish every shortcut you take.
Shrinkage and cone ratings come from our calculators page, which carries the full spec table for every body we stock. All glaze firings here go to cone 5½, which is cone 5 with a twelve minute hold, and bisque goes to cone 05.
Rolled coil links. Start here.
This is the method almost everyone uses, and the one worth learning properly before you try anything cleverer. Ten steps, and only two of them are really about the chain; the rest is coil craft.
Wedge, then roll one test coil and measure it.
You are setting the thickness that every other number keys off. Roll on canvas or a bare table, not on plastic, and keep your fingers spread so it thins evenly instead of growing a waist.
Roll every coil you need in one sitting, then cover them.
Consistency comes from doing them all in a row while your hands are in the same rhythm. Slide them onto a board and wrap the lot in plastic so nothing stiffens while you work.
Cut them all to one length against a paper strip.
Cut a strip of paper to your coil length and lay it beside each coil. Not a ruler. A strip you can lay flat and cut against is faster and more accurate than reading numbers thirty times.
Cut both ends at a slant, in opposite directions.
Hold the knife at a low angle, about 30 degrees to the length of the coil. The two ends have to mate face to face when the coil bends round, so the slants go opposite ways. At 30 degrees that doubles the joint area of square ends, and a steeper 45 degree cut still adds about half again.
Score both slanted faces and slip them.
Cross hatch hard enough to see the marks, both faces, then a thin coat of slip made from the same clay. Slip made from your own scraps beats water and beats slip from another body.
Wrap it around a former and press the joint home.
A dowel or a marker wrapped in a strip of newspaper gives every link the same hole and releases cleanly. Press the ends together and give them a small twist so the faces actually mate instead of kissing.
Blend clay across the seam from both sides.
This is the step that separates a chain that lasts from one that does not. Drag clay from each side over onto the other with a wooden tool, so the seam is bridged rather than butted. Both faces, all the way round.
Add a collar and blend it in.
A thin band of clay wrapped over the joint and smoothed into the link. It hides the seam, doubles the thickness at the weakest point, and if you do it on every link it reads as a design decision.
Thread the next coil through before you close it.
From here on, link two goes through link one while it is still an open arc. Everyone forgets this once. Everyone only forgets it once.
Set each finished pair down flat and covered.
Do not hang the chain, do not coil it tight, do not let it take its own weight. Flat, supported, covered, from the first link to the last.
The whole method, start to finish
The same home studio video in full. Its chapters take you from rolling the coils through cutting links, joining them and final assembly.
A shorter take, different hands
Worth watching second, because the small differences are where you find your own way of working. This one is a chain attached to a vase, and the description says the vase cracked while drying, so there is no finished reveal.
A chain is only as even as your coils.
Uneven coils give you links of different sizes, joints of different thicknesses, and a chain that dries at four different speeds. Twenty minutes of coil practice pays for itself on the first project.
- Start from a fat sausage, not a ball. Squeeze it roughly round in your hands first so the roll is refining a shape rather than inventing one.
- Fingers spread, palms flat, light pressure. Heavy hands make a flat coil with a waist in it.
- Move your hands outward as you roll. Staying in one place thins the middle and leaves the ends fat.
- If it goes lumpy, stop and re-roll from the fat sausage. Lumps do not come out by rolling harder.
- Work on canvas or a bare table. Plastic and formica make the coil skid rather than roll.
- Cover everything you are not touching. A coil left out for ten minutes joins badly.
Rolling an even coil
Nine minutes on rolling an even coil. The description promises a few tips for even coils, and the chapters cover preparing the clay, rolling and shaping the coil, and storing it.
Four tricks worth stealing
Four coil building tricks in under eight minutes: pushing the form out, air bubbles, flared rims and pinches. The description says they suit any skill level. It is about building pots from coils, so take it as general coil handling.
Slab-cut rings, where only half the links have a seam.
If the joint is enemy number one, the smartest move available is to build a chain that only has half as many joints. Cut your rings whole from a slab and only open every second one. It is a flatter, more graphic look than rolled coils, and it is structurally the safer method.
Roll a slab a touch thicker than your intended coil.
Slabs give you a flatter, more graphic link than a rolled coil. On our slab rollers, one pass at your chosen setting; you want it even more than you want it thin.
Cut whole rings with two round cutters.
A larger cutter for the outside, a smaller one centered inside it for the hole. What comes out is a flat ring with no seam anywhere in it, which is the entire point of this method.
Cut every second ring open, and only those.
One clean cut through the band. Those are the links you will thread and rejoin. The whole ones never get touched, so half your chain has zero joints and cannot crack at a seam.
Soften the cut ends and slant them.
Same joint craft as method one. Slant the two faces so they overlap, score, slip, and press.
Thread and close, alternating.
Whole ring, cut ring, whole ring, cut ring. The cut ring goes through both of its neighbors before it closes.
Blend and collar every join.
Only half as many joins to make as method one, so give each one twice the attention. Blend across from both faces, then collar.
Worth knowing before you start: slab rollers and our 248 slab molds need the slab roller certification first. It takes a few minutes. Get certified here, and the slab molds guide covers getting an even slab, which matters more here than usual.
Everything known about not cracking at the seam.
A join fails when two pieces of clay are held next to each other rather than made continuous. Held clay separates as it shrinks. Continuous clay does not.
- Match the moisture. Both pieces at the same stiffness. A soft coil joined to a stiffening one will pull apart as the soft side shrinks more.
- Score deep enough to see and feel. A few polite scratches do nothing. Cross hatch until the surface is genuinely rough.
- Slip from your own clay body. Scraps plus water, blended smooth. A splash of vinegar makes it grabbier still, and costs nothing.
- Press and twist, do not just press. The small twist mates the two faces and squeezes the excess slip out of the middle, which is where a weak join hides.
- Bridge the seam from both sides. Drag clay across the join in both directions with a wooden tool. This is the actual repair; everything before it was preparation.
- Collar it. A band of clay over the joint, blended in. Twice the material at the weakest point, and it looks deliberate.
- Compress the whole link afterward. A gentle roll or a rib over the finished ring closes the surface everywhere, not only at the seam.
And the things that quietly ruin joints
- Water instead of slip. Water makes clay slippery, not sticky, and leaves a wet seam that shrinks harder than everything around it.
- Smoothing with a wet sponge. It looks tidy and it puts water straight back into the joint you just made. Smooth with a dry-ish finger or a rib.
- Working one link at a time from fresh clay. The new coil is always wetter than the chain it is joining. Roll them all together.
- Rushing the collar. A collar that sits on the surface instead of blending into it is a crack line drawn in advance.
Strong joints, on slab pots
An 11 minute clip from Lisa Naples’s Flat to Functional, on joining slab pots. Its chapters cover forming the cylinder wall, compressing and smoothing, refining the joint and stiffening. It is about slab pots, so the compressing chapter is the part closest to our seams.
More chains are lost to drying than to anything else.
A chain is an unusually cruel drying problem. The links touch, so they dry unevenly. They shrink, so they drag on whatever they are sitting on. And they are joined, so any drag goes straight into the joints.
- Lay it flat on a bed of sand or grog. A thin scatter on the board lets every link slide as it shrinks. On a bare board they grip and the joints take the strain.
- Loose, not taut. Lay the chain in gentle waves rather than pulled straight. A straight chain has nowhere to go when it shortens.
- Plastic over the whole thing for the first several days. Slow is the entire strategy. Loose plastic, not tight, so a little air moves.
- Turn it over daily. The underside gets no air at all otherwise, and the two faces of every link end up at different stiffnesses.
- Rearrange the contact points as you go. Where two links touch, both stay damp. Shifting them every day evens it out.
- Give it a week minimum uncovered after that. Thicker links, longer. Nobody has ever regretted another week; plenty of people have regretted going early.
Never hang a chain that is not fired. Not to dry it, not to look at it, not for a photo. Wet and leather hard clay creeps under load, and the top joint takes the weight of everything below it. Flat, supported, and horizontal until it comes out of the glaze kiln.
How to wrap something so it dries slowly
A 12 minute video on wrapping thrown pottery so it dries slowly and the bottom does not crack, with an experiment checked day by day. For a chain we would aim for an even, boring, slow week with no drafts and no sunny windowsills.
Reading a crack to find out what caused it
Cracks tell you their own history if you know the shapes. It is about cracks in pots and in glaze, and what causes each, from structural cracks and S-cracks to thermal shock, shivering and crazing. Read it for the causes, then ask which of them could happen at a seam.
The firing is where chains become sculptures of chains.
Bisque is the easy one. At cone 05 there is no glass in the room, so links touching each other come apart fine. Lay the chain flat on a scatter of sand so it can shrink and slide, keep it loose, and it will be waiting for you.
The glaze firing is the whole problem. At cone 5½ the glaze is molten, and molten glaze between two links is solder. There is no careful version of this. If glass is present where clay meets clay, they fuse.
The four options
1. Underglaze, no clear
Color on the outside, glass nowhere. Underglaze fired without a clear coat over it comes out chalky and matte and barely melts, so keep the coats thin. It is our drawing bottle, best for bands, dots and lines, and a main instructor has to say yes before you color a surface bigger than your hand. Our 150+ underglazes make this a colorful option for small touches on a first chain.
2. Glaze the outer faces only
Links touch on the inner curve of the hole. Glaze the outside of each link and leave a generous bare band all the way round the inside. Generous means wider than you think, because links roll.
3. Leave it bare
Plain bare clay, or a thin engobe. A burnish or a terra sigillata polish does not survive our cone 5½ glaze firing, so do not count on one. With no glaze on it nothing can weld, and a speckled or dark body looks genuinely beautiful this way.
4. Fire the links separately
Glaze every link fully, fire them apart on a bead rack, and join the chain afterward with metal jump rings or wire. Fully glazed and fully movable, and honest about being two materials.
One thing to know: a fully glazed, fully movable, one piece chain is genuinely hard, and most of the chains you admire online are either unglazed, underglazed, or glazed only on the outer faces. That is not a compromise, it is the craft. Decide which of the four you are doing before you pick up a brush.
- Fire flat and loose, on a cookie you made, with alumina or sand scattered on it. Everything in a glaze firing sits on a cookie or a catcher here, every time, and a chain covers more shelf than almost anything else you will make. Roll a slab of your own scrap clay a little wider than the nest the chain sits in, bisque it, and scatter alumina or sand over it. A taut chain pulls at its own joints as it shrinks the last few percent, so lay it loose either way.
- Wax resist plus alumina on any contact zone you are unsure about. The same trick used on lidded jars, and it works here.
- Never stack anything on a chain. A shelf post landing on a link is a broken link. Staff load every kiln here, so tell the studio team how the chain should sit and what you brought to go under it.
- Assume one or two links will fuse anyway on your first attempt. Build two spare links into the length so a rescue still leaves you with a chain.
Firing small pieces so they do not stick to anything
A 7 minute video on firing fully glazed small pieces without them sticking to the kiln shelf, by building a clay shelf with high temp wire hooks to hang them from. It is about beads, so we show it for the idea of keeping glazed pieces apart. Check with us before trying any wire in a kiln.
Bisque firings are free here, every time. Glaze firings are priced on the box the piece fits inside: a $4.80 flat rate covers anything small, then five cents per cubic inch above that, and small pieces that fit together on one 6 inch kiln cookie with a quarter inch between them count as one piece under 125 cubic inches. A chain measured coiled into a nest takes up a lot less box than one measured stretched out. The firing calculator will do the sums, and you can pay for a firing here.
Color without welding it shut.
Everything below assumes you have picked one of the four firing options above, because the surface decision and the firing decision are the same decision.
- Underglaze goes on raw clay here, never on bisque. Paint leather hard or bone dry links, then bisque them. Leather hard is easiest, because you can paint before the chain is even dry, which beats working around a fired chain that will not lie still.
- Two or three thin coats, and let each one flash dry. Same rule as anywhere else. Thick underglaze on a thin link is a chip waiting to happen.
- If you want gloss, put it only where nothing touches. Clear on the outer faces, bare inside the hole. Test one spare link through a whole firing before you commit twenty.
- Engobes can suit chains. They fire matte, every color, so there is no shine. Keep the coats thin. They go on bisque, or at leather hard if you plan to carve back through them.
- A speckled or dark body needs no color at all. Speckled Buff or Berlin Gray left bare reads as stone, and with no glaze on it nothing can fuse.
- Sand every bisque link before you decorate, wet. Sanding is wet only in this building, and it is worth keeping to at home: dry sanding bisque puts respirable silica into the air you are standing in. A damp diamond pad or a wet green scrubby, held over a bucket of water, takes a seam down in seconds. Any burr at a seam becomes a sharp edge in the finished chain, and a chain gets handled constantly.
Brush-on glazes and underglazes need the glazing certification before you can use the wall, and dipping needs its own. Both take a few minutes: brush-on and underglaze, then dipping. The Glaze Finder will point you at any bottle on the wall, and the underglaze guide covers what underglaze does with and without a clear coat over it.
Glazing small pieces without ruining them
A 14 minute tutorial on ceramic beads, from rolling coils to glaze firing, with the glazing running from 9:50 to 12:54. Beads are small like links, so watch how she glazes them and takes them through the kiln.
Eight failures, and what each one is telling you.
The three that get first-timers.
Chains fail in a small number of very recognizable ways, and every one of them points back at either the joint or the glaze.
The chain will not move at all, straight out of the glaze kiln.
The links fused. Glaze was present somewhere they touched. Sometimes a fused pair can be freed at home, wet, with safety glasses and an N95 or better, working the glass bridge rather than the clay, and the freed edges then need grinding smooth, wet. Power tools are a home job, never a studio one. Our fixing fused and sharp pottery page walks through it. Next time, bare clay inside every hole.
A link cracked at the seam while it was drying.
The joint was butted rather than bridged, or the two pieces were at different moisture levels when they met. Score deeper, slip with your own clay body, and blend across the seam from both sides. Then collar it.
The chain is technically movable but stiff and awkward.
The holes are too small for the coil thickness. Under three times the coil thickness, links jam against each other instead of swinging. This cannot be fixed after the fact; it has to be sized right at the planning stage.
Every link is a slightly different size.
The coils were different lengths. Cut against a paper strip rather than by eye, and roll the whole batch in one sitting so your hands stay in the same rhythm.
It came out much shorter than intended.
Shrinkage. Build the wet chain oversized by your clay body’s figure, between 10 and 14 percent for the bodies we stock, and the fired chain lands where you wanted it.
Links snapped when it was picked up after bisque.
Either a weak joint or the chain was lifted by one end. Bisqueware is porous and not especially strong. Support a chain along its length with both hands, or carry it on the board it dried on.
There are hairline cracks across the middle of links, not at the seams.
That is a drying problem rather than a joint problem. The links dried unevenly, most likely because they were touching in the same spots for a week. Turn them daily and rearrange the contact points.
The joints look fine but feel gritty and sharp.
Unsanded seams after bisque. Sand every link before you decorate, wet, never dry, and run a finger round the inside of each hole where you cannot see.
A ceramic chain is decorative. It is not hardware.
Fired stoneware is strong in compression and weak in tension, which is exactly the wrong way round for a chain. Every link is being pulled apart by whatever hangs below it, and clay has no warning before it breaks. It does not bend or creak first. It is fine, and then it is on the floor.
- Never hang anything from a ceramic chain. Not a plant, not a light, not a picture. The chain carries itself and nothing more.
- Never hang one over a person, a pet, or a walkway. This is the one we would rather over-say than under-say.
- Hang from the rod, not the top link. If it goes on a wall, put a dowel or a metal rod through the top link and let the wall carry it.
- A snapped fired link cannot be re-fired closed. Five minute epoxy is the repair, and we sell it at the front desk for kintsugi work.
- Check it after a move. Chains take knocks badly and the damage hides at the seams.
None of that makes chains a bad idea. It makes them a thing to design carefully. Drape it, coil it, lay it across something, or hang it where its own weight is all it ever carries and where nothing underneath it minds. Then it will last decades.
The rest of it.
How long does a chain actually take?
For a first decorative chain of twelve to sixteen chunky links, budget one evening to roll, cut and close everything, then about two weeks of drying, covered for the first several days and open for a week after that, then the two firings. Call it at least three weeks of calendar and two evenings of hands. Jewelry-scale chains take far longer per inch because the joints are tiny.
Can I make a chain on my first day here?
You can, and people do, but we would gently suggest a short one. Three or four thick links teaches you the joint, which is the only part that matters, and you find out in ten days whether your joints are any good before you have invested an evening in forty of them.
Do I need a wheel?
No. This is entirely hand building. The table side of the studio has everything you need, and one of the nicer things about chains is that they can be made almost anywhere with almost nothing.
What about an extruder or a mold?
Extruded coils are wonderfully even if you have access to an extruder, and press-formed links are possible too. Both change how you make the coil and change nothing about the joint, the drying or the firing, so everything on this page still applies unchanged.
Can I fire a chain hanging up in the kiln?
People do try it, and gravity does keep the links apart, but every link still touches the one above it at a single point, and a single point of contact is all glaze needs. It also puts the entire weight of the chain through the top link at the moment the clay is softest. Flat and loose is safer.
Will a chain cost a fortune to fire?
Less than people expect. Glaze firings are priced on the box the piece occupies, so a chain nested into a loose pile measures very differently from one laid out straight. Bisque is free. The firing calculator will give you a number in about ten seconds.
Two links fused. Is the whole chain ruined?
Usually not. A fused pair can sometimes be separated at home, wet, with safety glasses and an N95 or better, and the raw edges then get smoothed, wet. Our fixing fused and sharp pottery page covers the method and the safety side of it.
What clay should I not use?
Nothing we stock is off limits, but #16 Porcelain at 13.9 percent shrinkage is a lot of movement through a lot of joints, so it punishes an average joint badly. Grogged bodies are the forgiving end of the range. Outside clay cannot come through the door, so everything here is from our shelves anyway.
The pages this one leans on.
Make three links before you make thirty.
Go make three links.
A three link chain takes twenty minutes and tells you everything a thirty link chain would tell you, ten days sooner and at a tenth of the cost. You find out whether your joints hold, whether your holes are big enough, and what your clay does when it dries. Then build the real one already knowing the answers.
Three links, one evening. If they survive drying and come out of the kiln swinging, your joints are good and you can build the long one with confidence. There is a much longer version of this page behind the toggle at the top if you want the reasoning behind every step.
Bring it to any class and grab an instructor in a pink shirt. Chains are one of the things people crowd around, and somebody will absolutely want to know how you did it.
Which version would you like to print?
Videos come out as a labeled box with the title and channel to search for, since paper does not play them.