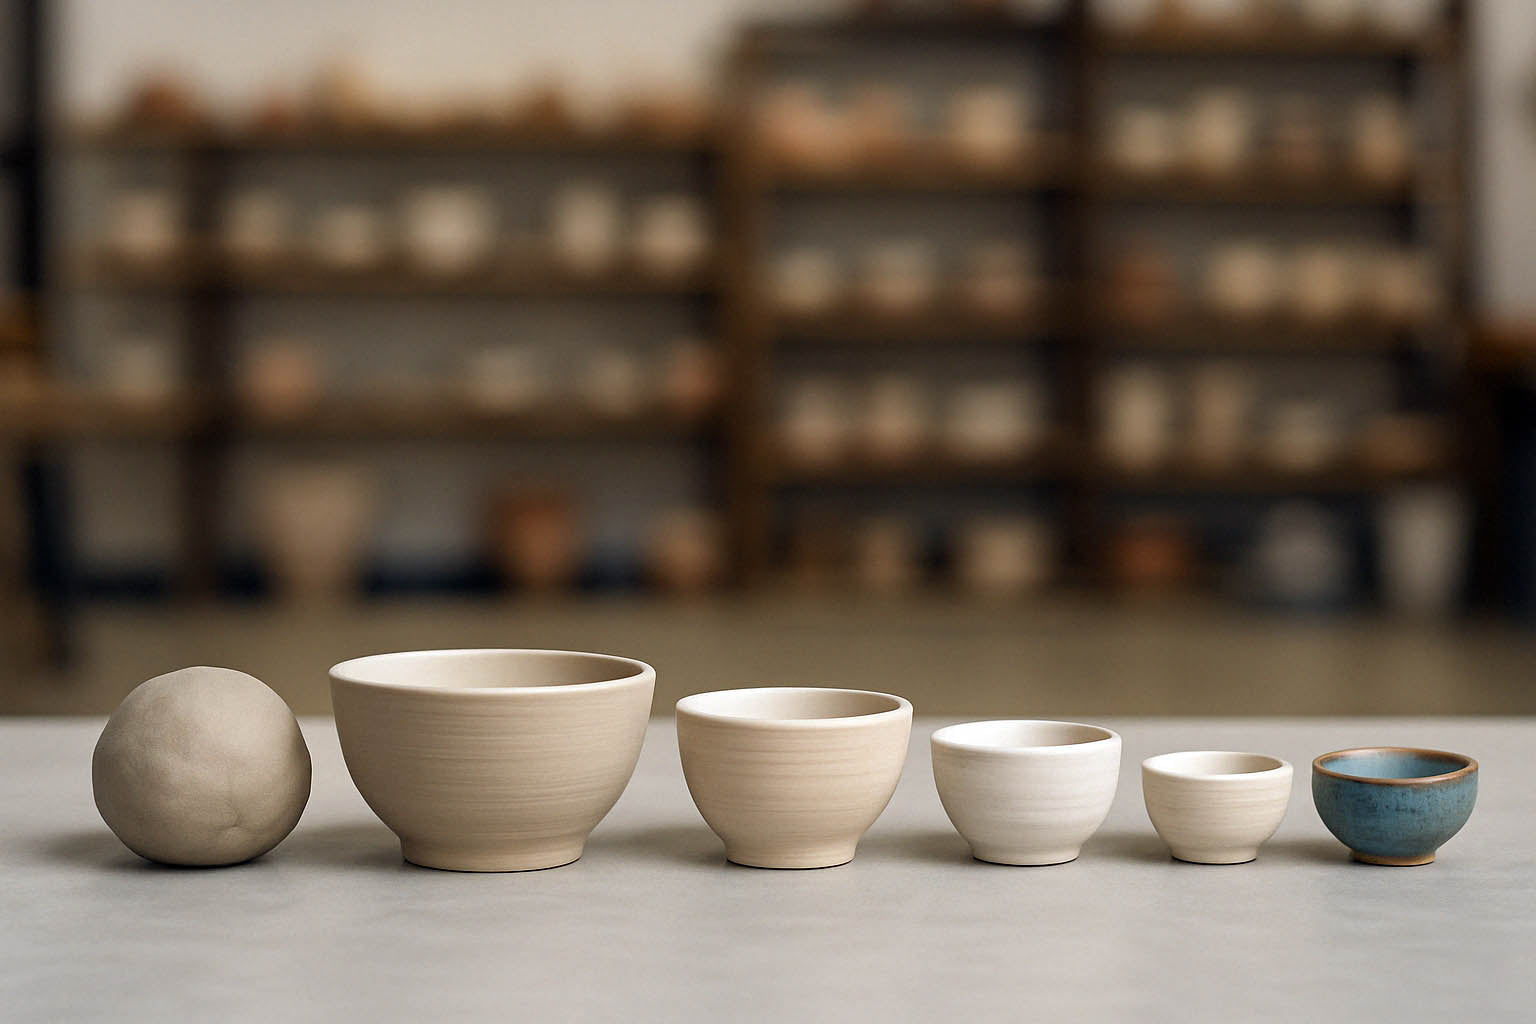
The Full Process of Pottery: From Ball of Mud to Finished Piece
Pottery might look like magic—but there’s a step-by-step rhythm behind the beauty. Whether you’re brand new or just want a clearer roadmap, this detailed guide will walk you through the **entire pottery process**—from slicing clay out of the bag to pulling your finished piece from the kiln.
1. Preparing the Clay
Start with a fresh block of clay, usually straight from a 25lb bag. At The Clay Hole, we stock 8 types of clay, each with different properties. Use a wire cutter to slice off the amount you need—usually 1–2 lbs for beginners.
- Optional: Let clay rest out of the bag for 10–15 minutes to stiffen slightly for easier wedging.
- Cut clay into smaller slabs to make it easier to wedge uniformly.
2. Wedging
Wedging is critical. This kneading process removes air bubbles and aligns clay particles for strength and consistency. There are multiple wedging styles—spiral, rams head, and stack-and-slam being most common.
- Target time: 2–5 minutes depending on the clay type and quantity.
- Look for: a smooth, bubble-free, consistent texture when you slice through the clay.
3. Centering on the Wheel (If Throwing)
Clay is slapped onto the wheel head and compressed to anchor it in place. You’ll use both hands to center the clay—an essential but often frustrating step for beginners.
- Use **coning up and down** several times to truly center the mass.
- Apply consistent water to reduce friction, but don’t overwet—mushy clay is harder to shape.
4. Opening & Pulling
Once centered, you’ll press into the center to create a well (opening), then slowly pull the walls upward while maintaining even thickness.
- Compress the base regularly to prevent cracking.
- Use fingers and ribs to shape, smooth, and support your form as it grows.
5. Trimming Excess & Adding Details
After shaping, use a wire cutter to remove your piece from the wheel and place it on a bat to begin drying. Once it’s leather-hard, you’ll trim excess clay from the base and optionally add handles, feet, or carved decorations.
- Use loop tools to refine the foot and remove weight.
- Score and slip when attaching additional pieces like handles.
6. Drying
Drying is often underestimated. Pottery should dry slowly and evenly to prevent cracks or warping.
- Keep pieces covered loosely in plastic to slow drying.
- Rotate pieces occasionally to promote even drying.
- Ready for firing when fully **bone dry**—feels room-temp and chalky.
7. Bisque Firing
Once bone dry, your piece enters its first kiln cycle—called **bisque firing**. This hardens the clay, burns out organics, and turns it into ceramic.
- Bisque is typically fired to cone 04 (approx. 1945°F).
- The clay becomes porous and ready to accept glaze.
- Cool down: The kiln must be fully cool before opening (24–48 hours).
8. Waxing & Glazing
After bisque, glaze prep begins. Wax resist is often applied to the bottom to prevent glaze from sticking during the next firing.
- Choose from 500+ glazes at The Clay Hole.
- Apply by dipping, pouring, brushing, or spraying.
- Allow 100% drying before reloading into the kiln.
9. Glaze Firing
The second firing melts the glaze into glass and vitrifies the clay body. This is where the magic happens—color, texture, and shine all emerge.
- Most pieces at The Clay Hole are glaze-fired to cone 5 or 6 (2167°F+).
- Don’t rush it: Cooling too fast can crack glaze or pottery.
- Expect final shrinkage of about 13% from original size.
10. Finished Piece
Your piece emerges fully transformed—strong, food-safe, and uniquely yours. Glaze colors may surprise you, and that’s part of the joy. This is the moment where clay becomes pottery.
Experience the Full Process YourselfConclusion
Every step of pottery, from that first slice of clay to a beautifully glazed piece, is filled with intention, patience, and joy. Whether you're just beginning or rediscovering your creativity, pottery reminds you to slow down and trust the process. And at The Clay Hole, you'll have guidance, tools, and community every step of the way.
FAQs
How long does the full process take from start to finish?
Depending on drying and kiln schedules, expect 10–14 days minimum for a single piece.
Can beginners really do all of these steps?
Absolutely. Every class at The Clay Hole is built to guide you through this entire journey with expert support, no matter your experience level.
What happens if my piece cracks?
Cracks happen to everyone. We’ll help you understand why and try again with more success next time. That’s part of the magic of clay.
Find us at our studio
Come take a tour or visit one of our classes in person. We’re centrally located in Draper, Utah, serving Salt Lake County and Utah Valley alike.